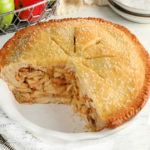
Gluten-Free Apple Pie {Dairy-Free & Vegan Option}
An easy recipe for gluten-free apple pie. This classic homemade apple pie recipe also includes a dairy-free and vegan option.
Servings: 8 servings
Ingredients
Apple Filling:
- 8 cups peeled apples and sliced apples Sliced ¼-inch thick (6-8 apples, 3.5 pounds). I used Granny Smith and Honey Crisp apples.
- 1 tablespoon lemon juice
- 1 teaspoon pure vanilla extract
- 1/4 cup gluten-free all-purpose flour I like Pillsbury gluten-free and Better Batter.
- 1/2 cup granulated sugar
- 1/4 cup brown sugar, packed
- 1 teaspoon ground cinnamon
- 1/8 teaspoon ground nutmeg
- 1/4 teaspoon salt
Gluten-Free Pie Crust
Double my Gluten-Free Crust Recipe
- 1 large egg, whisked Vegan use dairy-free milk for and omit the water.
- 1 tablespoon water
- 2 tablespoons coarse sugar (optional) Decorators sugar, sugar crystals, or turbinado.
Instructions
Gluten-Free Pie Crust
- Double my gluten-free pie crust recipe. Remove the dough from the bowl and form it into a ball. Cut the dough ball in half then form each half into discs. Wrap each disc with plastic wrap and refrigerate for 1 hour.
Apple Filling
- Place the peeled and sliced apples in a large bowl.
- Add the lemon juice and vanilla to the sliced apples. Stir to combine.
- In a small bowl add the gluten-free flour, granulated sugar, brown sugar, cinnamon, and nutmeg. Stir together until all the ingredients are combined.
- Pour the sugar mixture over the apples and stir until the apples are well coated.
Assemble the Pie
- Preheat the oven to 400°F.
- Roll out the first gluten-free pie dough disc to about an 11-inch circle. Check for the correct size by inverting the pie dish over the dough. The dough should be about 1-2 inches larger than the dish. Place the pie dough into the bottom of a greased 9-inch pie pan.
- Pour the apple filling into the bottom of the dough-lined pie pan.
- Roll out the second gluten-free pie dough disc to about an 11-inch circle.
- Place the second pie dough round over the apple pie filling. Seal the edges of the pie dough. Cut slits into the top center of the pie.
- In a small bowl whisk the egg with a tablespoon of water. Lightly brush the crust with a pastry brush with the egg wash. For the vegan, option brush the top with dairy-free milk. The wash step adds shine and helps the crust brown. Sprinkle the top of the pie with coarse sugar (optional).
Bake the Pie
- Place a baking sheet onto the bottom rack of the oven to catch any juices. Bake the pie on the middle rack at 400°F for 20 minutes, then reduce the oven temperature to 350°F. Continue to bake the pie for 40-50 minutes at 350°F. Check on the pie halfway through the baking time and cover it loosely with foil as needed to prevent the crust from over-browning. You can also Use pie shields to keep the edges of the pie crust from getting too brown. Or make your own pie shield by cutting a circular hole in the center of a large piece of aluminum foil and placing the foil loosely on top of the pie.
- To check for the doneness of the pie, use a cooking thermometer. The pie should be at 195°F degrees. You can also use a knife to pierce the pie. If the apples feel too crunchy, the pie needs more time to bake. Start at 5-10 minute intervals. It often depends on the type of apples you used and how thinly they were sliced.
Serve the Pie
- Allow the pie to cool at room temperature for at least 2 hours before serving. I like to let the pie cool for 1 hour at room temperature and then place it in the refrigerator for 1 hour. Waiting to slice the pie until cooled allows the filling to thicken and prevents soft pie slices. Enjoy!
- Cover with plastic wrap and store the leftover pie at room temperature for up to one day, or in the refrigerator for up to 5 days.
- To freeze the pie: flash-feeze the pie in the freezer. Once the pie is frozen solid, wrap the pie with plastic wrap or foil and place it back into the freezer. It can be frozen for up to 3 months. Defrost in the refrigerator overnight.
Video
Notes
- Depending on the type and how thick you sliced the apples, it may need more baking time. Use a knife to pierce the pie. If the apples feel too crunchy, the pie needs more time to bake. Start at 5-10 minute intervals.
- For making the dairy-free/vegan pie cust I used Smart Balance butter.
- I used Bob's Red Mill gluten-free egg replacer for the vegan pie crust.
- For the vegan option use dairy-free milk in place of the egg for brushing the top of the pie crust.
- Cover the pie and store it at room temperature for one day, or refrigerate for up to 5 days.
- I like Pillsbury gluten-free flour and Better Batter gluten-free flour for making pie crusts. Not all gluten-free flours are created equal. You may experience different baking results depending on the gluten-free flour blend you choose.
- Mama says, "always check your labels!"
Nutrition
Serving: 1slice | Calories: 364kcal | Carbohydrates: 40g | Protein: 2g | Fat: 1g | Saturated Fat: 1g | Polyunsaturated Fat: 1g | Monounsaturated Fat: 1g | Trans Fat: 1g | Cholesterol: 23mg | Sodium: 85mg | Potassium: 156mg | Fiber: 4g | Sugar: 32g | Vitamin A: 102IU | Vitamin C: 6mg | Calcium: 22mg | Iron: 1mg