Gluten-Free Yeast Donuts
An easy recipe for gluten-free yeast donuts. This gluten-free yeast donut recipe fries up lighter than air using Cup4Cup flour and instant yeast to achieve a pillowy soft rise.
Servings: 8 donuts
Ingredients
- 2½ cups Gluten-Free Flour with Xanthan Gum recommended for yeast baking (We recommend Pillsbury or Better Batter Brand.)
- ¼ cup granulated sugar
- 2 teaspoons baking powder
- 2 teaspoons instant yeast also called rapid rise yeast
- ½ teaspoon cream of tartar
- ½ teaspoon ground nutmeg
- ¼ teaspoon salt
- ¾ cup whole milk room temperature or lukewarm
- 1 large egg
- ¼ cup unsalted butter melted but not hot
- Vegetable oil for frying
For Glazed Donuts
- 2 cups confectioner's sugar
- ⅓ cup whole milk
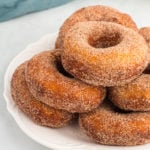
For Cinnamon-Sugar Donuts
- ⅓ cup granulated sugar
- 1 teaspoon ground cinnamon
Instructions
- In a large bowl, combine gluten-free flour, granulated sugar, baking powder, instant yeast, cream of tartar, nutmeg and salt. Stir together until well combined.
- Add milk and egg into the flour mixture. Use an electric mixer with a dough hook and knead on low-medium speed for 5 minutes. Use a spatula to blend in any dry ingredients that have settled at the bottom of the bowl. Keep kneading with the dough hook for the full 5 minutes and the dough will start to come together better into smoother dough.
- Knead the butter in, using the dough hook on low-medium speed, until it is well combined (about 1 minute).
- Spray a medium bowl with non-stick cooking spray and place the dough into the bowl. Cover the bowl with food-safe plastic wrap and place the dough into the fridge for at least 2 hours. This can also sit overnight in the fridge. Gluten-free flour needs this time to hydrate so don’t skip this cooled proofing time.
- Line a large baking sheet with parchment paper. Set aside for now.
- Lightly flour your work surface, your rolling pin, and your donut cutter with gluten-free flour then place your dough down on that lightly floured work surface. Roll the dough out to about ¾” thickness then use a donut cutter to cut out the donut shapes. The size of the donut cutter I used is 3” in diameter.
- Gently place the raw donuts onto the prepared baking sheet. Space the donuts out at least 2 inches from each other. Wrap this tray well with food-safe plastic wrap then place in a warm area of your kitchen to rise for 1½ to 2 hours (until about 50% larger in size).
- Heat oil in a pot that’s big enough to have at least 2 inches of oil in it without spilling over the edges. Oil should be heated to a temperature between 320°F to 330°F. Use a candy thermometer to measure the temperature of the oil. Too hot of oil will burn the outside of the donut while the middle remains raw. Oil that isn’t hot enough will result in your donut turning into a lump of dough and not holding its shape. A candy thermometer is essential as the temperature of your oil will make or break your donuts.
- While your oil is heating up, prepare your work space by lining a wire rack with paper towels (to soak up oil after removing the donut from the pot). You’ll also need metal tongs for turning your donuts over while frying plus a slotted spoon for removing the donut from the oil and placing on the paper towel to cool.
- If this is your first time deep frying donuts, start with frying one donut at a time. This will give you a better idea of how long you’ll want to keep your donut in the oil. At a temperature of 330°F, I cook the donuts for less than a minute on each side. You’re looking for a golden color but not too brown as that will lead to a burnt outer layer.
- Use the metal tongs to flip donuts over in the oil during baking.
- Use a slotted spoon to scoop donuts out of the oil and place on the paper towel lined wire rack.
- Let the donuts cool slightly (about 10 minutes) before adding toppings.
- For glazed donuts, stir the confectioner's sugar and milk together until smooth. Dip donuts as desired (either fully dipping them or just dipping the tops). Can add gel food coloring if you’d like.
- For cinnamon-sugar donuts, Stir the sugar and cinnamon together. Dip both sides of warm donut into the mixture and gently shake off excess sugar. This needs to be done while the donuts are warm or the sugar mixture won’t stick to the donut.
Notes
- We recommend Pillsbury Gluten Free Flour or Better Batter for any gluten free yeast recipes.
- Measure the flour using a scale or the spoon-and-level method. If you’ve measured your flour correctly and the dough is still too crumbly, add another tablespoon or two of milk until it is a soft dough consistency (a little lighter and stickier than play-dough).
- The amount of vegetable oil needed for frying depends on the size of pot you’re using to deep fry the donuts. You’ll need at least 2 inches of oil in the pan. You can substitute the vegetable oil for canola oil or sunflower seed oil.
- I wouldn’t recommend hand kneading this dough. It’s much too sticky to work with at first. Use an electric mixer with a dough hook to knead this dough up to the step of placing in the fridge to proof. After removing from the fridge, the dough will then be at a consistency suitable for handling with your hands.
- If you do not have a donut cutter, I’d recommend using a 3” circle cookie cutter with a Wilton 1M tip (or similar size) to cut out the hole in the middle of the donut.
- The area you choose should be about room temperature. Do not place the tray in direct sunlight as too much heat will kill the yeast.
- Nutritional information does not include glaze or cinnamon-sugar.
- To store: Gluten-free yeast donuts are best eaten within an hour of baking them. They start to harden after 4 to 5 hours. They can be eaten the day after but they won’t be soft and fluffy like they were within an hour of baking them. Place leftovers in a sealed food-safe container and store at room temperature.
- To freeze: Tightly wrap the gluten-free yeast donuts in plastic wrap and place them in a freezer bag for up to 3 months.
- Mama says, “Make sure to always check your labels!”
Nutrition
Serving: 1donut | Calories: 297kcal | Carbohydrates: 37g | Protein: 7g | Fat: 15g | Saturated Fat: 5g | Polyunsaturated Fat: 4g | Monounsaturated Fat: 4g | Trans Fat: 0.3g | Cholesterol: 41mg | Sodium: 220mg | Potassium: 107mg | Fiber: 5g | Sugar: 9g | Vitamin A: 248IU | Vitamin C: 0.01mg | Calcium: 118mg | Iron: 2mg