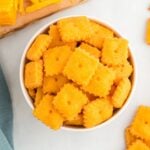
Gluten Free Cheez Its Copycat
These gluten-free Cheez Its copycats are cheesy, buttery, and just as flakey and crispy as the original (if not better!).
Servings: 10 dozen crackers
Ingredients
- 8 ounces sharp cheddar cheese shredded
- 1 cup gluten-free flour (140 grams) I use Cup4Cup Multipurpose Flour
- ¼ cup unsalted butter (57 grams) cold
- 1 teaspoon xanthan gum omit if your flour blend already contains it
- ¾ teaspoon salt
- ½ teaspoon garlic powder
- 2-3 tablespoons water ice cold
Instructions
- Line two large baking sheets with parchment paper. Set aside for now.
- Add the cheese, gluten-free flour, butter, xanthan gum (if needed), salt, and garlic powder to a high-powered blender or food processor. Blend for about 30 seconds until the mixture turns into a dry crumble.
- Add the cold water to the dry mixture and blend for about another 30 seconds until the mixture comes together into a dough consistency. The dough should be easy to work with – not too sticky to handle with your hands and not too dry that it crumbles apart.
- Form the dough into a ball and flatten to about a ½-inch to 1-inch in thickness. Wrap the dough in food-safe plastic wrap and place into the fridge for 20 minutes.
- Preheat your oven to 350°F (177°C).
- Lightly dust your work surface (clean table or silicone baking mat) and rolling pin with gluten-free flour and roll the dough out until it is 1/8-inch to ¼-inch in thickness. Thicker dough will give you chewier crackers.
- Use a pizza cutting wheel or fluted pastry wheel to cut the dough into 1-inch squares.
- Use a lightly floured spatula to carefully lift the squares off your work surface and place them onto the prepared baking sheet.
- Spread the crackers at least ½-inch apart on the baking sheet so they have room to grow slightly.
- Using a skewer or chopstick (not a toothpick since a toothpick is too small), press a hole about ¾ of the way down in the middle of each cracker.
- Place the tray of crackers (bake 1 tray at a time) into the oven and bake for 14 to 15 minutes. They should look set on the top but should not start to brown. If they start to brown in the oven, you’ll end up with burnt crackers quickly. Since these are so thin, you do not want to overbake them or they’ll burn really fast.
- Let the crackers cool completely before transferring to a food-safe sealed container for storage.
Notes
-
- Be sure to use certified gluten-free all-purpose flour. I use Cup4Cup Multipurpose Flour for this recipe. Other brands may yield different results.
-
- Measure your flour out in grams. Too much flour will cause the dough to be too dry and crumble when you try to roll it out. Too little flour will leave the dough too sticky to work with, and the crackers will be extra greasy. If you don't have a food scale, use the "scoop and fill method." Gently scoop spoonfuls of flour and sprinkle it into a measuring cup. Level off the top with a knife. If you use the measuring cup to scoop flour directly from the bag, you'll end up with 25% more flour than needed because the flour packs down into the cup.
-
- Don't use pre-shredded cheese. As I mentioned above, it doesn't melt well because of the powdery coating added to stop the shreds from sticking together in the bag. There's also a chance the anti-caking agent in the pre-shredded cheese could contain gluten. Grate your own cheese for the best results.
-
- I use sharp cheddar cheese in this recipe, but you can use mild cheddar for a less intense cheese flavor.
-
- Roll the dough out evenly so each cracker bakes at the same rate.
-
- It's important that both the butter and water are really cold when mixing the ingredients together. You don't want the butter to be melted or softened when cutting it into the flour.
-
- The thinner you roll out the dough, the crispier the cracker will be. If you like the crackers a little chewy, don't roll the dough thinner than ¼-inch.
-
- Keep in mind the crackers will continue baking on the hot tray once they're removed from the oven, so it's important to remove them when they still look a bit undercooked. Overbaking the crackers, even for a few extra seconds, will cause them to burn.
-
- Bake one tray of crackers at a time so each tray gets even heat distribution.
- To Store: Keep in an airtight container at room temperature for 3-4 days.
- Mama says “Check all of your labels.”
Nutrition
Serving: 1cracker | Calories: 15kcal | Carbohydrates: 1g | Protein: 1g | Fat: 1g | Saturated Fat: 1g | Polyunsaturated Fat: 0.04g | Monounsaturated Fat: 0.2g | Trans Fat: 0.02g | Cholesterol: 3mg | Sodium: 28mg | Potassium: 2mg | Fiber: 0.1g | Sugar: 0.04g | Vitamin A: 31IU | Calcium: 14mg | Iron: 0.04mg