Gluten-Free Croissants
Published


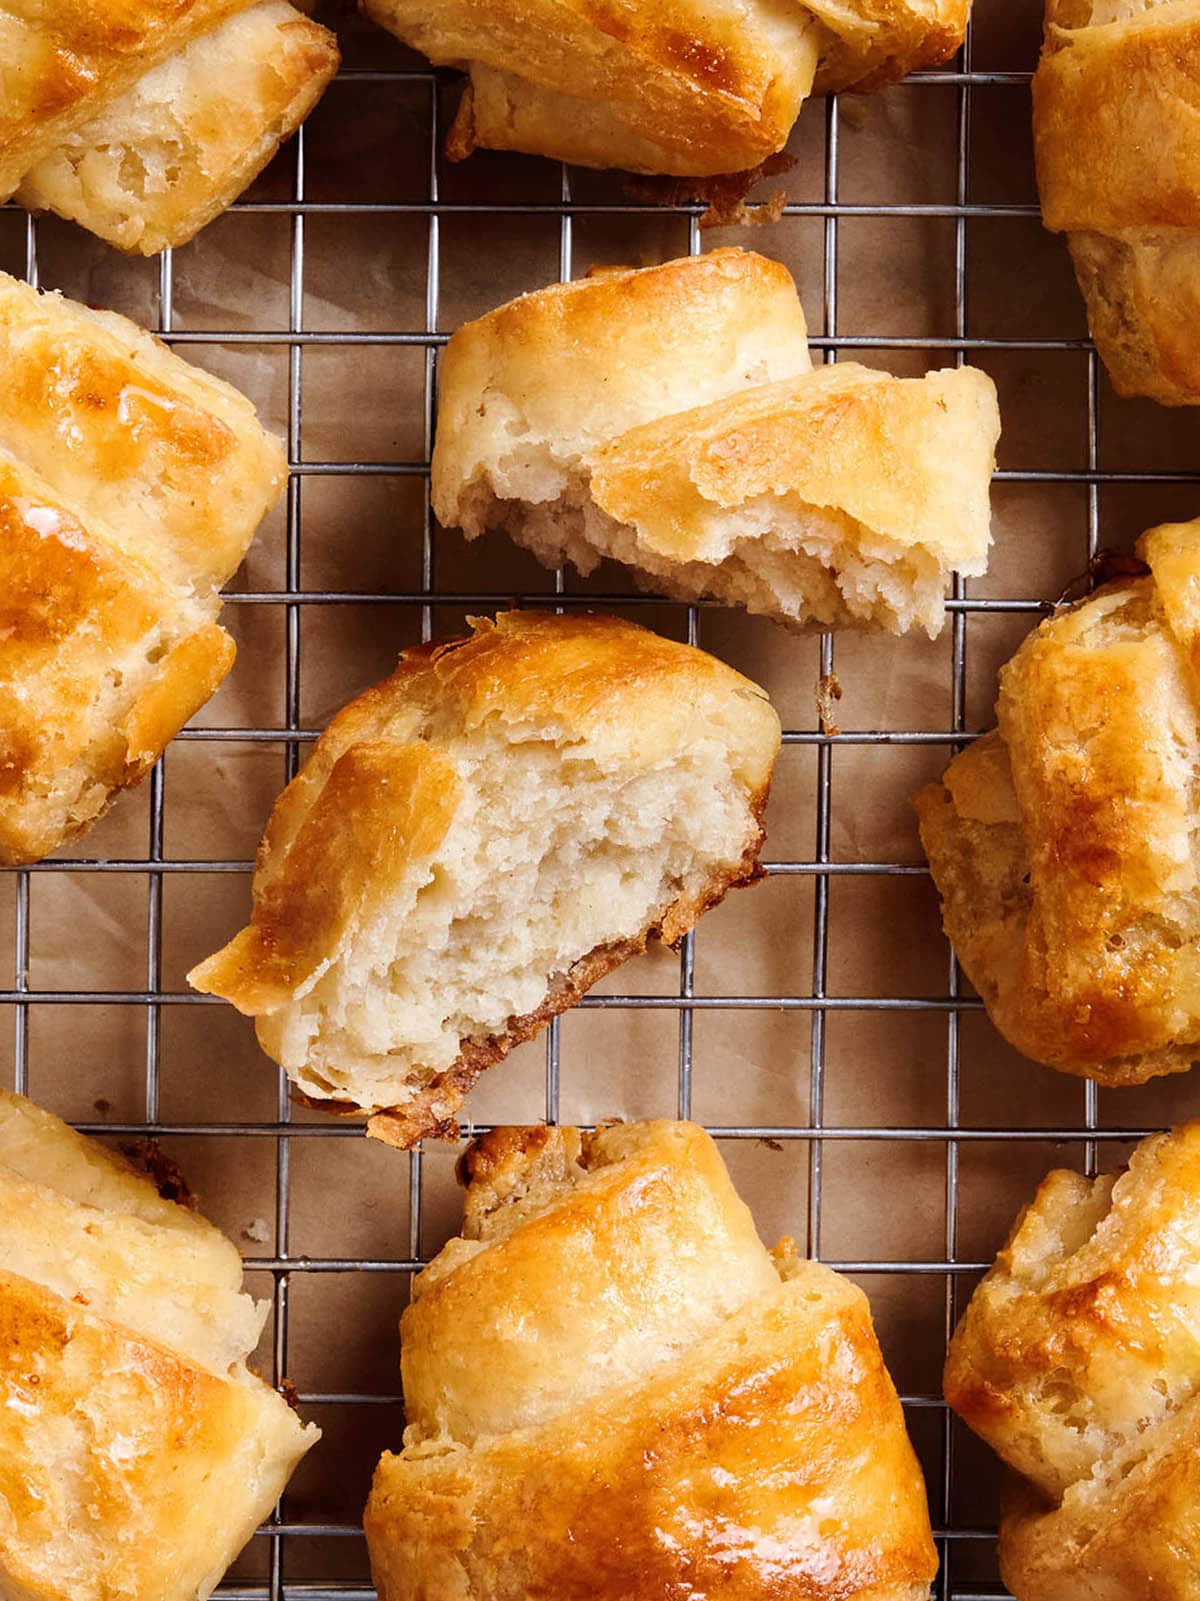
There’s something about a fresh croissant that just feels like a little moment of magic, with those flaky layers, soft centers, and buttery edges. And for a long time, if you were gluten-free, you just had to watch everyone else enjoy them. I get it. I’ve tried the frozen ones, the mixes, the shortcuts. None of them tasted anything like the real thing—until now!
Bakery-Style Gluten-Free Pastry
I set out to make a croissant recipe that actually works with gluten-free ingredients, one that is flaky, tender, and still totally approachable for a home baker. No fancy equipment, no chef training required. Just a little patience and the right flour. These gluten-free croissants take a bit of time, but the steps are simple, and the payoff is big. You can even proof the shaped croissants overnight for an easy morning treat. If you’ve been missing bakery-style pastries or want to try something that feels genuinely special, this recipe is going to make your kitchen smell like a dream. And yes, they’re every bit as good warm from the oven as they look. Let’s bake something worth waking up early for!
Gluten-Free Baking Tips
- Use the right flour. This dough is designed specifically for King Arthur Gluten-Free Bread Flour, which contains gluten-free wheat starch. That starch gives the dough the stretch, flexibility, and strength you need for laminating; it bends without cracking, keeps the butter contained, and creates real flaky layers. Most gluten-free blends simply can’t do that. Find notes for flour substitution in the recipe card.
- Hydration is everything. King Arthur GF Bread Flour needs roughly 100 ml more liquid than wheat flour. If it still looks dry, add a touch more warm water. It should feel like Play-Doh, not sand.
- Keep the butter cold. Cold butter is what creates those flaky croissant layers. As the butter stays firm between the folds of dough, it releases steam in the oven and lifts the layers apart. If the butter gets too soft, it blends into the dough instead of forming distinct sheets, and you’ll lose the crisp, laminated texture.
- Avoid cracking during lamination. If the dough cracks, let it rest 5–10 minutes to relax, then continue rolling.
- Don’t over-chill. Gluten-free dough becomes brittle when it’s too cold. If it resists rolling, wait.
- Keep butter contained. Trim clean edges and patch cracks to prevent leakage.
- Steam is great for lift. Toss a few ice cubes in a pan on the oven floor when baking for flakier layers.
- Proof longer than wheat croissants. Gluten-free dough needs the full 60–90 minutes for that soft, airy feel. I also have make-ahead and overnight proofing notes in the recipe card.
Gluten-Free Croissants

Equipment
- 1 Rolling Pin
- 1 baking sheet
- 1 Mixing Bowls
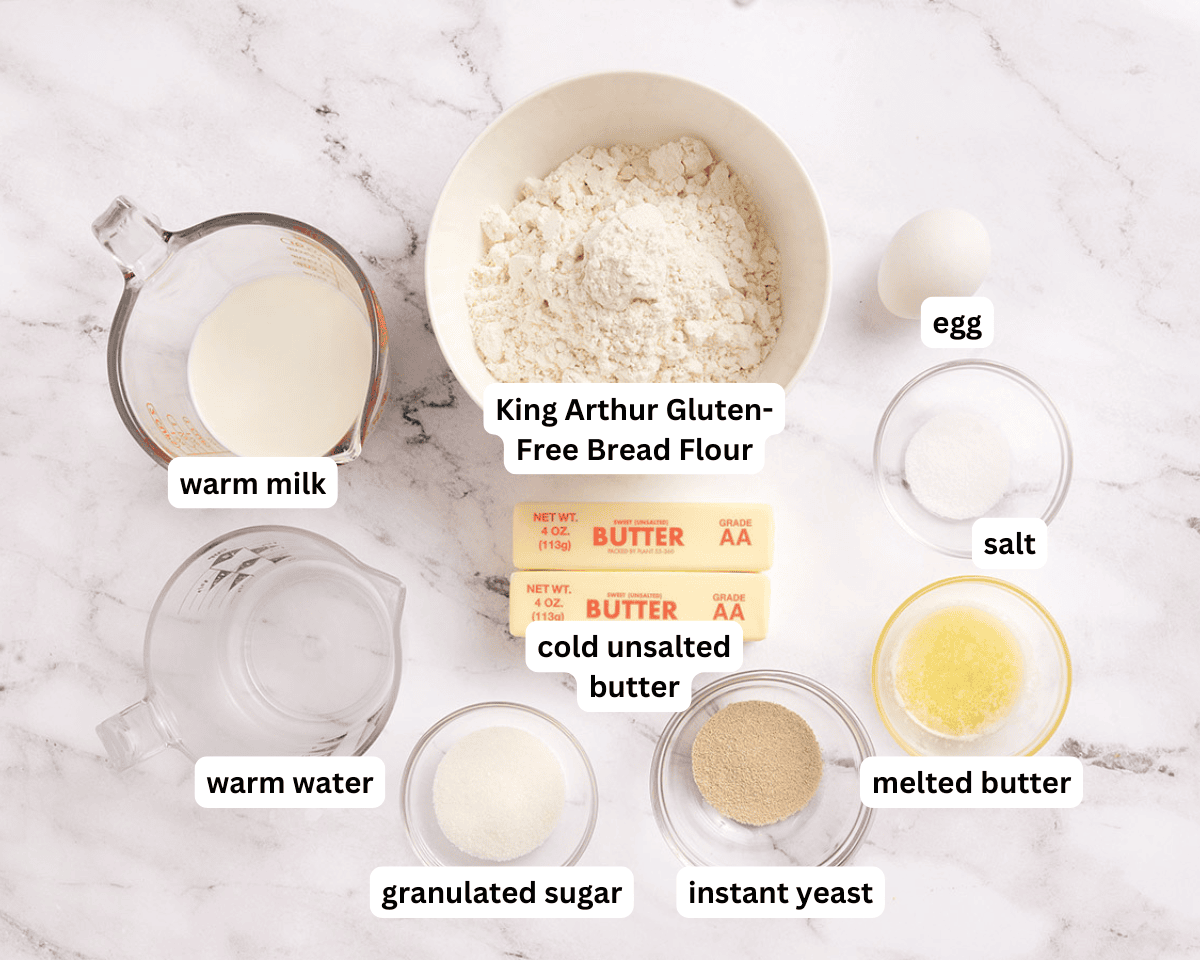
Ingredients
Butter Block
- 1 cup unsalted butter, cold,
Dough
- 2½ cups King Arthur Gluten-Free Bread Flour
- 2 tbsp granulated sugar
- 1 tsp salt
- 2 tsp instant yeast
- ¾ cup warm milk, about 100°F (38°C)
- ½ cup warm water, about 100°F (38°C)
- 1 tbsp melted butter
Egg Wash
- 1 large egg
- 1 tbsp water
Instructions
- Gather and measure all ingredients.
- Place the cold butter between two sheets of parchment and pound or roll it into a 7×8-inch slab. Chill while you prepare the dough.
- In a mixing bowl, whisk together the flour, sugar, salt, and yeast.
- Add warm milk, warm water, and melted butter. Mix on low speed or by hand until it forms a soft, cohesive dough. It should feel supple and slightly tacky, not dry or crumbly. If it cracks when pressed, add 1 tbsp warm water at a time until it smooths out. Cover and rest 30-45 minutes at room temperature.
- Roll the dough (between parchment) into an 8×14-inch rectangle. Place the chilled butter slab on one half, fold over, and seal the edges. Chill for 30 minutes, just to firm it slightly.
- Roll gently to 8×16 inches, then fold like a letter (3-fold). Chill for 30 minutes. Repeat once more for a total of two folds, chilling 30 minutes between.
- Roll out to about ¼-inch thick (11×16 inches). Trim edges for clean layers. Cut into triangles (about 3×10 inches) and roll from base to tip.
- Place on a parchment-lined tray. Cover loosely with plastic wrap and let rise in a warm, draft-free spot (75-80°F) for 60-90 minutes. They should puff up slightly and feel soft and airy to the touch.
- Preheat the oven to 400°F (204°C). Whisk the egg with water for the egg wash.
- Brush croissants lightly with egg wash and bake for 18-22 minutes, or until deep golden brown. Cool on a rack before serving.
Notes
- Cup4Cup: This is the closest match. Its milk powder helps the dough stay flexible, so it rolls and folds reasonably well. The croissants will be slightly softer with less lift, but still layered and successful.
- King Arthur Gluten-Free All-Purpose Flour: This can work only if you add 1 tsp psyllium husk powder or xanthan gum. Even then, the dough will be more delicate and prone to cracking, and the layers won’t be as defined.
- Bob’s Red Mill 1:1 is not recommended. It’s great for cakes and cookies, but too crumbly for laminated dough. The butter will break through, and the dough won’t stretch enough to create layers.
Nutrition
Nutrition information is automatically calculated, so should only be used as an approximation.
How to Make Easy Gluten-Free Croissants Step by Step
Gather all the ingredients together.

Make the butter block: Place the 1 cup cold unsalted butter between two sheets of parchment and pound or roll it into a 7×8-inch butter slab. Chill while you make the dough.
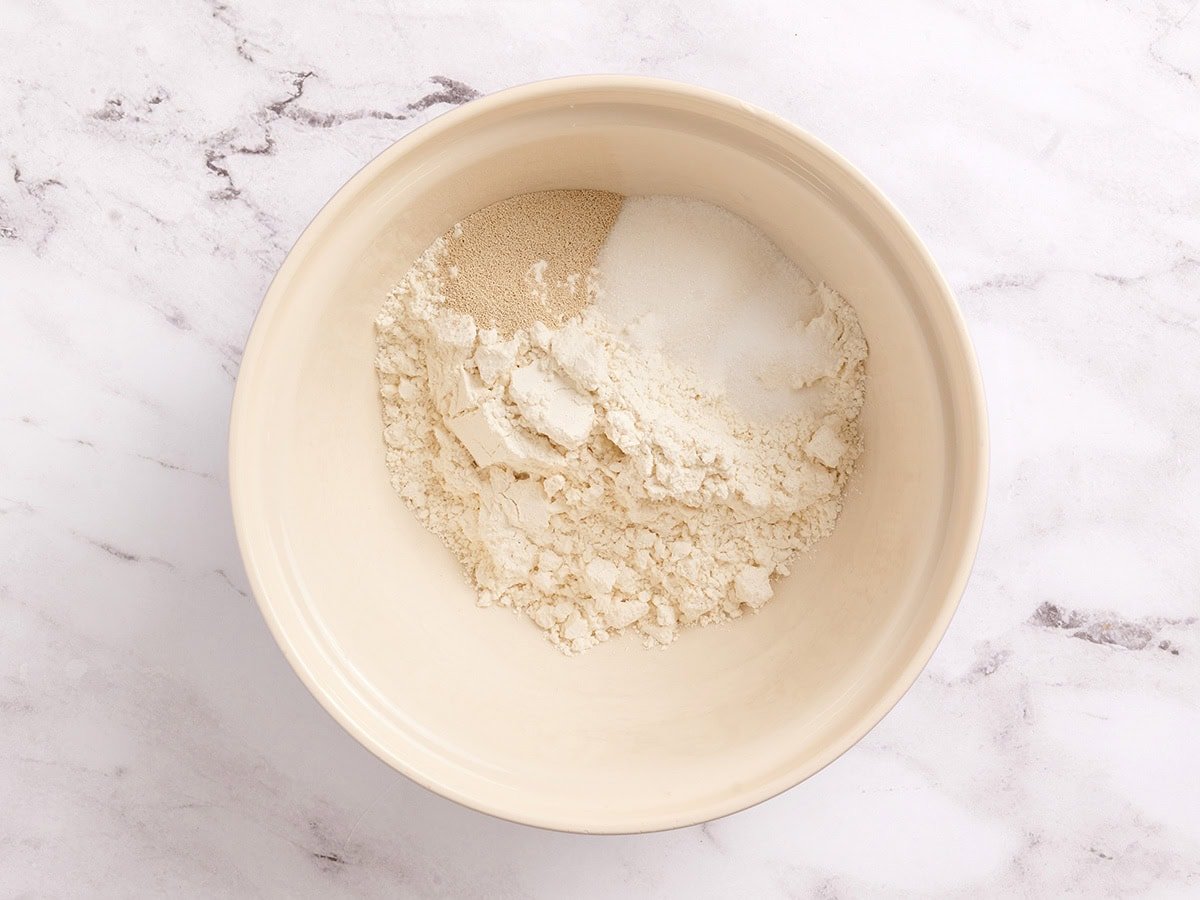
Mix the dry ingredients: In a mixing bowl, whisk together the 2½ cups gluten-free bread flour, 2 tbsp sugar, 1 tsp salt, and 2 tsp instant yeast.
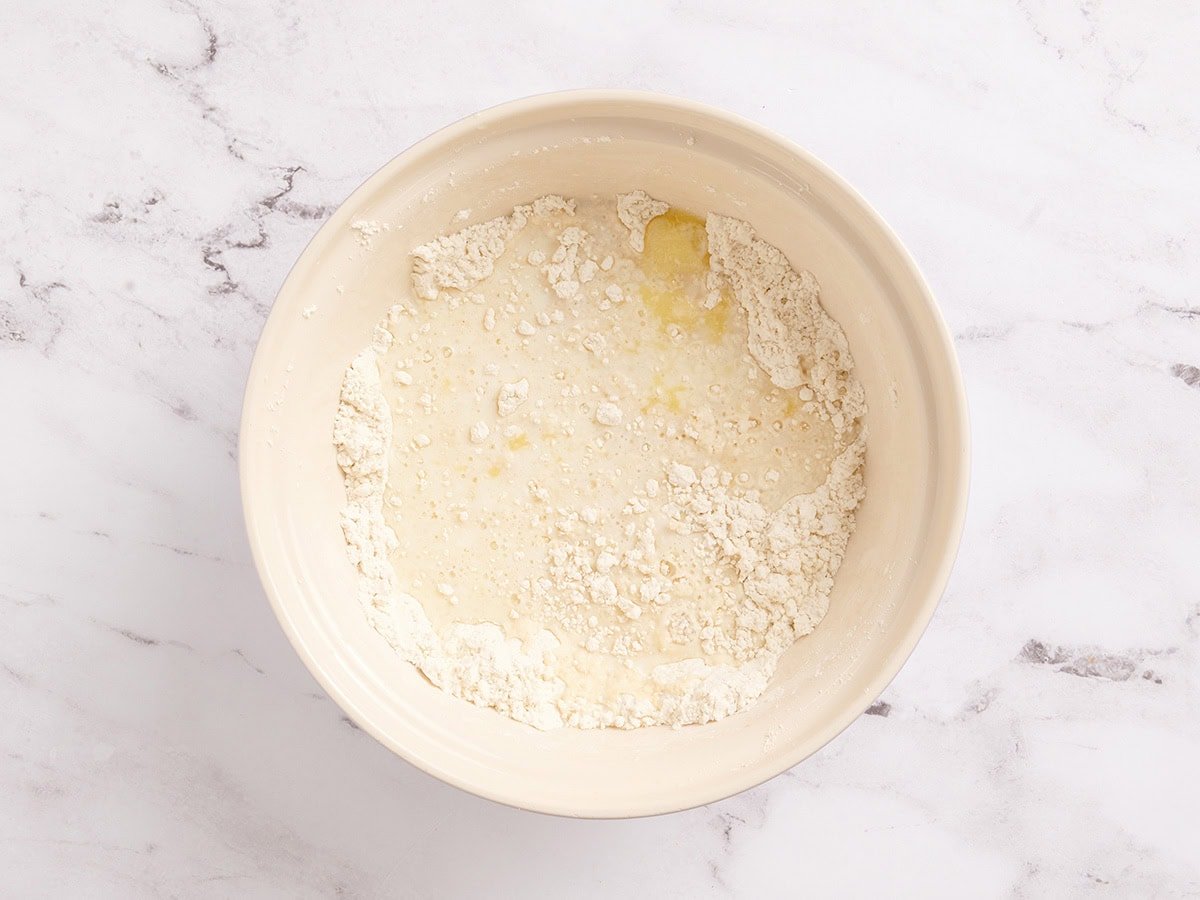
Bring the dough together: Add the ¾ cup warm milk, ½ cup warm water, and 1 tbsp melted butter. Mix until a soft, slightly tacky dough forms. If the dough cracks when pressed, add warm water 1 tbsp at a time until smooth. Cover and rest for 30–45 minutes.

Roll out the dough: Roll the dough between parchment into an 8×14-inch rectangle.
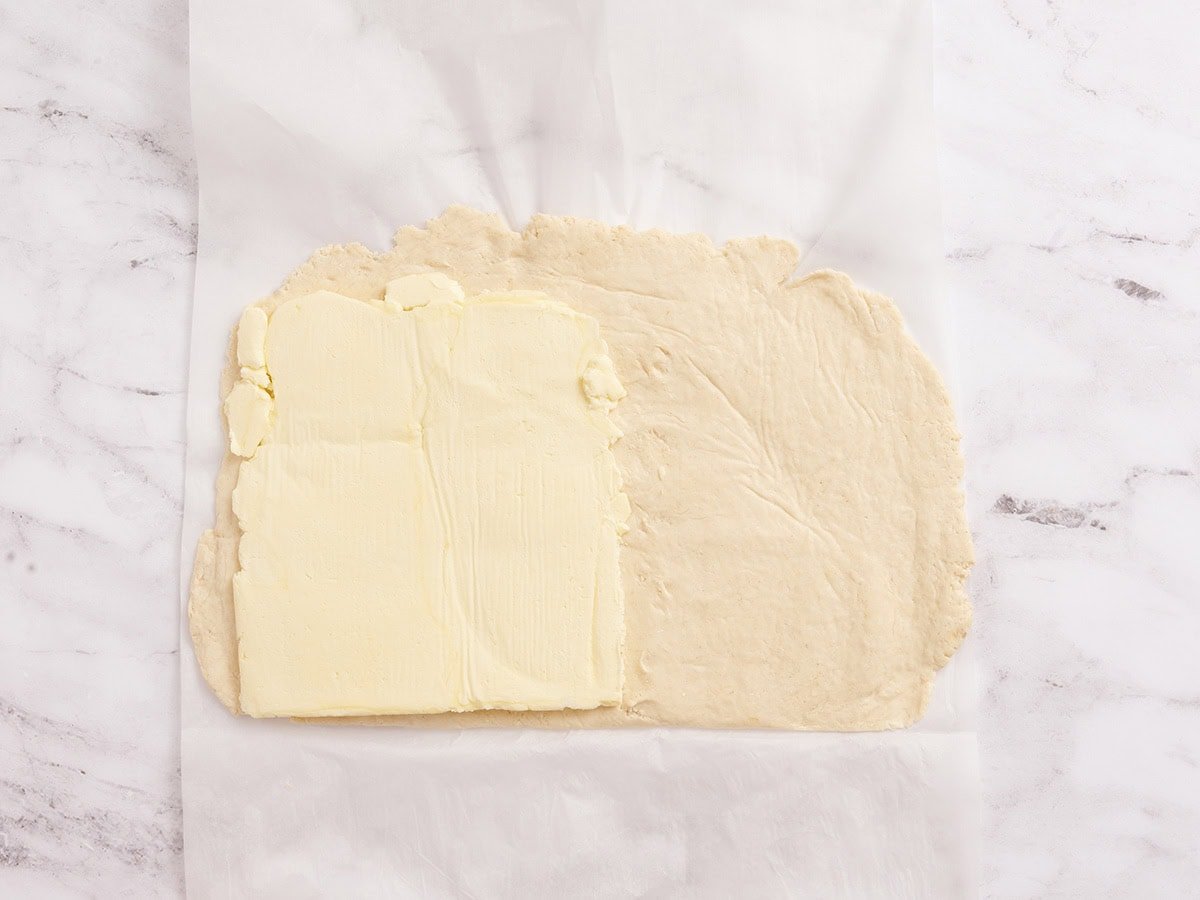
Add sheet of chilled butter: Place the chilled 7×8-inch butter block on one half.
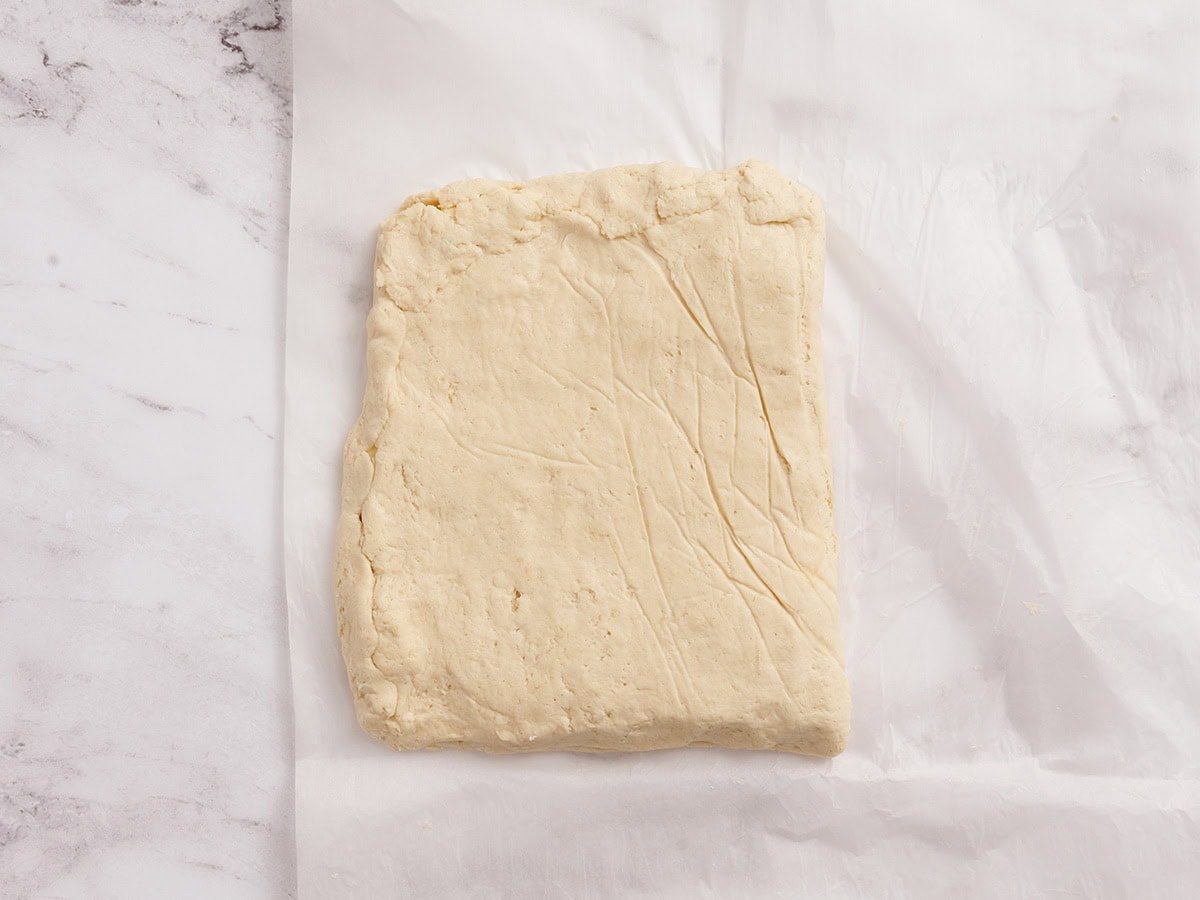
Fold and seal: Fold the other half of the dough over the butter, and seal the edges. Chill for 30 minutes.
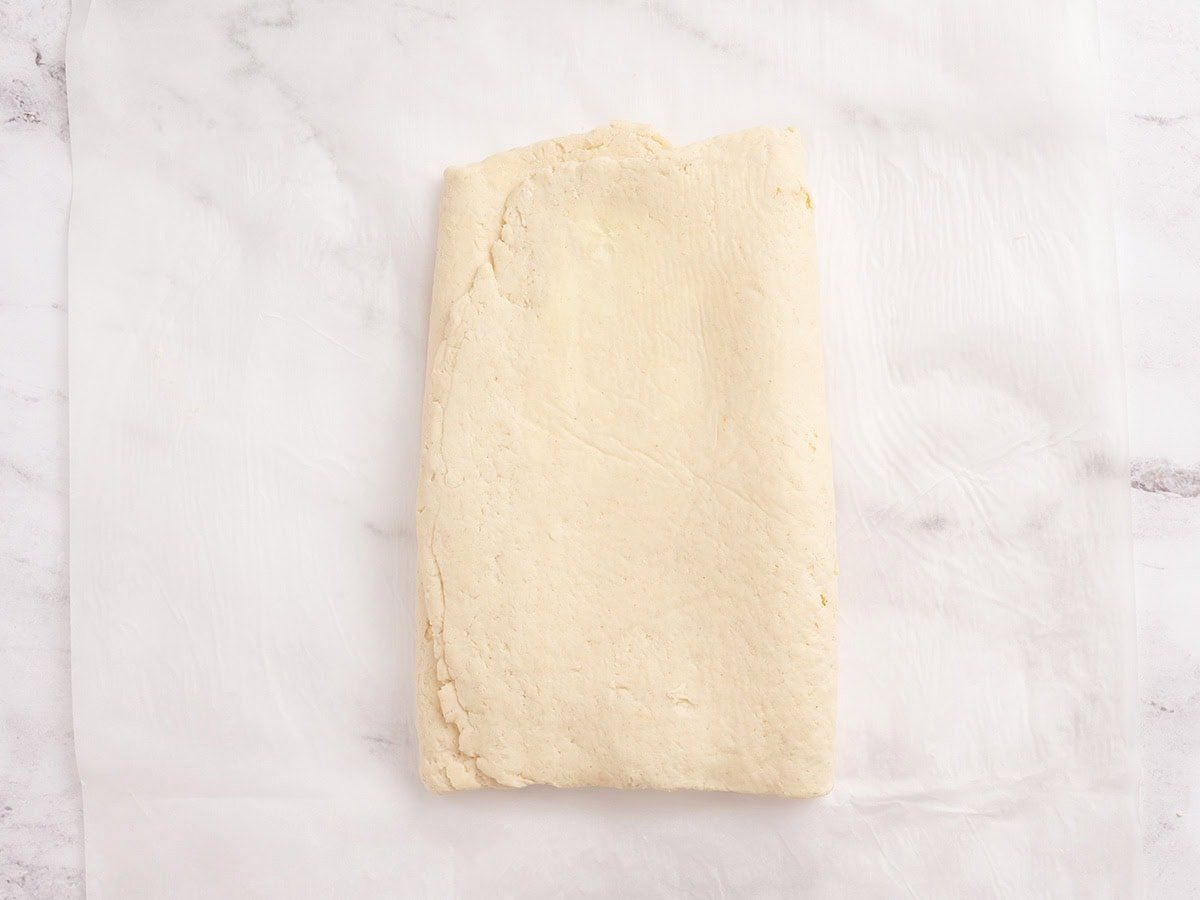
Roll and fold the dough twice: Roll the dough gently into an 8×16-inch rectangle, then fold it into thirds like a letter. Chill for 30 minutes. Repeat the roll-and-fold process once more, rolling to 8×16 inches and folding into thirds again. Chill for another 30 minutes.
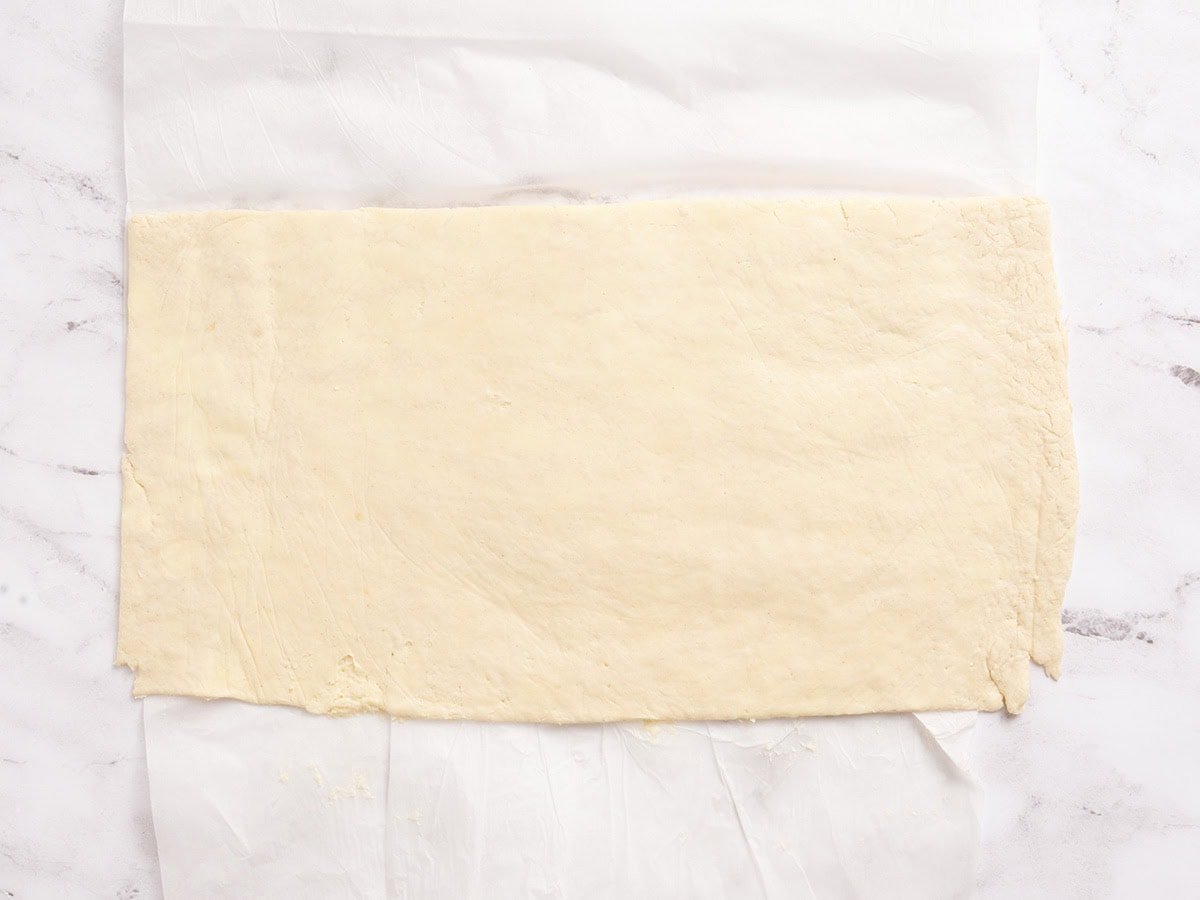
Roll out the dough: Roll the dough to ¼-inch thick, aiming for an 11×16-inch sheet. Trim the edges for clean layers.

Cut into triangles: Then cut into long triangles (about 3×10 inches).
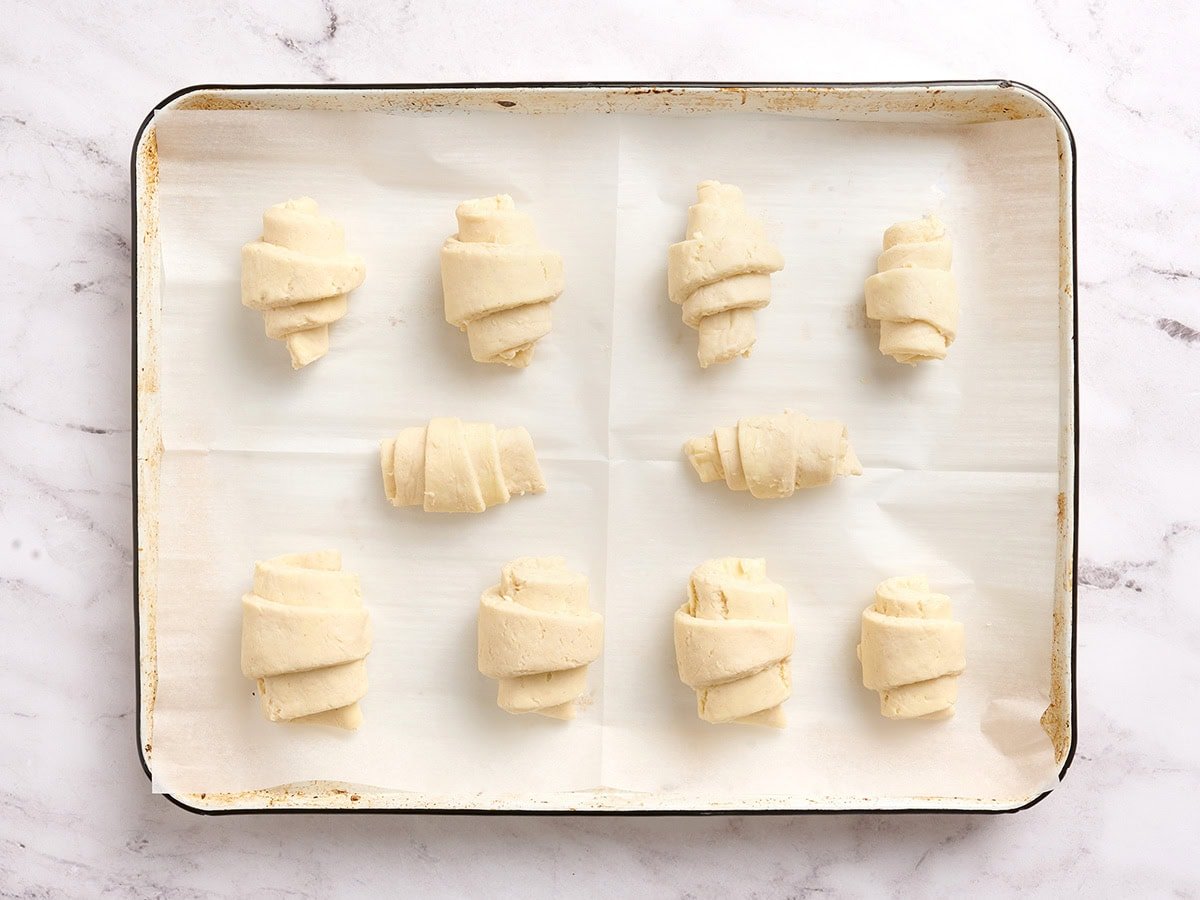
Shape and proof: Roll each triangle from the base to the tip and place on a parchment-lined baking sheet. Cover loosely with plastic wrap and let rise in a warm spot (75–80°F) for 60–90 minutes.
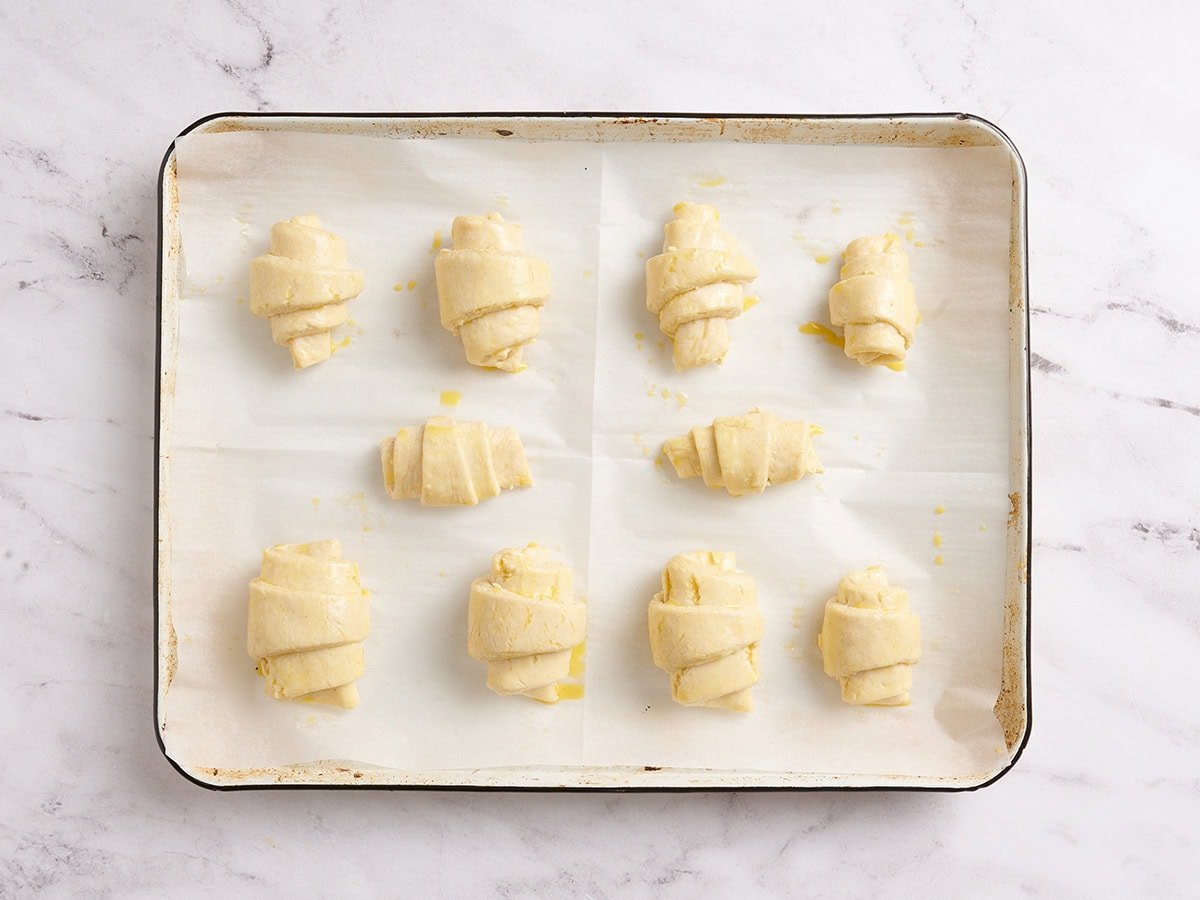
Egg wash: Whisk 1 large egg with 1 tbsp water until smooth. Brush the croissants lightly with the egg wash.
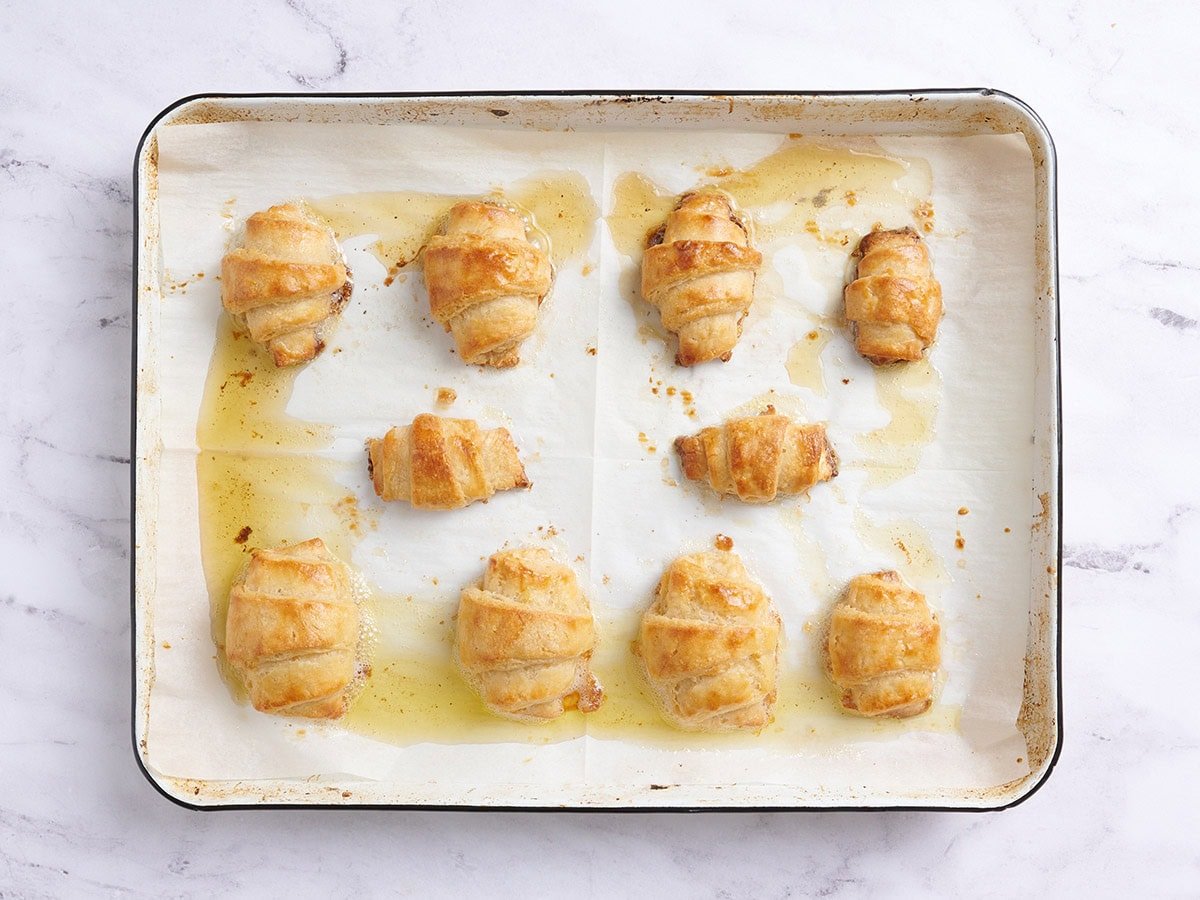
Bake the croissants: Bake the croissants at 400°F for 18–22 minutes, or until deep golden brown. Cool on a rack before serving.
Serving Suggestions
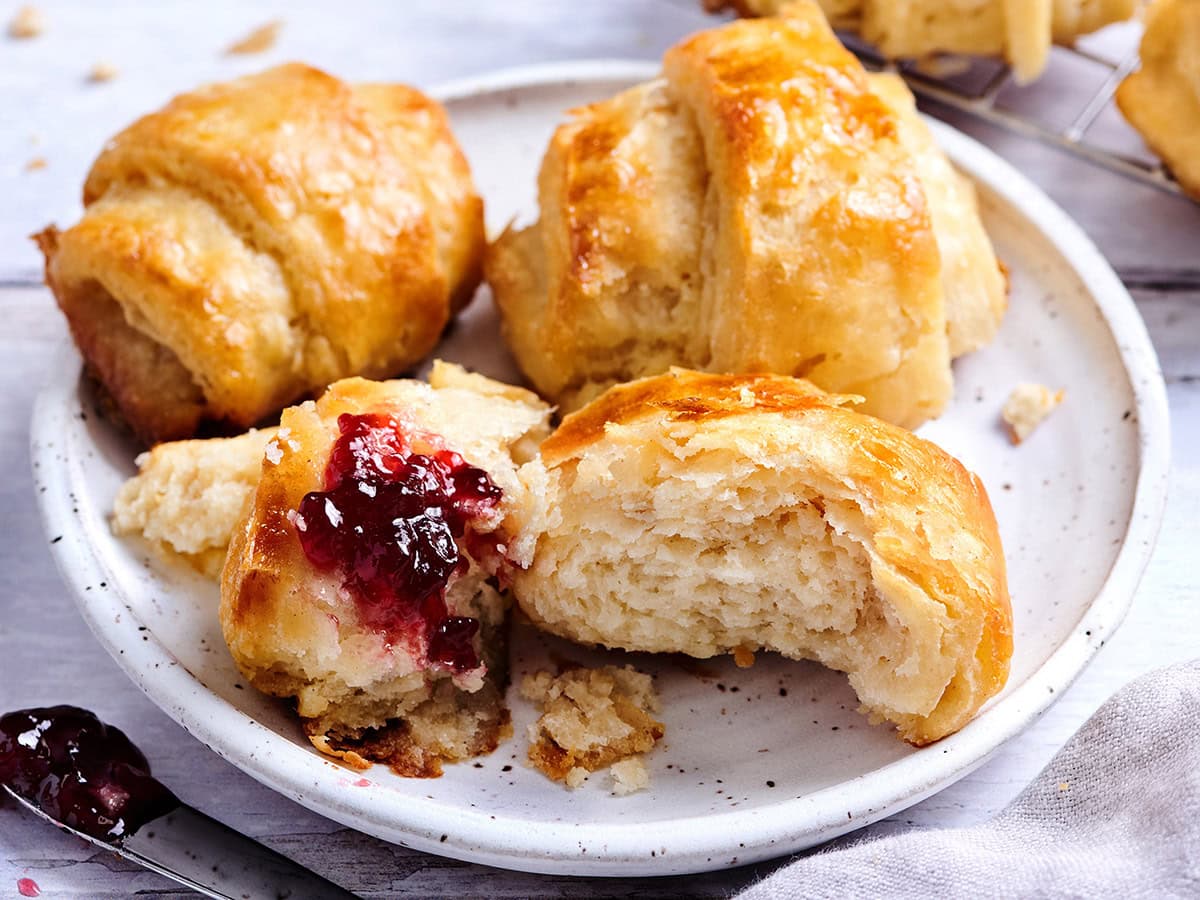
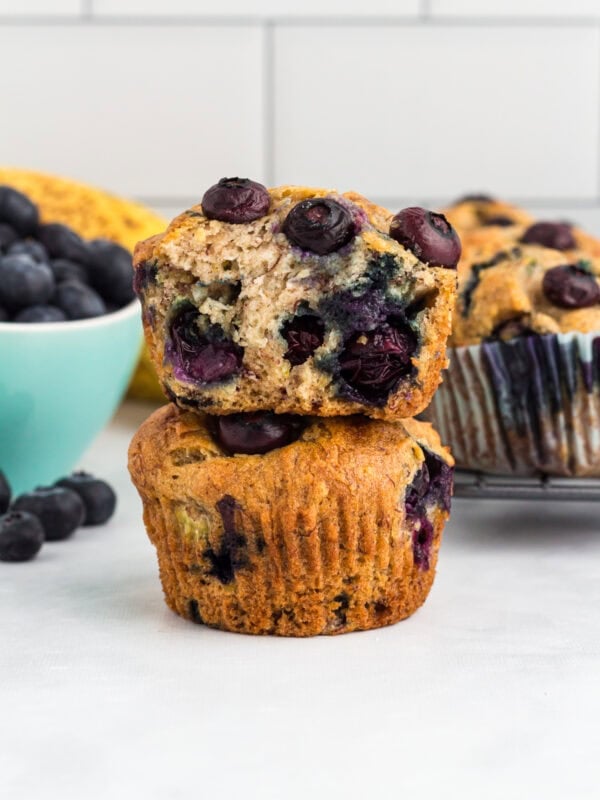
These easy gluten-free croissants are at their very best warm from the oven, when the layers are crisp, and the centers are still soft and steamy. I love splitting one open and adding a little butter, jam, or even chocolate spread because it is simple but so good with a cup of coffee. If you are putting together a brunch spread and really wnat ot impress, make gluten-free beignets! They also pair beautifully with other pastries like gluten-free scones, sweet rolls, or gluten-free blueberry muffins. You can also serve them with a small fruit plate or a crustless zucchini quiche for a balanced and cozy breakfast.
Storage Instructions
Let the croissants cool completely on a wire rack before storing to keep the layers from softening. For short-term storage, place them in an airtight container at room temperature for up to 24 hours. To bring back the crisp exterior, warm them in a 350°F oven for 5 to 7 minutes rather than microwaving. For longer storage, wrap each croissant in plastic wrap and place them in a freezer-safe bag. They will keep well in the freezer for up to 2 months. When you are ready to enjoy one, thaw it at room temperature for about 30 to 60 minutes, then reheat in a 350°F oven for 8 to 10 minutes.


quite disappointing. not flaky at all. it was very dense, even for a gluten free croissant
Hi Zara, Thank you for trying the recipe and sharing your feedback. I’m sorry to hear the croissants didn’t turn out as flaky as you were hoping.
Gluten-free croissants are one of the more challenging gluten-free baked goods because they don’t have the elasticity and structure that traditional wheat-based dough provides. The lamination process, dough temperature, proofing time, and even the specific gluten-free flour blend used can all have a big impact on the final texture and flakiness.
If the dough became too warm during the folding process, the butter layers may have blended into the dough rather than staying distinct, which can lead to a denser result. Under-proofing can also prevent the croissants from developing a lighter interior.
I appreciate you taking the time to leave a review, and I’m sorry this recipe didn’t meet your expectations.
Absolutely awesome! Thank you.