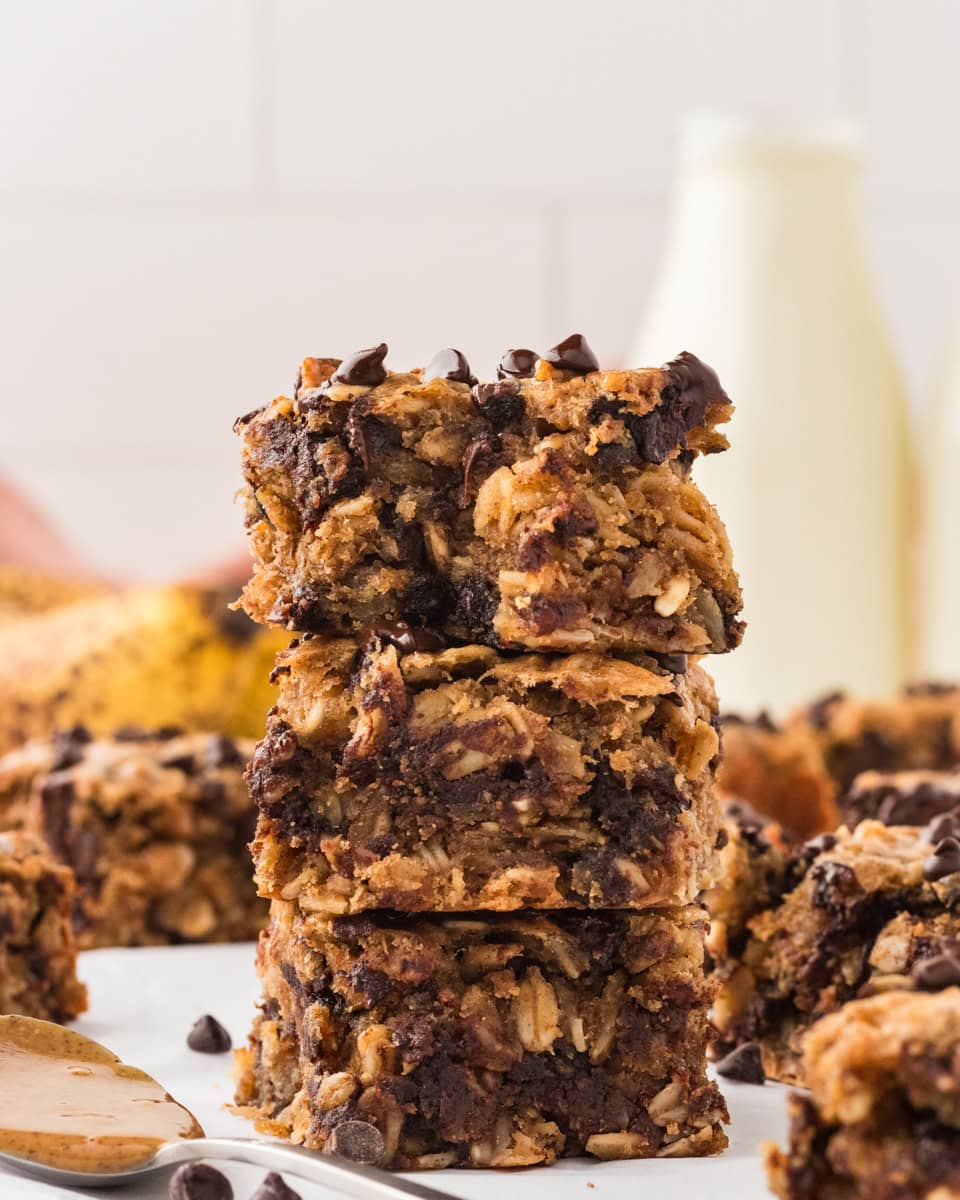
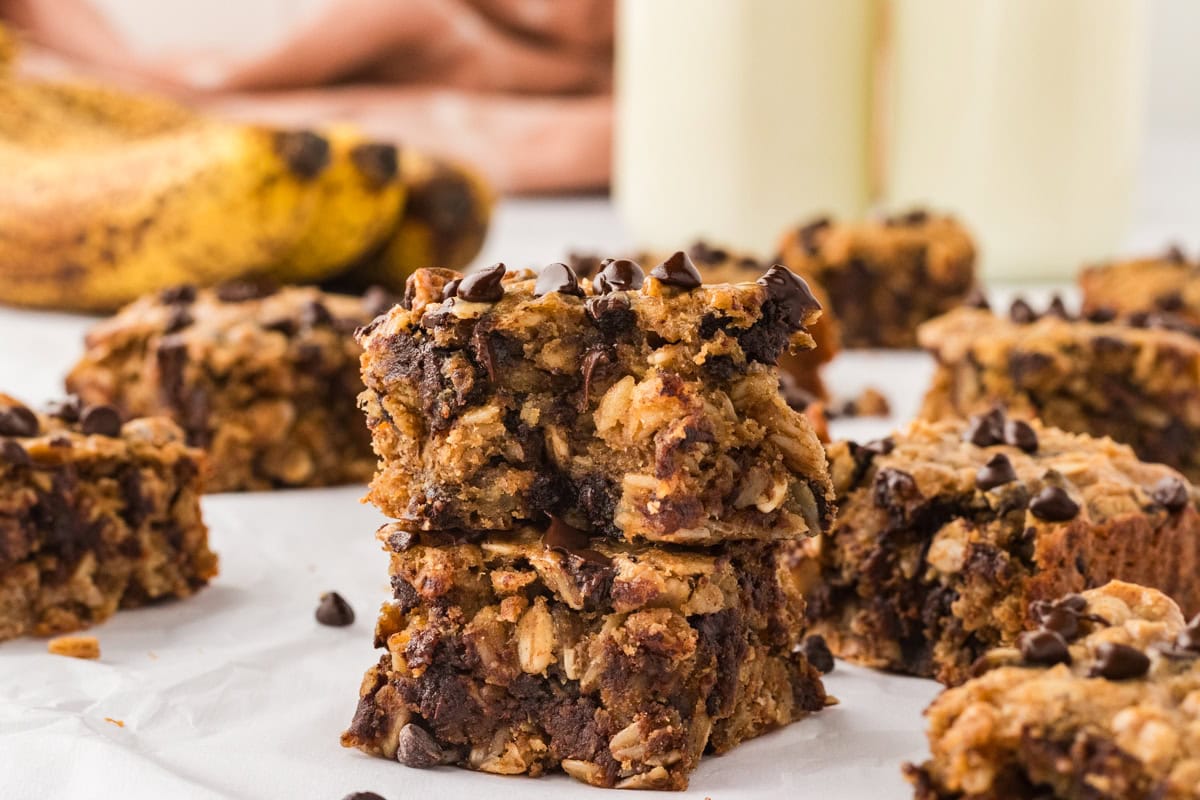
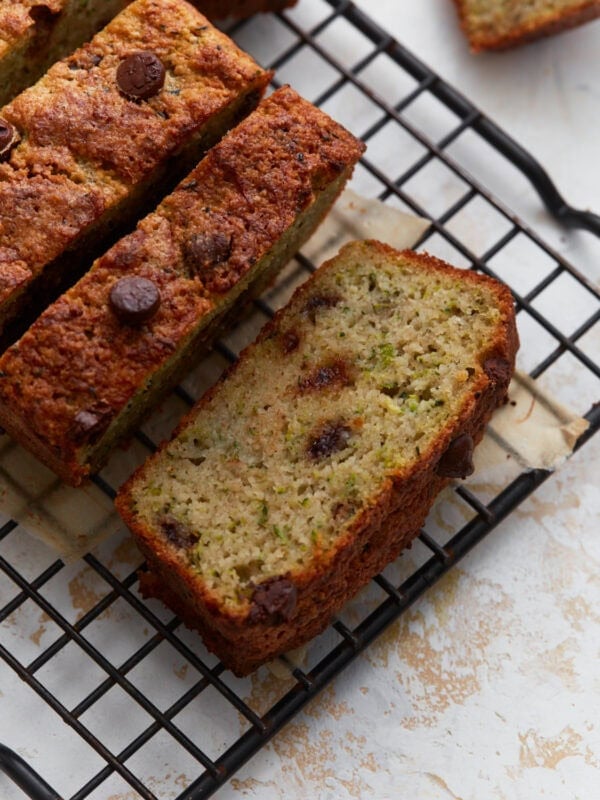
Banana Oatmeal Bars
Published


These banana oatmeal bars are soft, with just the right amount of sweetness, and I love the hearty texture of the rolled oats. Even with all the chocolate chips, they’re not too sugary and keep me feeling full with their balance of carbs, healthy fats, and protein. They’re my go-to banana-chocolate pick-me-up for park days, an easy on-the-go snack, or a quick bite between meals.
I always have ripe bananas and oats on hand, so these soft-baked oatmeal bars are a no-brainer for me. Sometimes I make homemade granola bars but when I need to use bananas I’ll whip these out. They’re quick and easy, taking just 30 minutes from start to finish, and they’re adaptable enough to suit any craving.
Flavorful, filling, and naturally gluten-free and dairy-free, they make a comforting breakfast, a quick snack, or even a healthy dessert. With hearty oats, peanut butter, and a soft and chewy granola bar texture, these bars are perfect for meal prepping or as a grab-and-go option. Plus, they’re totally kid-approved for packed lunches or afternoon snack time.
Banana Oatmeal Bars

Equipment
- 1 9×9-inch baking dish
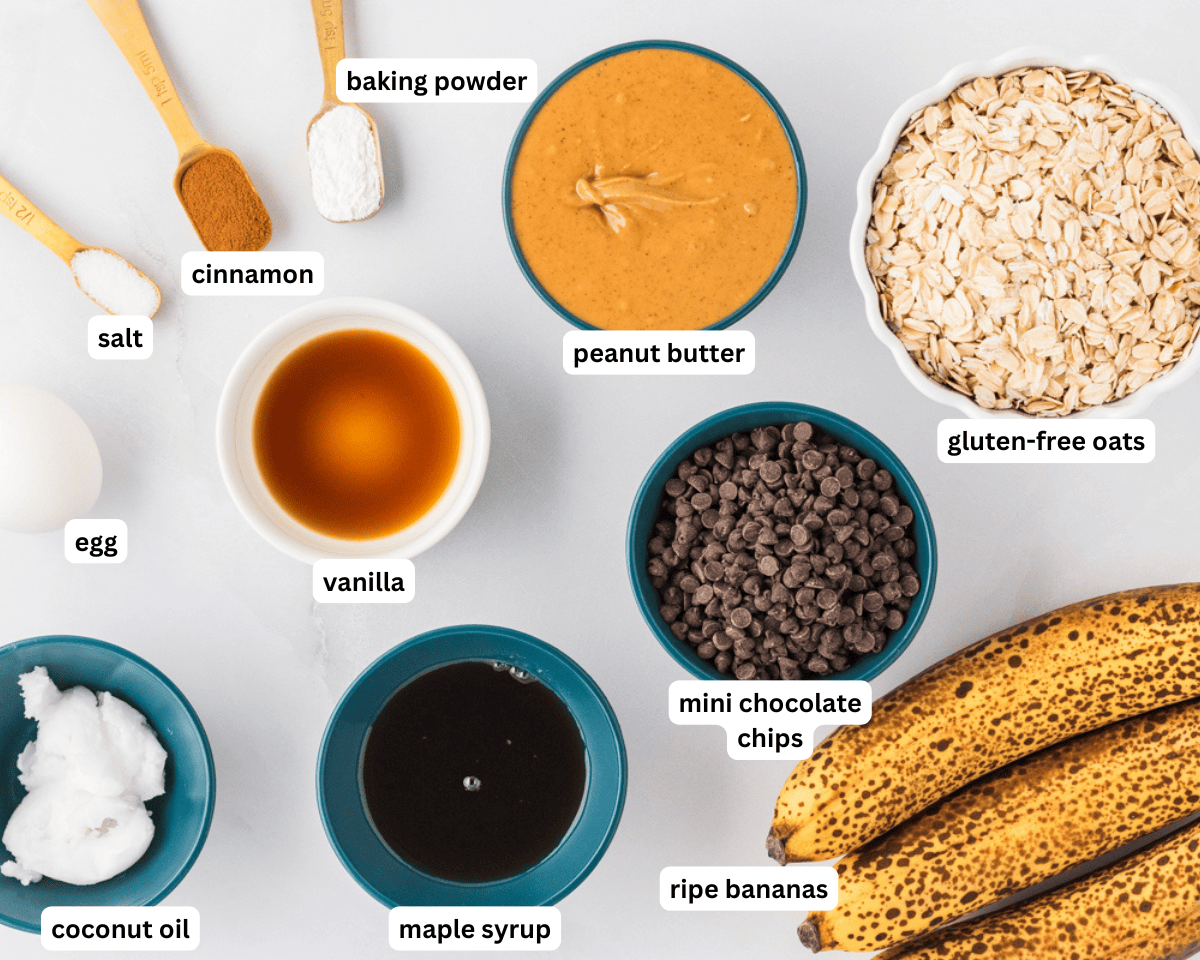
Ingredients
- 2 large ripe bananas, about 1 cup
- ¼ cup maple syrup
- 1 egg, beaten
- 2 tablespoons coconut oil
- 1 teaspoon vanilla
- 2 cups rolled oats
- ¾ cup natural peanut butter
- 1 teaspoon cinnamon
- 1 teaspoon baking powder
- ½ teaspoon salt
- ⅔ cup mini chocolate chips, plus more for sprinkling on top
Instructions
- Line a 9×9 baking dish with parchment paper that extends over the sides to make it easy to remove the bars later, and preheat your oven to 350°F.
- In a medium bowl, mash 2 bananas with a fork until mostly smooth, then stir in maple syrup, egg, coconut oil, and vanilla.
- To that, add peanut butter, oats, cinnamon, baking powder, and salt and mix until combined.
- To your bars, mix in your chocolate chips, then transfer the bars to prepared 9×9 dish.
- Bake at 350°F for 25 minutes until just beginning to brown around the edges.
- Remove from the oven and top with chocolate chips.
- Transfer the bars from the baking dish to a cooling rack using the excess parchment paper on the sides to easily remove the bars. Cut and serve cool for those patient enough to wait, or eat hot straight from the oven while the chocolate is still melty.
Notes
- You can also sub eggs for ¼ cup of applesauce.
- Since you’re cutting these into small bars, I prefer to use mini chocolate chips to ensure there’s chocolate in every bite. If you want to avoid all conventional sugar, you can use sugar-free chocolate chips (I like Lily’s) or omit them altogether. For a dairy-free option, try chocolate chips Enjoy Life Mini Chocolate Chips.
- Use virgin or unrefined coconut oil for moisture and to bind the ingredients together while keeping the chewy texture. You can use butter or dairy-free butter if you don’t like coconut.
- I used natural smooth peanut butter (the kind that separates), but you could also use crunchy for added texture or your preferred nut butter.
- I like to slightly melt my peanut butter before adding it to the batter by heating it up in 10-second intervals in the microwave. Natural peanut butter should only take 10-20 seconds to be at the right consistency.
- I like to measure out my bananas after mashing to make sure I have the right amount. Every banana is a different size, and using too much will result in mushy bars, while too little will result in dry bars.
- Be careful not to over-mix the batter. This will result in dense bars.
- Let the bars cool completely before cutting to avoid crumbling. Use a sharp knife or bench scraper.
- Add some protein by swapping ¼ cup of the oats for ¼ cup of protein powder.
- Make sure to grease the pan thoroughly or line it with parchment paper for easy removal.
- Store the bars on the counter for 2 days or refrigerate for up to a week.
- Freeze squares in single layers between sheets of parchment paper in a freezer-friendly container for up to 3 months. Thaw overnight in the refrigerator.
Nutrition
Nutrition information is automatically calculated, so should only be used as an approximation.
How to Make Banana Oatmeal Bars Step-by-Step
Gather all your ingredients together.
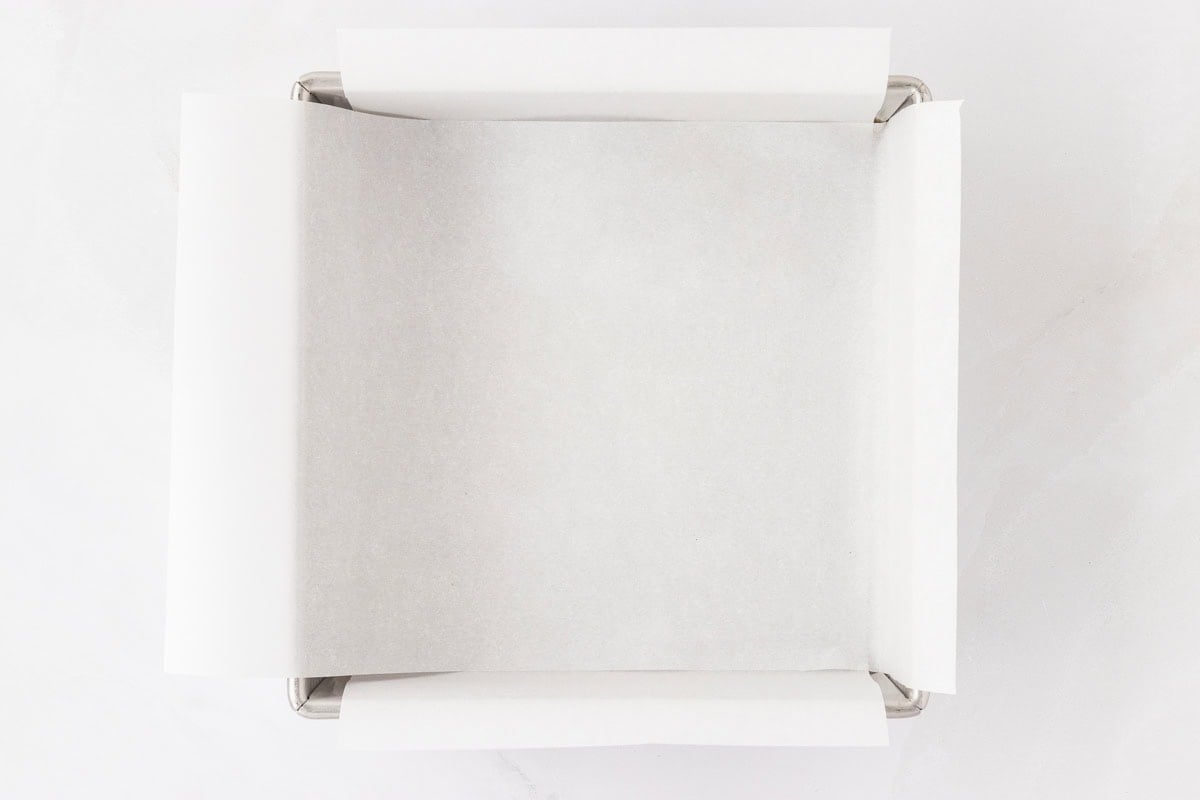
Grab a 9×9-inch baking dish and line it with parchment paper so it extends over the sides. Preheat the oven to 350°F.

Grab a mixing bowl and mash 2 ripe bananas with a fork until smooth.

Whisk in a ¼ cup of maple syrup, 1 egg, 2 tbsp melted coconut oil, and 1 tsp vanilla extract.

Next, add 2 cups gluten-free rolled oats, ¾ cup natural peanut butter (softened), 1 tsp cinnamon, 1 tsp baking powder, and ½ tsp salt.

Mix to combine all the ingredients.

Gently fold in ⅔ cup mini chocolate chips.

Pour the batter into the lined baking dish and spread evenly with a knife or spatula.

Place the dish into the preheated oven on the middle rack and bake for 25 minutes until the edges start to brown.

Remove the bake from the oven and top with more chocolate chips.

Use the parchment paper to lift the bars out of the dish and transfer them to a cooling rack. Eat them warm, or allow the bars to cool completely before cutting and serving. Enjoy!
Serving Suggestions
I make these oatmeal banana bars all the time for meal prep because they’re so versatile! They’re perfect for a quick breakfast, an easy snack, or even a healthier dessert. You can enjoy them straight off the counter or warmed up for extra comfort. Plus, they’re easy to customize—try adding chocolate chips, chopped nuts, shredded coconut, dried fruits, or a swirl of peanut butter for variety.
Storage Instructions
Store the bars on the counter for 2 days or refrigerate for up to a week.
Freeze squares in single layers between sheets of parchment paper in a freezer-friendly container for up to 3 months. Thaw overnight in the refrigerator.


Made these for my family this morning and they were a hit! Even for the picky husband. I will definitely be making these again in the near future.
I made these this morning for my family and they were a hit! Even for the picky husband