Dairy-Free Chocolate Pudding
Published


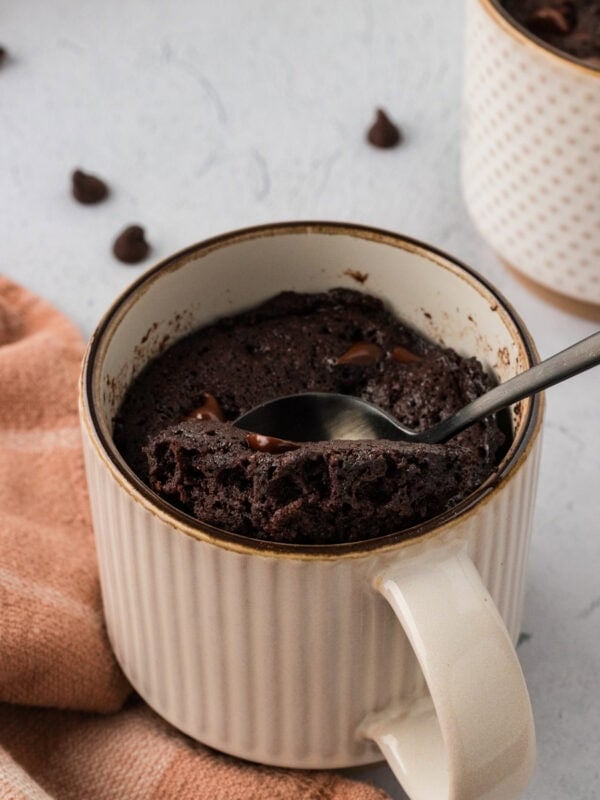
Rich, creamy, and irresistibly smooth, this dairy-free chocolate pudding is the perfect sweet treat. It’s even better than the pudding cups we all packed in our lunch boxes, and this version is made from scratch with simple ingredients you probably already have on hand. The result is a luscious, deeply chocolatey dessert that tastes far more indulgent than anything store-bought, yet comes together in just minutes on the stovetop.

Classic Dessert, but Without the Dairy!
A classic pudding has been sorely missed in this house, and making a dairy-free version just seemed like the way to go. There are so many great non-dairy alternatives now that I knew I could whip up a vegan chocolate pudding everyone would love, and I was right. Soy milk thickened with cornstarch and melted dairy-free chocolate chips creates a silky, rich pudding that easily beats anything from the store. Adults and kids both love it. With just a bit of whisking, melting, and chill time, you’ll have a smooth, spoonable dessert that feels nostalgic, comforting, and completely dairy-free.
Gluten-Free Baking Tips
- Dissolve the cornstarch completely. Always whisk the cornstarch into a small amount of milk before adding it to the rest of the ingredients. This extra step ensures the pudding thickens evenly and keeps those pesky lumps from forming.
- Sift the cocoa powder first. Cocoa powder naturally clumps together, so sifting it before whisking helps it blend smoothly into the milk mixture. Skipping this step can leave you with dry pockets of cocoa that won’t dissolve.
- Keep the heat low and steady. It can be tempting to crank up the heat to make things go faster, but slow and gentle heat is key. It helps the pudding thicken gradually without scorching or sticking to the bottom of the pan.
- Whisk constantly. Don’t walk away! Continuous whisking keeps the mixture silky and lump-free while preventing the chocolate and milk from burning.
- If the pudding is too thin or doesn’t set. You may not have simmered long enough, or the ratio of liquid to thickener is off. Try increasing cook time by a minute or two, or reduce the milk slightly next time.
Dairy-Free Chocolate Pudding

Ingredients
- 2 cups soy milk, divided; sub for almond or oat milk, but the consistency may be thinner
- 3 tbsp cornstarch, sub for arrowroot or potato starch can work
- ½ cup granulated sugar,
- ¼ cup unsweetened cocoa powder, sifted
- ⅛ tsp salt
- ¼ cup dairy-free semisweet chocolate chips, I use the brand Enjoy Life
- 2 tsp vanilla extract
Instructions
- In a small bowl, stir together ½ cup soy milk with the cornstarch. Stir until the cornstarch has completely dissolved.
- In a medium-sized saucepan, whisk together the soy milk and cornstarch mixture, the remaining soy milk, granulated sugar, sifted cocoa powder, and salt. Whisk constantly over low-medium heat until the mixture starts to simmer lightly.
- Once the mixture starts to simmer gently, stir in the chocolate chips. Reduce heat to low. Whisk constantly while the chocolate chips melt into the pudding and the pudding starts to thicken. The pudding should thicken within a minute or two. It’s thick enough when it coats the back of a spoon.
- Remove saucepan from heat and stir in vanilla extract.
- Pour pudding into a glass bowl or individual small glass containers, cover with food-safe plastic wrap and refrigerate for 3 hours before serving. To prevent a thick layer (skin) forming on top of the pudding, place the food-safe plastic wrap directly on top (touching) the top of the pudding.
- Serve chilled. Enjoy!
Notes
Nutrition
Nutrition information is automatically calculated, so should only be used as an approximation.
How to Make Dairy-Free Chocolate Pudding Step by Step

Gather the ingredients: Gather all the Ingredients together. In a small bowl, whisk together 3 tbsp cornstarch and ½ cup soy milk until the cornstarch has completely dissolved and the mixture is smooth.

Combine ingredients in a saucepan: In a medium-sized saucepan, add the cornstarch mixture along with the remaining 1½ cups soy milk, ½ cup granulated sugar, ¼ cup sifted unsweetened cocoa powder, and ⅛ tsp salt. Whisk everything together until well combined.

Cook until thickened: Place the saucepan over low-medium heat and whisk constantly as the mixture warms. Continue whisking until it begins to lightly simmer around the edges.

Add the chocolate chips: Once the mixture starts to simmer, stir in ¼ cup dairy-free semisweet chocolate chips. Reduce the heat to low and whisk constantly as the chocolate melts and the pudding thickens. It’s ready when the mixture coats the back of a spoon. This usually takes about 1–2 minutes.

Finish with vanilla: Remove the saucepan from the heat and whisk in 2 tsp vanilla extract for extra flavor.

Chill the pudding: Pour the pudding into a large glass bowl or divide it into individual serving cups. Press a piece of food-safe plastic wrap directly onto the surface of the pudding. This stops air from reaching the surface and forming that thick “skin” layer as it cools.
Refrigerate for at least 3 hours, or until fully chilled and set.

Serve and enjoy: Once chilled, remove the plastic wrap and serve. Enjoy!

Serving Suggestions
I love serving this dairy-free chocolate pudding chilled in small glass cups with a dollop of coconut whipped cream and a few fresh raspberries on top. Sometimes I’ll crush a few gluten-free shortbread cookies or even gluten-free graham crackers for a little crunch. It’s also fun to layer it with gluten-free granola or fruit for a pudding parfait. Whether it’s an after-dinner treat or a make-ahead dessert for guests, it always feels like a little bit of nostalgia in every spoonful.
Storage Instructions
Store any leftover pudding in an airtight container or cover each serving cup tightly with plastic wrap, and refrigerate for up to 5 days. The pudding will stay silky and rich as long as it’s kept cold.
This is also a great make-ahead dessert. You can prepare it a day or two before serving, then top it with whipped cream, fruit, or crushed gluten-free cookies right before serving. Freezing isn’t recommended since the texture can separate once thawed, but the chilled version keeps beautifully for several days.


This is SO easy to make and tastes So good. Thanks for the recipe.
Love this pudding! Very simple to make and it’s delicious!
Hey Cheryl,
Will the 1x chocolate pudding make enough for a 9″ pie?
Thanks,
Sue
Hi Sue, yes it should!