Gluten-Free Buttermilk Biscuits
Updated
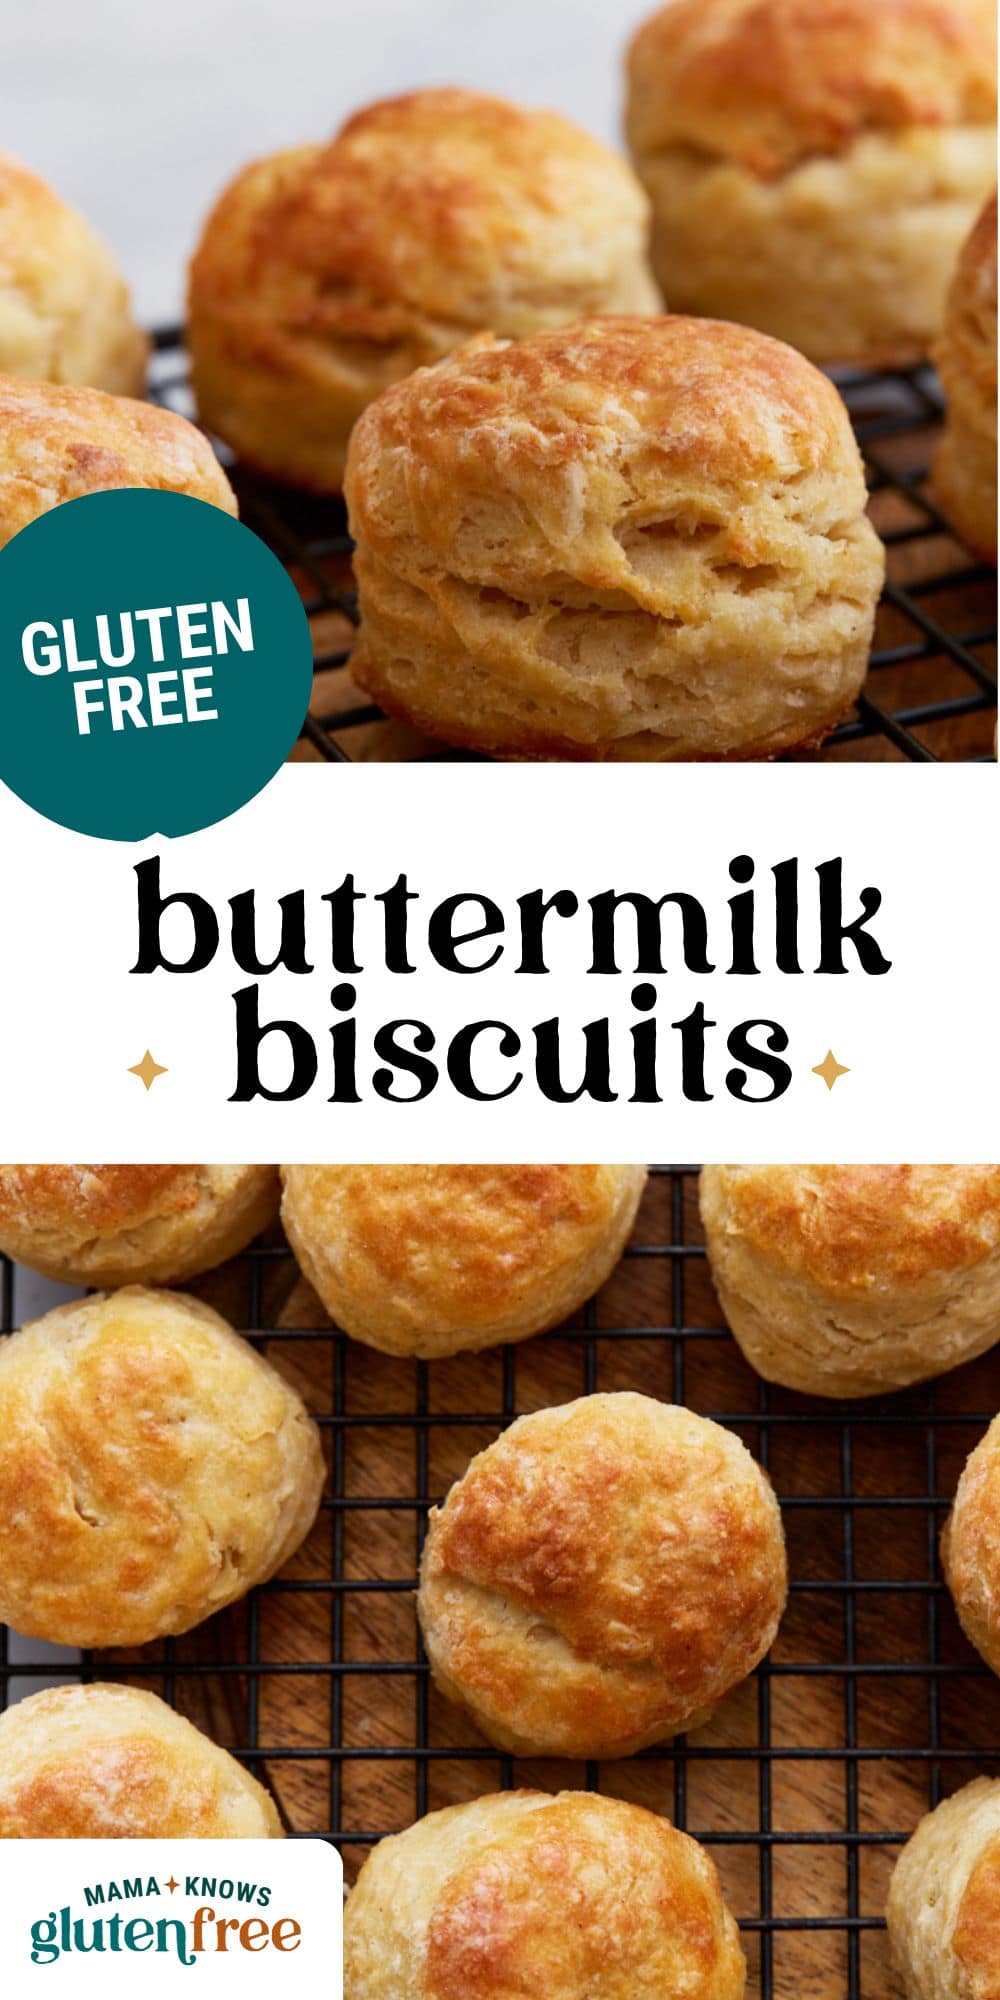
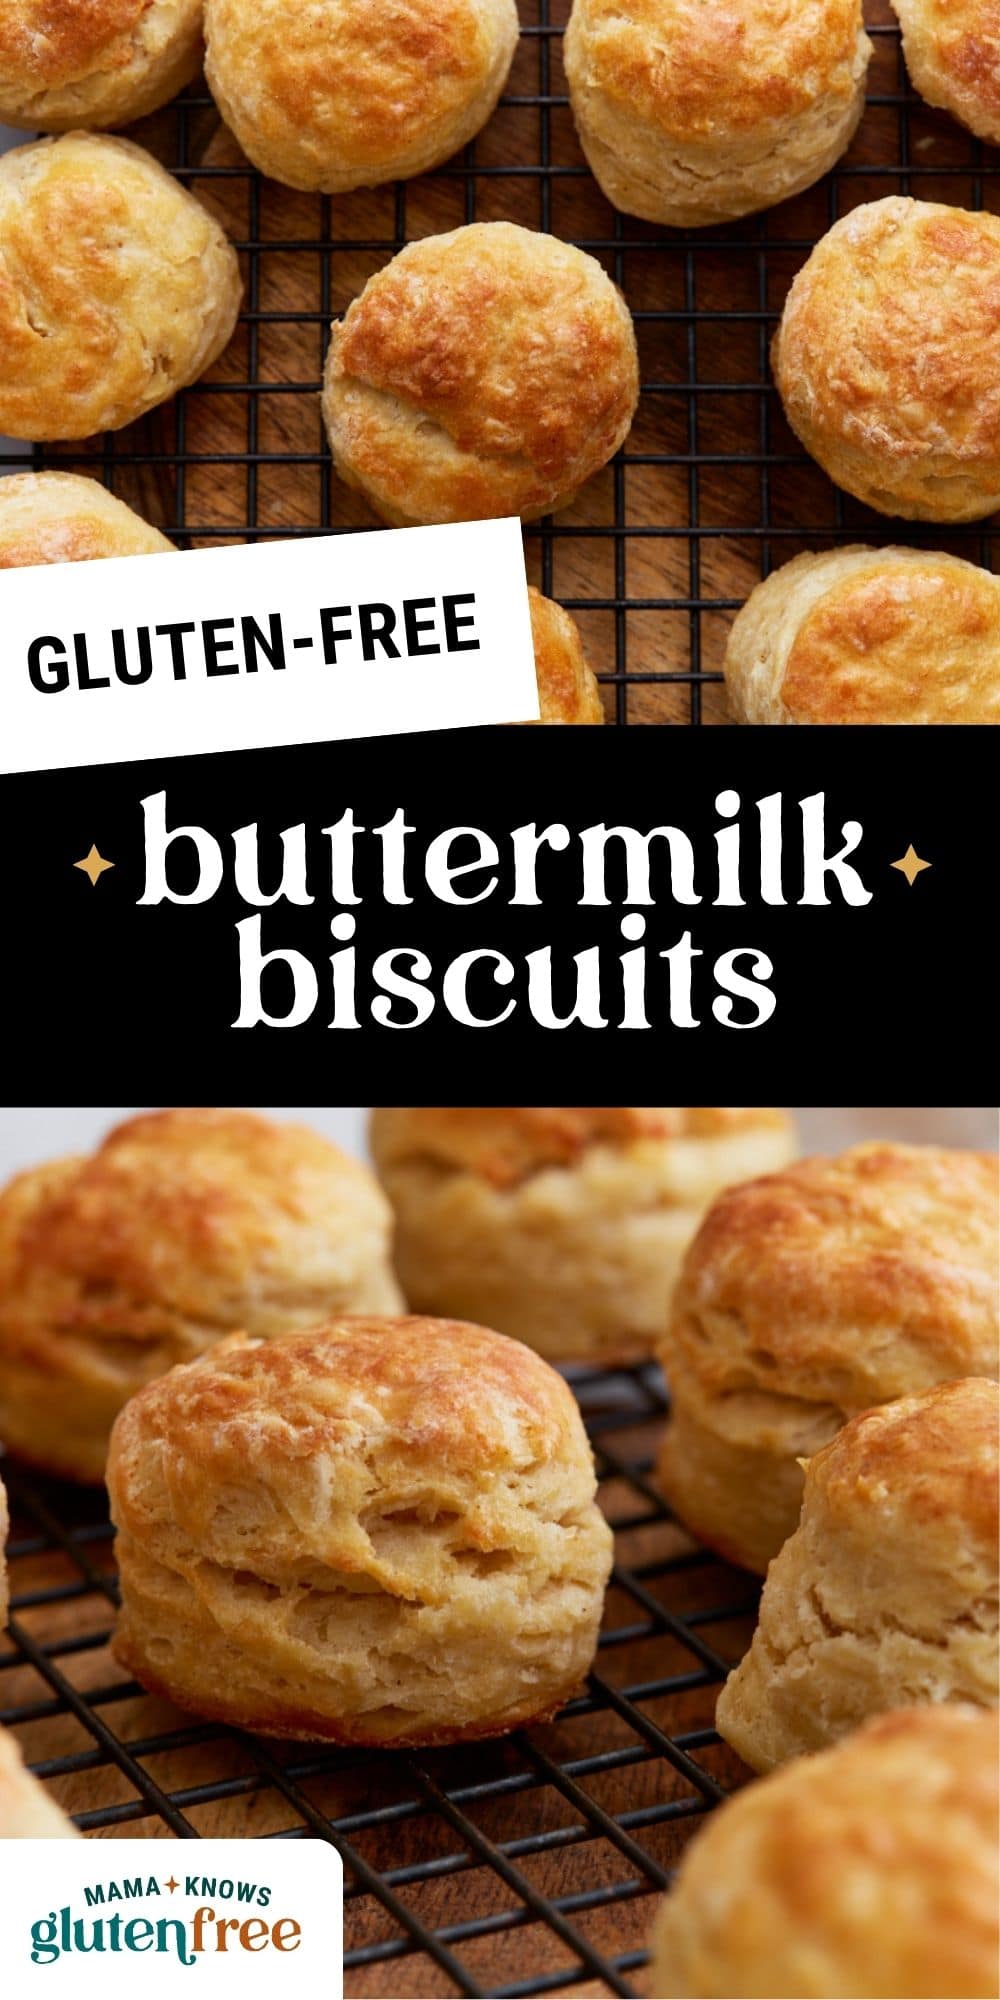

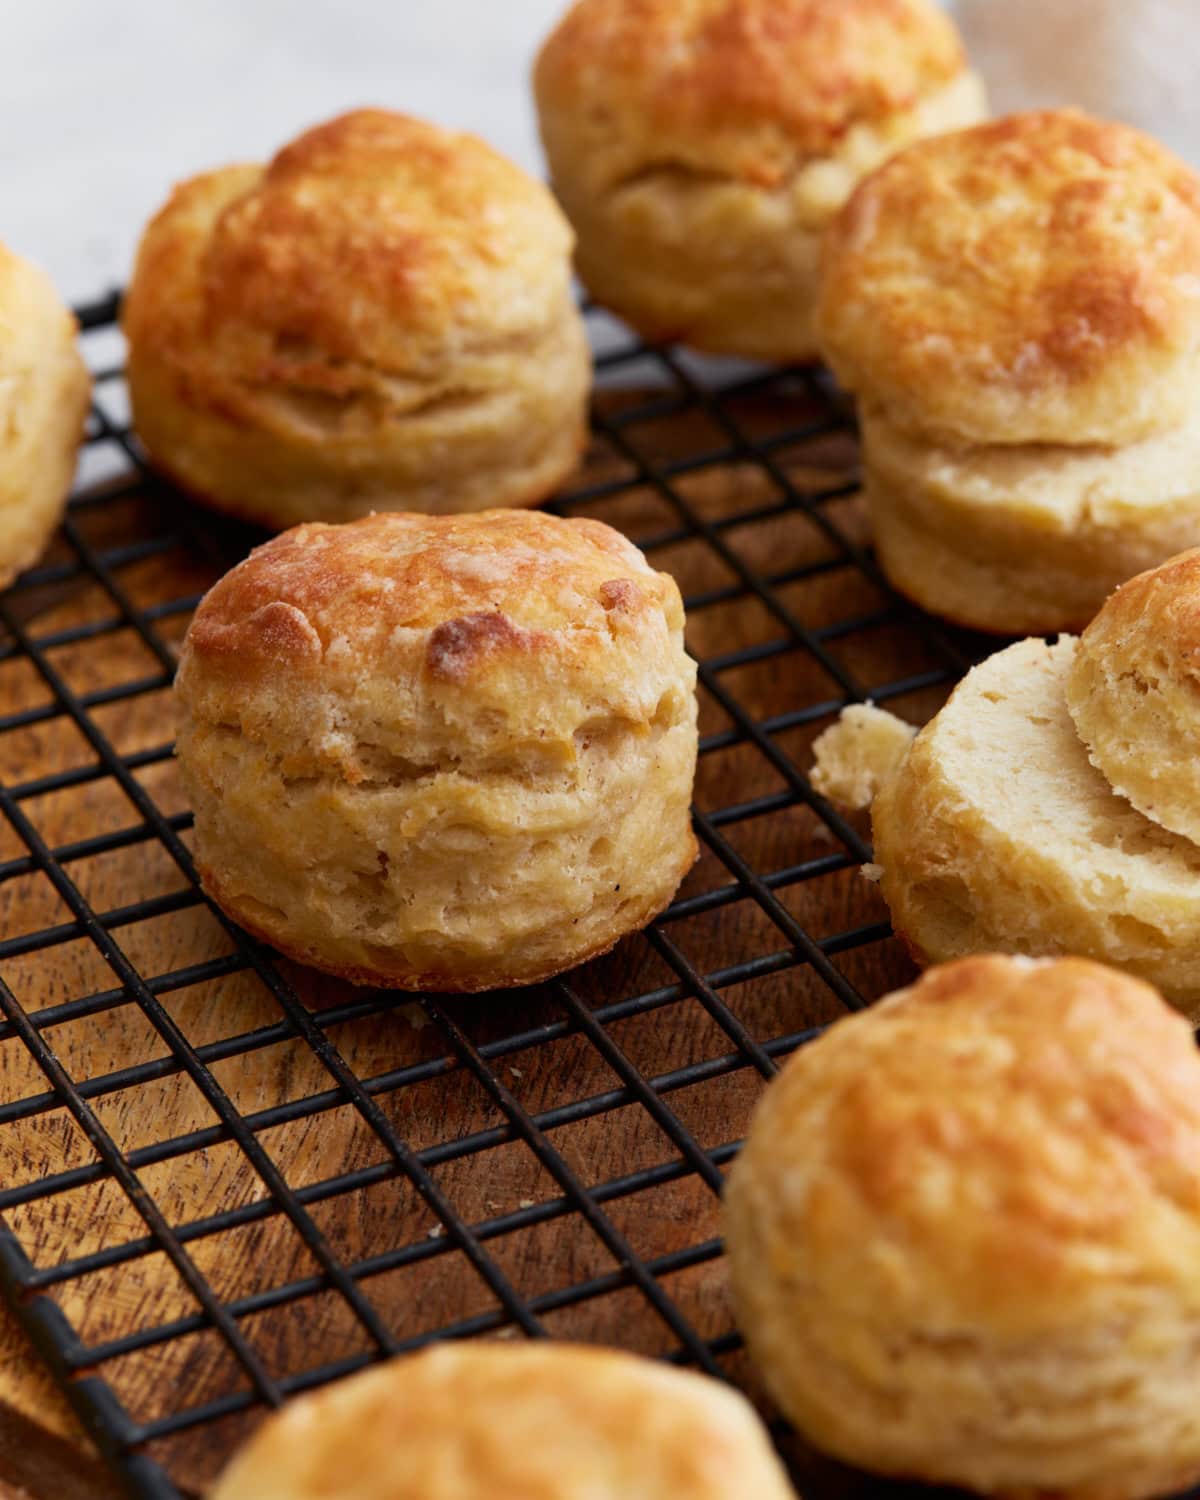
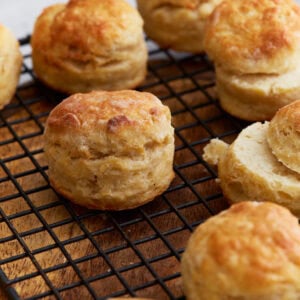
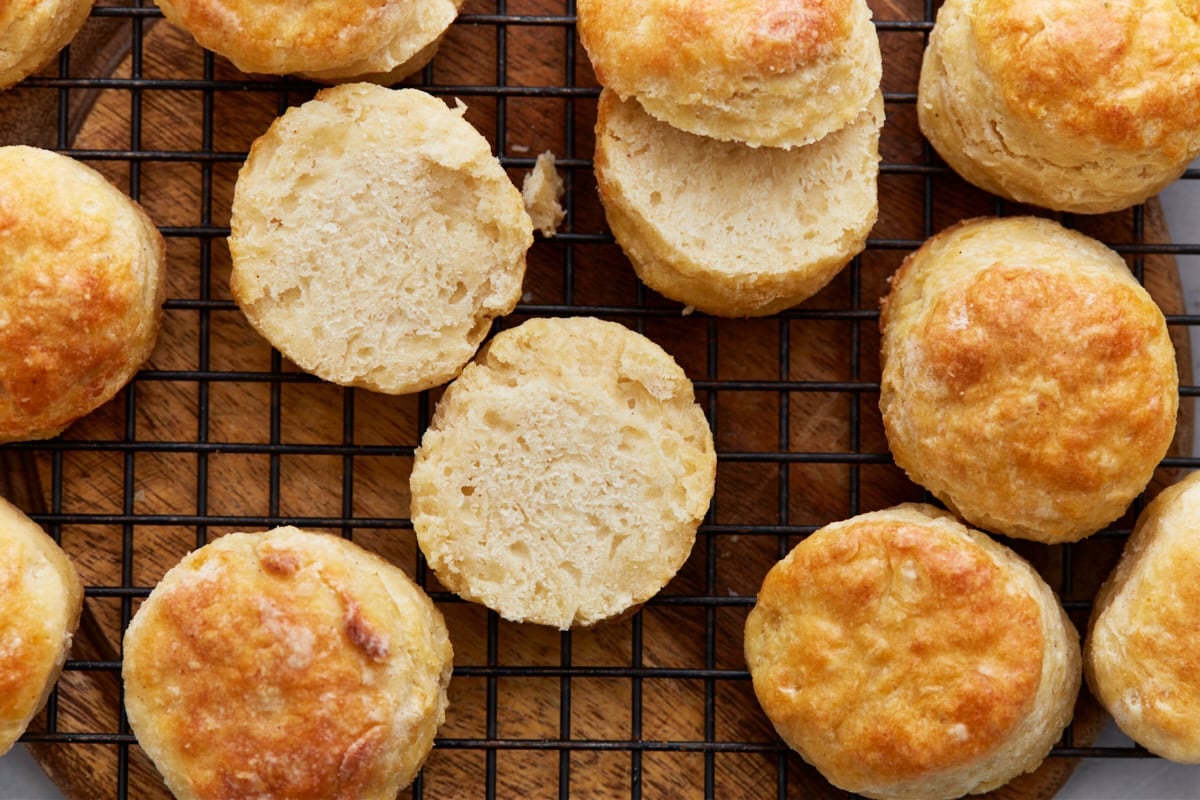
Buttermilk biscuits are near and dear to my family, and since going gluten-free, they’ve been sorely missed. These gluten-free buttermilk biscuits have taken me a while to get right, and I’m happy to say they hit the spot. This version delivers soft, fluffy, and full of buttery layers that pull apart just like the ones my husband grew up with. No rise, golden tops and tender centers made in just 30 minutes.
“They were out of this world! Even my son loved them, & he does not have Celiac. He keeps asking me to make more, so guess what’s for breakfast tomorrow! 😋 😋 😋 Thank you so much! ❤️❤️❤️”
– Anna
If you’ve followed my blog for a while, you know my husband is from Knoxville, Tennessee—and after years of living there and having two of our kids born in the South, I fell hard for Southern cooking. Biscuits are a staple at every meal, and I knew I had to create a gluten-free version that truly delivered. These buttermilk biscuits were the first ones I perfected, and they quickly became a favorite. Later, I developed an almond flour biscuit recipe as a grain-free option, but this version is still my go-to when I want that classic, tender, buttery Southern biscuit. I make them with a gluten-free flour blend, cold butter for flakiness, and buttermilk for that signature tang. They bake up golden, tender, and fluffy, just like the ones we loved back in Tennessee.
Gluten-Free Baking Tips
- Keep all your ingredients cold for the flakiest texture. Cold butter and buttermilk create steam in the oven, which helps the biscuits rise and form layers. If your kitchen is warm, you can even chill the flour.
- Freeze the butter for about 10 minutes before grating. Cold, grated butter spreads evenly through the dough and melts as the biscuits bake, creating tender, buttery layers.
- Don’t overmix the dough. It should look shaggy and slightly crumbly. Overworking it can lead to tough, dense biscuits instead of light and tender ones.
- Use a large cookie or ice cream scoop to portion the dough evenly. This helps the biscuits bake uniformly and gives you a consistent size and shape every time.
Gluten-Free Buttermilk Biscuits
Ingredients
- 2 cups gluten-free all-purpose flour, I like Pillsbury gluten-free. Not all gluten-free flours are created equal. You may experience different baking results depending on the gluten-free flour blend you choose.
- ½ tsp xanthan gum, leave out if your flour already contains it.
- 1 tbsp gluten-free baking powder
- 1 tsp salt
- 2 tbsp granulated sugar
- 1 cup buttermilk, Make your own buttermilk by adding 1 tablespoon of white vinegar or lemon juice to the cup of milk and let stand 5-10 minutes in the refrigerator to stay cold. Dairy-free use almond, cashew, or coconut milk and add the vinegar to make dairy-free buttermilk.
- 6 tbsp unsalted butter, dairy-free/Vegan use Smart Balance butter, shortening, or Earth Balance butter.
- 1 large egg, egg-free/Vegan use Bob's Red Mill Egg Replacer.
- 2 tbsp gluten-free all-purpose flour
Instructions
- Preheat oven to 450°F (232°C).
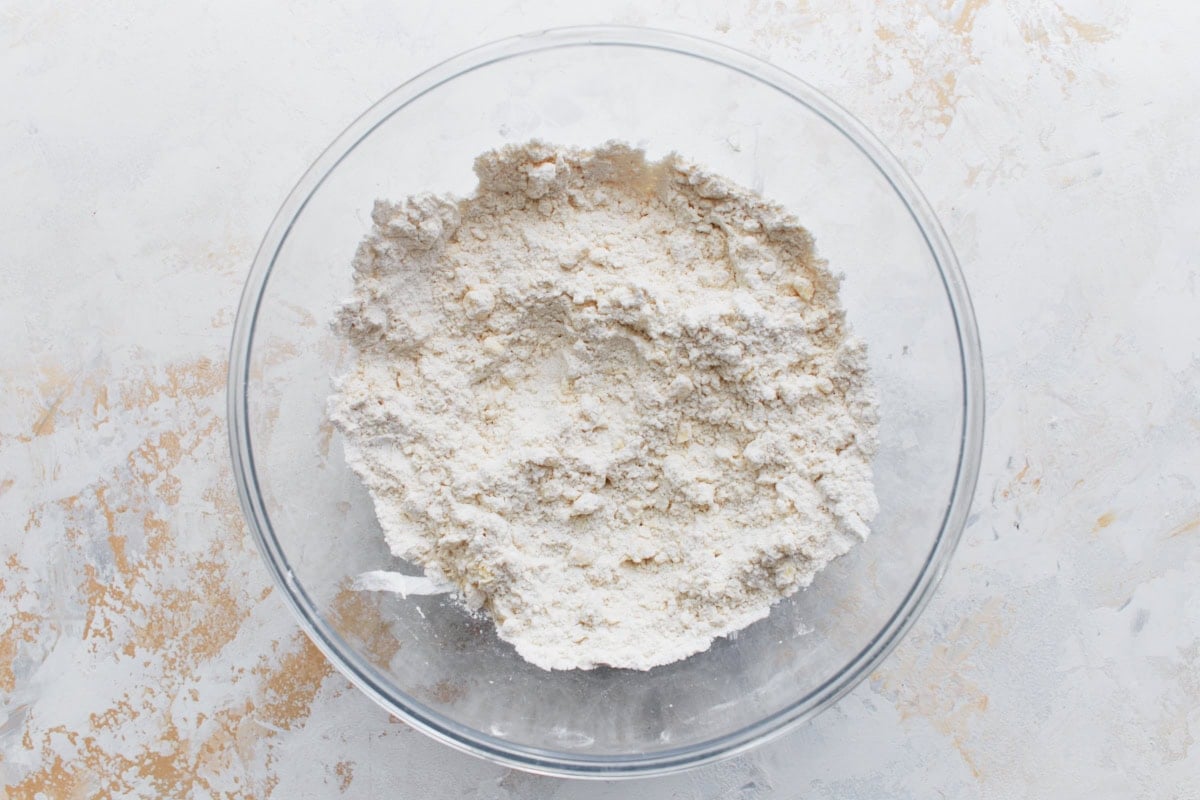
- In a large bowl add the gluten-free flour, baking powder, salt, sugar, and give it a quick whisk or stir to combine the ingredients.
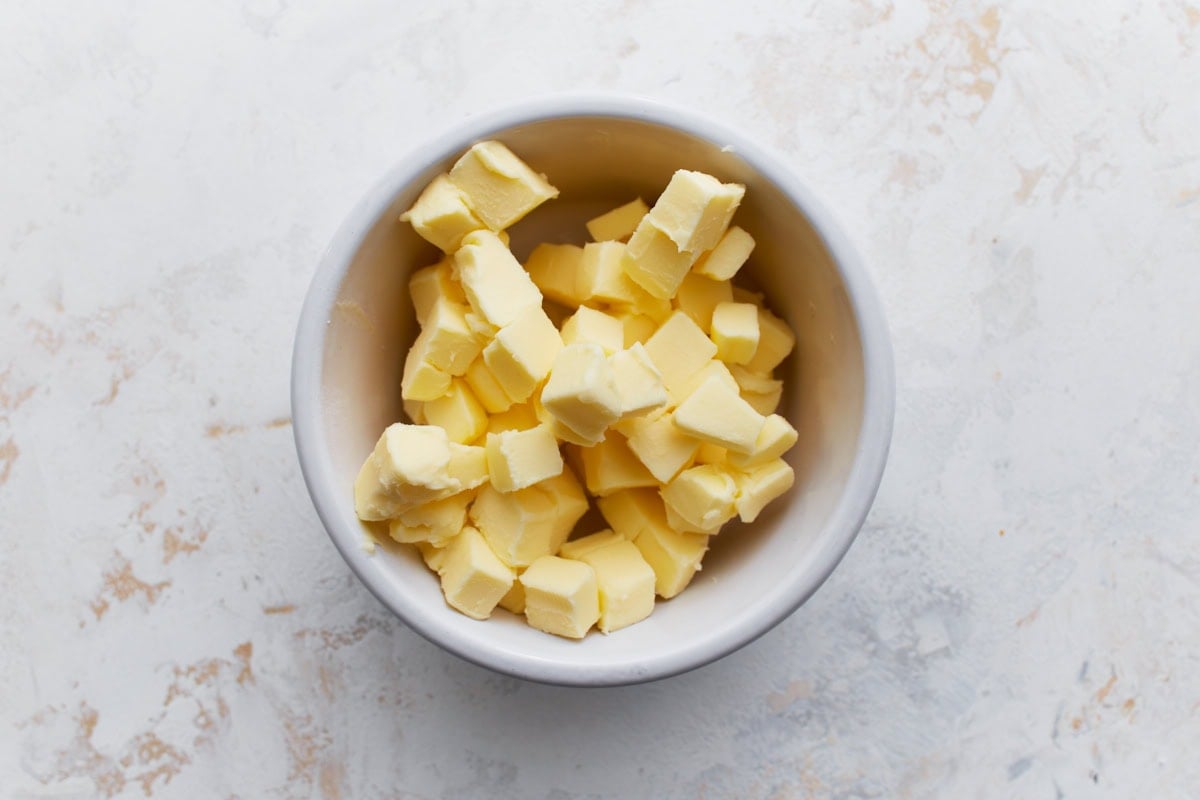
- Cut the butter into small pieces and put in the freezer for 10 minutes. If you do not have buttermilk make your own buttermilk by adding 1 tablespoon of white vinegar or lemon juice to the cup of milk and let stand 5-10 minutes in the refrigerator to keep cold. You can also make buttermilk out of dairy-free milk.
- Cut in butter (or shortening for dairy-free) into the flour with a pastry cutter or fork until it looks like the size of small peas.
- Add in the buttermilk and the whisked egg (or egg replacer) and stir until a soft dough forms. (I whisk the egg right in the buttermilk) The key is to not over mix because over-mixing causes the dough to yield tough biscuits. The dough will be sticky.
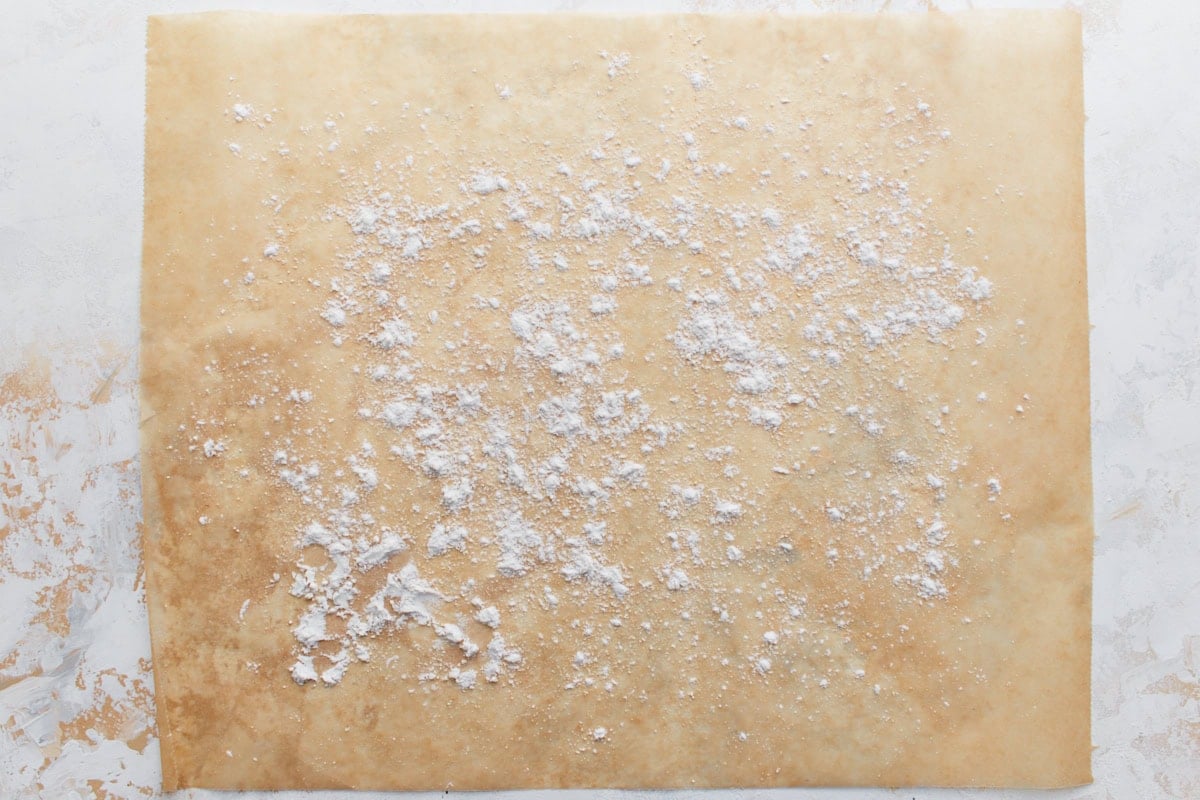
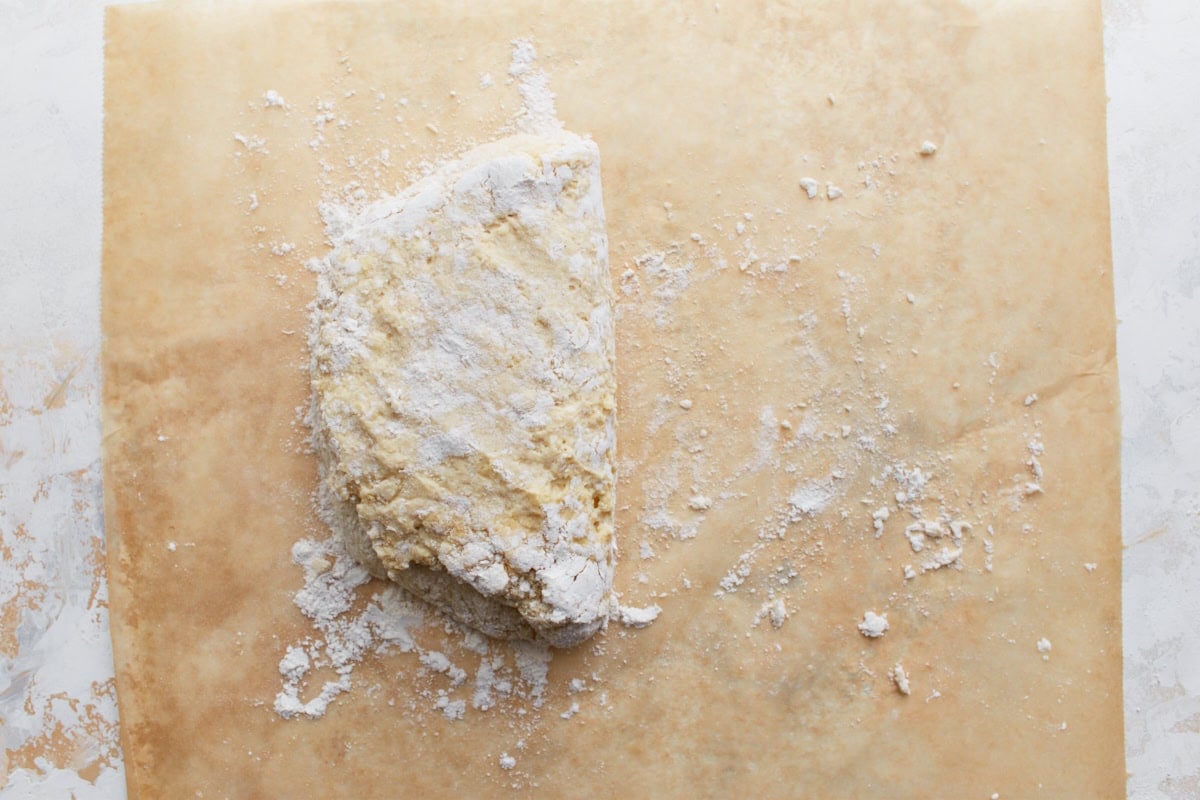
- Add one tablespoon of flour to a large piece of parchment paper. PLEASE DO NOT ROLL OUT THE DOUGH.
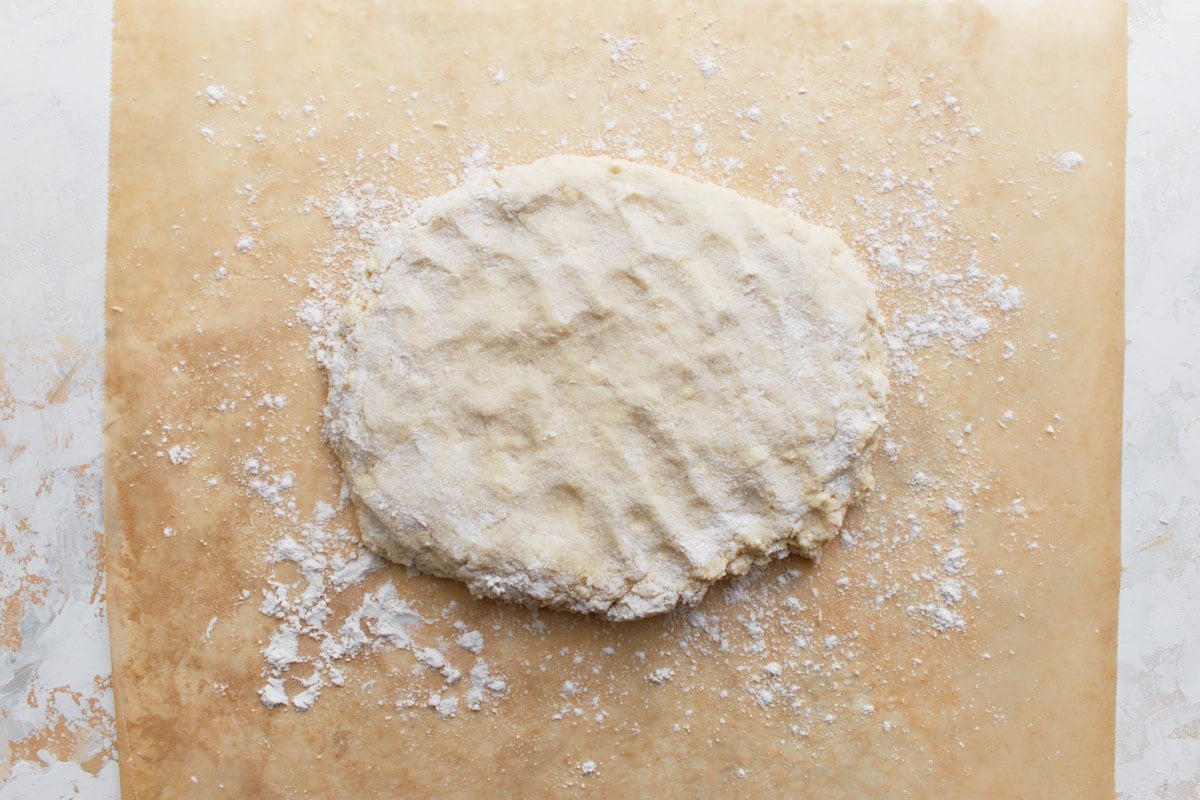
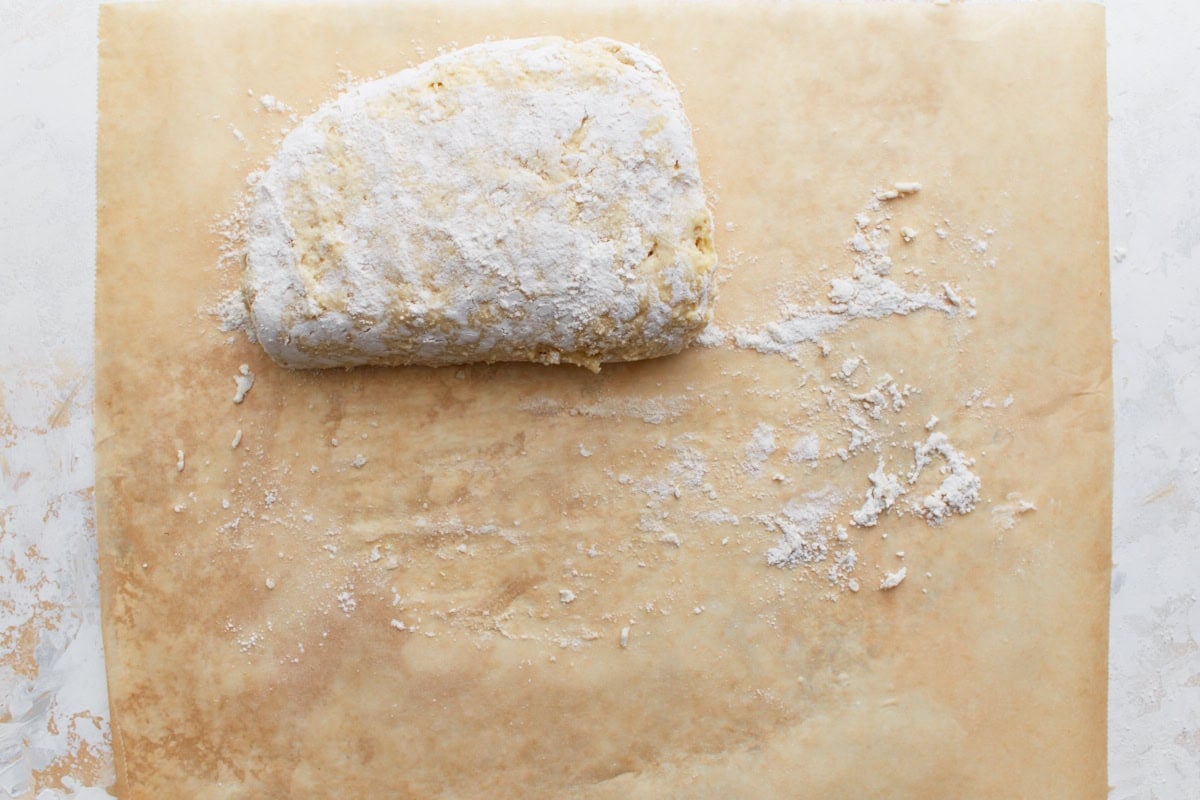
- Place the dough on top of the floured parchment paper. Dust the top of the dough with 1 tablespoon of flour and gently fold dough over on itself 2 times. You do this by folding the dough in half on top of itself and then doing it a second time.
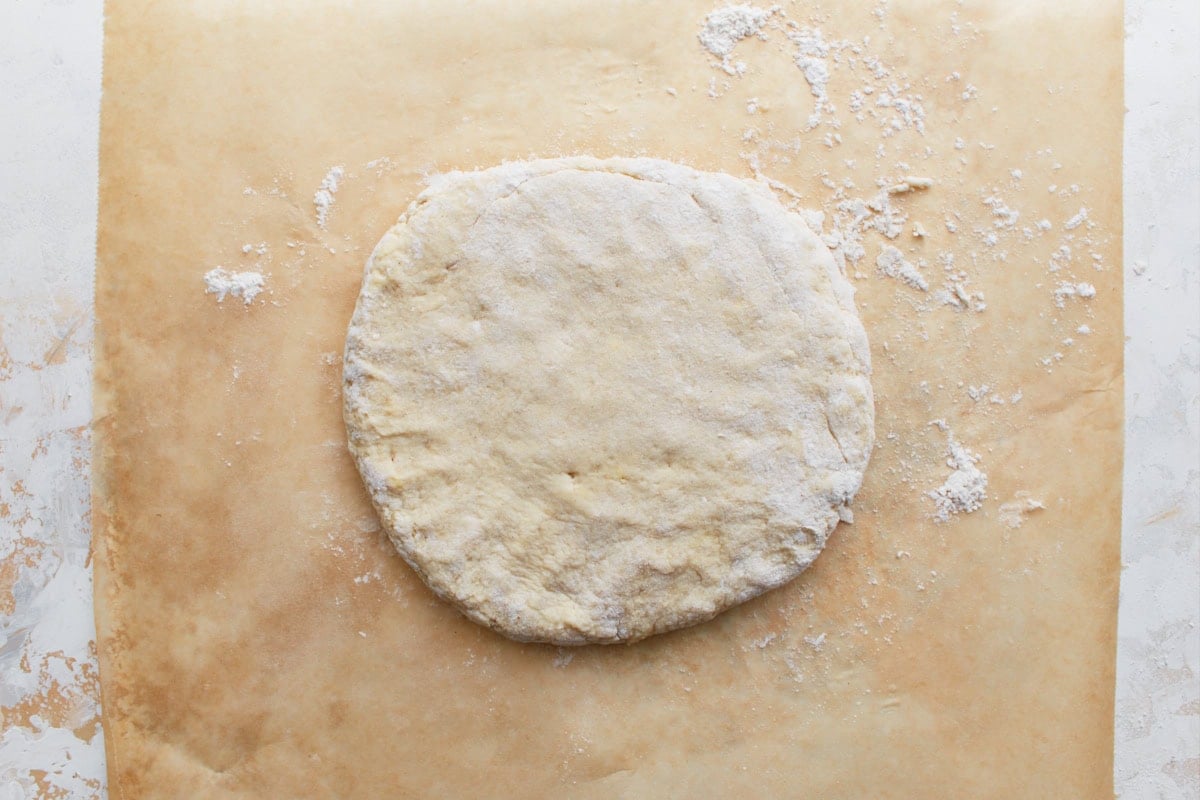
- With your hands form a dough round that is about 7 inches in diameter and 1 inch thick. If you make it any larger or flatter you will end up with hard, flat biscuits.
- Cut out 2-inch biscuits using a biscuit cutter, the mouth of a glass or the lid of a mason jar. Do not twist cutter when cutting; this will crimp the edges of the biscuit causing it not to rise well. Reform the dough scraps into a dough round and cut out more biscuits. Put the biscuits on a greased large cast iron pan or baking sheet. You will have 12 biscuits to bake.
- Bake the biscuits for 15-20 minutes at 450°F (232°C). At the 15-minute point please check your biscuits to see if they are golden brown. Please watch your biscuits because all ovens are different.
- I like to brush melted butter on top of the warm biscuits. Serve warm and enjoy!
Notes
- I recommend Pillsbury gluten-free flour—it yields the fluffiest results. Other blends like Bob’s Red Mill, Great Value, King Arthur, and Pamela’s contain sorghum flour, which makes the dough wetter and the biscuits less fluffy. If using one of those, increase the flour to 2½ cups.
- Always use the spoon & level method to measure flour: spoon it into the measuring cup, then level with a knife. Avoid scooping directly from the bag—it packs the flour and throws off the ratio.
Nutrition
Nutrition information is automatically calculated, so should only be used as an approximation.
How to Make Gluten-Free Buttermilk Biscuits Step by Step

Gather the Ingredients: Gather all the ingredients together. Preheat your oven to 450°F. Lightly grease a large cast-iron pan or baking sheet and set aside. In a large bowl, whisk together 2 cups of gluten-free all-purpose flour (I like Pillsbury), 1/2 tsp xanthan gum (omit if your flour blend already includes it), 1 tbsp gluten-free baking powder, 1 tsp salt, and 2 tbsp granulated sugar.
Cut the butter and make the buttermilk: Cut 6 tbsp of unsalted butter (or dairy-free butter like Smart Balance or Earth Balance) into small pieces and place them in the freezer for about 10 minutes to firm up. This helps create flaky layers during baking. If you don’t have buttermilk on hand, make your own by adding 1 tbsp of white vinegar or lemon juice to 1 cup of milk (or dairy-free milk like almond, cashew, or coconut). Let it sit in the fridge for 5–10 minutes to chill and thicken.
Cut in the butter: Cut the cold butter into the dry mixture using a pastry cutter or fork until the mixture resembles coarse crumbs with pea-sized bits of butter throughout.

Add the wet ingredients: In a separate bowl or measuring cup, whisk together 1 large egg (or use a vegan egg replacer like Bob’s Red Mill) with the prepared buttermilk. Pour the egg-buttermilk mixture into the flour-butter mixture and gently stir until a sticky dough forms. Don’t overmix—the dough should look shaggy. Overworking it can make the biscuits tough.
Flour your surface: Sprinkle 1 tbsp of gluten-free flour onto a large sheet of parchment paper.
Turn the dough out: Turn the dough out onto the floured parchment and sprinkle the top with another 1 tbsp of flour.
Fold dough in half: Gently fold the dough over itself once in half by lifting one side and folding it over.
Fold dough in half again: Fold the dough over once more in half. This helps build layers without rolling it out.
Shape the dough: With your hands, shape the dough into a round about 7 inches in diameter and 1 inch thick. Avoid making it thinner or larger—doing so will result in flat, dense biscuits.
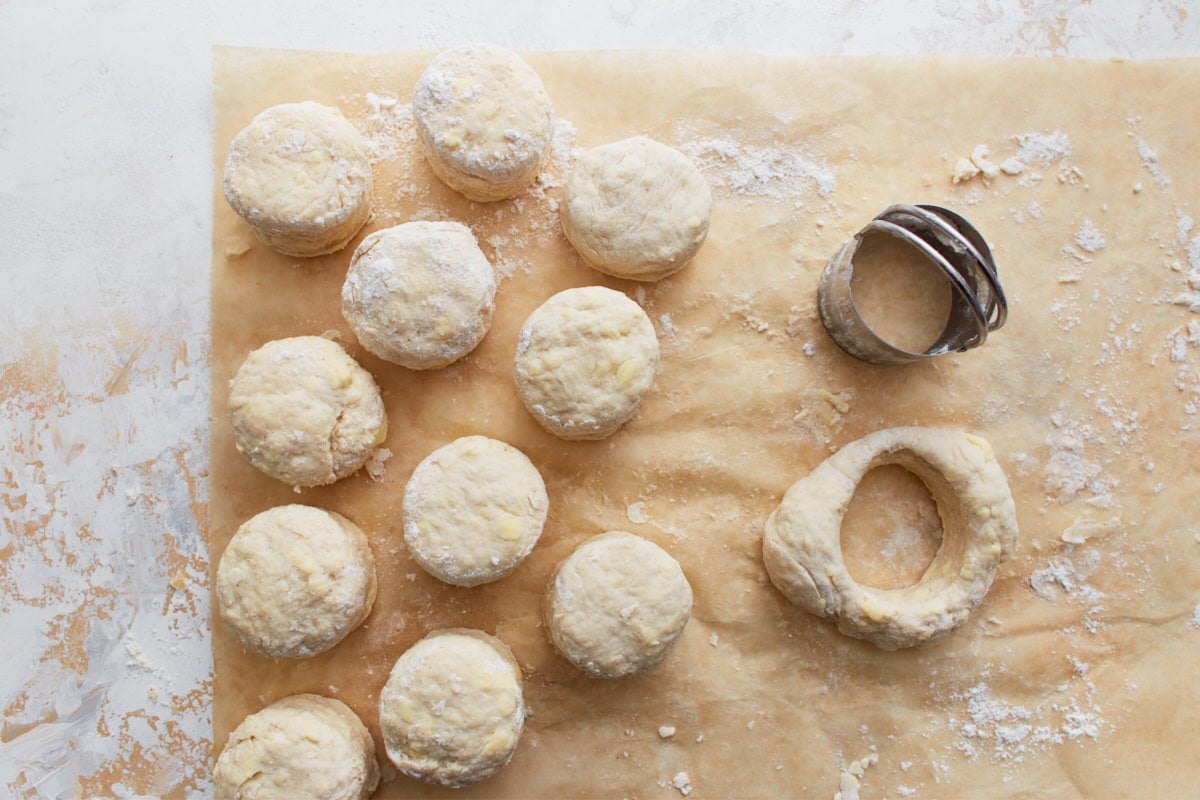
Cut out the biscuits: Use a 2-inch biscuit cutter, the mouth of a glass, or a mason jar lid to cut out biscuits. Press straight down without twisting, which can seal the edges and prevent rising. Gather and re-shape scraps as needed to cut out a total of 12 biscuits.
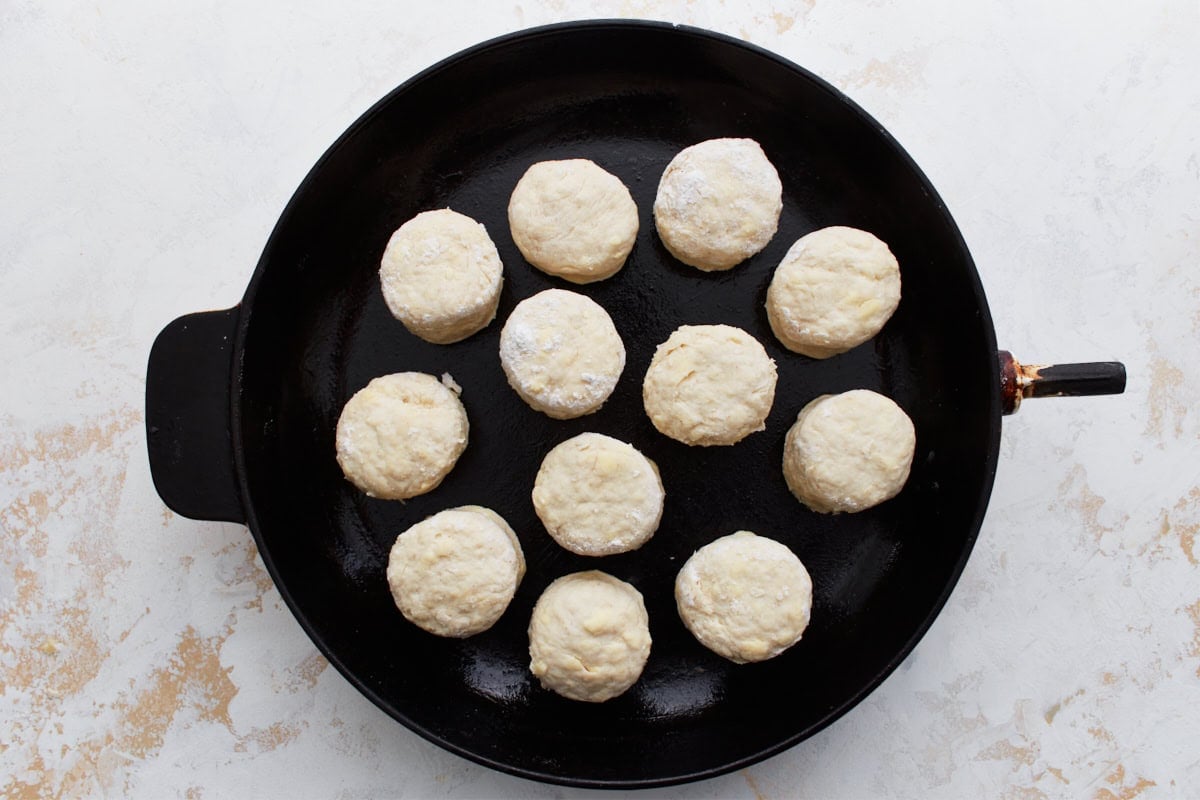
Place the biscuits in a cast-iron: Place the biscuits close together on the prepared cast iron pan or baking sheet.
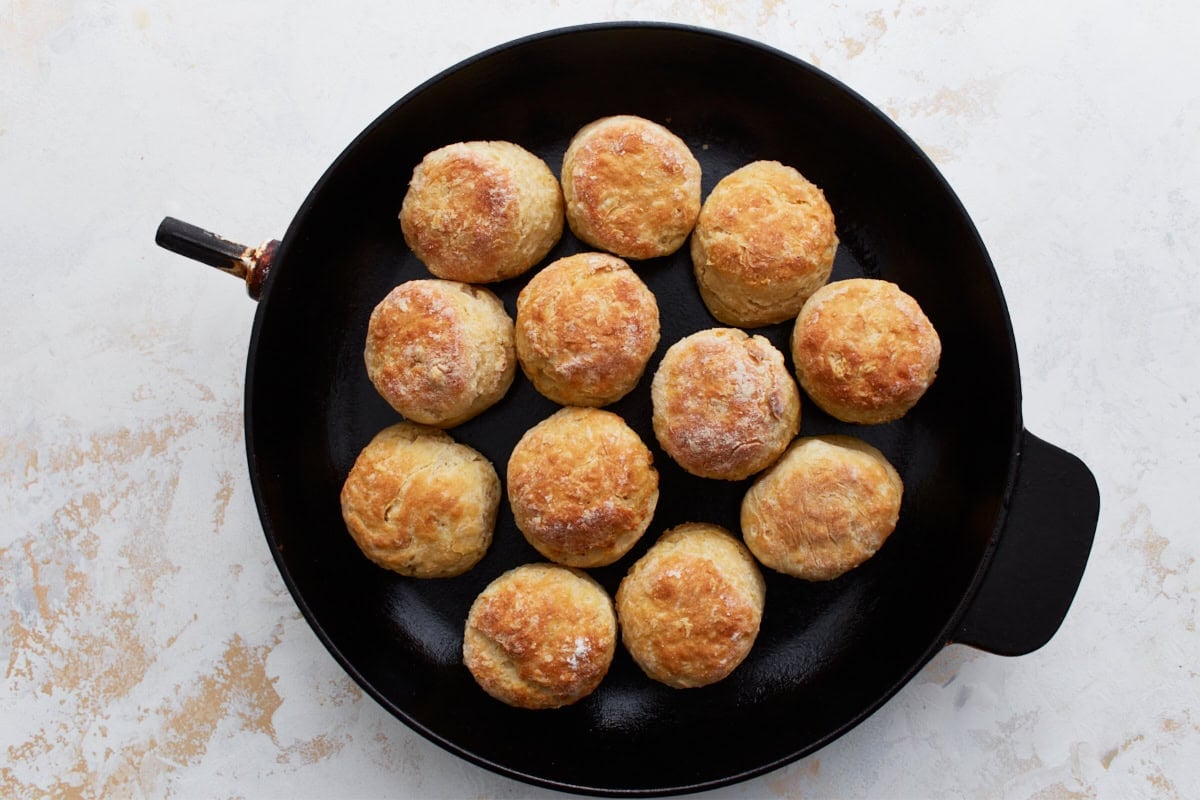
Bake the biscuits: Bake for 15–20 minutes, or until the tops are golden brown. Check around the 15-minute mark, keeping in mind that oven temperatures can vary.
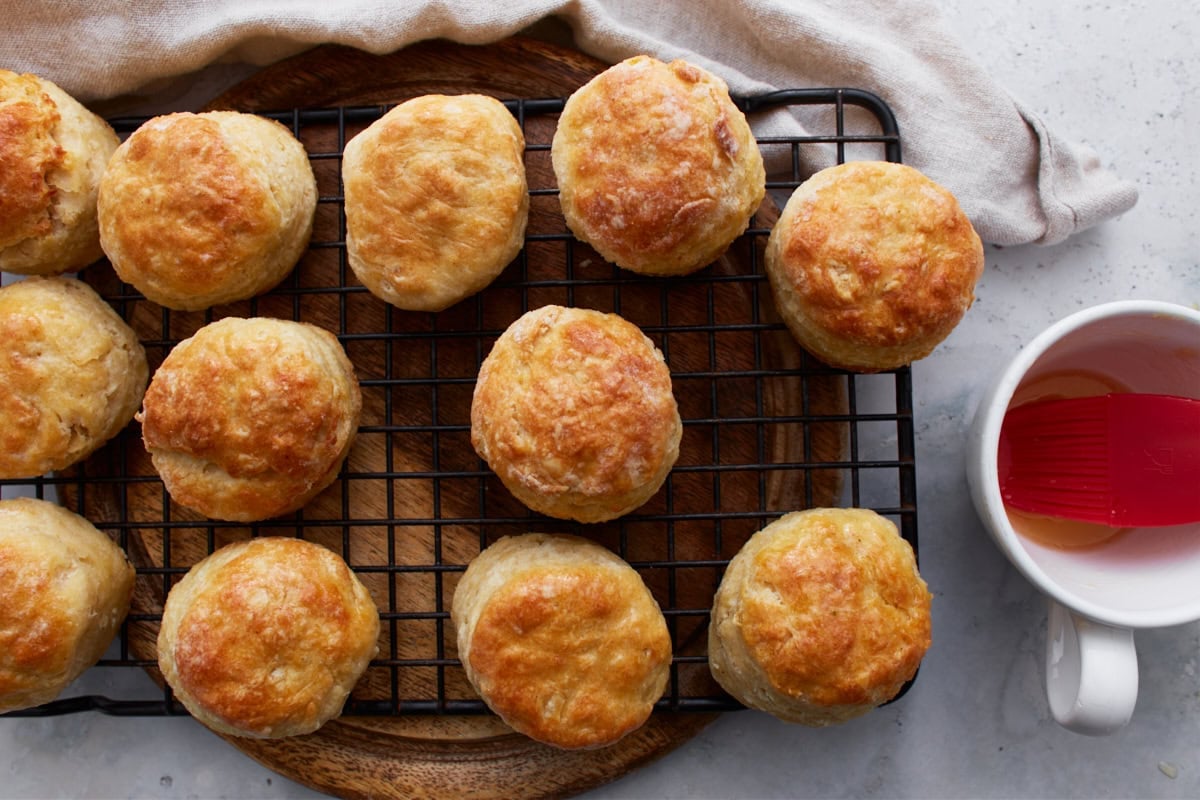
Brush and serve: If desired, brush the tops with melted butter while the biscuits are still warm. These are best enjoyed fresh out of the oven. Enjoy!
Serving Suggestions
In the South, biscuits aren’t just for breakfast—they’re served morning, noon, and night, and I fully embraced that tradition when we lived in Tennessee. These gluten-free buttermilk biscuits are just as versatile. I love them warm from the oven with butter and jam for breakfast, but they’re just as good paired with a hearty bowl of soup, stew, or our gluten-free chili. They also make the perfect base for a breakfast sandwich or a classic biscuits and gravy situation. However you serve them, they’re sure to become a regular in your gluten-free lineup.
Storage Instructions
Store any leftover biscuits in an airtight container at room temperature for up to 2 days. To bring back that fresh-baked texture, pop them in the oven or toaster oven for a few minutes until warmed through.
You can also freeze the raw, scooped dough or fully baked biscuits for up to 2 months—just bake straight from frozen, adding a few extra minutes to the cook time if unbaked.
More Buttery Flaky Bakes to Try
- Gluten-Free Blueberry Scones
- Gluten-Free Dinner Rolls
- Gluten-Free Croissants
- Gluten-Free Danish
- Gluten-Free Crescent Rolls
Our Gluten-Free Buttermilk Biscuits recipe was originally published 7/30/18. It was retested, reworked, and republished to be better than ever 7/23/25.


Have been looking for a really good biscuit recipe and finally my wish has come true! I just LOVE your recipes. I have never had a flop yet
So far the best gluten free biscuits I’ve made!
As someone who grew up in the south, I am so happy to finally have biscuits and gravy again.
We have bob’s red mill 1to1 flour, so I could skip the xanthan gum. 2nd time around I added a pinch more salt for taste and kept the oven door closed when checking the bake which kept more steam and made a fluffier, taller biscuit.
I followed the recipe exactly but added extra flour per your suggestion if using different brand of flour. The dough seemed kind of dry but formed up nice. I think 450 degrees was way too hot though because the tops and bottoms were very done (not burned) and the inside wasn’t cooked through, was actually mucky feeling. I have an oven thermometer and the temperature was right on. Will try again at a lower setting because the flavor of the biscuits was really good.
I accidentally forgot the egg and they still turned out amazing!
I have made these a few times in different variations. The first I made as the recipe directs. My only change is that I do not have a cast iron pan and I use King Arthur’s 1:1 GF Flour. They were fluffy, golden, and delicious. My non-GF husband liked them just as much a regular biscuit.
My second time making them, I used them as a crust for a Chicken pot pie. *You will only need half the dough. I used all of it and it was a bit biscuit heavy for my liking.
The last time I made these I added strawberries and a lemon icing glaze. They were very good. I might try adding a smidge more sugar next time.
This recipe is now my go to biscuit recipe and it’s incredibly easy too. Thankful I found this website as a newly GF sensitive girly.
These were so easy to make and delicious 😋
These are the best biscuits ever – even compared with “normal” biscuits! The family prefers these.
These biscuits are so good that I seriously screwed them up the first two times I made them (SERIOUSLY screwed up, like forgot the butter) and they were still pretty edible.
I finally got it right and they are wonderfully fluffy with a crispy outside.
I can’t use Pillsbury flour because it has potato starch, so I used 1 1/2 cups of Krusteez GF flour, 1/4 cup GF oat flour, and then a little more than 1/4 cup tapioca flour, measured on the cooking scale to add up to a total of 250 g of flour.
It turned out great!
Best GF biscuit recipe I’ve used so far! I baked them on 400 F and they came out very flaky and fluffy.
Thank you!
They were a big hit at the Super Bowl party. I have a friend who is gluten intolerant and this satisfied everyone. Thanks again