Gluten-Free Danish
Updated
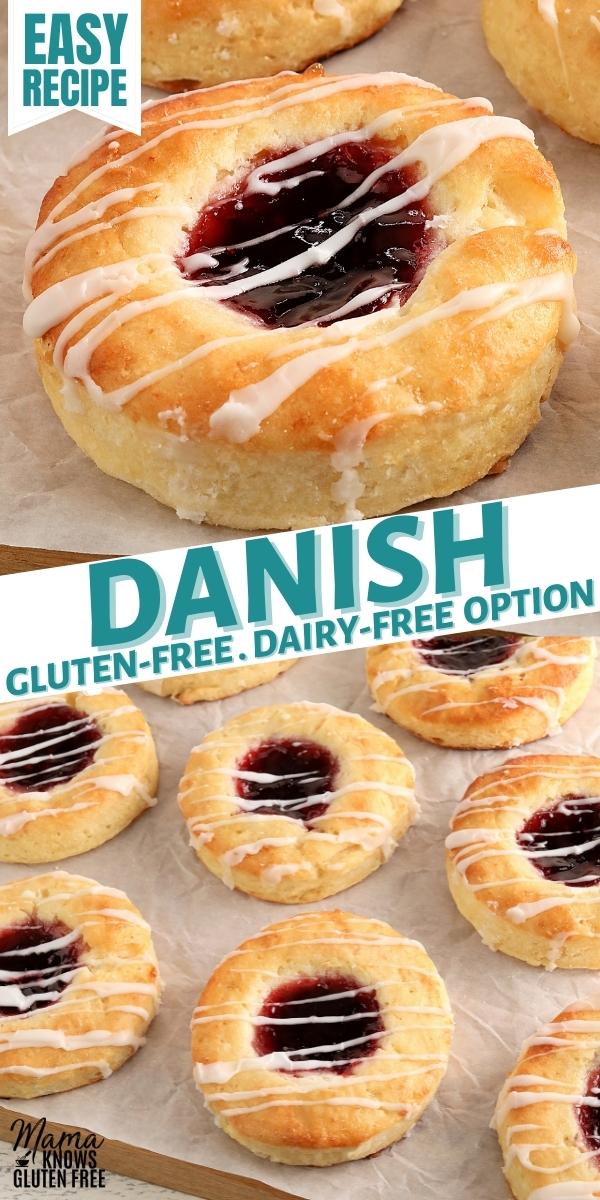
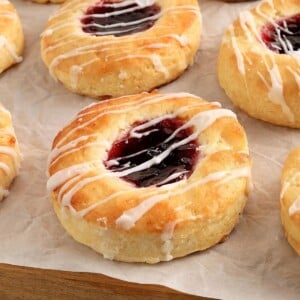
These gluten-free Danish pastries are one of my favorite weekend bakes. A soft and buttery gluten-free pastry filled with jam and topped with a sweet glaze, they taste just as indulgent as anything you’d find in a bakery case. I spent a long time testing this recipe to make sure the texture was just right—flaky, tender, and not overly sweet—and now it’s one I come back to again and again for brunches, holidays, or when I just need a little something special with my coffee.
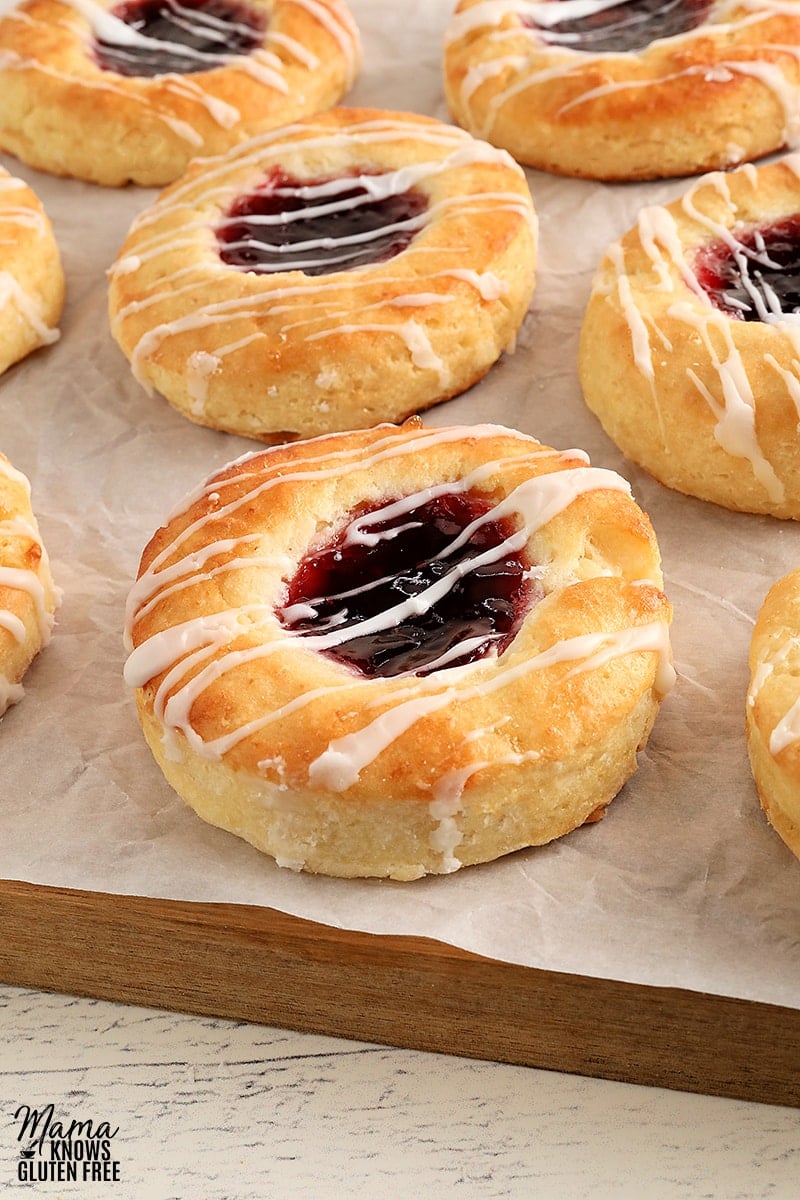
Making gluten-free Danish at home might sound intimidating, but I promise—it’s totally doable, even if you’ve never worked with yeast dough before. I’ve taken a few shortcuts to make this recipe approachable without sacrificing that soft, buttery texture you’d expect from a classic Danish. Instead of using traditional laminated dough (which involves layering butter and rolling the dough repeatedly), I cut the butter directly into the gluten-free flour mix—just like making pie dough. Then I give the dough a few quick folds to mimic those flaky layers. It comes together easily with a spoon or stand mixer, and best of all, it only needs a 30-minute chill time.
Tips for Success
- Only use a brand of gluten-free flour that is recommended for yeast baking. Please check the brand’s website or the package to confirm that it is recommended for yeast baking. For this recipe, I test baked with Better Batter (Original & Artisian) and Pillsbury gluten-free flour.
- Avoid flour blends made with almond, coconut, oat, or bean flours, and skip any blends labeled as not ideal for yeast recipes.
- Use butter that is cool but slightly softened—firm enough to hold its shape when cubed, but soft enough to cut into the flour with a pastry cutter or fork. It should not be warm or melty.
- Use fresh instant yeast. Check the expiration date.
- Do not skip the egg wash step. It really makes a difference in how your pastry will brown.
- I like using seedless jam when baking the Danish.
Gluten-Free Danish
Ingredients
Gluten-Free Danish Dough
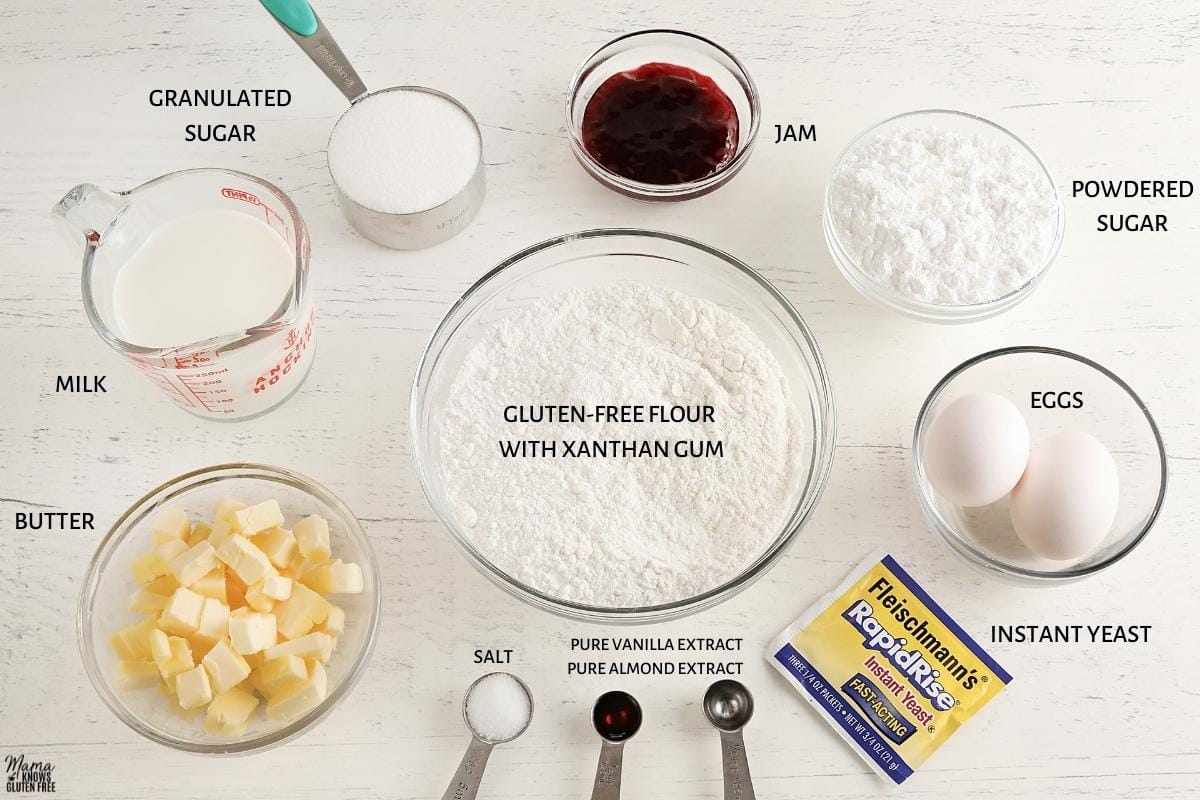
- 2 cups all-purpose gluten-free flour with xanthan gum, I test baked with Better Batter (original), Better Batter Artisan, and Pillsbury gluten-free flour. Not all gluten-free flours are created equal. You may experience different baking results depending on the gluten-free flour blend you choose. Not all brands of gluten-free flour are recommended for yeast baking.
- 1/2 cup granulated sugar
- 1 packet instant yeast, Or 2 1/4 teaspoons of instant/rapid yeast.
- 1/2 cup butter, softened and cubed, Use butter that is cool but slightly softened—firm enough to hold its shape when cubed, but soft enough to cut into the flour with a pastry cutter or fork. It should not be warm or melty. For dairy-free use Smart Balance buttery spread.
- 3/4 cup milk, For dairy-free use unsweetened almond milk.
- 1/4 teaspoon pure vanilla extract
- 1/4 teaspoon pure almond extract
- 1 teaspoon salt
- 2 large egg yolks,
- 1/3 cup seedless raspberry jam, 2 teaspoons of jam per Danish
Egg Wash
- 2 large egg whites
- 1 tablespoon water
Glaze
- 1/2 cup powdered sugar
- 2 teaspoons water
Instructions
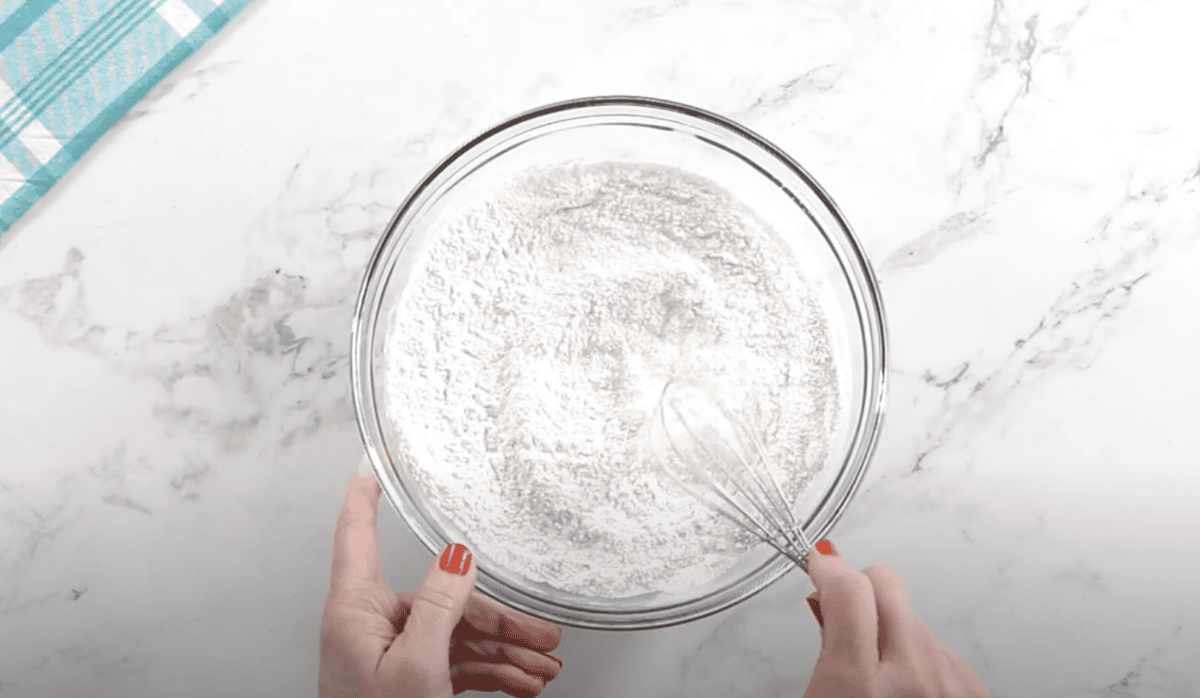
- In a large freezer-safe bowl, stir together the gluten-free flour, granulated sugar, and instant yeast.
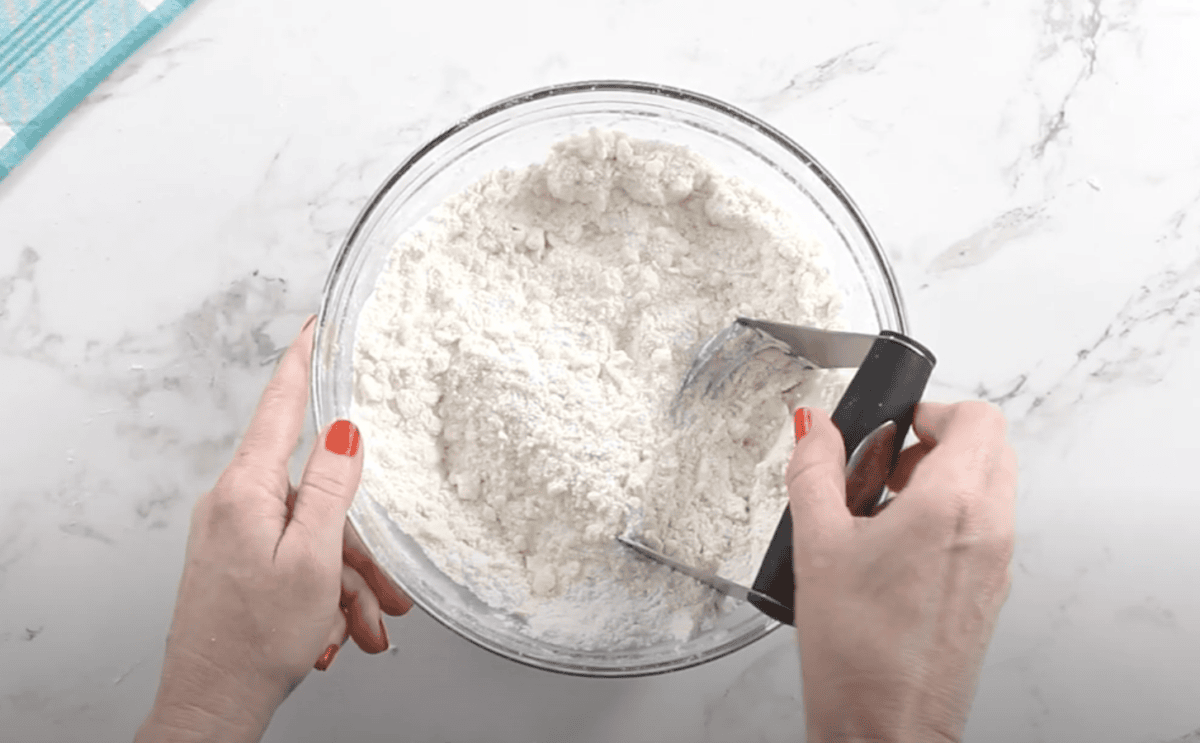
- Cut the softened butter into the flour mixture with a pastry cutter or fork until it looks like the size of small peas.
- Separate the egg yolks and whites into two small bowls. Cover the egg whites with plastic wrap and place them in the refrigerator. The egg whites will be used as an egg wash for the Danish before baking.
- In a medium-sized bowl, whisk together the milk, pure vanilla extract, pure almond extract, 2 egg yolks, and salt until fully combined.
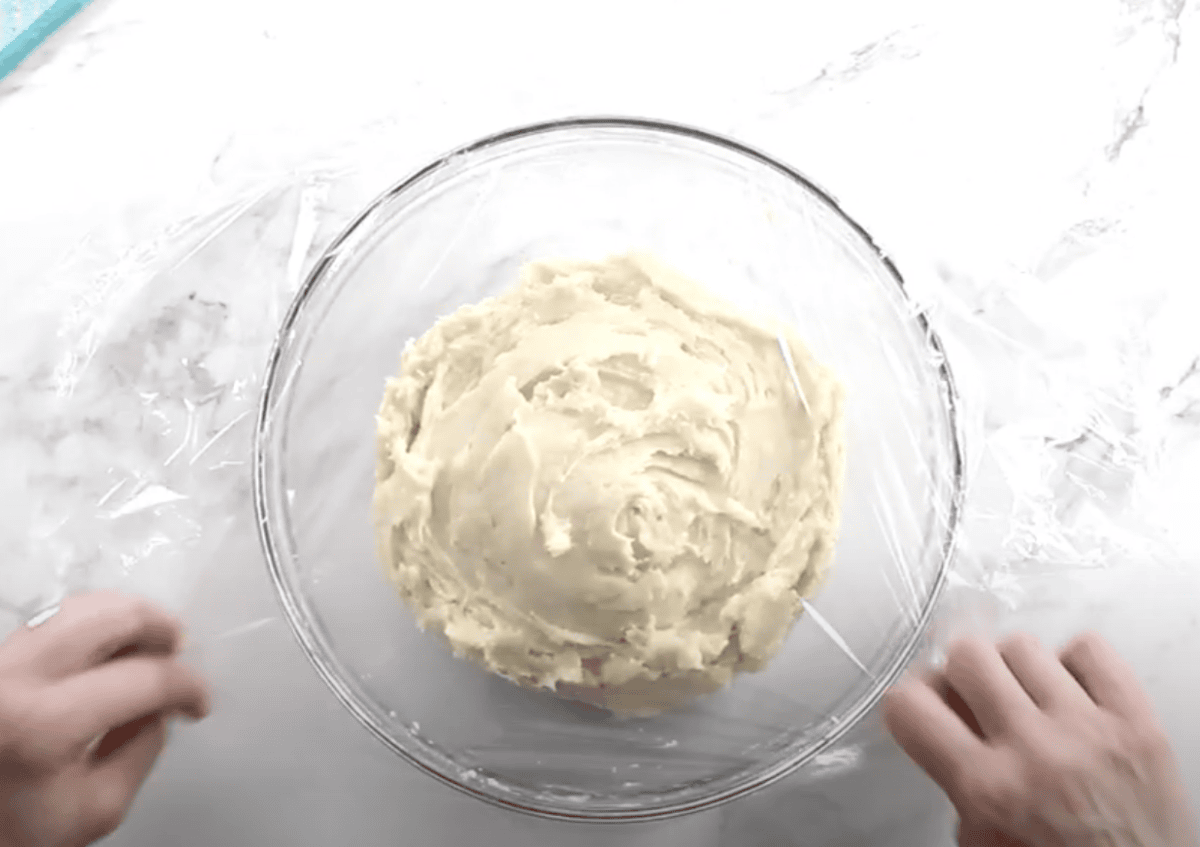
- Pour the milk mixture into the flour mixture and stir until fully combined and a sticky dough is formed. The dough will be very sticky.
- Cover the dough with plastic wrap and place the freezer-safe bowl in the freezer for 30 minutes.
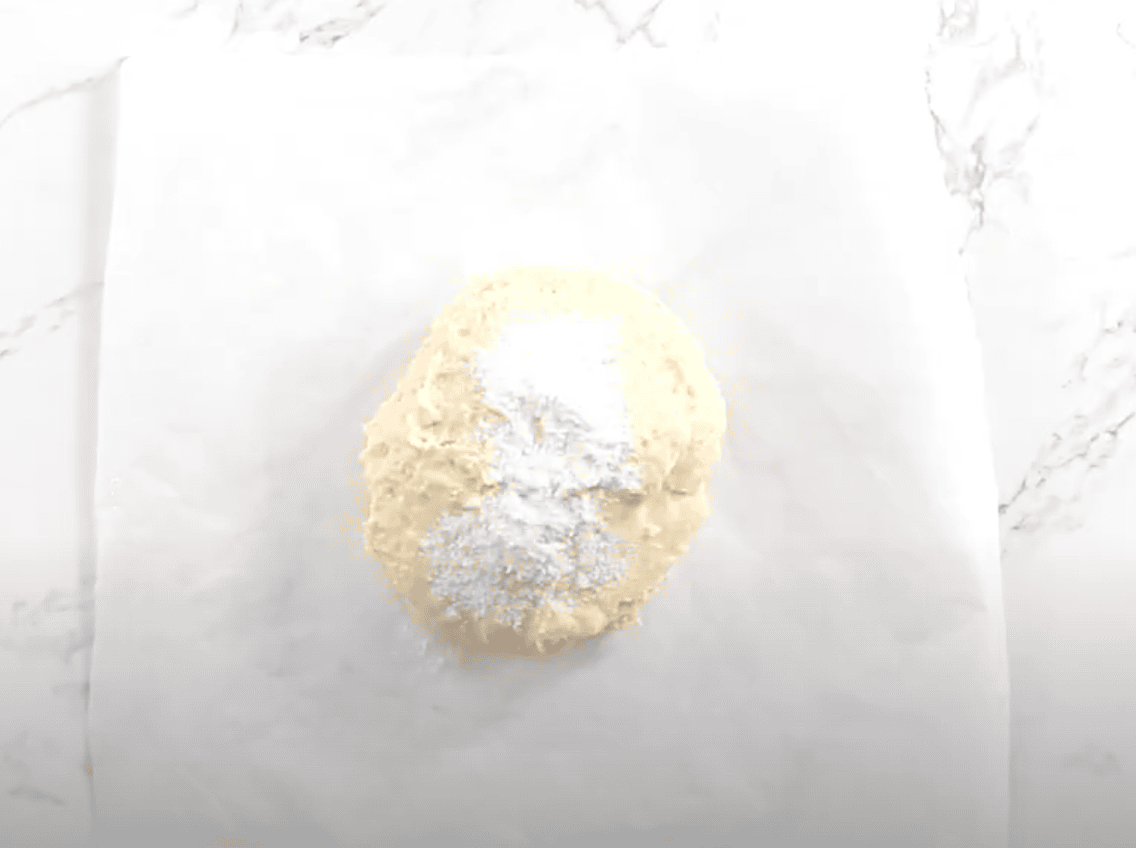
- Add 1 tablespoon of flour to a large piece of parchment paper. Place the dough on top of the floured parchment paper.
- Dust the top of the dough with 1 tablespoon of flour, and gently fold the dough over on itself 3 times. You do this by folding the dough in half on top of itself and then doing it a second time and third.
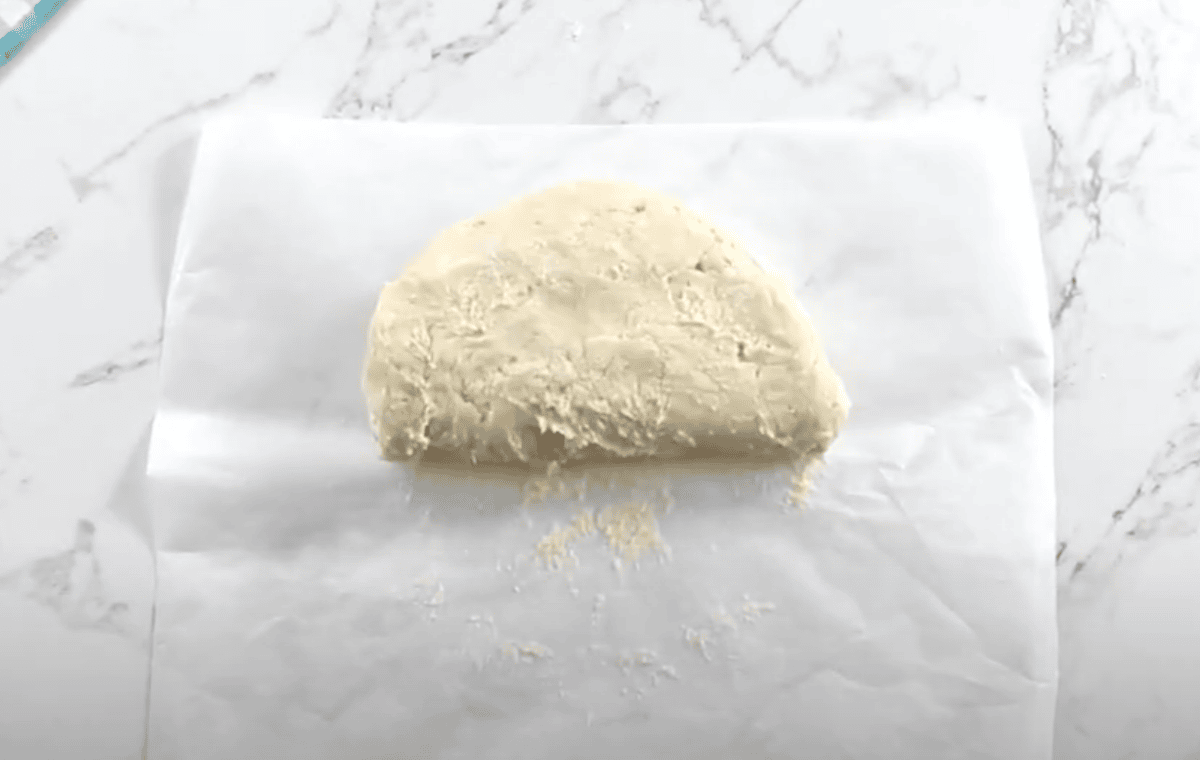
- With your hands, form a dough round that is about 7-inches in diameter and 1-inch thick.
- Cut out the dough using a greased 3-inch biscuit cutter, the mouth of a large glass, or the lid of a mason jar. Do not twist the cutter when cutting; this will crimp the edges of the dough causing it not to rise well.
- Put the dough rounds on a parchment-lined baking sheet, cover with plastic wrap and then a kitchen towel and let the cut dough rounds rise in a warm place for 30 minutes. I use the proof setting on my oven. You can also pre-heat your oven to 200°F and then turn it off. Remove the dough before pre-heating the oven to 400°F for baking the Danish.
- Pre-heat oven to 400°F.
- Use the back of a greased rounded tablespoon to press down on the center of the dough rounds. I use gluten-free coconut oil spray to grease the back of the tablespoon.
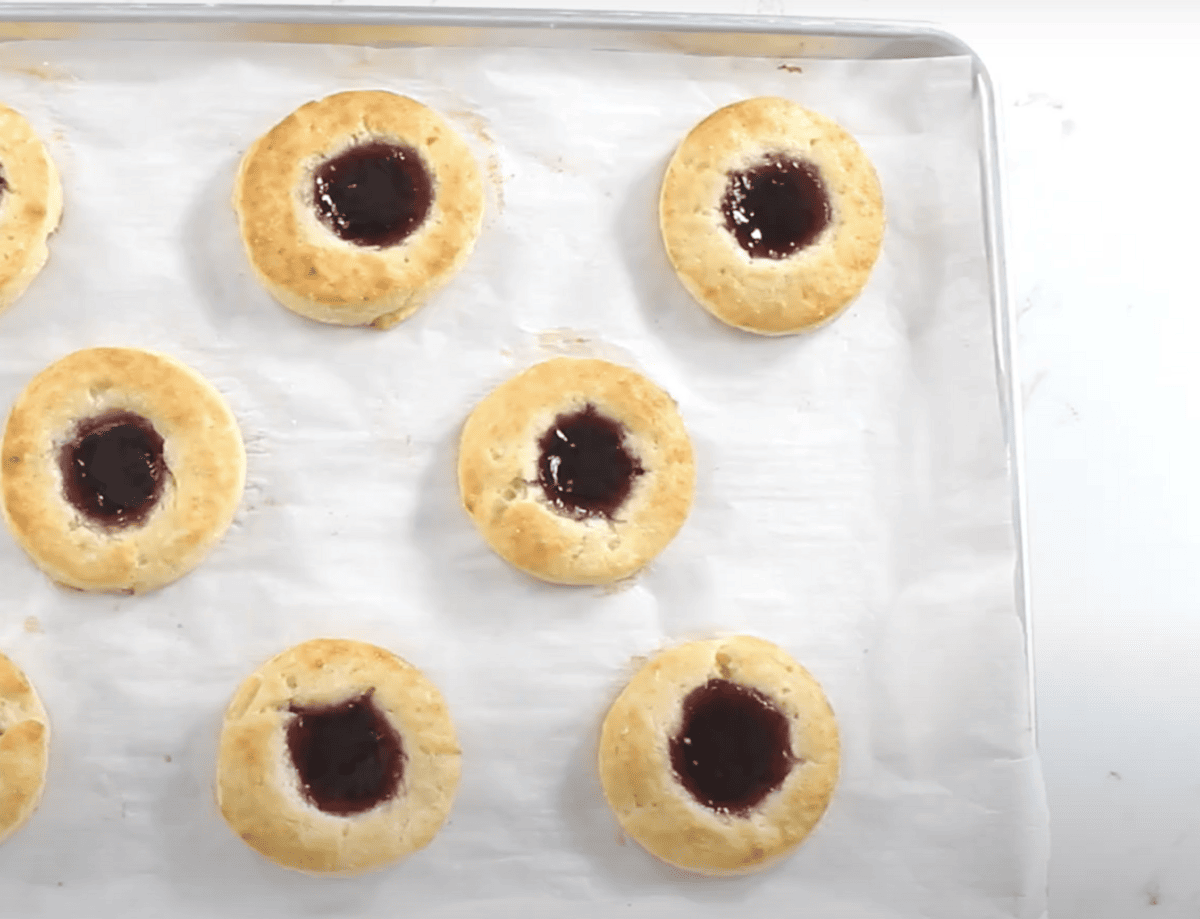
- Stir the jam in order to make it smooth. Place 2 teaspoons of jam in the center of each dough round.
- Whisk together 1 tablespoon of water and the egg whites. Using a pastry brush, brush the tops of the dough with the egg white mixture.
- Bake the Danish for 18-20 minutes until the tops start to turn golden brown. Please watch your oven because all ovens are different.
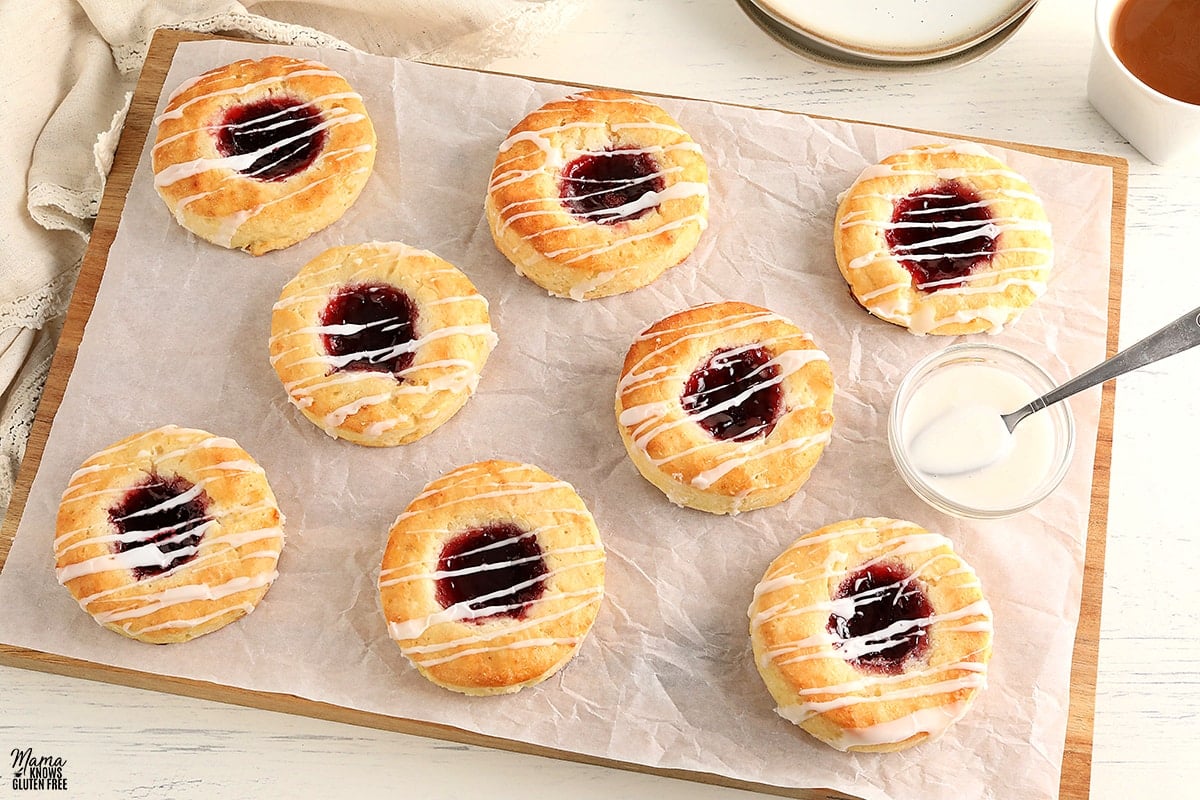
- In a small bowl, whisk together the powdered sugar and 2 teaspoons of water.
- Allow the Danish to cool for 20 minutes until the jam is no longer hot.
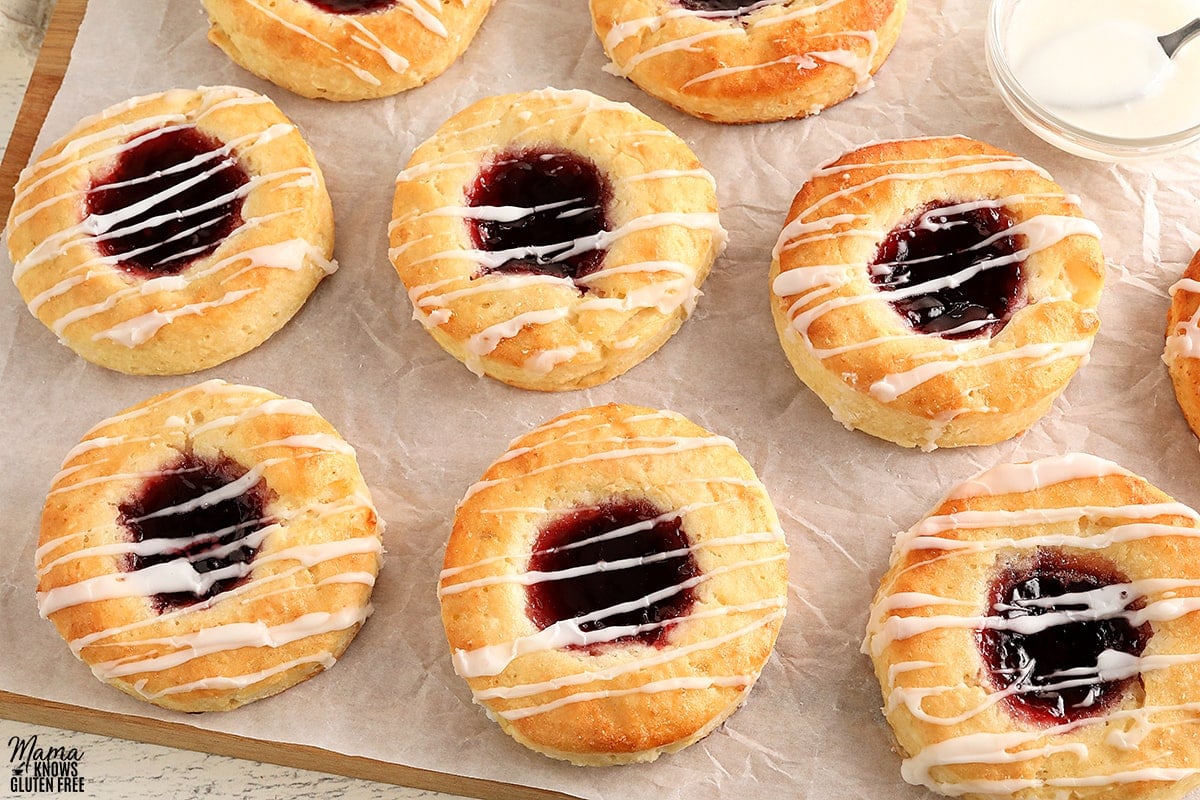
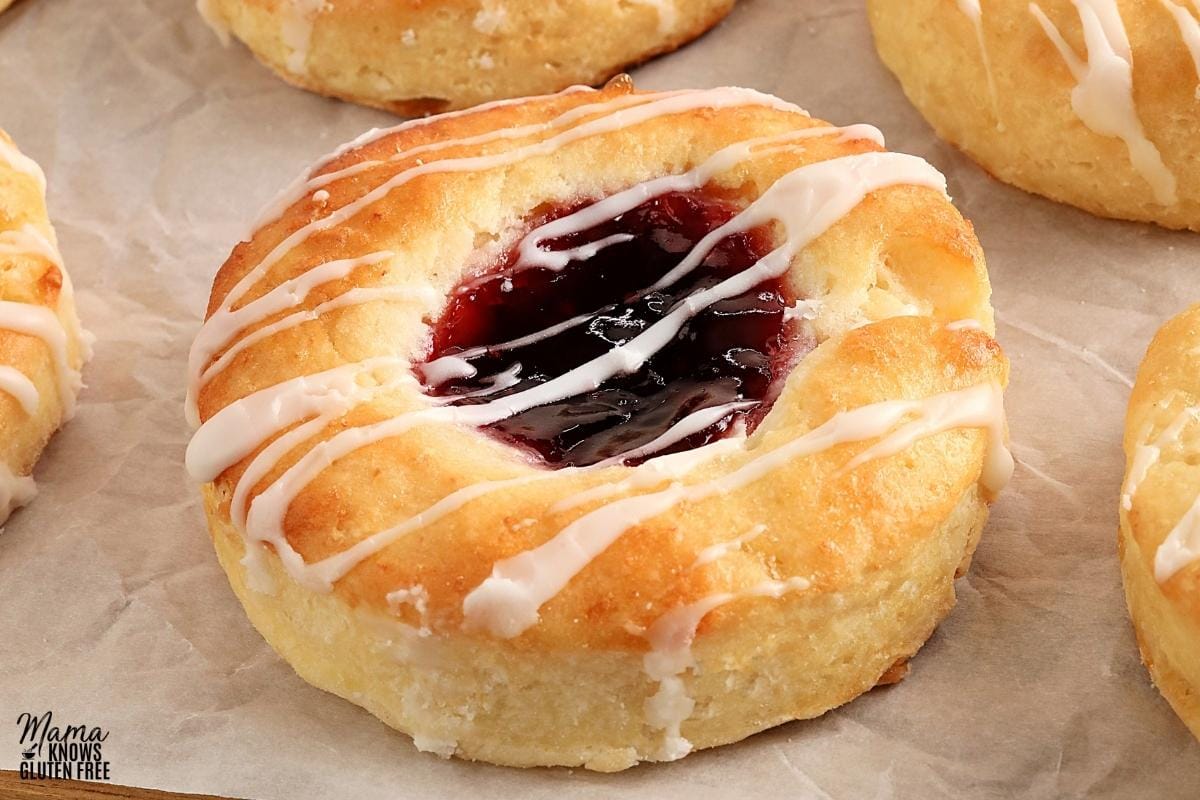
- Drizzle the glaze on top of the Danish and enjoy.
- Store the leftovers in an air-tight container.
Notes
- I like Pillsbury gluten-free. Not all gluten-free flours are created equal. You may experience different baking results depending on the gluten-free flour blend you choose. Not all brands of gluten-free flours are recommended for yeast baking.
- For the dairy-free option, use Smart Balance butter and unsweetened almond milk.
- Mama says, “check all of your labels!”
Nutrition
Nutrition information is automatically calculated, so should only be used as an approximation.
How to Make Gluten-Free Danish Step-by-Step
Gather the ingredients: Gather all the ingredients together.
Mix the dry ingredients: In a large freezer-safe bowl, combine 2 cups of gluten-free all-purpose flour with xanthan gum, 1/2 cup of granulated sugar, and 1 packet (or 2 1/4 teaspoons) of instant yeast. Stir to evenly distribute.

Cut in the butter: Add 1/2 cup of softened, cubed butter to the flour mixture. Use a pastry cutter or fork to work the butter into the dry ingredients until the mixture resembles small peas. The butter should be cool but pliable—not warm or melted.
Separate the eggs: Separate 2 large eggs, placing the whites in a small bowl and covering them with plastic wrap; refrigerate for later use in the egg wash. Set aside the 2 yolks for the dough.
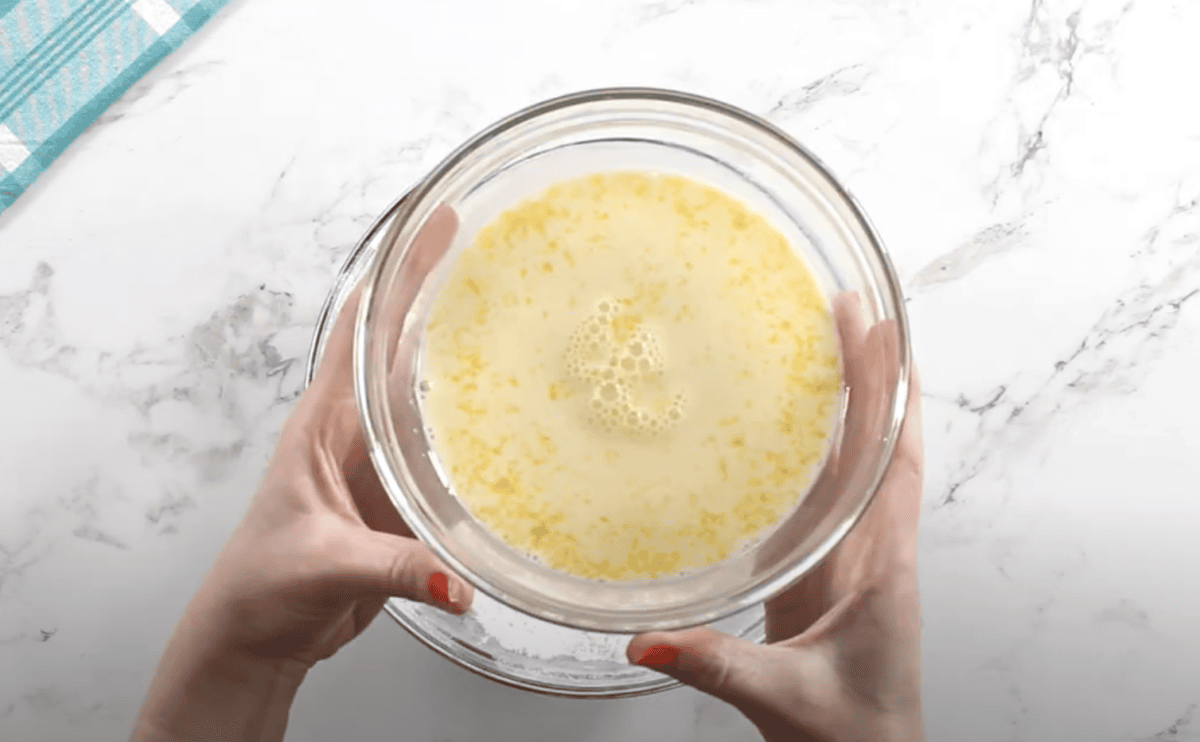
Whisk in the wet ingredients: In a separate medium bowl, whisk together 3/4 cup of milk (or unsweetened almond milk for dairy-free), 1/4 tsp of pure vanilla extract, 1/4 tsp of almond extract, 1 tsp of salt, and the 2 egg yolks until smooth.
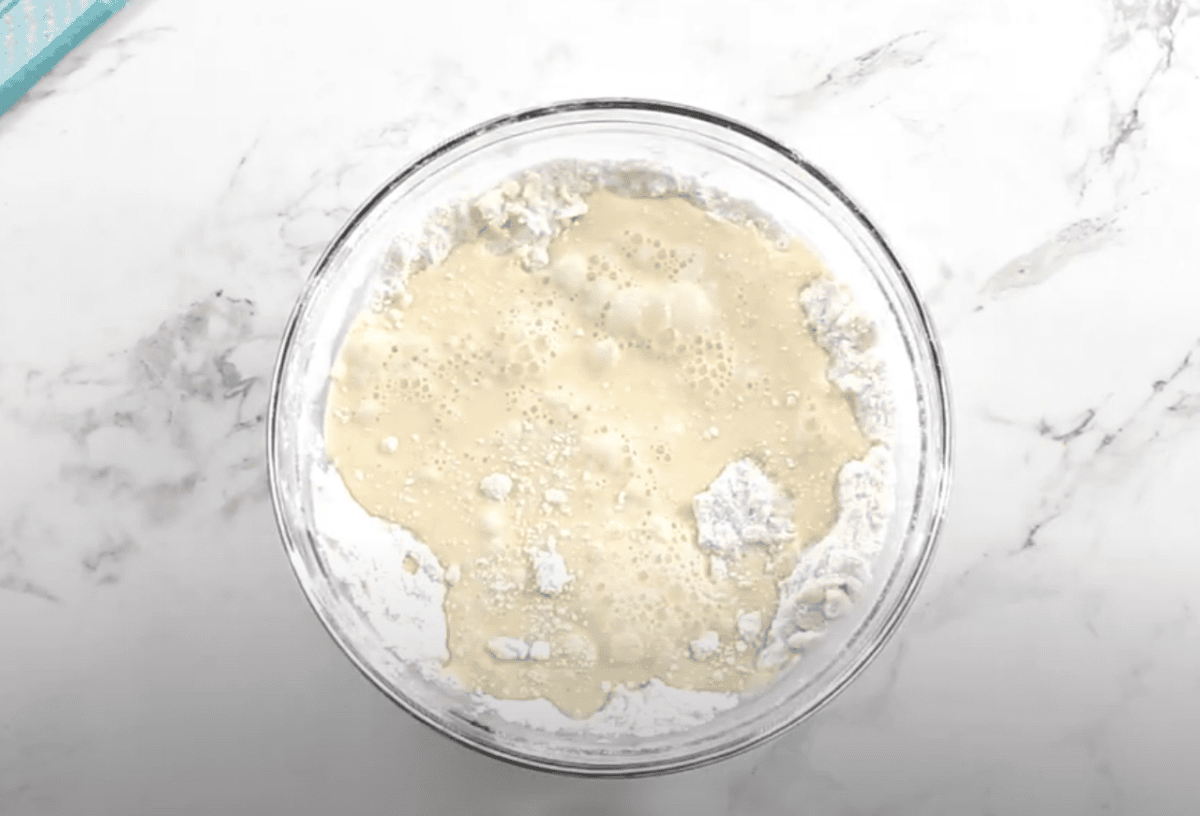
Combine wet and dry ingredients: Pour the milk and egg mixture into the flour mixture and stir until a sticky dough forms. It will be very soft and tacky to the touch.
Chill the dough: Cover the bowl tightly with plastic wrap and place it in the freezer for 30 minutes to firm up the dough.
Place the dough on parchment paper: After chilling, sprinkle 1 tbsp of flour over a large piece of parchment paper and turn the dough out onto it. Dust the top with another 1 tbsp of flour.
Fold the dough: Fold the dough over itself three times. To do this, gently lift and fold the dough in half, then repeat two more times to create layers.
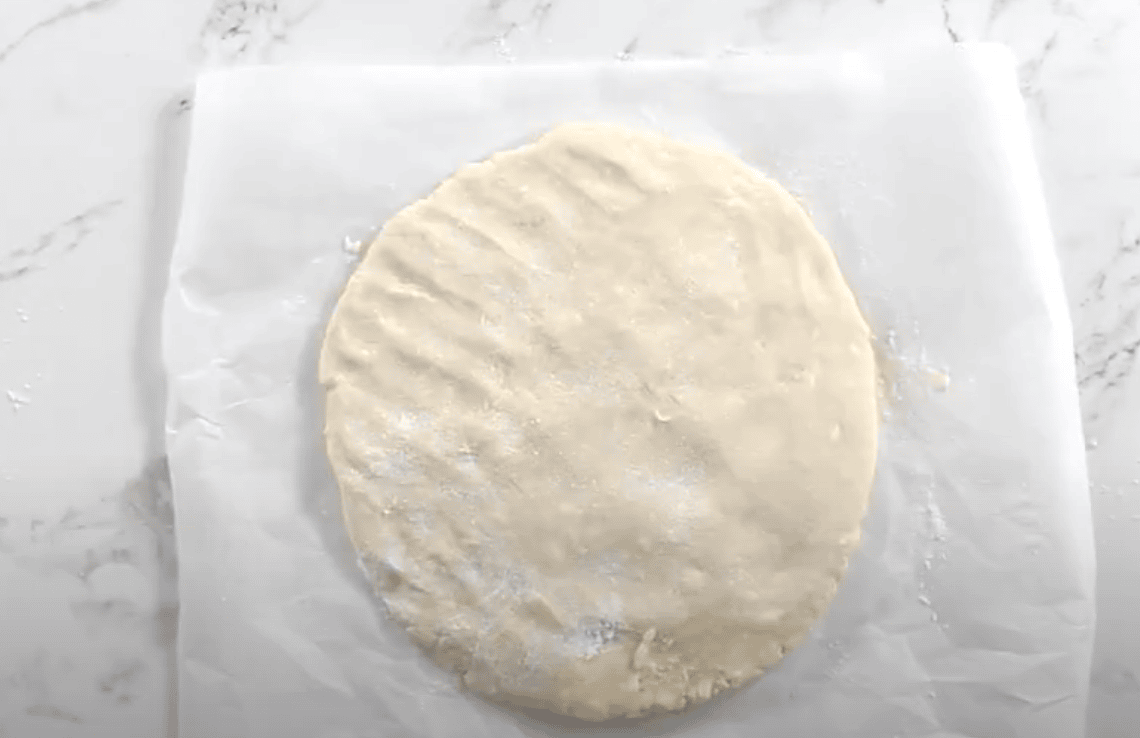
Shape the dough: Shape the dough into a round approximately 7 inches in diameter and 1 inch thick.
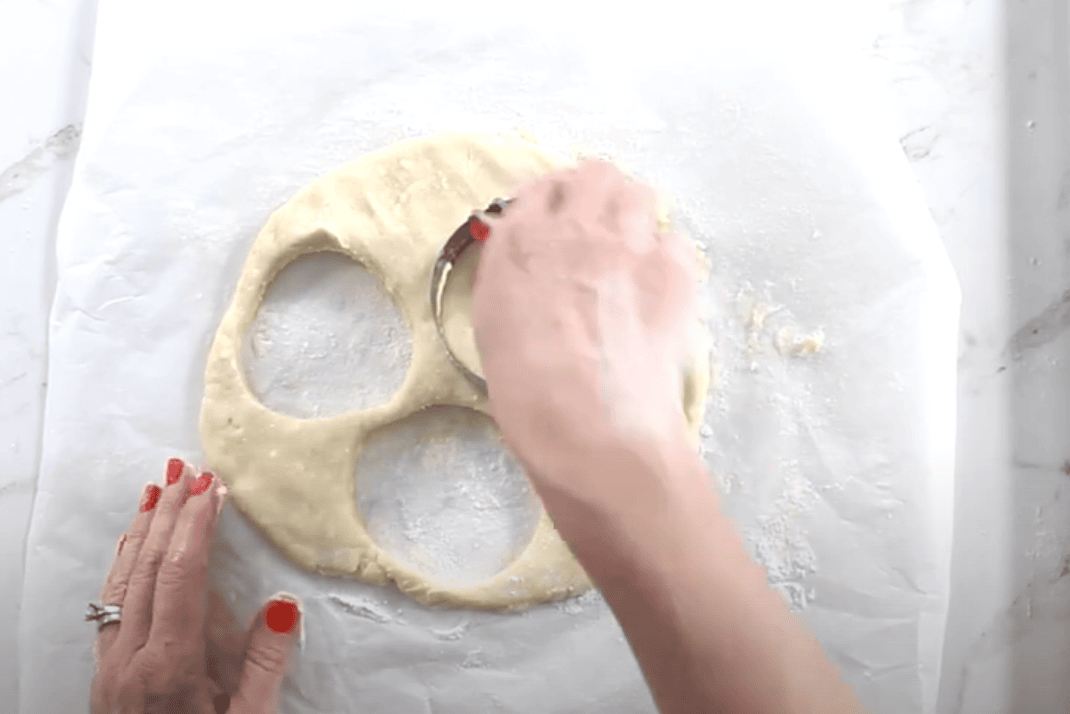
Cut the dough rounds: Using a greased 3-inch biscuit cutter (or the rim of a glass or mason jar lid), cut out rounds of dough. Press straight down—do not twist—as twisting can seal the edges and prevent proper rising.
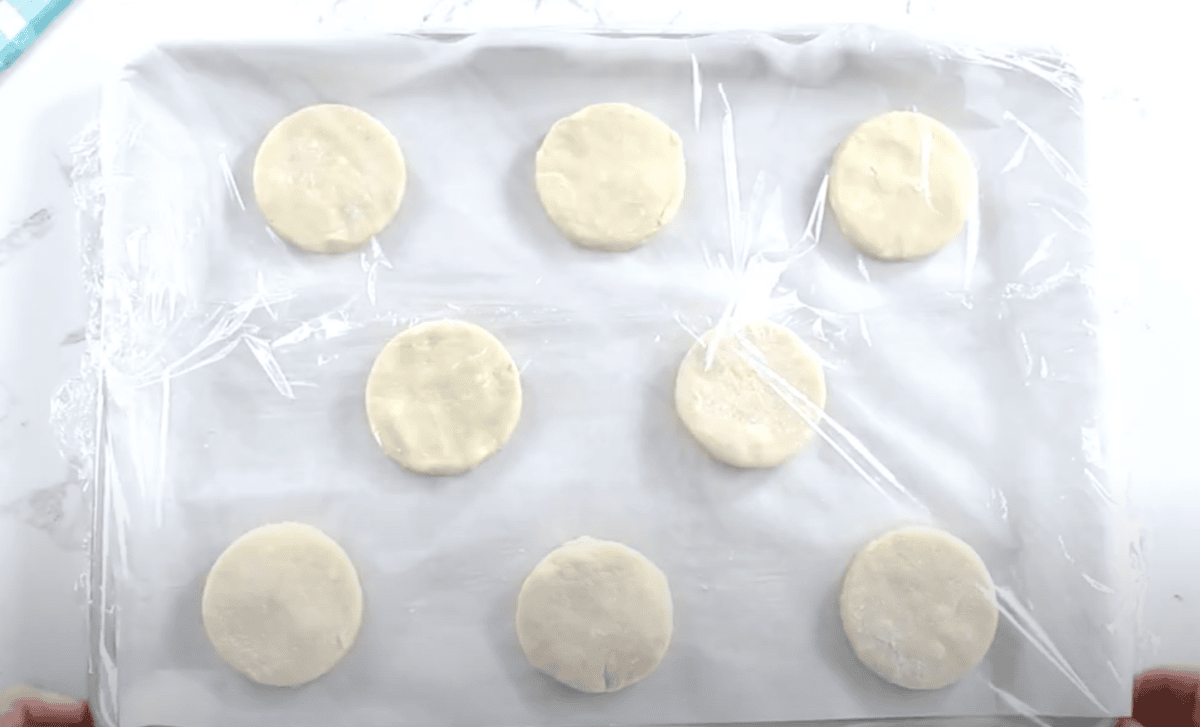
Let the dough rise: Place the rounds onto a parchment-lined baking sheet. Cover them with plastic wrap and a clean kitchen towel. Let rise in a warm place for 30 minutes. If needed, use the oven’s proof setting or briefly warm the oven to 200°F, then turn it off and place the dough inside. Just remember to remove it before preheating for baking.
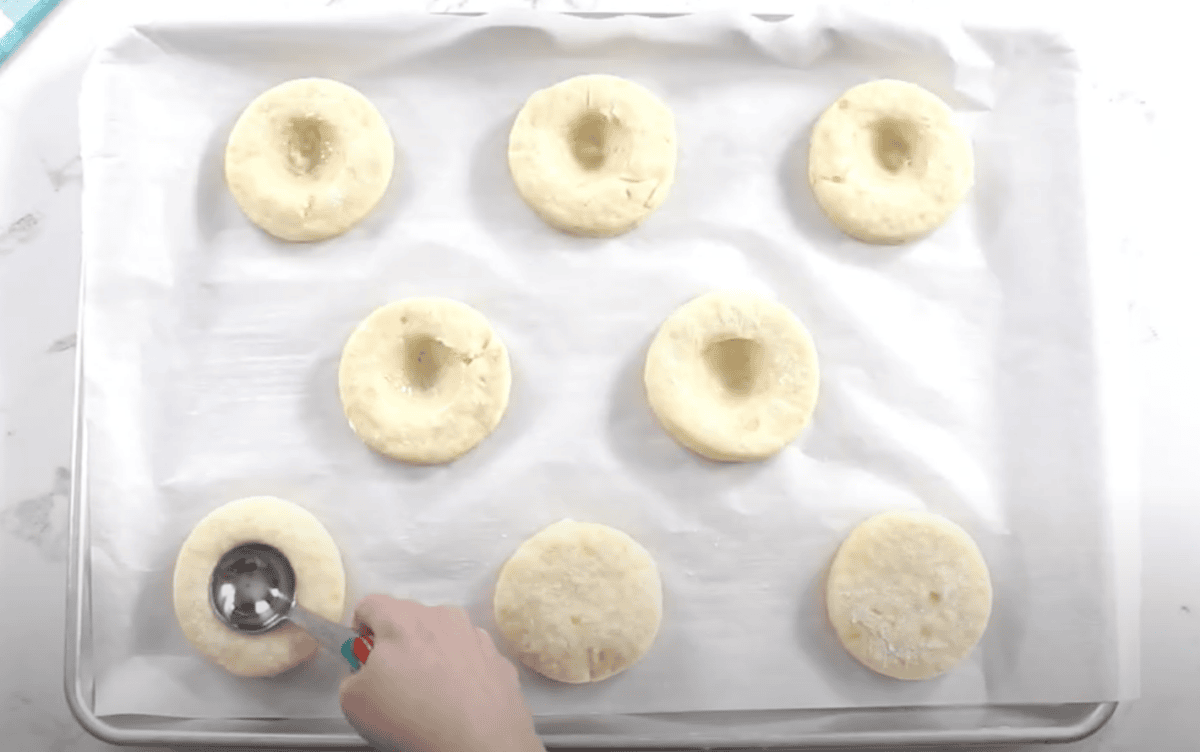
Create indentations: Preheat the oven to 400°F. Spray the back of a tablespoon with nonstick spray (such as coconut oil) and use it to gently press down the center of each dough round, creating a well.
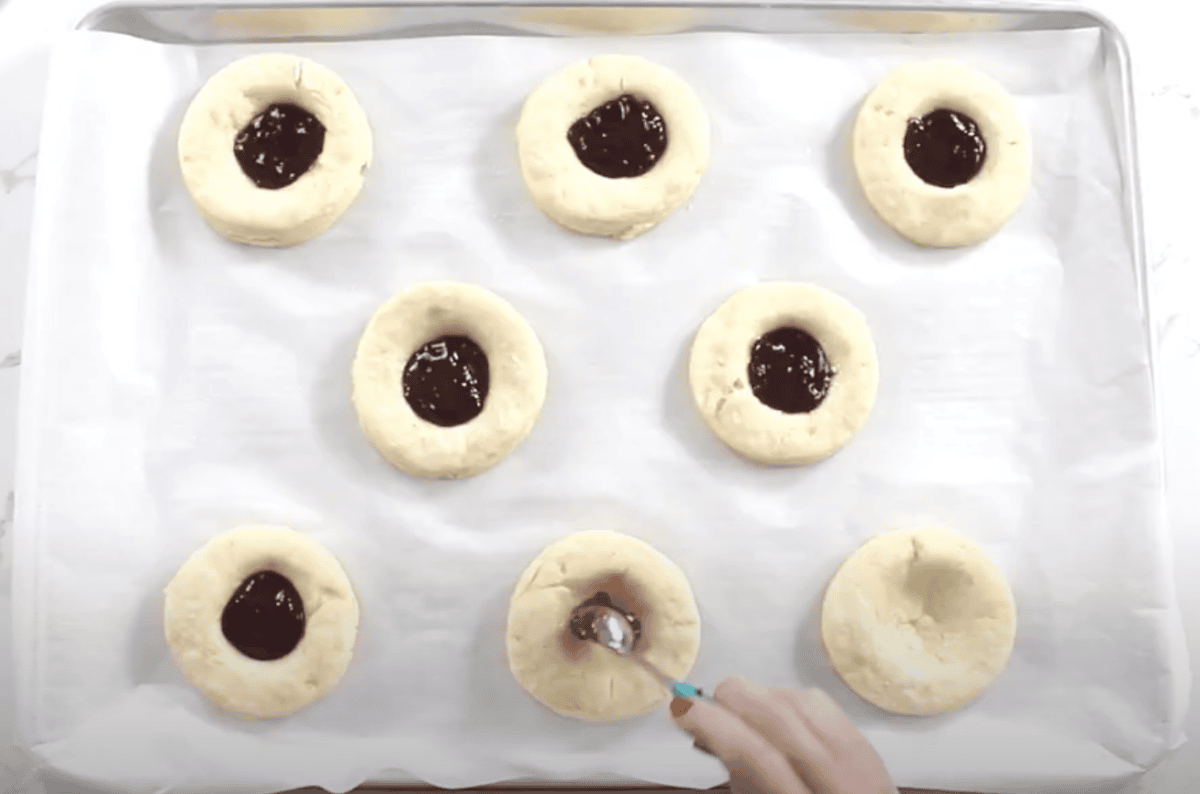
Fill with jam: Stir 1/3 cup of seedless raspberry jam until smooth. Spoon 2 tsp of jam into the center of each round.

Apply the egg wash: In a small bowl, whisk together 2 large egg whites with 1 tbsp of water. Brush the tops of the dough with this egg wash.
Bake until gold: Bake for 18–20 minutes, or until the tops are lightly golden. Keep a close eye on them, as oven temperatures can vary.
Make and drizzle the glaze: While the Danish bakes, prepare the glaze by whisking together 1/2 cup of powdered sugar with 2 tsp of water in a small bowl. Once baked, let the Danish cool for 20 minutes, allowing the jam to set and cool.
Serve and enjoy: Serve warm or cooled and enjoy!
Serving Suggestions
I love serving these gluten-free Danish pastries fresh for a weekend brunch or a cozy breakfast treat. They pair perfectly with a hot cup of coffee or a frothy latte, and they’re just as good alongside a simple fruit salad if you want to round out the meal. If you’re hosting, you can set them out on a pretty platter next to gluten-free beignets. They’re also a great make-ahead option for holidays or special occasions—you can bake them the night before and just warm them slightly before serving for that fresh-from-the-oven taste.
Storage Instructions
Store leftover Danish in an airtight container at room temperature for up to 2 days. For longer storage, refrigerate them for up to 5 days.
Freezing the Dough
The gluten-free Danish pastry dough can be frozen for up to 3 months. Once the dough is frozen for 30 minutes, shape the dough into a disk. Wrap the disk in plastic wrap and place it in a freezer-safe plastic bag and freeze. Thaw the dough overnight in the refrigerator, and then proceed with the recipe as written.
Freezing the Assembled Pastries
To freeze the assembled pasties before baking, complete the recipe through the step of filling the pastries with jam (step 14). Place the baking sheet with the Danish in the freezer until they are flash-frozen for at least 2 hours. Then place the pastries in an airtight freezer-safe container or plastic freezer bag and freeze for up to 1 month.
Do not defrost the Danish when ready to bake. Brush the pastries with the egg wash and bake for an extra 10 to 15 minutes.
Freezing the Baked Danish
To freeze the baked gluten-free Danish, allow the Danish to cool completely to room temperature. Once completely cooled, wrap the Danish tightly in plastic wrap and place in an airtight freezer-safe container or plastic freezer bag and freeze for up to 3 months.
Thaw in the refrigerator overnight. Reheat the gluten-free pastries in the oven at 350°F for 8 to 10 minutes or reheat in the microwave.


Do you cut the dough in half for two disks of dough. In the picture, it looks like you can only get four danishes not eight as it says at the top.. so I was wondering if you’re supposed to make two disks of dough or after cutting the first four circles do you shape the dough into another circle and cut four more?
Hi Deanne, no you cut the circles and then reshape the dough to cut again. The video shows it a bit better.
I loved these! Really easy to make. I used Bob’s Red Mill 1 for 1 flour and they came out great. As with any flaky recipe, make sure your butter is cold – despite the comment below, the butter melting during the proofing period won’t have a negative impact on the recipe turning out if you make sure your butter is cold and pea sized like the recipe recommends. I used Amarena cherries (like luxardo cherries) and the juice instead of jam and added some cherry juice to the glaze. I also incorporated lemon zest in the dough while folding after freezing and in the glaze for an extra pop. Most other gluten free Danish recipes call for gluten free puff pastry, but this one is much more of a bread texture while still remaining light and fluffy like a traditional puff pastry variation – it’s a fun difference I think and I appreciate the change. Wonderful recipe, thank you so much!!
Thank you Meg! Glad you enjoyed the gluten-free danish!
Didn’t come out soft and fluffy.
Sorry they didn’t turn out for you!
I have just found your site and saw this recipe. I’m often intimidated by these kind of recipes but thought I’d try it. I used a local gluten free flour blend and needed to add about an extra 1/2 cup flour. It was actually relatively easy to make and turned out very good! Only change next time is I’ll make the hole for the jam bigger. lol. I’m from Canada so Better Batter gf flour is very expensive and Pillsbury isn’t even available. I had read the reviews and read the one from another Canadian who mentioned she needed to add more flour. Thanks for an amazing recipe. Looking forward to exploring this new site and trying more of your recipes.
I idea to incorporate cold butter in the dough to make it flaky seems to be defeated by proofing the formed dough which melted the butter. Just getting ready to put my first batch in the oven. Eager to taste them.
400 for 18 minutes and they brunt to a crisp. I even made much larger ones too.
Sorry they didn’t turn out for you Nikki!
As usual, this is another great recipe from mama. I was wondering, after forming and getting ready to bake can I put these in the refrigerator overnight to be baked in the morning? Thank you for all your great recipes. I appreciate your hard work.
Thanks Terry, yes that should be okay!
was so excited to see this recipe. I make treats for our Gluten free at church. just wondering if these freeze well after baked, & for how long
very excited to try this recipe with my 8yr old gf/df son!! I have never seen anything like this. Thank You!
So happy to find the recipe here as the cookbook omitted the temperature for baking!
I followed the ingredients exactly using Better Batter original but had so many issues. I first saw a problem when my softened cubed butter never formed peas when added to the flour mixture. When I took it out of the freezer after 30 minutes it was not workable at all, I had to lightly use a rolling pin to get a dough round.
When I used the biscuit cutter I couldn’t lift them off the parchment. I used a small spatula which squished them into ovals. The dough was obviously too wet. The final result was a danish that was under-risen and had a chewy, gummy texture. Where might I have gone wrong?
Hi Maureen, Perhaps your butter was softened and too warm? For this recipe, the butter should be softened on the counter to come to room temperature but it shouldn’t be hot or warm. If the butter was too soft, it would blend into the flour rather than stay in distinct pieces, which prevents proper flakiness. We are updating the post to reflect these instructions as well!