Gluten-Free English Muffins
Published
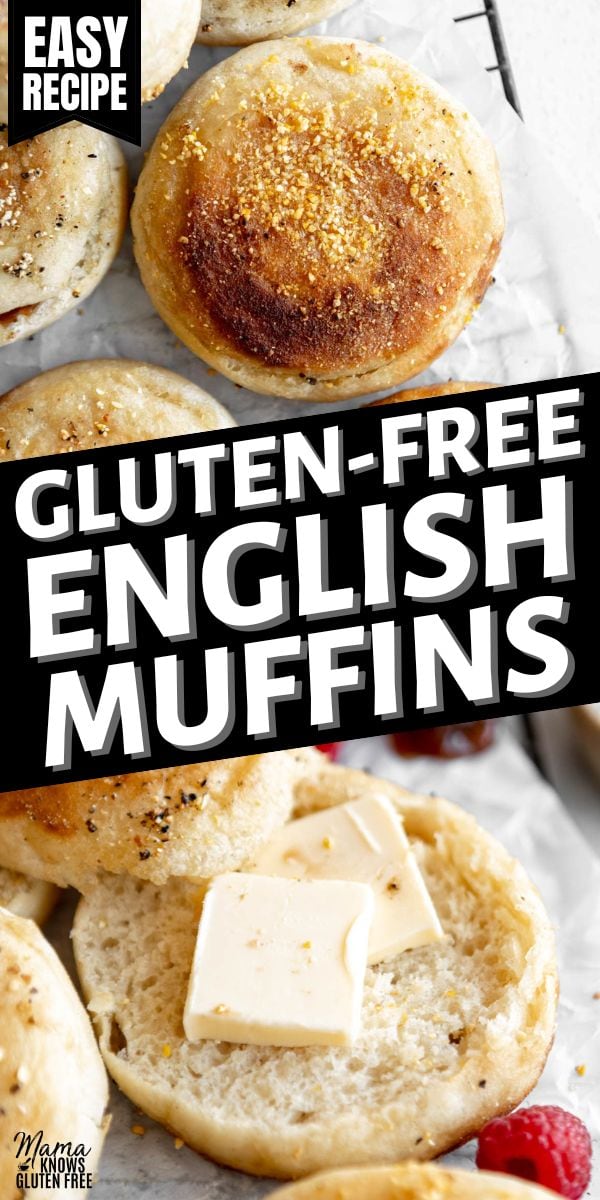
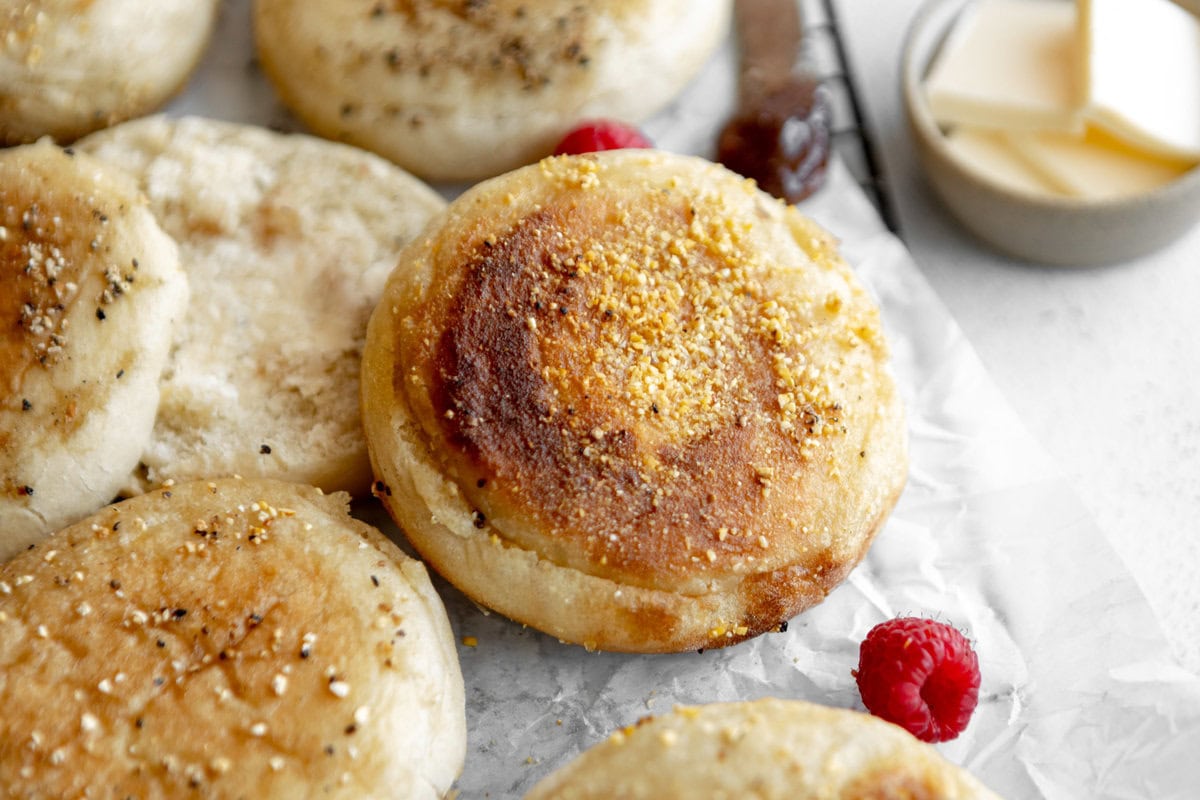
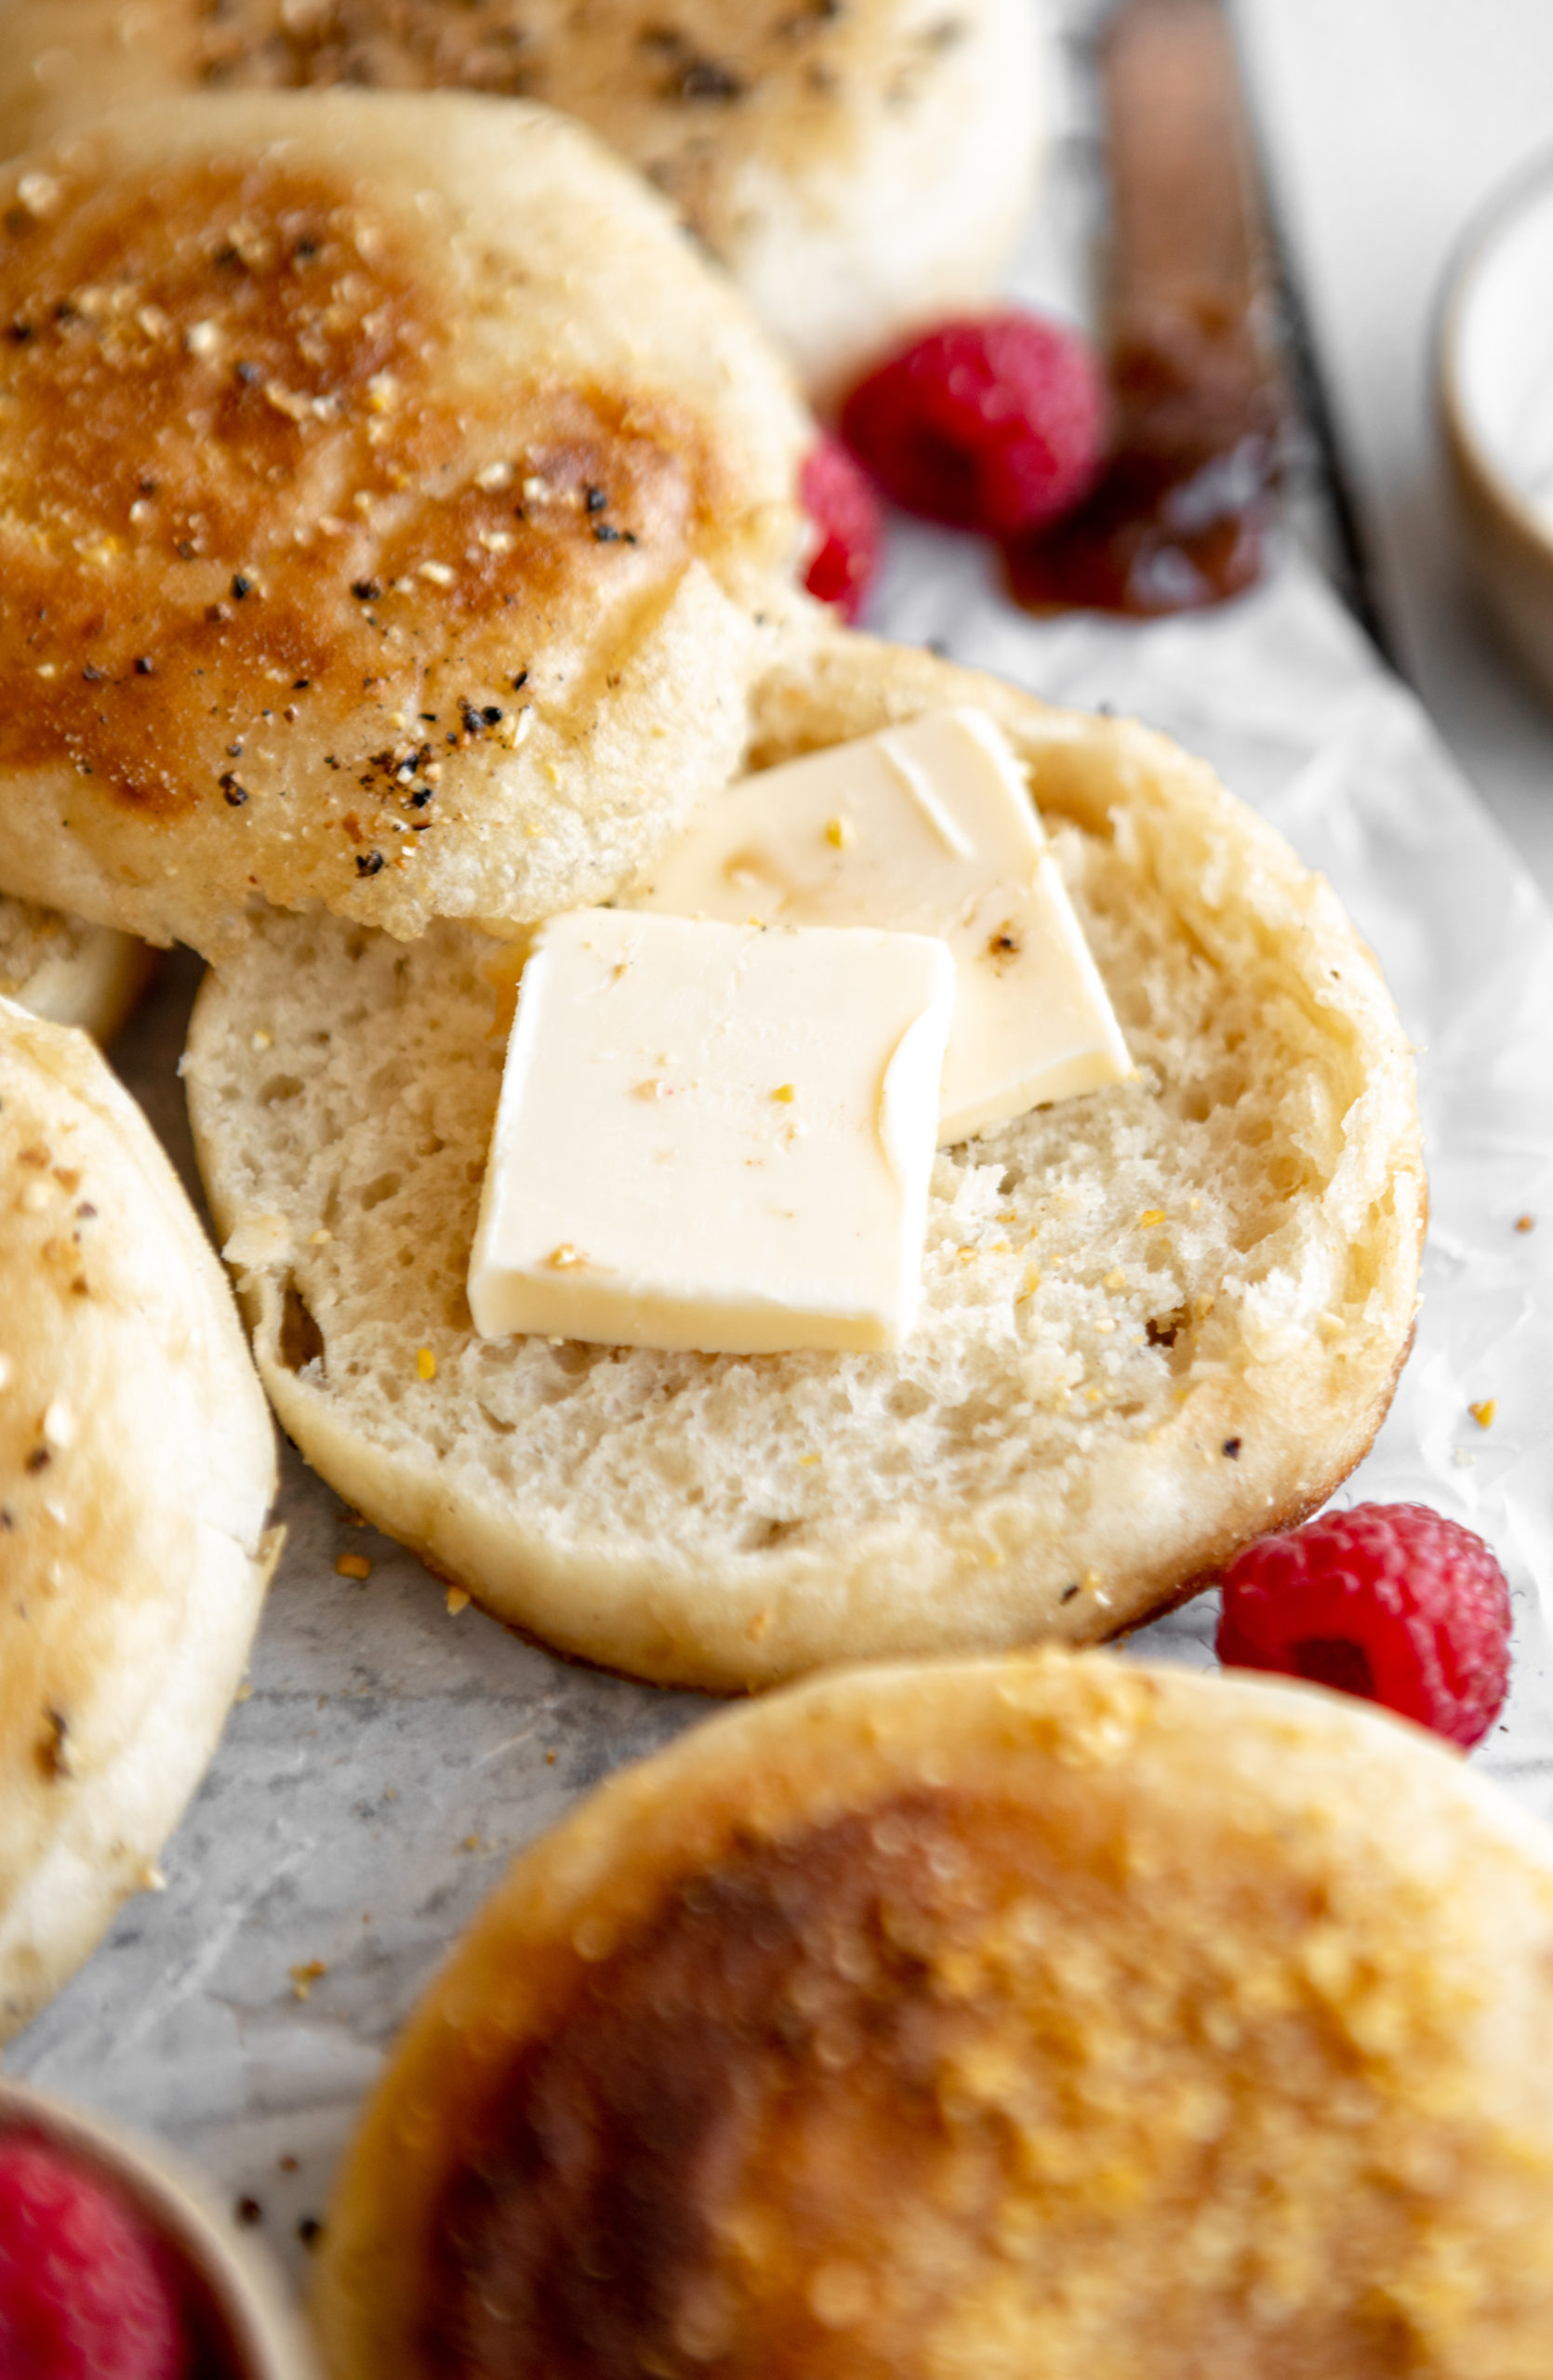
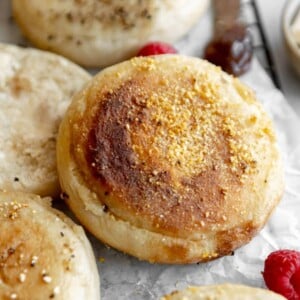
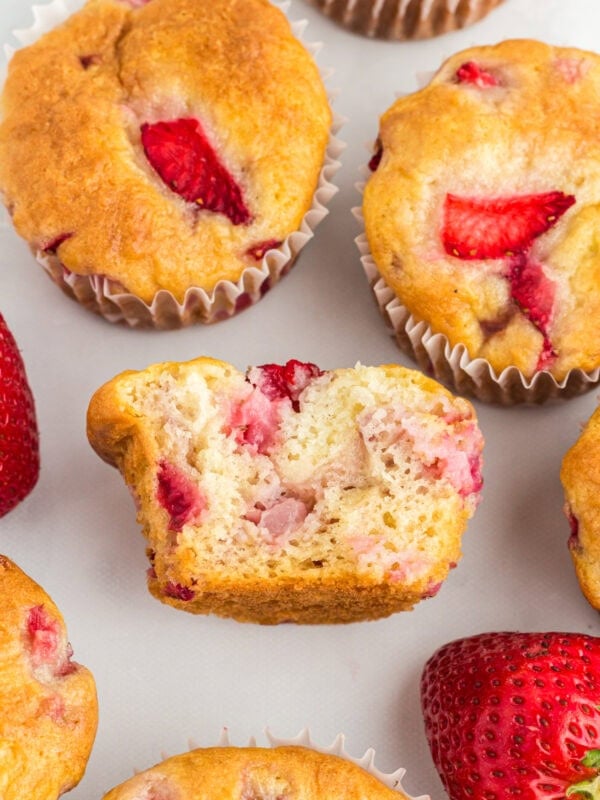
Soft, chewy, and craggy gluten-free English muffins are a breakfast staple at my house. I love them with a pat of butter, slathered in jam, or as the base of a breakfast sandwich. With this easy recipe, I can make a big batch of delicious muffins full of nooks and crannies right at home.
Gluten-Free English Muffin Recipe
I made these gluten-free English muffins with instant yeast for a fluffy rise, and I rolled them in gluten-free cornmeal for that signature crunch. Whether slathered with butter and jam or topped with a fried egg and cheese, they are a versatile hero on busy mornings! These muffins are made with simple ingredients and have easy recipe instructions so that you can have a batch ready to start the week.
Ingredients
- Gluten-Free All-Purpose Flour with Xanthan Gum: We recommend Pillsbury Gluten-Free or Better Batter gluten-free flour. Not all brands of gluten-free flour work for yeast baking.
- Tapioca Flour: Adds elasticity to the dough to create a soft and chewy texture.
- Granulated Sugar: Adds a touch of sweetness to the dough and feeds the yeast for a fluffy rise.
- Instant Yeast: Helps the dough rise.
- Salt: Enhances the overall flavor.
- Milk: Adds moisture and richness to the dough and creates a tender crumb. For a dairy-free option, use your favorite dairy-free milk.
- Egg White: Adds structure and protein and helps the muffins bake up golden brown.
- Unsalted Butter: For additional richness. For a dairy-free option, use Smart Balance butter.
- Gluten-Free Cornmeal: Prevents the muffins from sticking to the pan and adds a wonderful crunchy texture.
- Vegetable Oil: Prevents the muffins from sticking to the pan and aids in browning.

Tips and Notes
- Not all gluten-free flours are recommended for yeast baking. You may experience different baking results depending on the gluten-free flour blend you choose. I like Pillsbury gluten-free flour for this recipe.
- The best way to measure gluten-free flour is the “spoon & level” method. Using a spoon, scoop the flour into the measuring cup. After you’ve spooned the flour into the measuring cup, use the back of a knife to level off the top of the measuring cup. Avoid scooping the flour out of the bag with your measuring cup!
- Cook the muffins over medium heat to achieve even browning, and don’t flip too often.
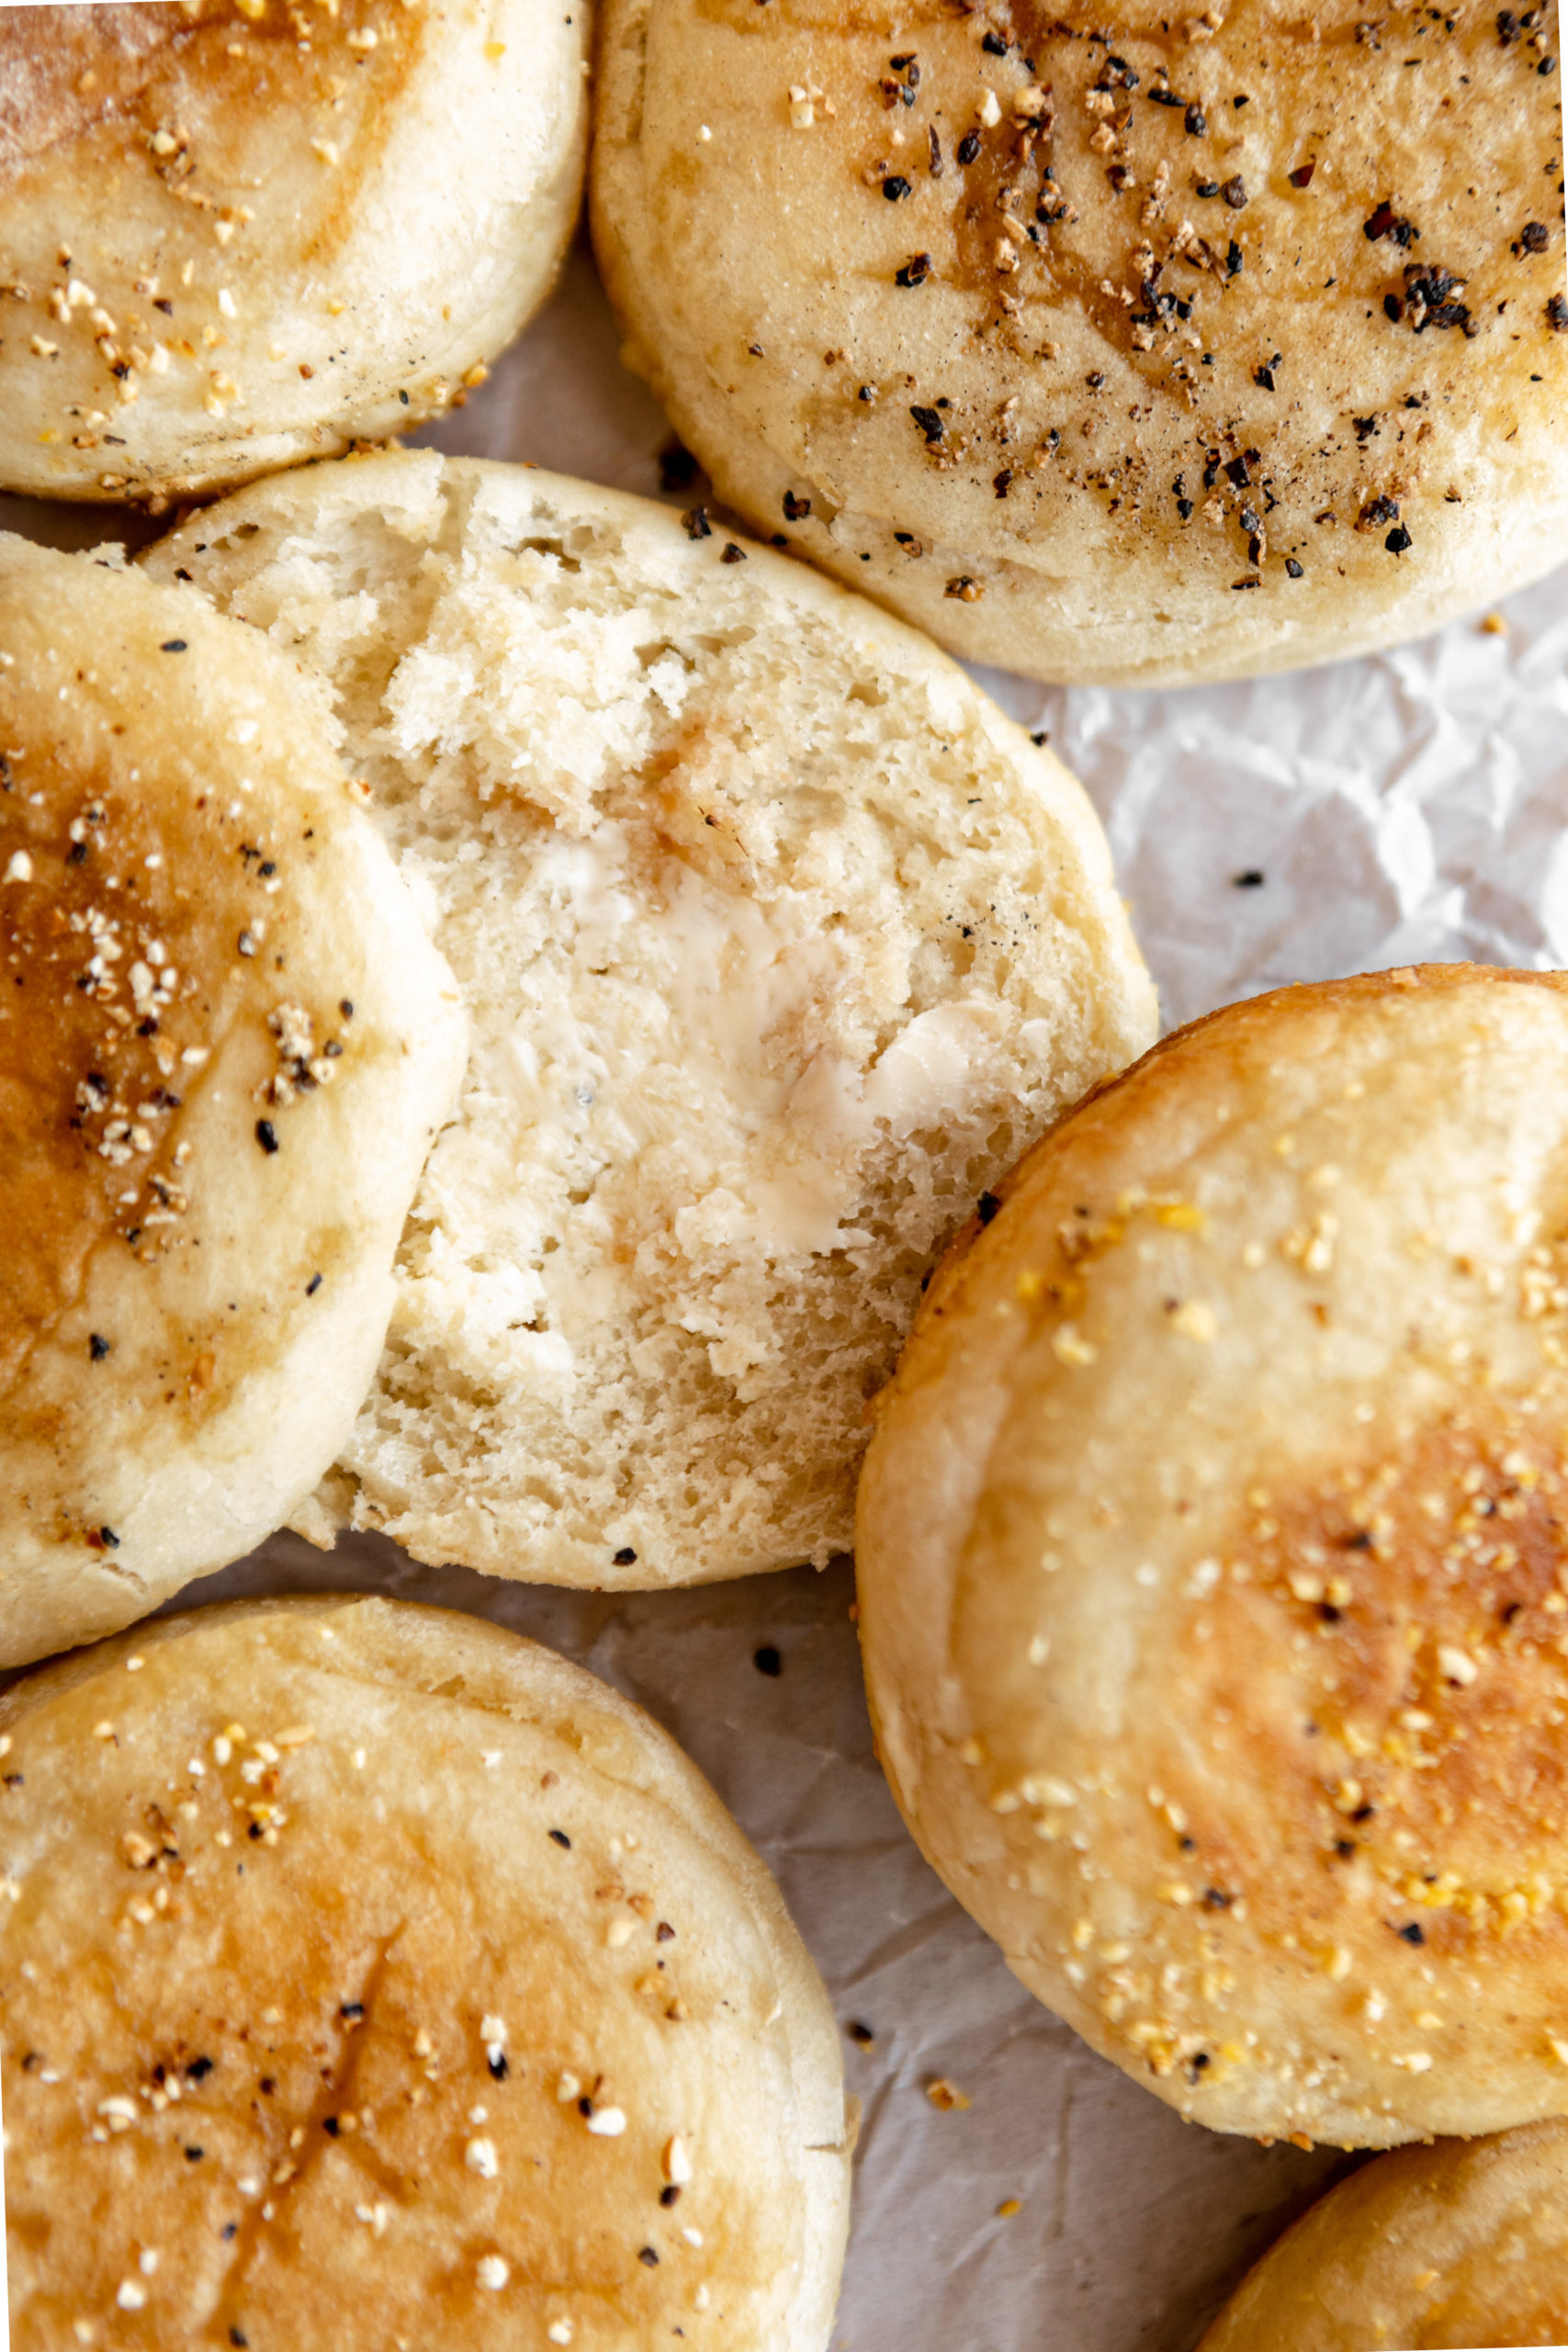
- For best results on texture, use a fork to poke holes in the sides all the way around instead of slicing with a knife. Also, allow the muffins to cool before trying to fork-split them.
Do I Need Rings To Make English Muffins?
Nope! So long as you chill the dough properly, these muffins will hold their shape all on their own. If you’d like them to be perfectly round, you can use cookie cutters or mason jar lids to help them hold that shape.
Can I Cook These On A Griddle?
Yes, you can cook these muffins on a griddle instead of a cast iron pan.
What Does It Mean To Fork-Split English Muffins?
Fork splitting is a method for halving an English muffin using the tines of a fork rather than slicing with a knife. This method helps to preserve the craggy texture of the interior.
Storage Instructions
Gluten-free English muffins will keep well in an air-tight container at room temperature for up to 2 days. You can also place them in the freezer for longer-term storage, where they will last for up to 3 months.
More Gluten-Free Breakfast Recipes to Try!
Gluten-Free English Muffins
Ingredients
- 2¾ cups gluten-free all-purpose flour with xanthan gum, We recommend Pillsbury gluten-free. Not all brands of gluten-free flour are recommended for yeast baking.
- ¼ cup tapioca flour
- 1 tablespoon granulated sugar
- 2¼ teaspoons instant yeast
- 1½ teaspoons salt
- 1½ cups milk, warm
- 1 large egg white, room temperature
- 1 tablespoon unsalted butter, melted
- ¼ cup gluten-free cornmeal, for dusting
- 2 tablespoons vegetable oil, for frying
Instructions
- In the bowl of a stand mixer fitted with the paddle attachment, combine the gluten-free all-purpose flour, tapioca flour, sugar, instant yeast, and salt. Set aside.
- Warm the milk to about 110°F using the microwave or a saucepan set over low heat.
- With the mixer running on low speed, pour in the milk, egg white, and melted butter. Scrape down the sides as needed. Let the mixer run for about 5 minutes.
- Cover the dough and let it rise for 60 minutes at room temperature, then 30 minutes in the fridge. It will seem pretty shapeless at first, so chilling is important.
- After rising, cut the dough into 6 pieces and roll into balls. If the dough is sticky, flour your hands slightly. Let rise for an additional 30 minutes.
- Preheat the oven to 350°F.
- Dust each ball with cornmeal and press down slightly.
- Grease a cast iron pan with oil, then fry on each side for 3 to 5 minutes over medium/low heat or until golden brown.
- Place the pan directly in the oven and bake for 5 minutes to finish cooking through the center.
- Let cool slightly, then slice and enjoy! For best results on texture, use a fork to poke holes in the sides all the way around instead of slicing with a knife.
Notes
- Not all gluten-free flours are recommended for yeast baking. You may experience different baking results depending on the gluten-free flour blend you choose. I like Pillsbury gluten-free flour for this recipe.
- The best way to measure gluten-free flour is the “spoon & level” method. Using a spoon, scoop the flour into the measuring cup. After you’ve spooned the flour into the measuring cup, use the back of a knife to level off the top of the measuring cup. Avoid scooping the flour out of the bag with your measuring cup!
- Cook the muffins over medium heat to achieve even browning, and don’t flip too often.
- For best results on texture, use a fork to poke holes in the sides all the way around instead of slicing with a knife. Also, allow the muffins to cool before trying to fork-split them.
- To store: Gluten-free English muffins can be stored in an airtight container at room temperature for up to 2 days.
- To freeze: Tightly wrap the gluten-free English muffins in plastic wrap and place them in a freezer bag for up to 3 months.
- Mama says, “Make sure to always check your labels!”
Nutrition
Nutrition information is automatically calculated, so should only be used as an approximation.
How To Make Gluten-Free English Muffins Step-by-Step

In the bowl of a stand mixer fitted with the paddle attachment, combine 2¾ cups of gluten-free all-purpose flour, ¼ cup of tapioca flour, 1 tablespoon of granulated sugar, 2¼ teaspoons of instant yeast, and 1½ teaspoons of salt. Set aside.

Warm 1½ cups of milk to about 110°F using the microwave or a saucepan set over low heat. With the mixer running on low speed, pour in the milk, 1 large egg white, and 1 tablespoon of melted unsalted butter. Scrape down the sides as needed. Let the mixer run for about 5 minutes.

Cover the dough and let it rise for 60 minutes at room temperature, then 30 minutes in the fridge. It will seem pretty shapeless at first, so chilling is important.

After rising, cut the dough into 6 pieces and roll into balls. If the dough is sticky, flour your hands slightly. Let rise for an additional 30 minutes. Preheat the oven to 350°F.

Dust each ball with cornmeal (about ¼ cup total) and press down slightly. Grease a cast iron pan with 2 tablespoons of vegetable oil, then fry on each side for 3 to 5 minutes over medium/low heat or until golden brown. Place the pan directly in the oven and bake for 5 minutes to finish cooking through the center. Let cool slightly, then slice and enjoy! For best results on texture, use a fork to poke holes in the sides all the way around instead of slicing with a knife.


Excellent. I have made these several times with King Arthur gluten-free bread flour with very good results. I do the 60 minute proof at 100° and the 30 minutes at room temperature (I forgot to put it in the fridge and it was fine). I made eight muffins instead of six and they are a good size. Thank you for letting me have eggs Benedict again.
I love this recipe! It takes time to make, but it’s worth the effort.
Tasty and easy recipe. I did flatten the balls and placed them on cornmeal topped parchment then topped with cornmeal. Left to rise for 30 minutes. Fried for three minutes on each side and placed in the oven for five minutes. My granddaughter enjoyed having muffins like the rest of the family. Thank you mama for great recipes.
These turned out terrifically! I used KAF 1:1 flour with great results. Next time I might cut small squares of parchment paper to place each of the shaped English muffins on for easy transfer to the cooking surface since the dough is a tad sticky. Thanks for the great recipe, I’ll definitely be making these again and again.
Tried multiple recipes but these English Muffins are the best! Make a double batch every 2 weeks for my daughter who eats one for breakfast everyday. She says they are great! I know they are easy to make. You don’t need any rings for shaping as they keep their round shape easily. I make they gluten free and dairy free using almond milk. I do cut them into 8 muffins as found the 6 rather large. After fried and baked, I let them cool, then wrap them each individually in plastic wrap so they can be frozen and thawed as needed. Thanks for the great recipe!