Easy Gluten-Free Bread
Updated
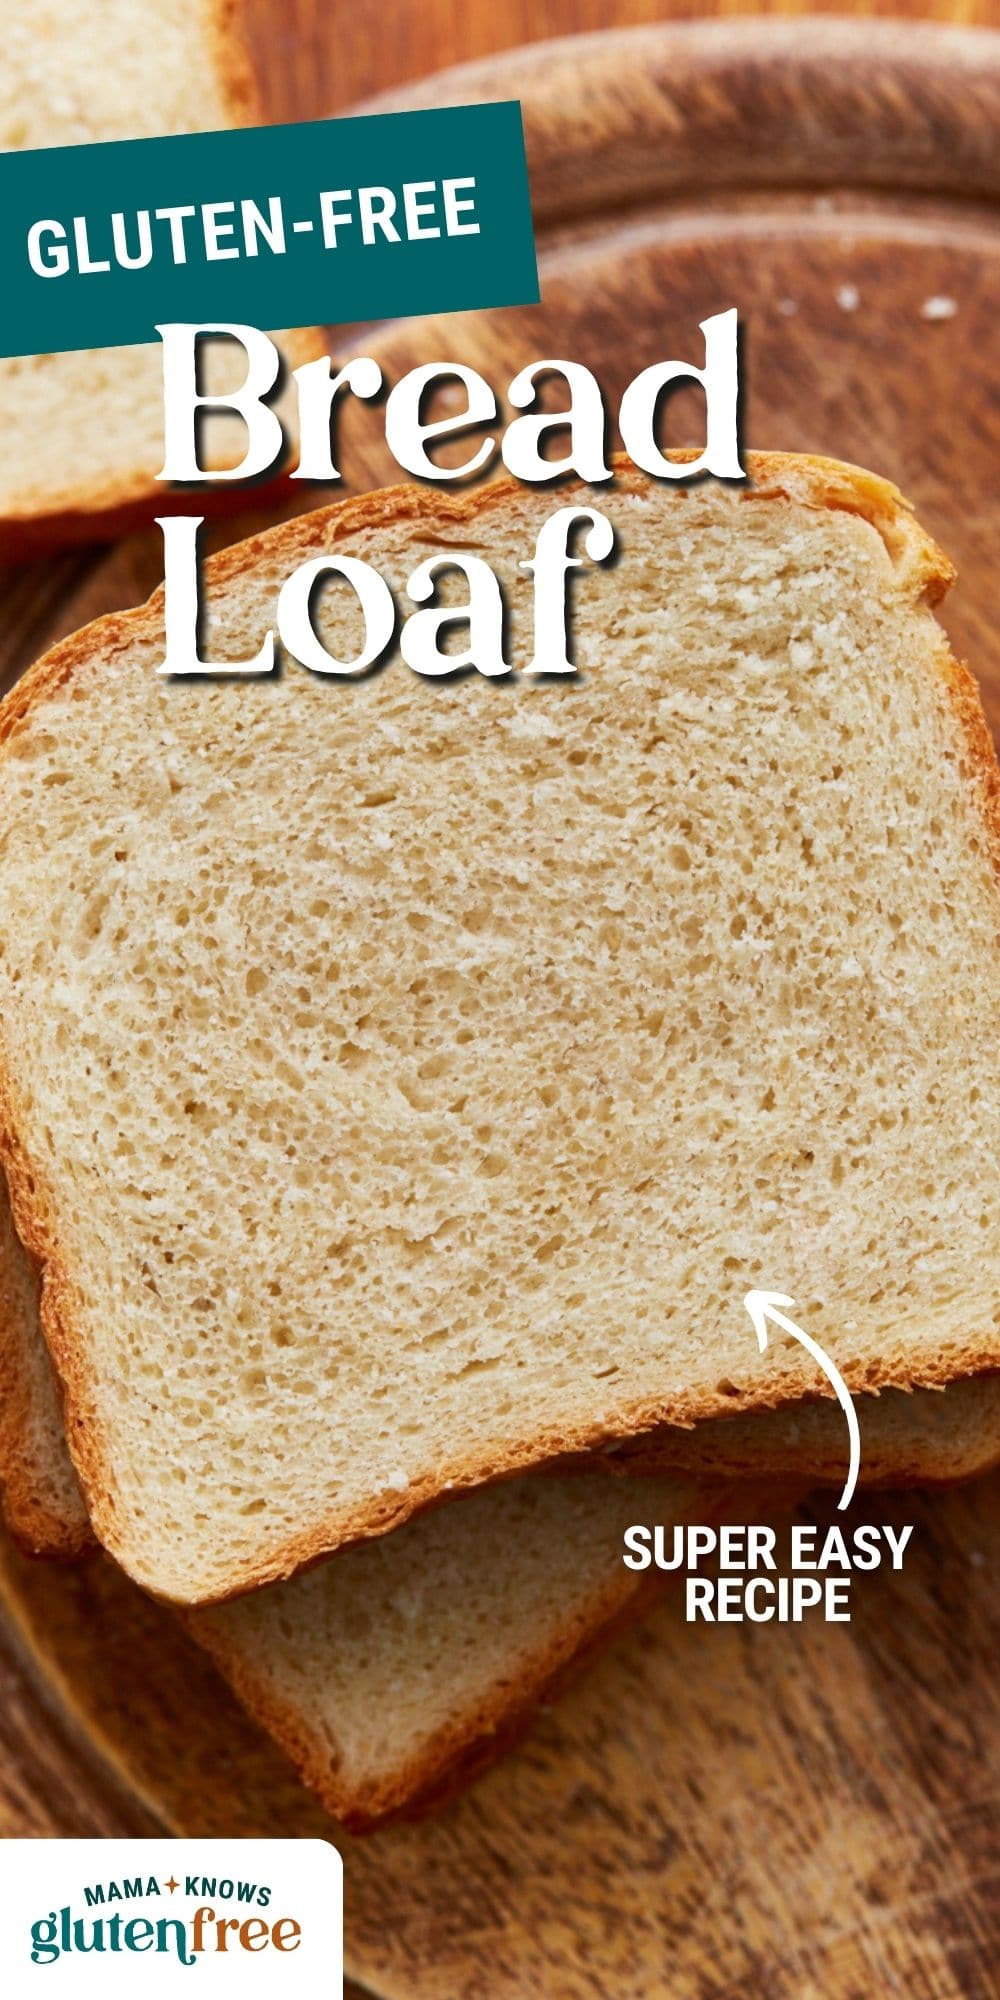
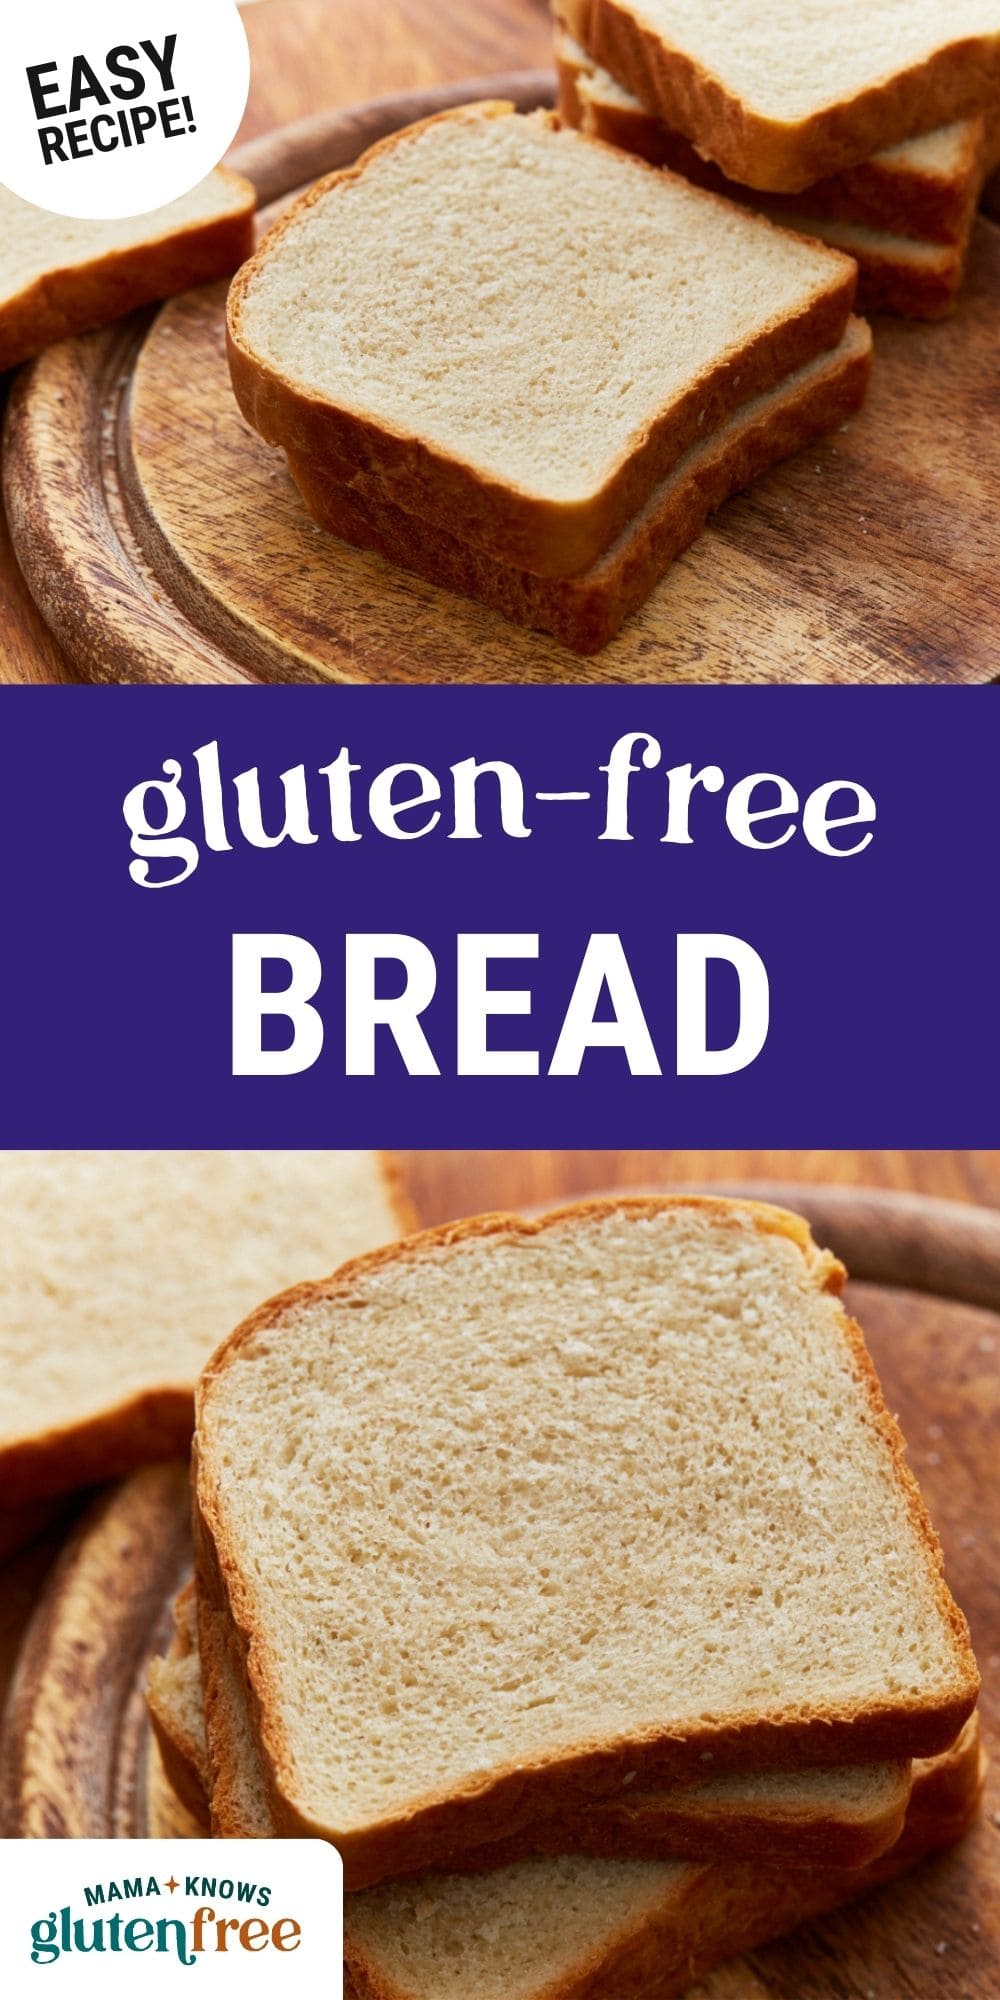
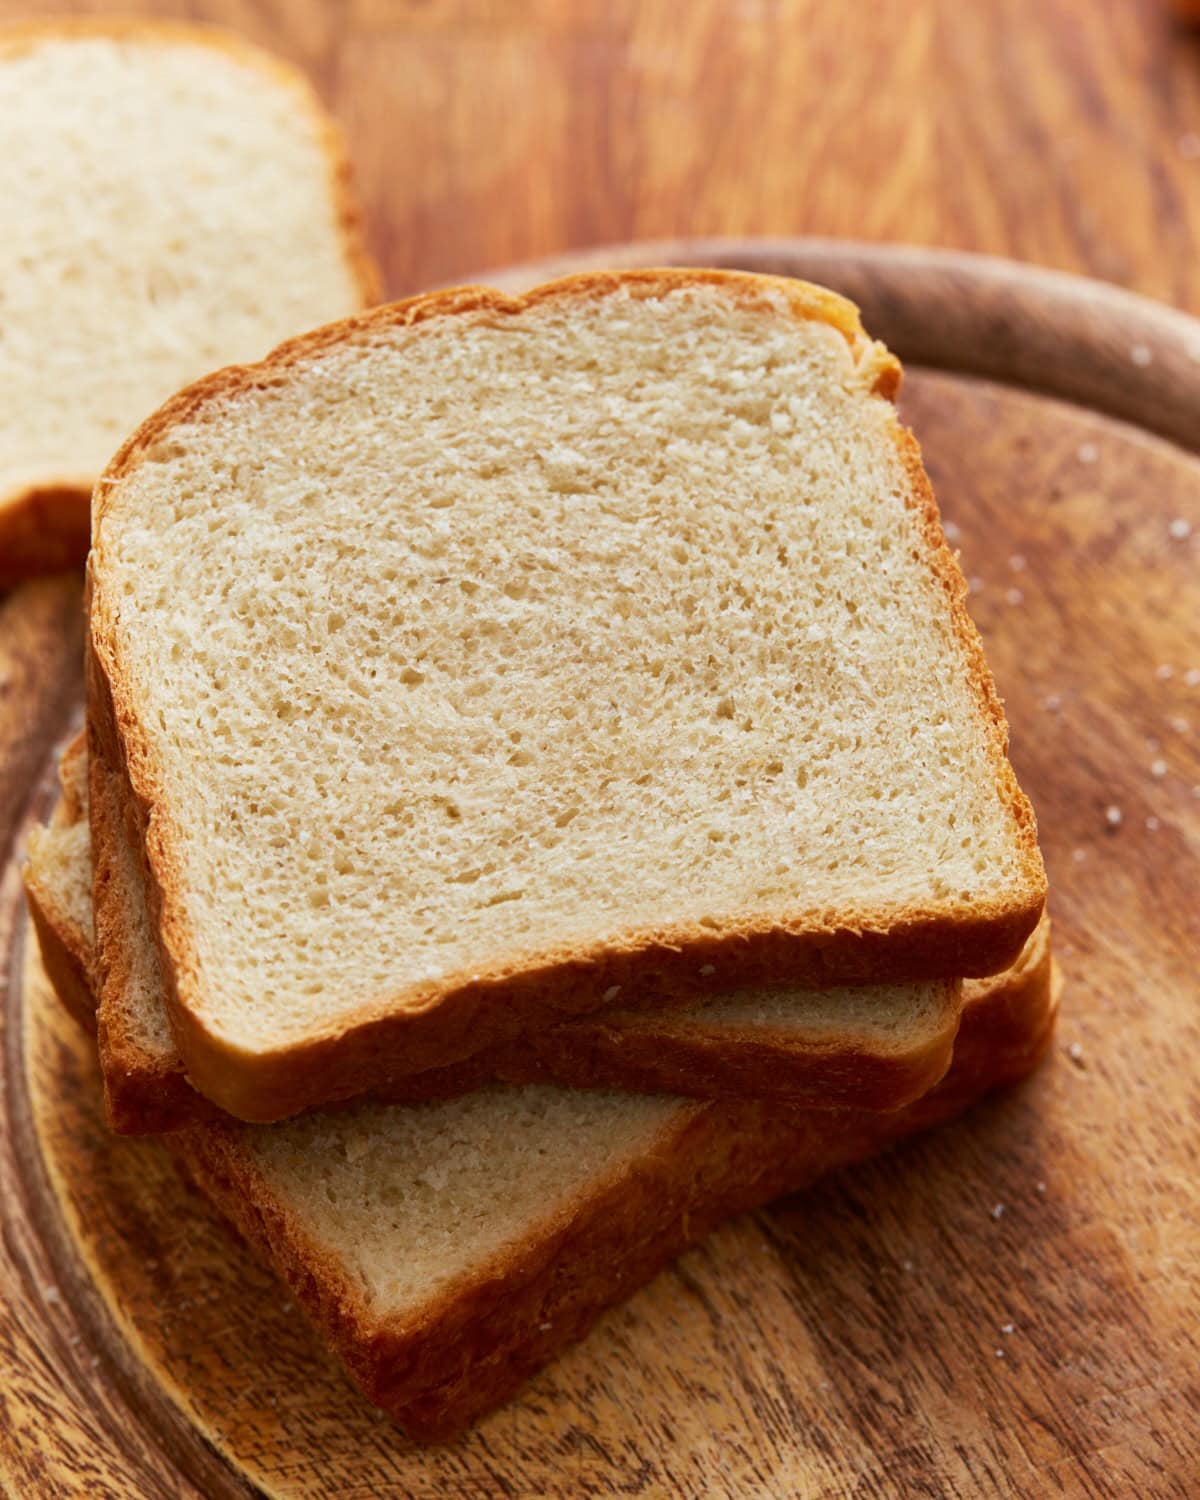
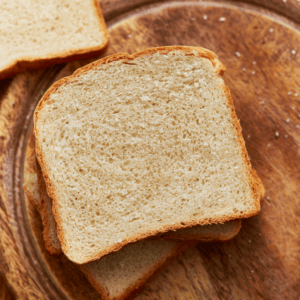
The easiest gluten-free bread recipe is baked right at home in your oven. This soft, fluffy white sandwich bread is made with amazing dexterity. I make it every week and slice it up for all my kids’ sandwiches.
Gluten-Free Bread Recipe
For years, readers have been asking me how to bake my Bread Machine Recipe in the oven. I have always baked my bread in an Oster bread machine with a gluten-free setting, but I wanted a recipe that could be made right in the oven.
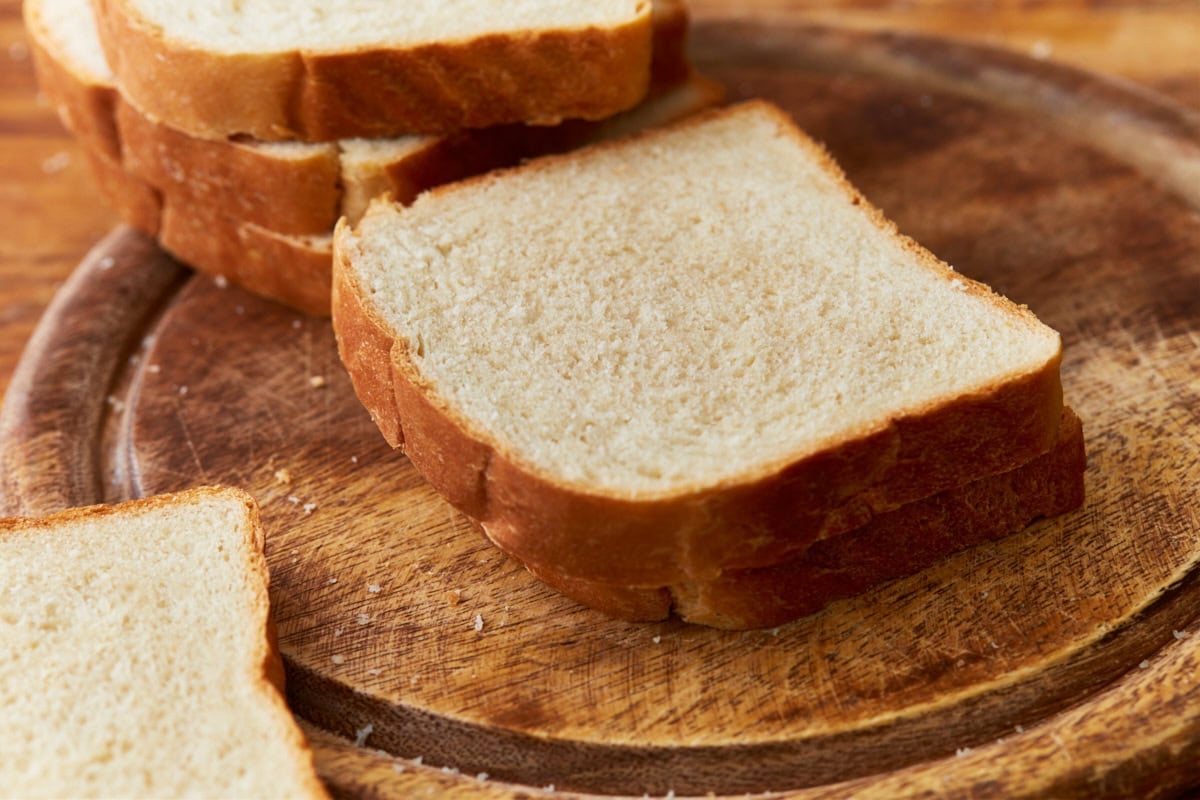
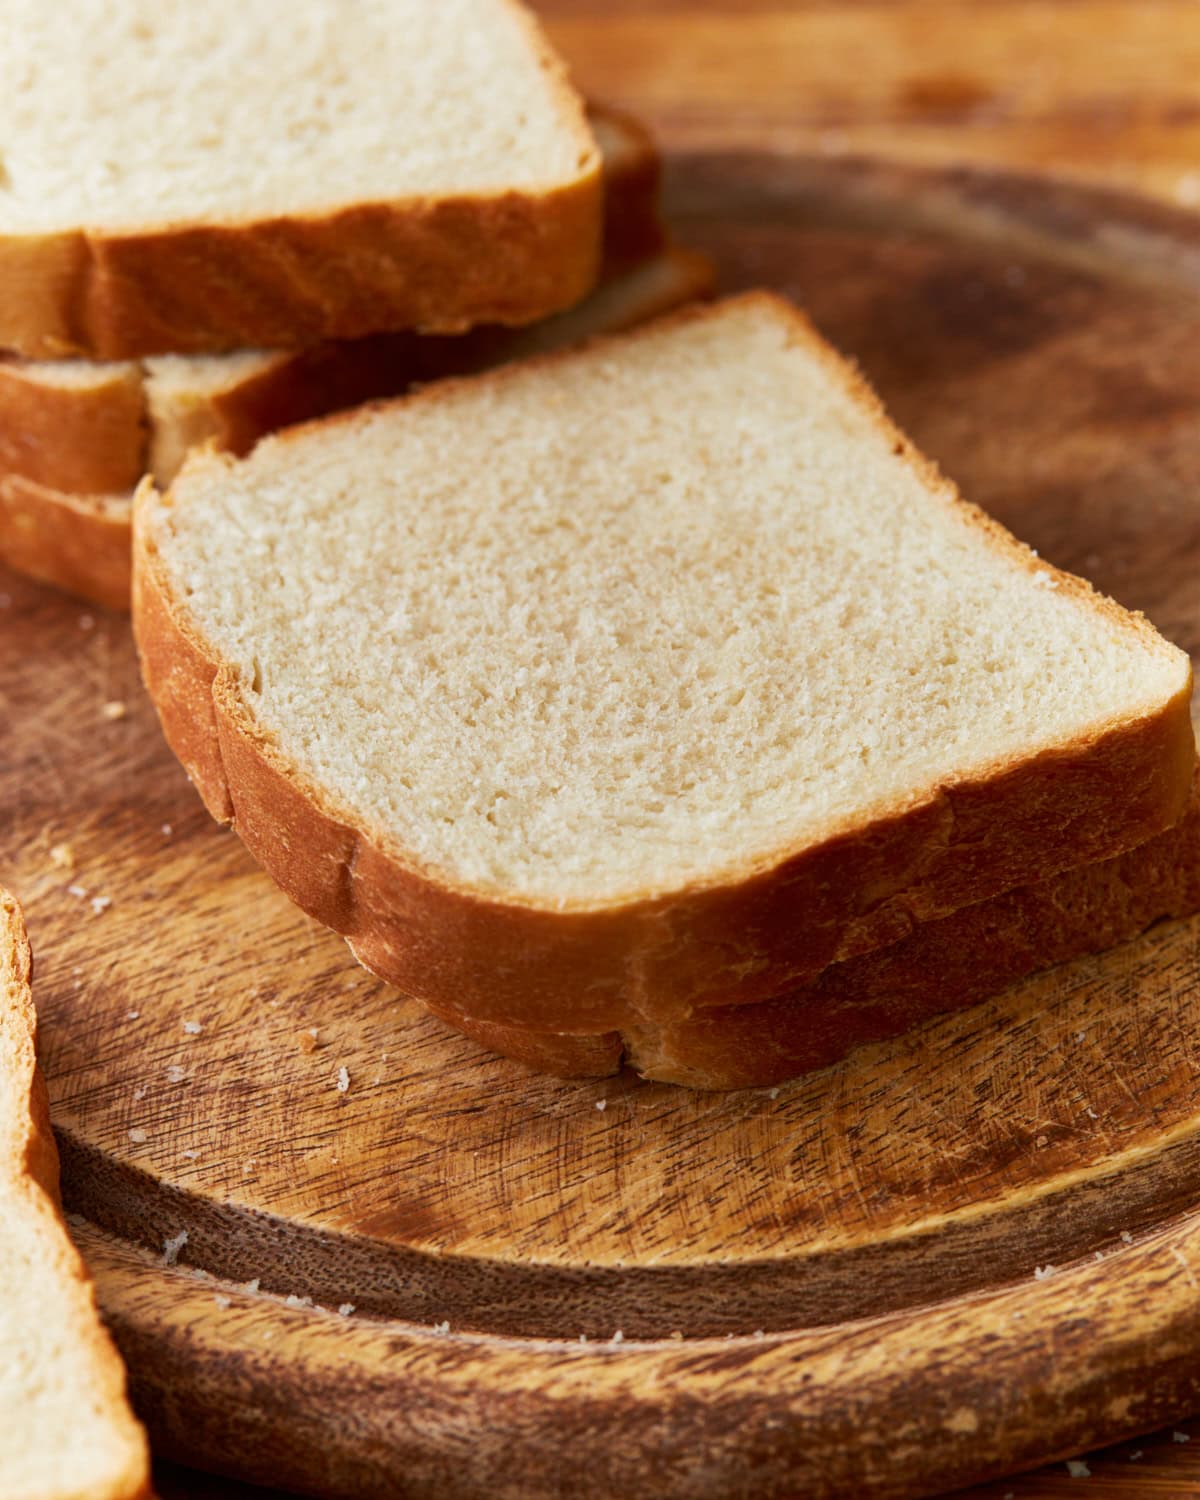
This oven-baked gluten-free homemade bread is also completely dairy-free, a dietary must in my house. Instead of using milk, I used a mixture of olive oil and warm water to activate the yeast and add moisture to the bread. This recipe makes excellent gluten-free sandwich bread! This yeast bread is so soft, has an amazing texture, bends and squishes, and is easy to slice.
Gluten-Free Baking Tips
- Bread rises best in a warm location. My oven has a bread proofing mode. When the oven is set in bread proofing mode, it is 100°F.
- Best baked in a 9″x 4″ small Pullman loaf pan. If you use a 9″x 5″ bread pan, the bread will not rise as tall. I tried it with both a 9″x 5″ bread pan and a 9-inch x 4-inch Small Pullman loaf pan. I HIGHLY recommend using the small Pullman loaf pan.
- The best way to measure gluten-free flour is the “spoon & level” method. Using a spoon, scoop the flour into the measuring cup. After you’ve spooned the flour into the measuring cup, use the back of a knife to level off the top of the measuring cup. Do not scoop the flour out of the bag with the measuring cup.
- Gluten-free dough doesn’t benefit from being over-proofed. Once the dough doubles in size, it’s time to bake!
Easy Gluten-Free Bread
Equipment
- 1 Stand Mixer
Ingredients
- 2 1/2 cups all-purpose gluten-free flour, I like Pillsbury gluten-free flour. Not all gluten-free flours are created equal. You may experience different baking results depending on the gluten-free flour blend you choose. Bob's Red Mill 1 for 1 and King Arthur Measure for Measure state on their website and/or package that their blends are not recommended for yeast baking.
- 1 teaspoons xanthan gum, leave out if your flour already has it in it
- 1 teaspoon gluten-free baking powder
- 1 packet rapid rise/instant yeast*, (2 1/4 teaspoons)
- 1/4 cup extra virgin olive oil
- 1/4 cup honey, You can use agave nectar or maple syrup.
- 1 teaspoon apple cider vinegar
- 1 1/2 cups warm water, 100-110°F
- 3 egg whites, from large eggs and room temperature**
- 1 teaspoon salt
Instructions
- Spray a 9-inch x 5-inch bread pan or 9-inch x 4-inch small Pullman loaf pan with gluten-free cooking spray. Move the top oven rack to the middle rack. Preheat your oven to 350°F. I used both a 9-inch x 4-inch Small Pullman loaf pan.
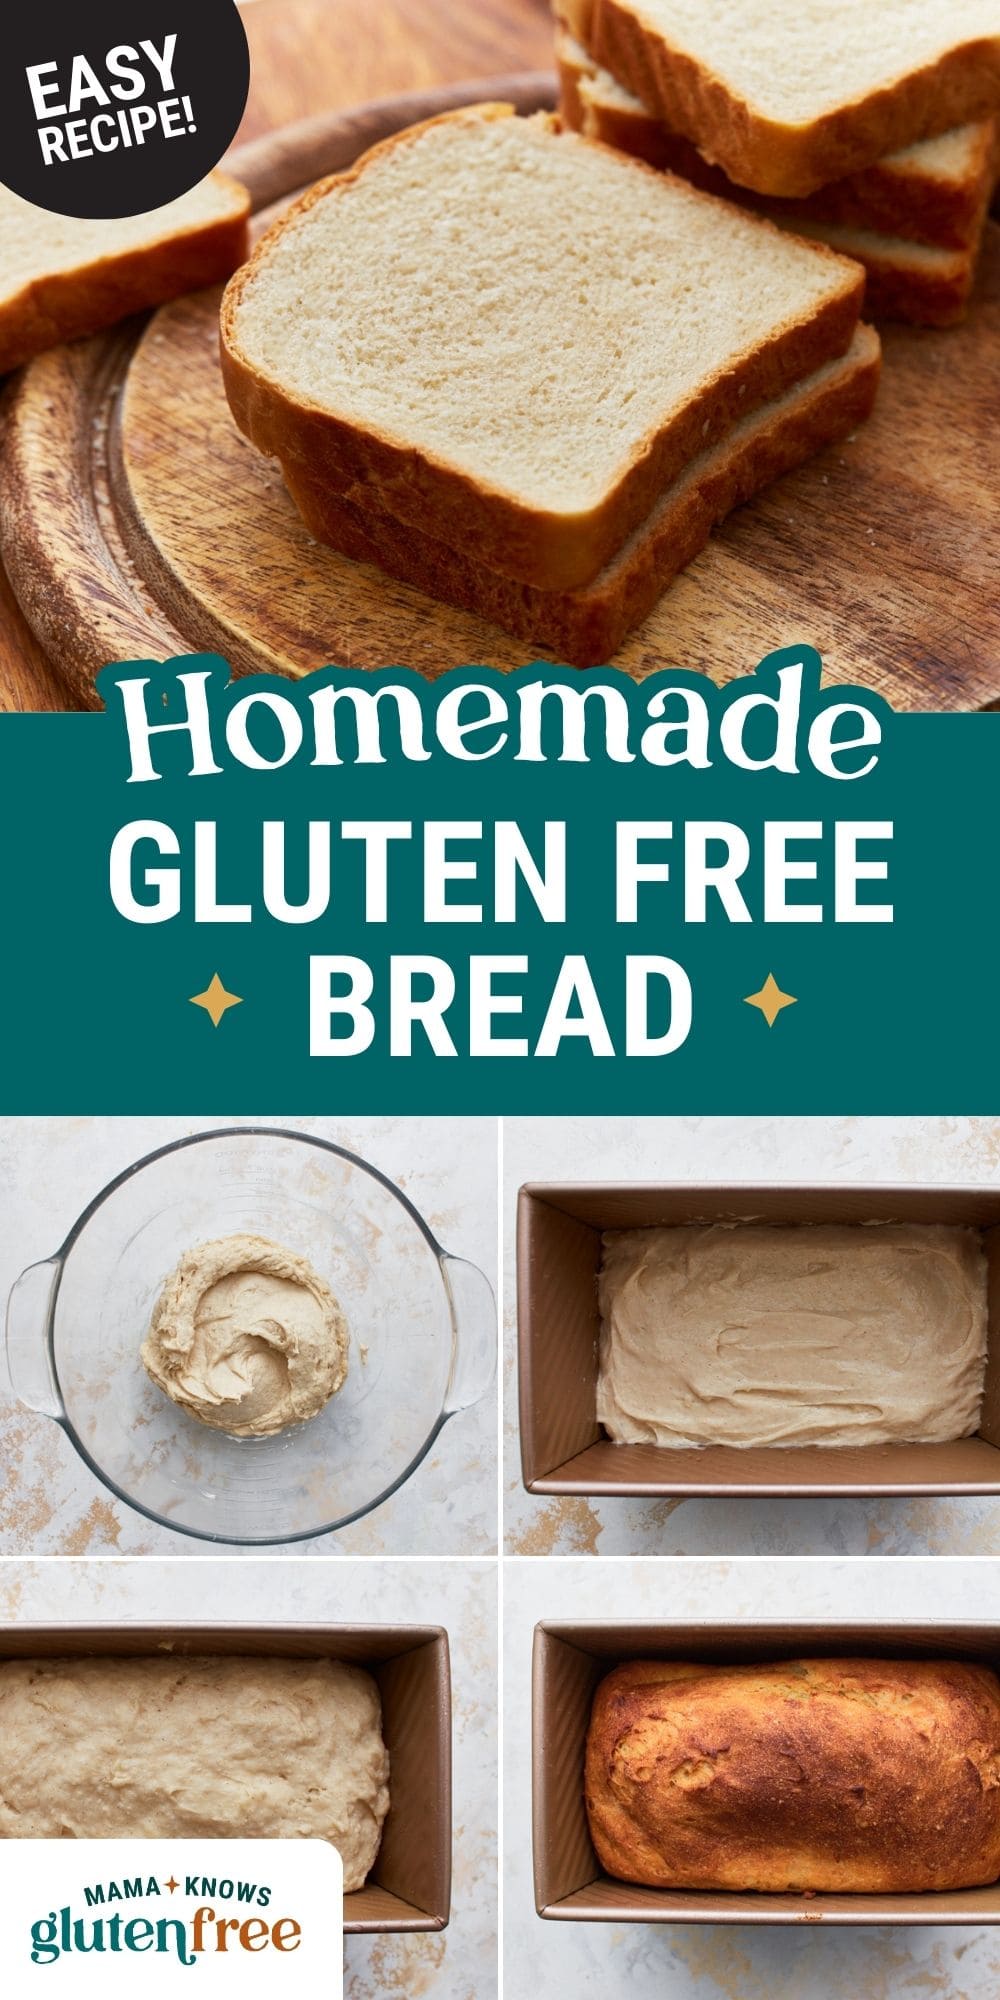
- Add the gluten-free flour, baking powder, and instant yeast to a large bowl and stir to combine the ingredients.
- Add the olive oil, honey, and apple cider vinegar, and warm water to the flour mixture and mix on low for 1 minute. If you are using a stand-up mixer use the paddle attachment, not the dough hook.
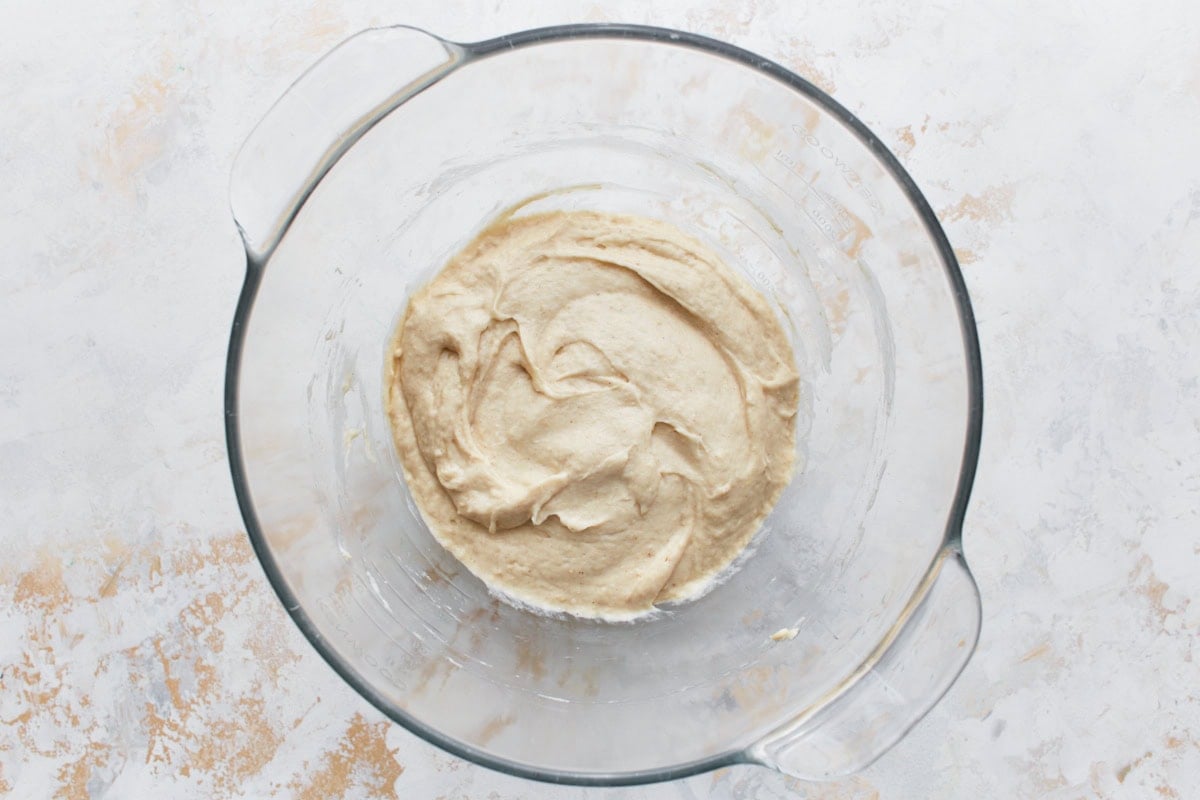
- Add the egg whites and salt to the dough and mix on medium for 1 minute. The dough will look like a thick cake batter.
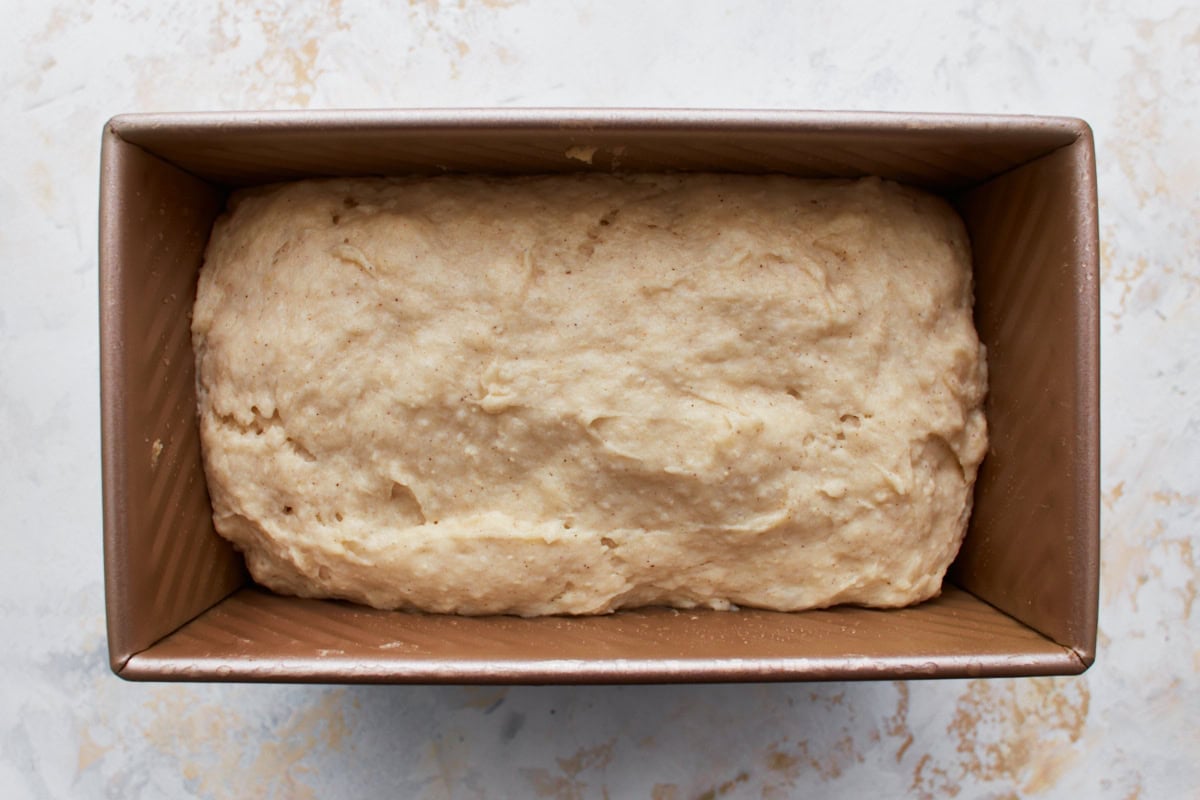
- Pour the dough into a greased 9-inch x 5-inch bread pan or the 9-inch x 4-inch small Pullman loaf pan. I HIGHLY recommend using a 9-inch x 4-inch Small Pullman loaf pan. Spray plastic wrap with gluten-free cooking spray and cover the top of the pan. Cover the pan with a kitchen towel and allow the bread to rise in a warm place for 30 minutes.
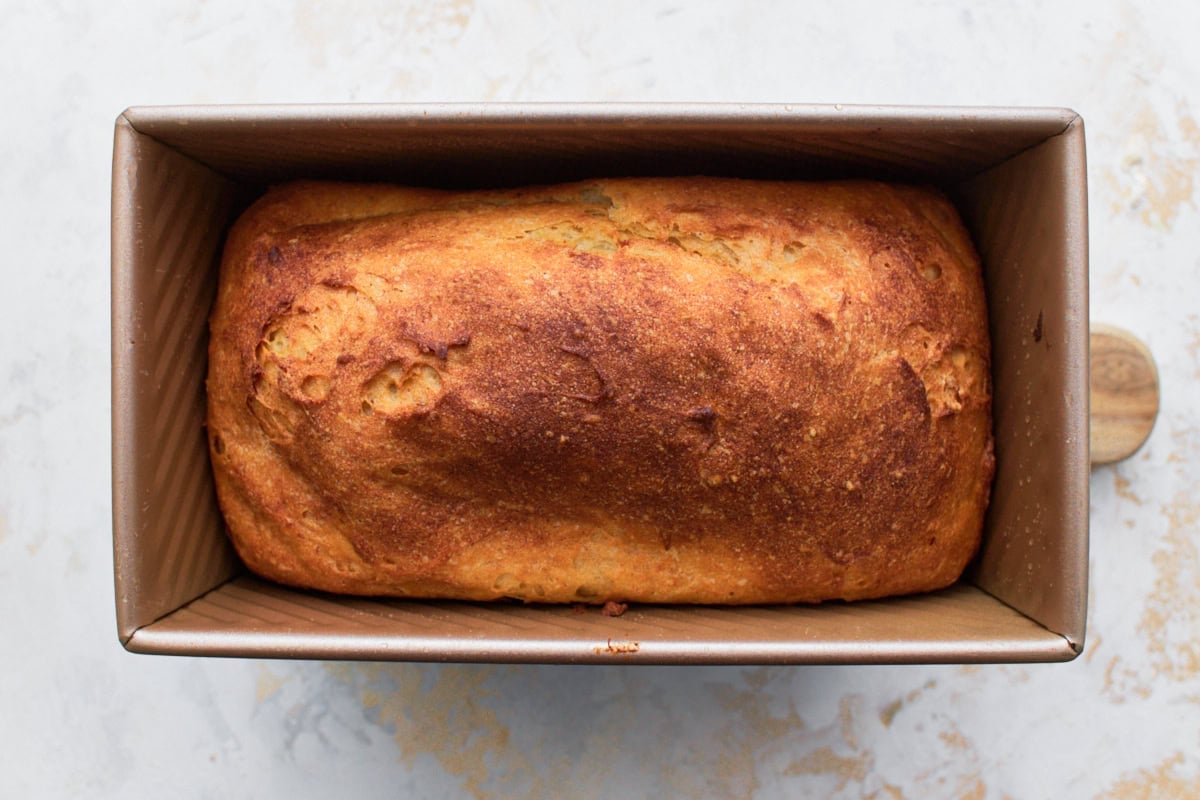
- Place in the oven to bake for 30 minutes at 350°F. Bake the bread on the middle rack horizontally. The bread will be golden brown and have the internal temperature between 205-210ºF.
- Allow the loaf to cool for 10 minutes in the pan. Remove the loaf from the baking pan and place it on a cooling rack. If the bread completely cools in the pan, the steam can get trapped and the loaf can get soggy, especially on the bottom. Allow the bread to cool completely before slicing.
- Use a serrated knife to slice the bread. Using a smooth-blade knife can squish the bread.
- Store the leftover bread in an airtight container, once it’s completely cooled. It may be kept on the counter at room temperature. It is also best not to pre-slice the bread before you store it, so just store the leftover portion of the loaf.
- The bread can be frozen once it is completely cooled. Wrap the loaf tightly in plastic wrap, then wrap it in foil or freezer paper. Place the wrapped loaf in a freezer bag. The bread can be frozen up to 3 months. Thaw the bread in the refrigerator overnight.
Notes
Nutrition
Nutrition information is automatically calculated, so should only be used as an approximation.
How to make Gluten-Free Bread Step-by-Step
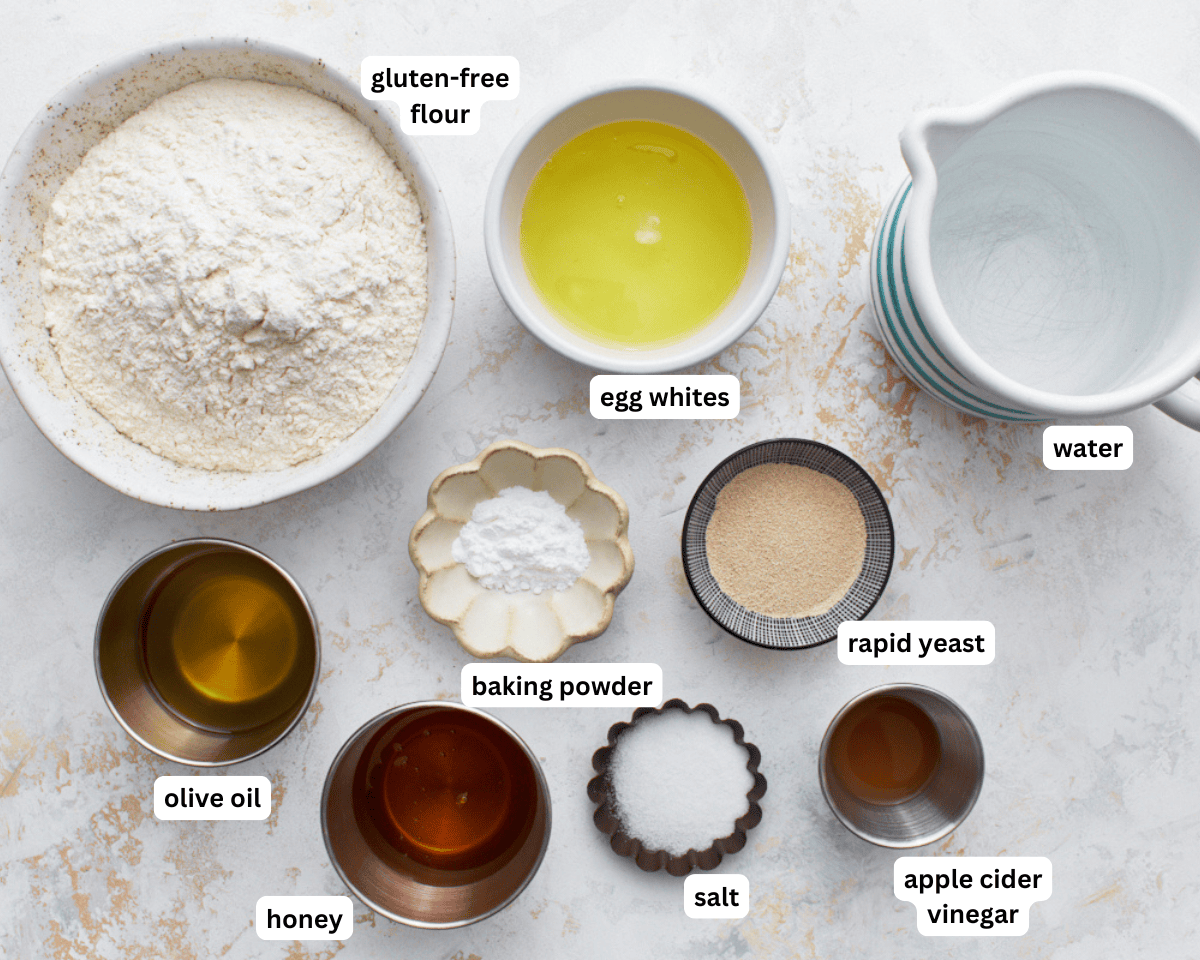
Gather your ingredients.

Spray a 9-inch x 5-inch bread pan with gluten-free cooking spray. Using a large bowl, add 2 ½ cups gluten-free flour, 1 tsp baking powder, and 1 packet of instant yeast. Stir to combine the ingredients fully.
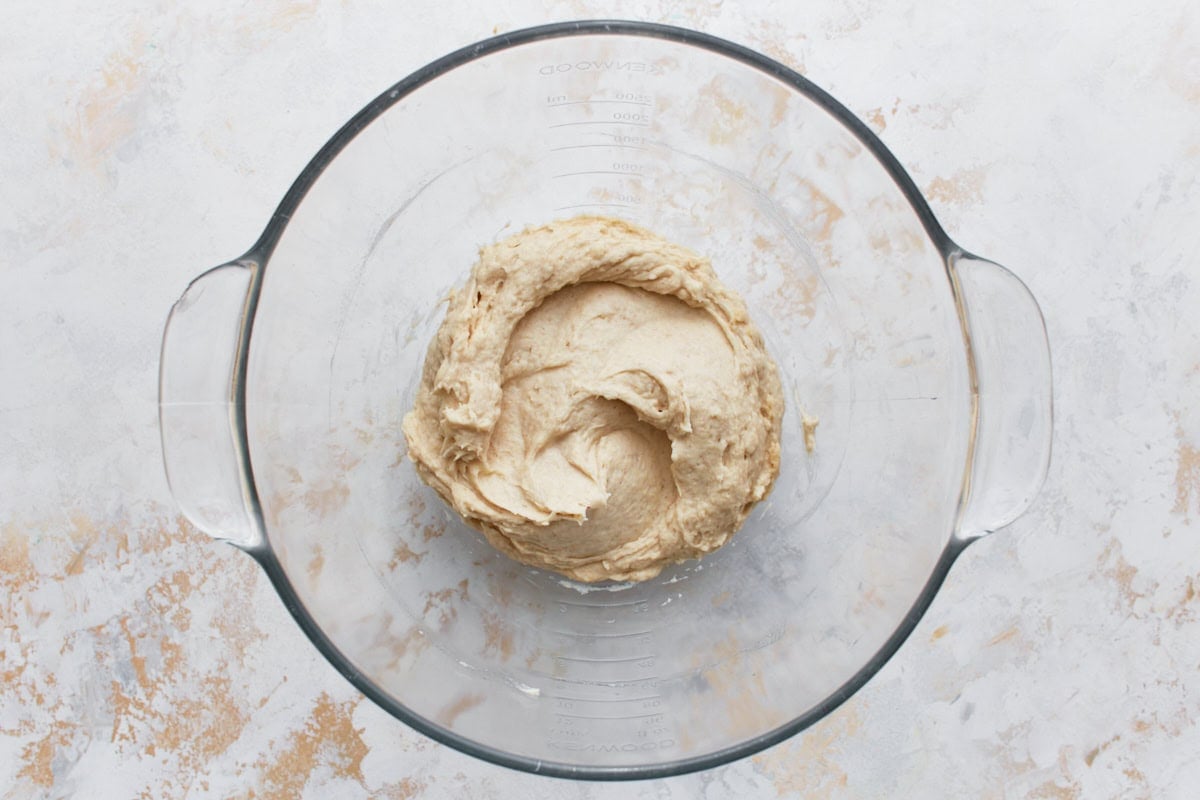
Make the dough: Add 3 large egg whites and 1 tsp salt to the dough and mix on medium speed for 1 minute. The dough should look like a thick cake batter.
Pour the gluten-free dough into the greased 9” x 5” bread pan. Place greased plastic wrap over the pan and drape a kitchen towel on top.

Proof dough: Set the dough aside in a warm area to proof for 30 minutes to rise.
Bake: Once proofed, place the bread pan on the middle rack horizontally. Bake at 350 degrees F for 30 minutes. The bread should be golden brown and reach an internal temperature between 205-210 degrees F.
Let the loaf cool for 10 minutes, remove it from the loaf pan, and place it on a cooling rack. Let the loaf cool completely before slicing.
Making it in a bread machine
Even though I developed this gluten-free bread recipe to be an oven-baked recipe, I also tested it in my bread machine. Just swap out these ingredients for the ingredients in my gluten-free bread machine recipe and follow the recipe’s directions. I always recommend using a bread machine that has a gluten-free setting.
Serving Suggestions
This is an everyday gluten-free bread recipe. I make this sandwich bread for my family every week to enjoy for morning toast and sandwiches like my homemade Uncrustables.
Storage Instructions
Store the leftover bread in an airtight container once it’s completely cooled. It may be kept on the counter at room temperature. It is also best not to pre-slice the bread before you store it, so just store the left-over portion of the loaf.
Place the wrapped loaf in a freezer bag. The bread can be frozen for up to 3 months. Thaw the bread in the refrigerator overnight.
More Gluten-Free Bread Recipes
- Gluten-Free Pita Bread: If you love baking simple gluten-free breads like this easy loaf, try this gluten-free pita bread. These soft, fluffy pockets are perfect for stuffing with sandwiches, wraps, or dipping into hummus and sauces.
- Gluten-Free Garlic Bread: Once you’ve mastered easy gluten-free bread, turn it into gluten-free garlic bread. It’s buttery, garlicky, and crisp around the edges—perfect for serving alongside pasta, soups, or salads.
- Gluten-Free Baguette: For a bakery-style option, try this gluten-free baguette. It bakes up with a crisp crust and soft interior, making it perfect for sandwiches, crostini, or slicing alongside dinner.


I make this weekly now! This recipe was my first ever bread recipe and it is so simple and turns out so good!!
The best gluten free loaf I have made. The loaf rose to well above the tin in the oven and is soft in texture. I mixed the ingredients by hand and the dough was just as described. I thought there would be too much liquid but that was not the case. I used a supermarket brand flour because that was all I had access to. I think it is the egg whites that make the difference, I have never used them in gluten free bread. Super happy with the recipe it was so easy to make with no unusual ingredients.
Is it OK to use a regular hand mixer? I do not have a stand mixer.
Hi Terrie, yes that’s fine.
This is definitely my go to gluten free bread recipe! I have made it several times and it has never failed! I am making two loaves now as a gift for a gluten free friend. Looking great, as usual. The recipe is very easy too.
It… Had… Holes… 😩
Oh my gosh I’ve made so many dense brick loaves of gf bread lol, this was light and soft and fluffy and it had air bubble holes which was thrilling !! My only problem was that while baking it rose over the bread pan. The flavor is quite good too! Im in love if I can get it to not spill over 💖
Hi Tonya, We love this so much, holes are everything in a gluten-free loaf! The good news is that spilling over is actually a sign your bread rose beautifully, so your yeast and technique are working perfectly. The fix is simple: we highly recommend using the 9×4 inch small Pullman loaf pan instead of a standard 9×5 inch pan. It gives the dough more structure and keeps it from spreading out and over the sides as it rises. That should solve the overflow and give you a gorgeous tall loaf every time.
BEST gluten free bread I have ever had!!
This recipe has perfect flavor light bread recipe.
Although I have one question. It was very difficult to make sandwiches with because it fell apart. What could do differently to make it more firm. I follow the directions to a T.
Would adding psyllium to the recipe make it more firm.
Hi Danny, Adding psyllium husk powder is something you could try, but we haven’t tested it in this recipe so we can’t guarantee the results. It is commonly used in gluten-free baking as a binder and may help give the bread more structure, but it could also affect the texture and crumb. If you do try it, start with just 1 teaspoon added to your dry ingredients and work up to 2 teaspoons if needed. We’d love to hear how it turns out!
I made this and let it proof twice. The first didnt do much. The second was much better. After putting dough in oven it failed to rise as shown in your picture. Very disappointed
Hi Brian, I’m sorry the bread didn’t rise as expected—that’s definitely frustrating, especially after taking the time for both proofs.
Gluten-free breads can be a bit sensitive, and rise can vary quite a bit depending on factors like yeast freshness, dough temperature, and even the humidity in your kitchen. The second rise being better is a good sign that your yeast was active, so it may be that the dough needed a slightly warmer environment or a bit more time during the final proof to fully expand before baking.
Why can’t you do things properly by giving weights of the ingredients, instead of stupid volume measurements. Professional bakers always use weighed ingredients, it is far more reliable and repeatable than the judgemental method of getting the right volume.
Hi Steve, we provide both. If you click on the Metric button it has all the weights.
What can substitute the egg whites for if I want this to be egg free?
Hi Brandy, we haven’t tested this recipe with an egg white substitute.