Gluten-Free Brownies
Published
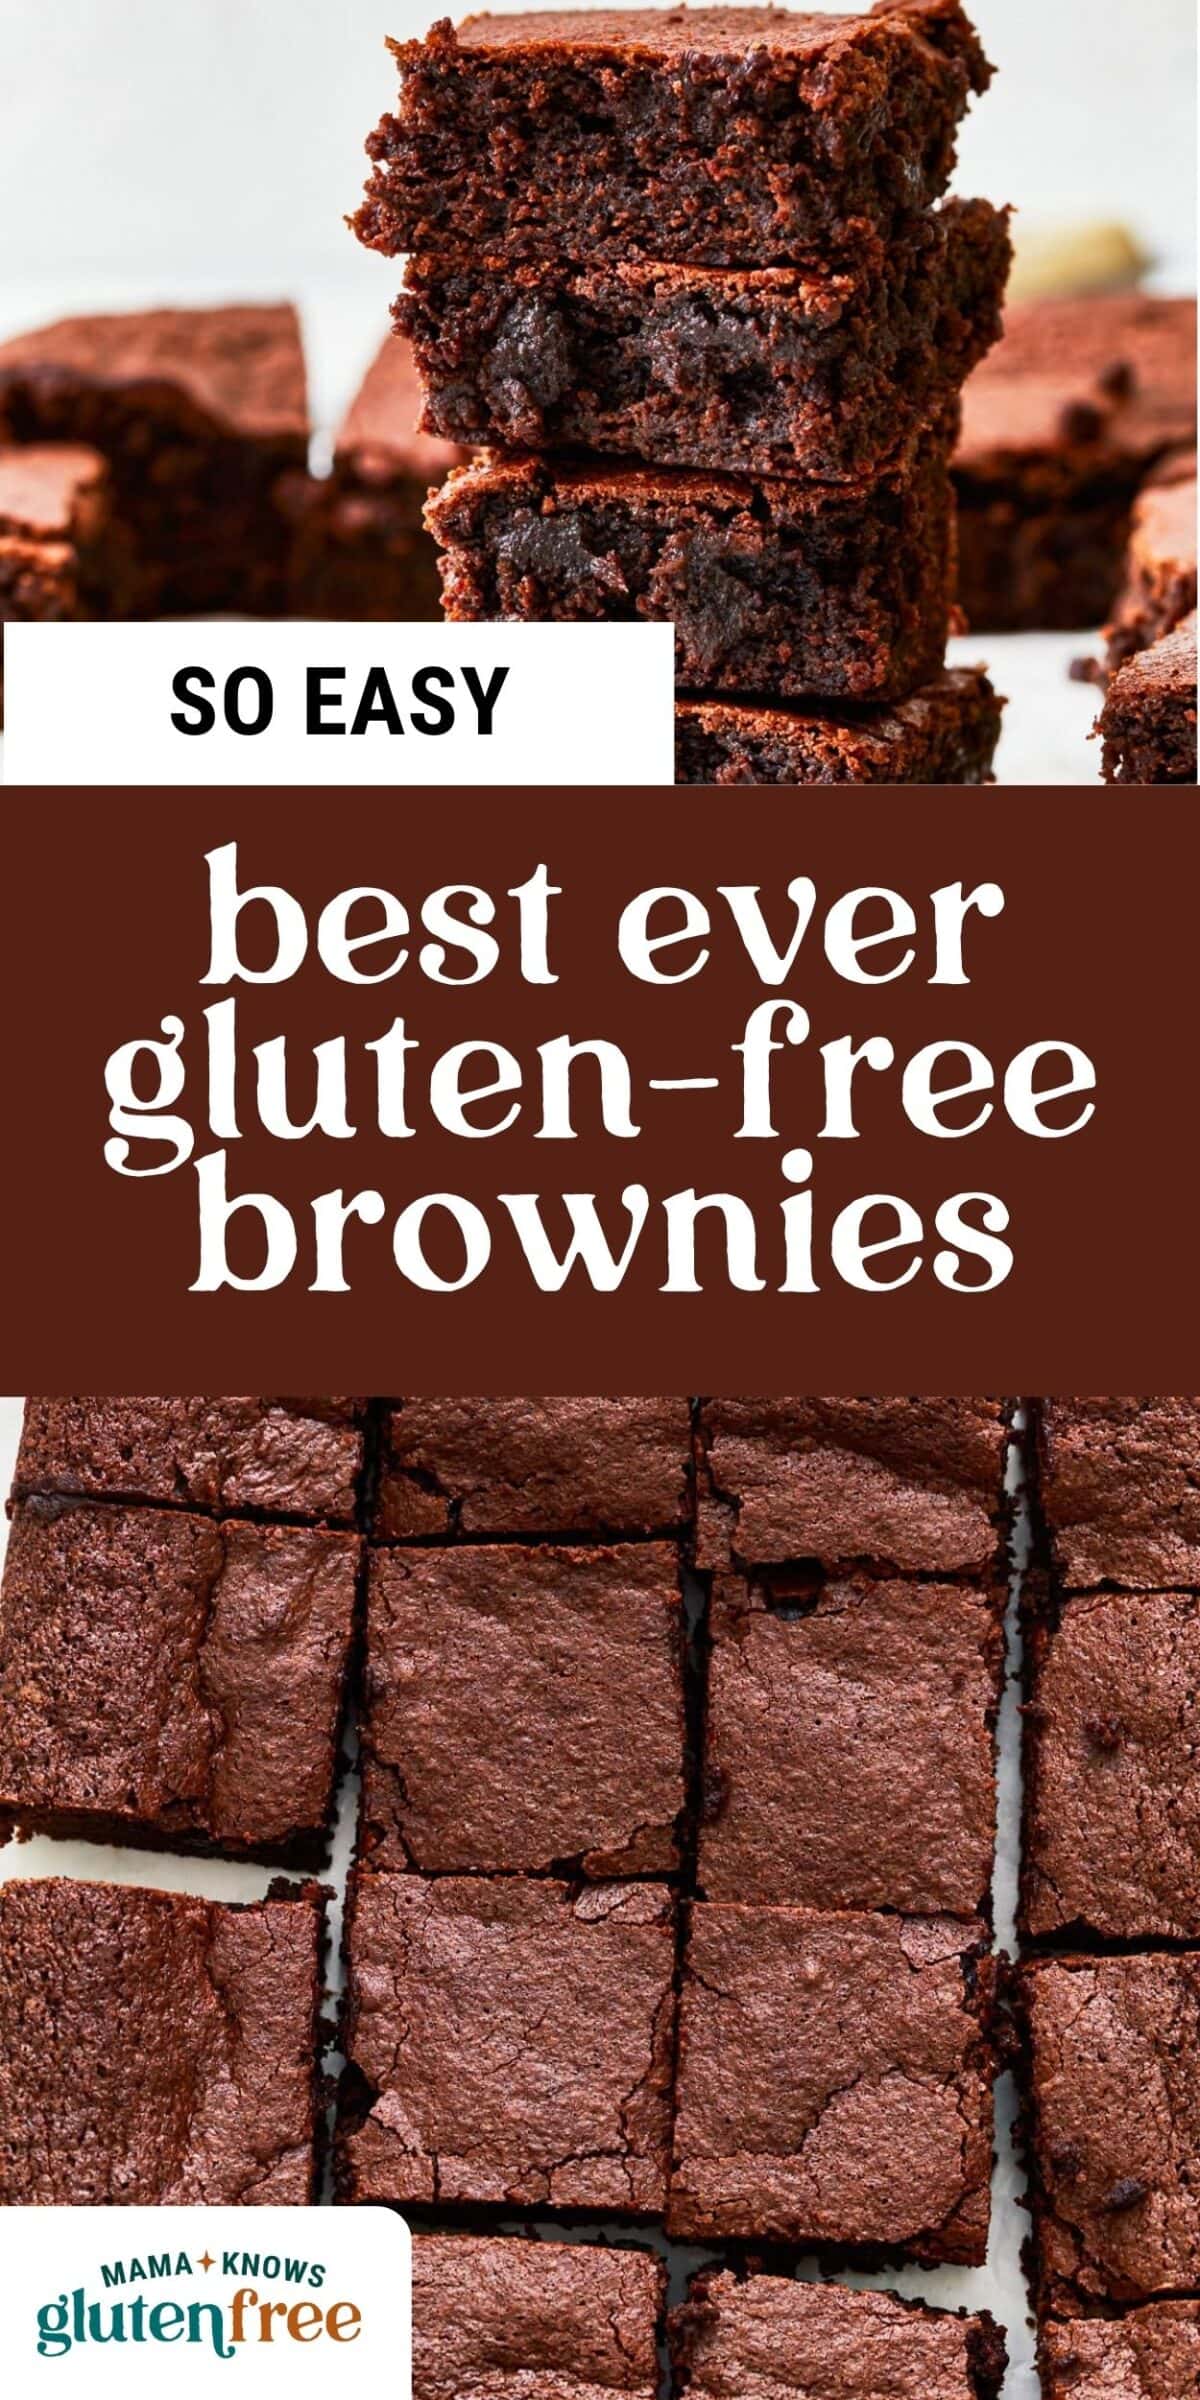
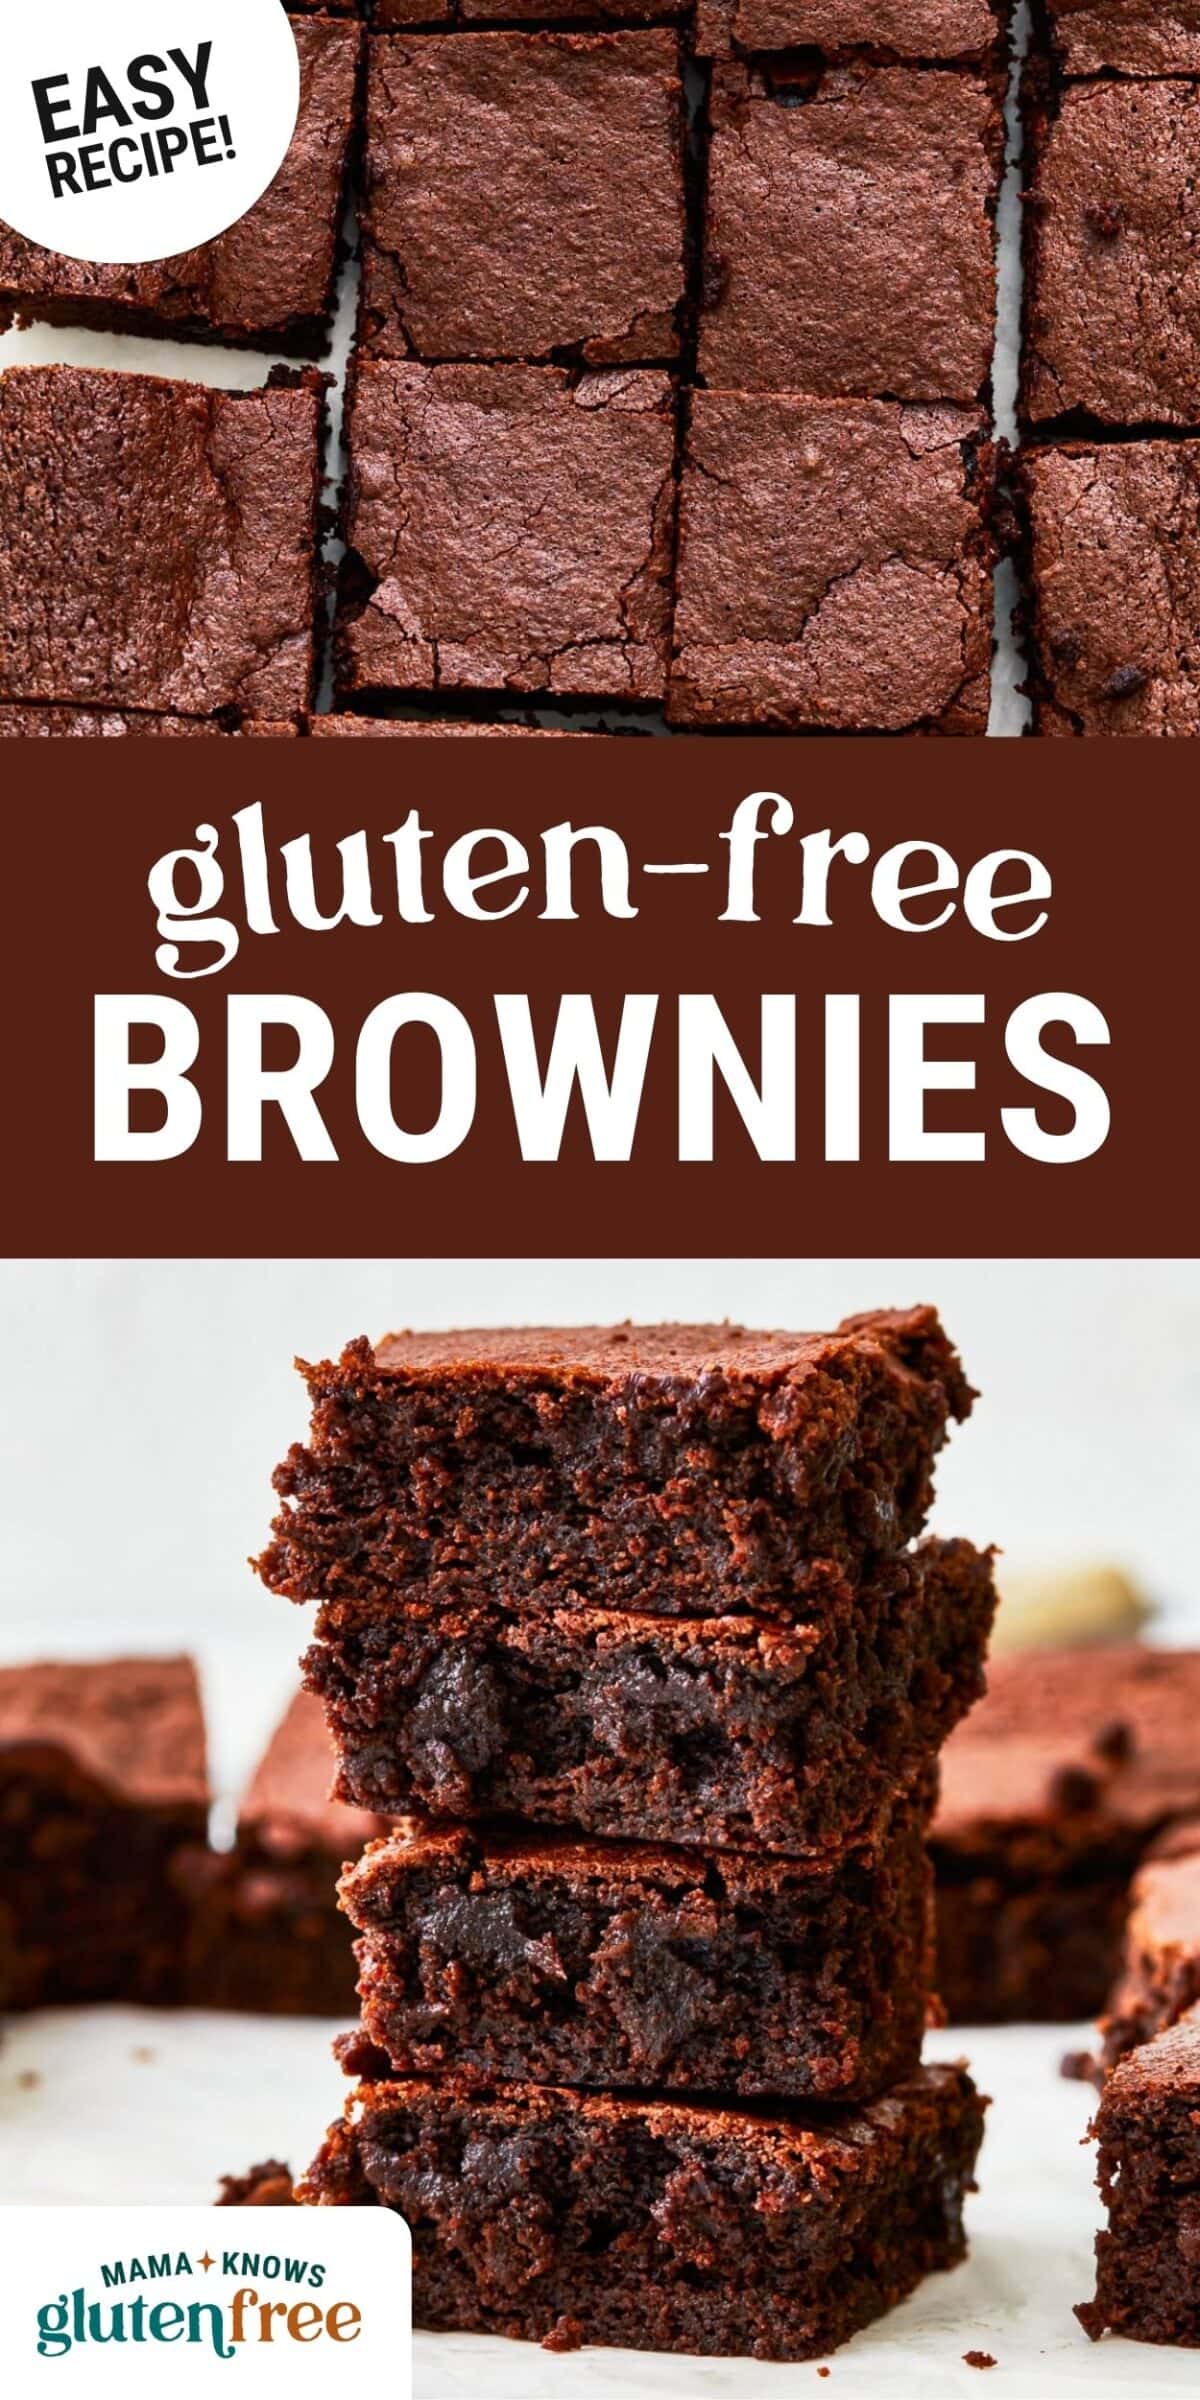
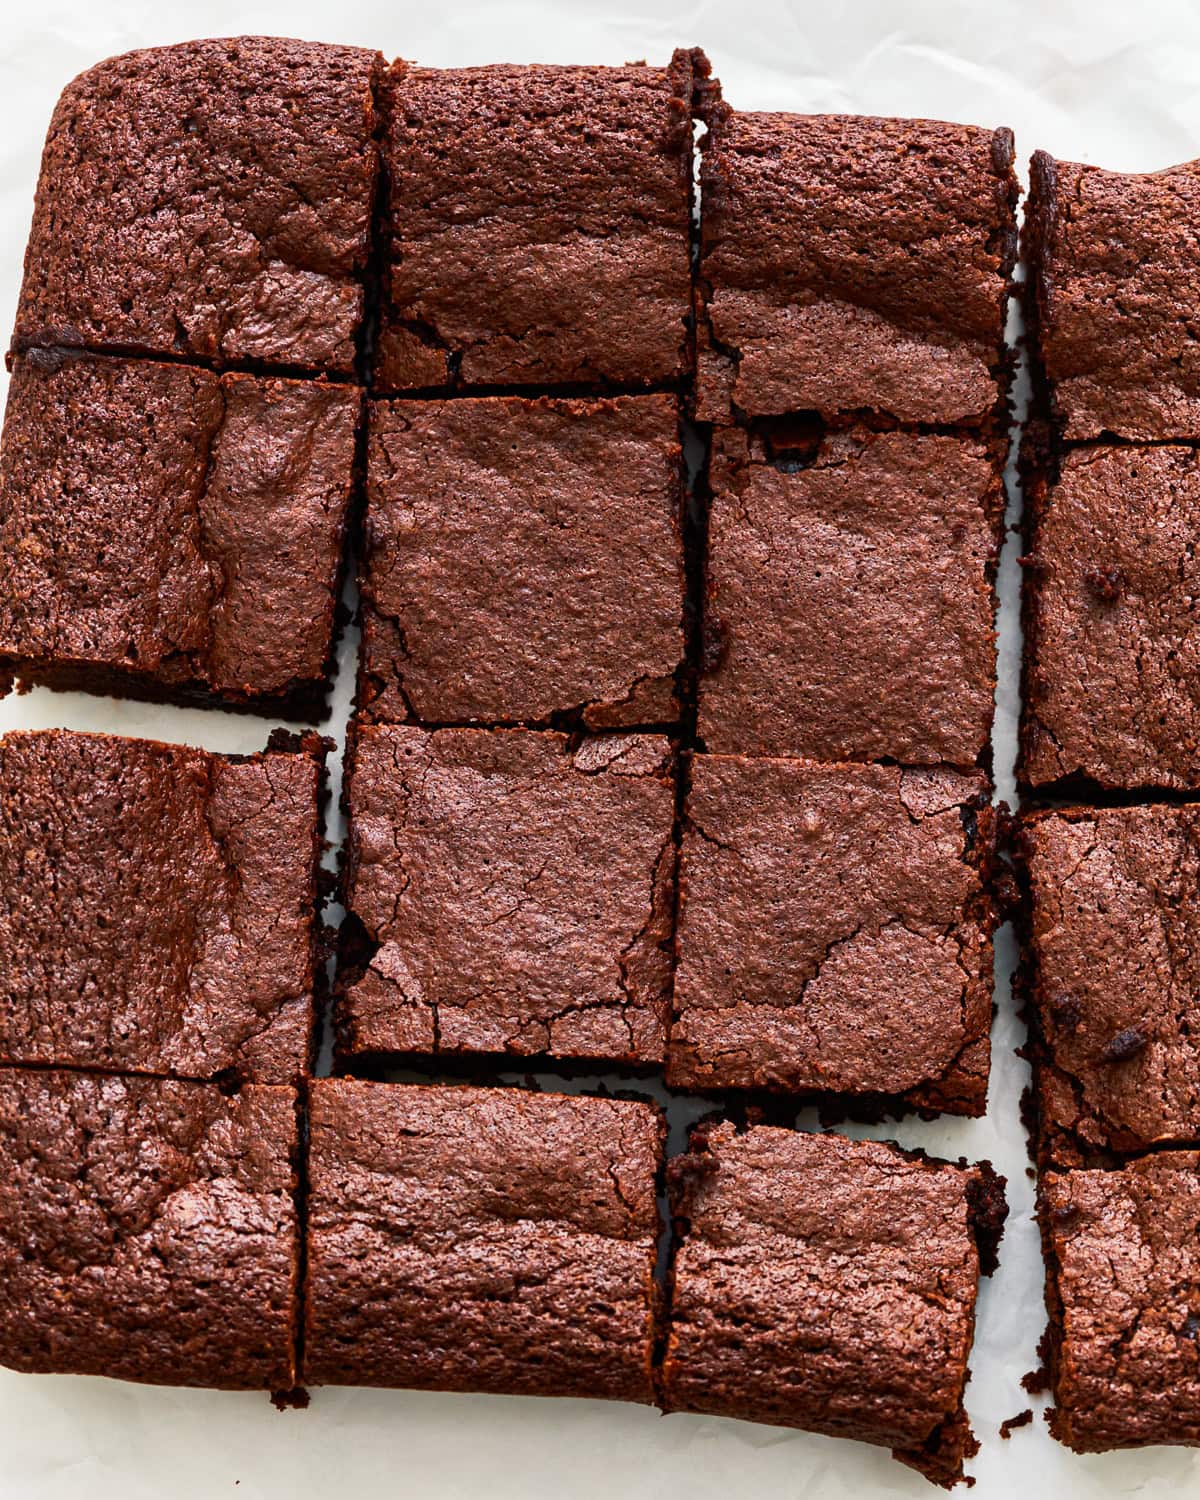
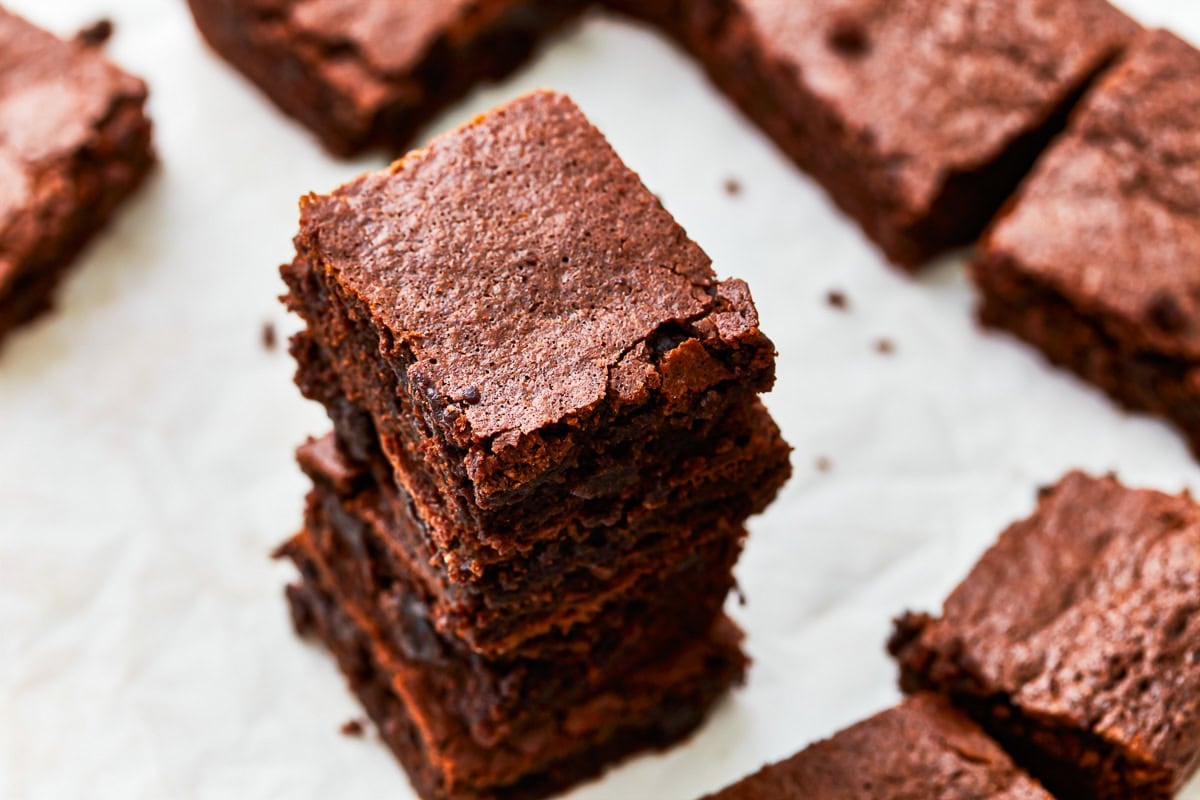
If you are a chocolate lover like me, you are going to be taken to chocolate heaven when you bite into these gluten-free brownies! I like brownies to have a flaky crust and be light like a cake but also chewy inside. But most of all, I want to taste the chocolate. These are the ultimate easy, gluten-free brownies made from scratch. Seriously, you are not going to want to buy a gluten-free brownie mix again!

Gluten-Free Brownie Recipe
There is something just magical about brownies. For any chocolate lover, it’s an easy chocolate dessert that can be made in a little over 30 minutes.
Better than box-mix, these homemade gluten-free brownies are fudgy, chewy, and soft. I promise you won’t go back to your favorite gluten-free boxed brownie mix when you see how easy it is to make gluten-free brownies from scratch! These brownies truly are a one-bowl wonder recipe, you don’t even need a mixer!
Ingredients
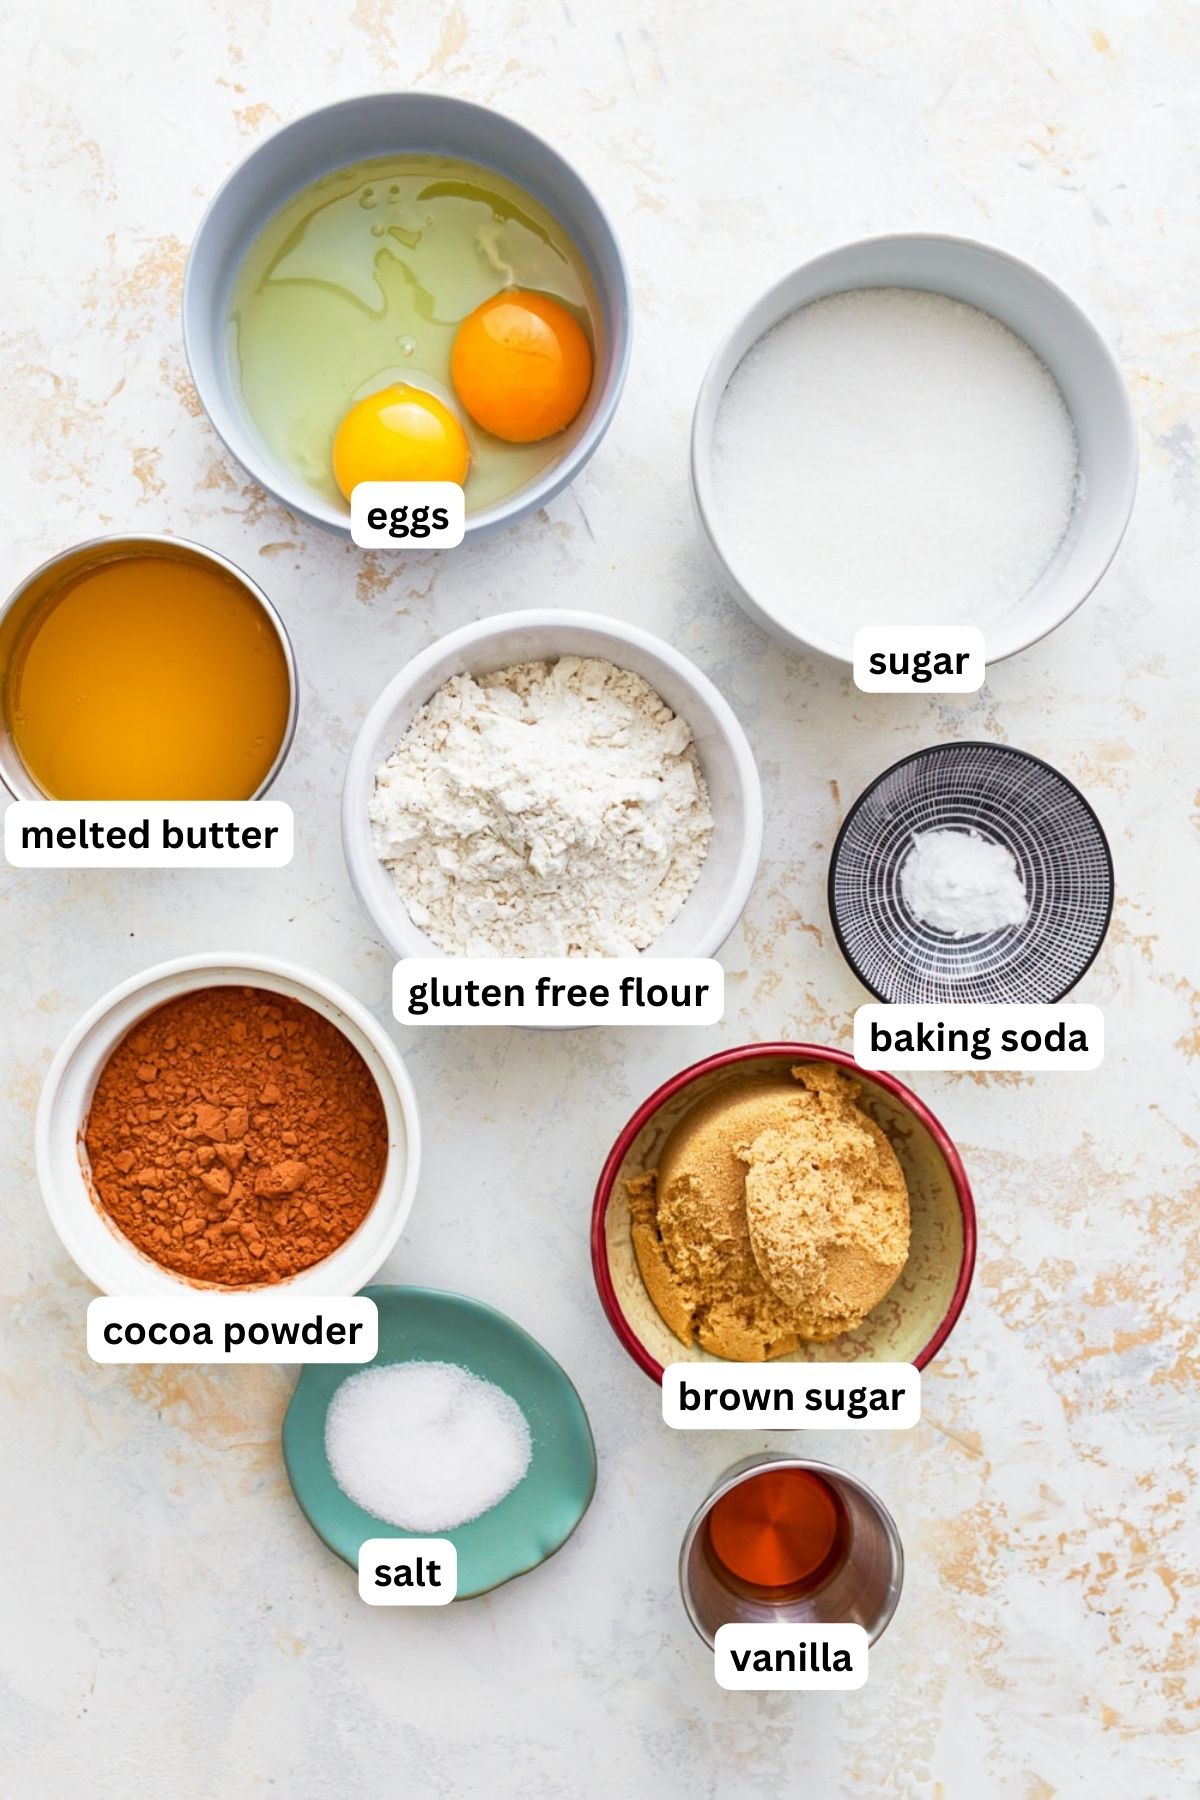
- Unsalted Butter: Makes these brownies rich and tender. For a dairy-free option, use Smart Balance butter.
- Sugar: I used a combination of granulated white sugar and brown sugar to create moist and sweet brownies.
- Eggs: Help give the brownies structure.
- Pure Vanilla Extract: Enhances the sweetness of the brownies.
- Gluten-Free All-Purpose Flour with Xanthan Gum: I like Pillsbury gluten-free. Not all gluten-free flours are created equal. You may experience different baking results depending on the gluten-free flour blend you choose.
- Cocoa Powder: Adds rich chocolate flavor to the brownies.
- Baking Soda: Helps the brownies rise so they aren’t too dense.
- Salt: Enhances the chocolate flavor of the brownies.
Tips and Suggestions
- So make sure to check the ingredients of your gluten-free flour and not to add any extra xanthan gum to your flour if it already includes it. If you do, you will get gummy brownies!
- The best way to measure gluten-free flour is the “spoon & level” method. Using a spoon, scoop the flour into the measuring cup. After you’ve spooned the flour into the measuring cup, use the back of a knife to level off the top of the measuring cup.
Should I Use A Metal Or Glass Pan?
I like to bake brownies in a glass pan. Glass pans provide better heat distribution, which leads to more evenly baked brownies. Metal pans tend to produce a firm, but chewy brownie. Metal pans also heat up quickly and you will have to watch your brownies to keep them from over-baking.
Can I Add Mix-Ins?
Yes, add your favorite mix-ins like chocolate chips, M&M’s, or peanut butter swirls.
Storage Instructions
Store leftover gluten-free brownies in an airtight container at room temperature for up to 3 days or in the refrigerator for up to 1 week. You can freeze the brownies once they are completely cooled. Wrap tightly in plastic wrap or foil and place them in a freezer bag to store for up to 3 months. When ready to serve, thaw at room temperature for a few hours or in the refrigerator overnight.
More Gluten-Free Brownies and Bars to Try!
- Almond Flour Brownies
- Flourless Brownies
- Gluten-Free Blondies
- Gluten-Free Lemon Bars
- Gluten-Free Granola Bars
Gluten-Free Brownies

Ingredients
- 1/2 cup unsalted butter, melted, Dairy-free use Smart Balance Butter.
- 3/4 cup granulated sugar
- 1/2 cup brown sugar, packed
- 2 large eggs
- 1 tablespoon pure vanilla extract
- 3/4 cup all-purpose gluten-free flour with xanthan gum, I like Pillsbury gluten-free.
- 1/2 cup cocoa powder
- 1/2 teaspoon baking soda
- 1/2 teaspoon salt
Instructions
- Preheat oven to 350ºF.
- Spray the 8×8 square baking pan with gluten-free non-stick cooking spray or line the baking pan with parchment paper and coat the bottom and sides with gluten-free nonstick cooking spray or butter.
- In a large bowl, add melted butter, pure vanilla extract, granulated sugar and brown sugar and mix until fully combined.
- Add in eggs one at a time and mix until fully combined.
- In a medium-sized bowl combine gluten-free flour, cocoa powder, baking soda and salt and whisk together.
- Slowly add the gluten-free flour mixture to the wet ingredients and mix until fully combined and smooth.
- Pour the brownie batter to 8×8 sized baking pan.
- Bake for 30-35 minutes, or until a toothpick inserted into the center comes out just barely clean. The sides of the brownies with start to pull away from the pan. Please watch your brownies because all ovens are different.
- Remove brownies and allow to cool completely. Enjoy!
- Store leftovers in an air-tight container.
Notes
- I like Pillsbury gluten-free flour. Not all gluten-free flours are created equal. You may experience different baking results depending on the gluten-free flour blend you choose.
- The best way to measure gluten-free flour is the “spoon & level” method. Using a spoon, scoop the flour into the measuring cup. After you’ve spooned the flour into the measuring cup, use the back of a knife to level off the top of the measuring cup.
- For the dairy-free option, I used Smart Balance butter.
- To store: Place gluten-free brownies in an airtight container at room temperature for up to 3 days or in the refrigerator for up to 1 week.
- To freeze: Wrap gluten-free brownies tightly in plastic wrap for up to 3 months.
- Mama says, “Please check all of your labels!”
Nutrition
Nutrition information is automatically calculated, so should only be used as an approximation.
How To Make Gluten-Free Brownies Step-by-Step
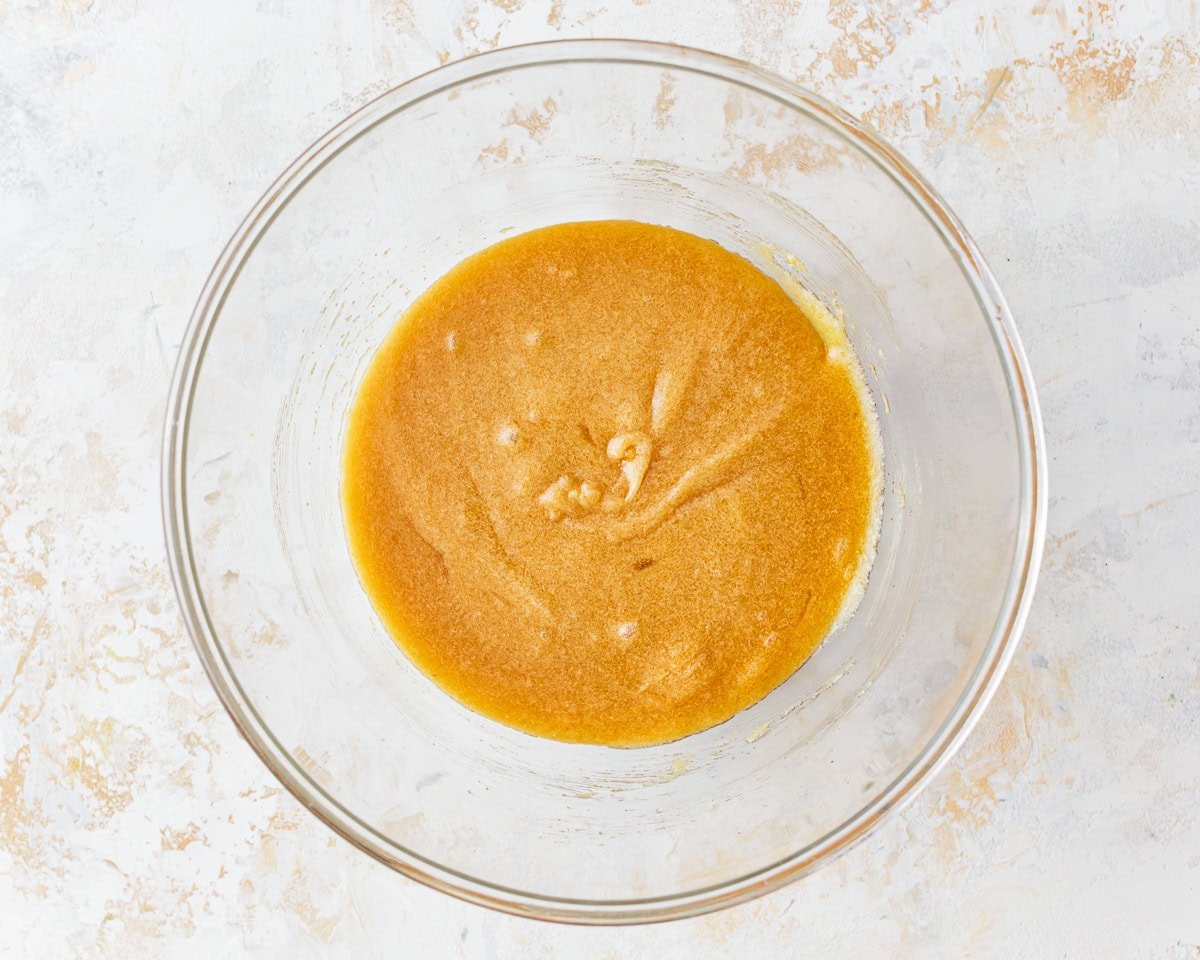
Preheat your oven to 350º F. Spray an 8×8 square baking pan with gluten-free non-stick cooking spray or line the baking pan with parchment paper and coat the bottom and sides with gluten-free nonstick cooking spray or butter. In a large bowl, add 1/2 cup of melted unsalted butter, 1 tablespoon of pure vanilla extract, 3/4 cup of granulated sugar, and 1/2 cup of brown sugar and mix until fully combined. Add in 2 large eggs one at a time and mix until fully combined.

In a medium-sized bowl combine 3/4 cup of gluten-free flour, 1/2 cup of cocoa powder, 1/2 teaspoon of baking soda, and 1/2 teaspoon of salt and whisk together.
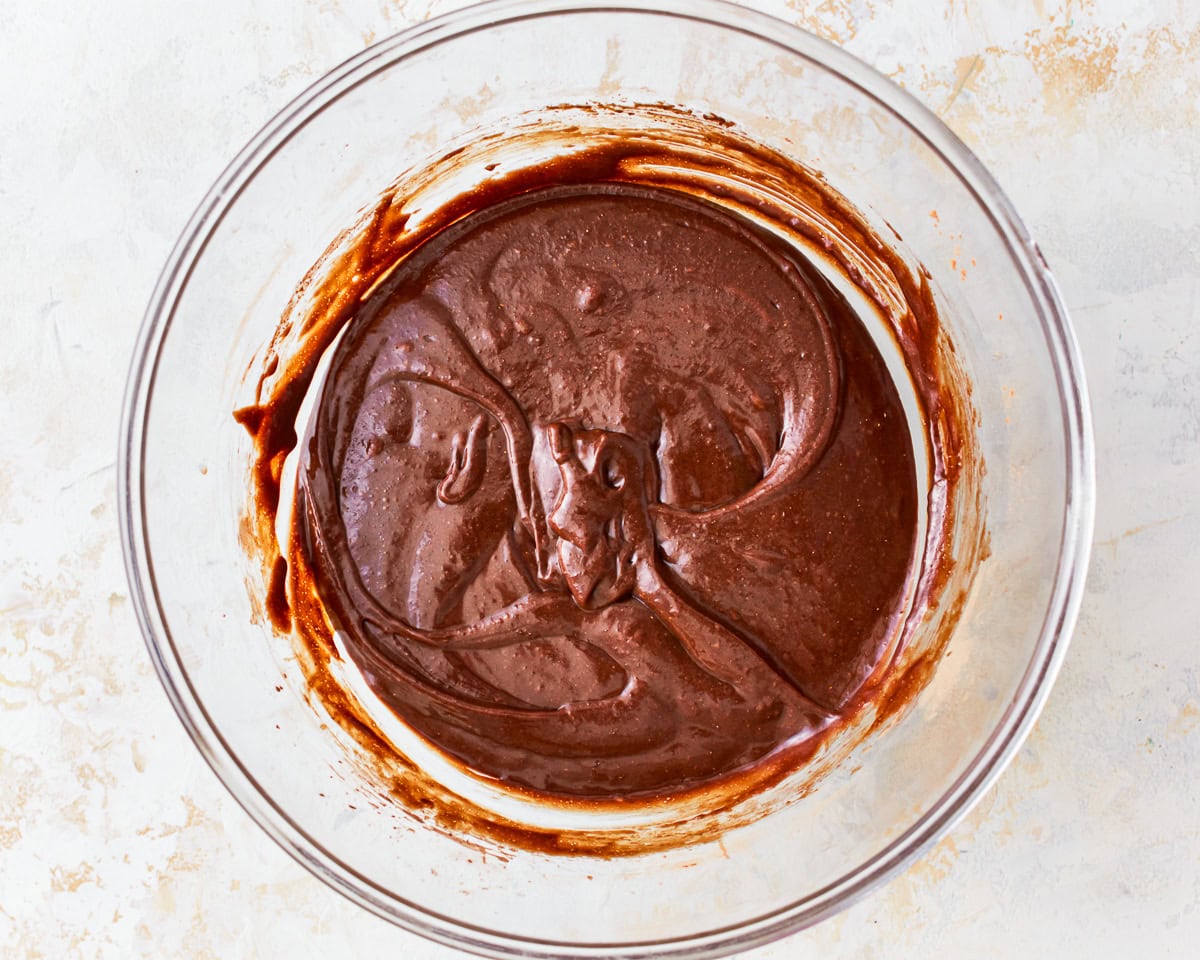
Slowly add the gluten-free flour mixture to the wet ingredients and mix until fully combined and smooth.
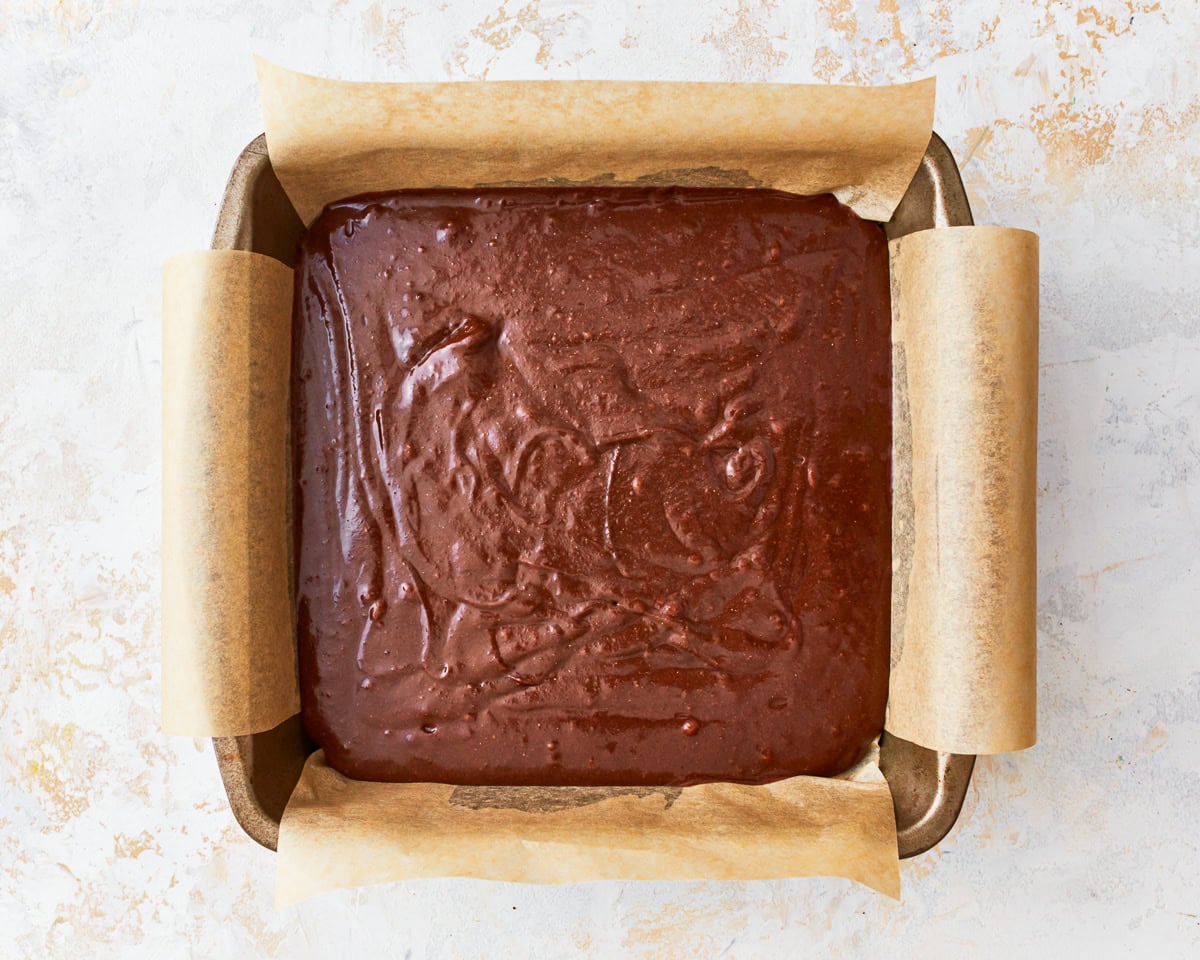
Pour the brownie batter to 8×8 sized baking pan.

Bake for 30-35 minutes, or until a toothpick inserted into the center comes out just barely clean. The sides of the brownies with start to pull away from the pan. Please watch your brownies because all ovens are different. Remove brownies and allow to cool completely. Enjoy!


Very cakey and fairly dry, was hoping for moist brownies.
Hi Jennifer, Thanks for your feedback. I’m sorry they didn’t turn out the way you were hoping! These brownies are designed to be a bit of a balance between fudgy and slightly cake-like, rather than super dense and gooey. That said, a dry or cakey result usually comes down to a couple of small factors:
Bake time: Even a few extra minutes can take brownies from fudgy to dry pretty quickly. Pulling them out when a toothpick has just a few moist crumbs (not fully clean) can help keep them soft.
Flour measuring: With gluten-free flour especially, too much can make brownies more cake-like—spooning and leveling instead of scooping makes a big difference.
Flour blend: Not all gluten-free blends behave the same, and some can produce a drier texture than others.
I’ve made this recipe twice, once using 1/2 butter and 1/2 Smart Balance and the second using canola oil. Both times although it tasted great, it poofed up but then the center fell to 1/2 inch at the end. Otherwise 5 stars.
If I am using xathan gum and all purpose flour, what would the amounts of each be. Thanks! this looks like an amazing recipe
If your flour doesn’t have the xantham gum, add 1/4 tsp xanthan gum
Delicious and gooey
I have baked this… 4 times in the last 2 weeks. I messed up twice – once with double baking soda and one was a mixing order mistake. it didnt matter. this is an excellent recipe. double baking soda turns it into a cake, it was super fluffy and cronchy on the sides.
I put 70% chocolate baking chunks and almonds on top.
The best GF brownie recipe I have ever tried and absolutely loved it! Moist, rich and will be making it again soon!
Here’s mine. Can anyone help me know what I did wrong or what happened ? I used coconut oil otherwise I followed the recipe strictly. I opened the oven to check on them and they were boiling to the top of the pan- violently boiling. And then if you can see in the photo- they barely cover a half inch thick the bottom of the pan.
Ok photo is not working- can’t post a photo.
I’m certain this is a good recipe. I’m sorry I must have done something wrong. Sometimes I get all British Baking Show Overconfident!
Hi Cleo, Unlike butter, coconut oil is 100% fat and melts very quickly, which can make the batter too thin and unstable in the oven. As it heats up, the fat can separate and cause rapid bubbling that looks like boiling, then once the structure tries to set, it collapses and spreads out thin. If you need a dairy-free alternative I’d suggest using a neutral oil like avocado oil, or using a dairy-free butter.
can I use Dutch Process?
Hi Lisa, we haven’t tested it with Dutch process but let us know how it turns out!
Hi Audrey, Thank you for this amazin recipe. My Daughter, granddaughter and myself are all GF, DF & egg free & soy free & the only nut we can have is walnuts. I doubled the recipe, used Bob’s 1:1, applesauce & baking powder for 2 of the eggs, and Bob’s egg replacer for the other 2 eggs. Baked at 325 in a metal pan for 27 minutes. It was a little higher on the sides, but that was how it baked. It tastes amazing. So thank you again for this amazing recipe and all the time you put into testing all these recipes for us.
Delicious! Added semi sweet chocolate chips to batch for intense flavor .