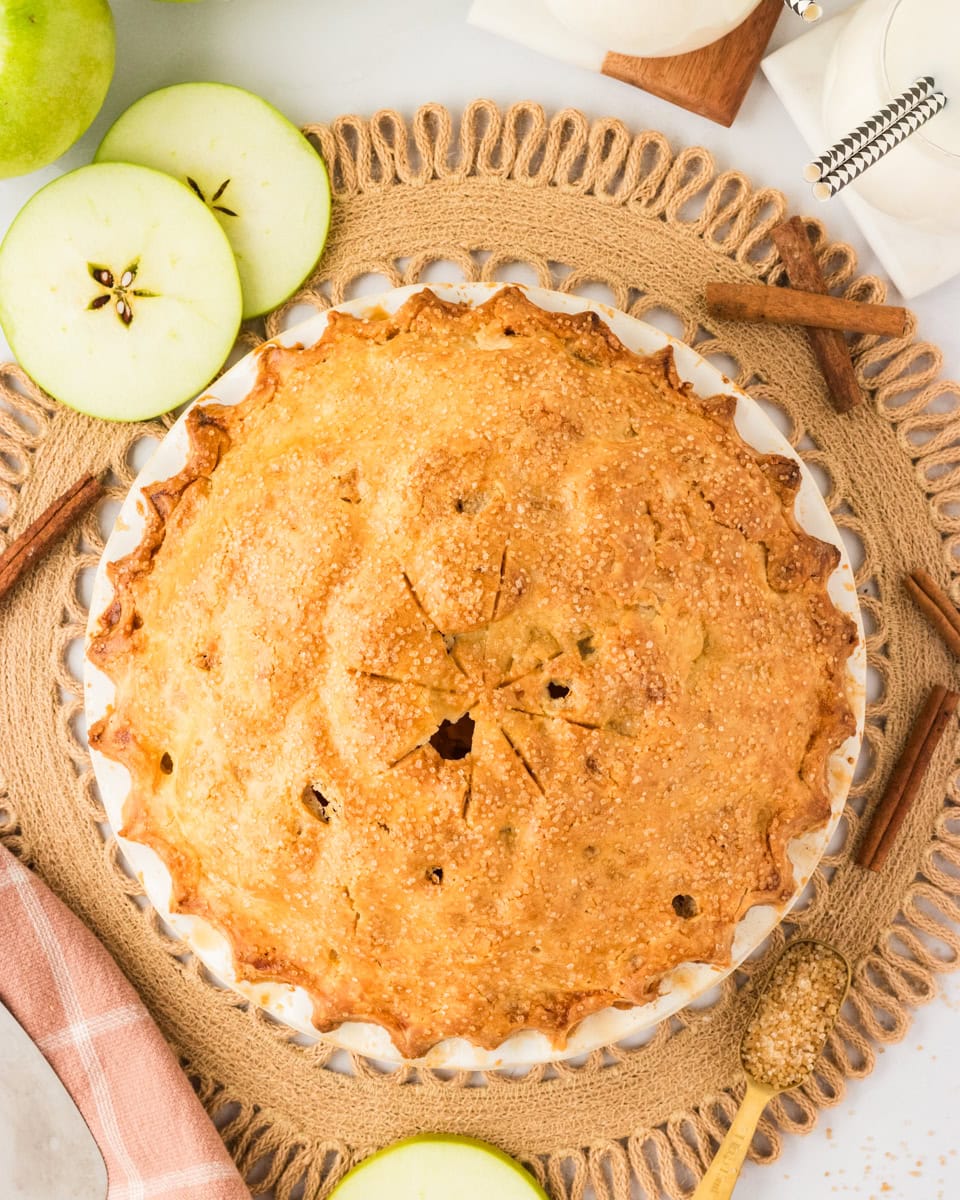
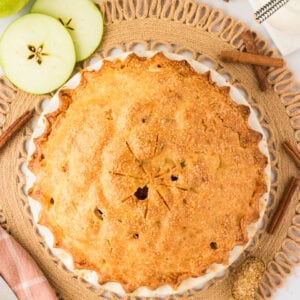
Gluten-Free Apple Pie
Published


I love the way my kitchen fills with the warm, spiced aroma of homemade apple pie baking in the oven. This gluten-free apple pie has all the comforting flavors of a classic apple pie, with a buttery, flaky crust made from gluten-free flour and a cinnamon-spiced apple filling featuring Granny Smith and Honeycrisp apples. Perfect for Thanksgiving, Christmas, or any cozy autumn gathering, this recipe proves that a gluten-free pie crust can be just as delicious as the original.
Easy Gluten-Free Apple Pie Recipe
What I love most about this dessert is how perfectly the textures and flavors come together. The crisp, golden pastry holds up beautifully, creating the ideal base for a rich, spiced fruit center. Every bite is a balance of sweet and tart, with tender layers that bake to perfection—no extra steps needed. Whether I’m making it for a festive gathering or just craving something cozy, this pie always gets compliments, and no one even notices it’s gluten-free.
Gluten-Free Apple Pie
Ingredients
Apple Filling:
- 8 cups peeled apples and sliced apples, Sliced ¼-inch thick (6-8 apples, 3.5 pounds). I used Granny Smith and Honey Crisp apples.
- 1 tablespoon lemon juice
- 1 teaspoon pure vanilla extract
- 1/4 cup gluten-free all-purpose flour, I like Pillsbury gluten-free and Better Batter.
- 1/2 cup granulated sugar
- 1/4 cup brown sugar, packed
- 1 teaspoon ground cinnamon
- 1/8 teaspoon ground nutmeg
- 1/4 teaspoon salt
Gluten-Free Pie Crust
Double my Gluten-Free Crust Recipe
- 1 large egg, whisked, Vegan use dairy-free milk for and omit the water.
- 1 tablespoon water
- 2 tablespoons coarse sugar (optional), Decorators sugar, sugar crystals, or turbinado.
Instructions
Gluten-Free Pie Crust
- Double my gluten-free pie crust recipe. Remove the dough from the bowl and form it into a ball. Cut the dough ball in half then form each half into discs. Wrap each disc with plastic wrap and refrigerate for 1 hour.
Apple Filling
- Place the peeled and sliced apples in a large bowl.
- Add the lemon juice and vanilla to the sliced apples. Stir to combine.
- In a small bowl add the gluten-free flour, granulated sugar, brown sugar, cinnamon, and nutmeg. Stir together until all the ingredients are combined.
- Pour the sugar mixture over the apples and stir until the apples are well coated.
Assemble the Pie
- Preheat the oven to 400°F.
- Roll out the first gluten-free pie dough disc to about an 11-inch circle. Check for the correct size by inverting the pie dish over the dough. The dough should be about 1-2 inches larger than the dish. Place the pie dough into the bottom of a greased 9-inch pie pan.
- Pour the apple filling into the bottom of the dough-lined pie pan.
- Roll out the second gluten-free pie dough disc to about an 11-inch circle.
- Place the second pie dough round over the apple pie filling. Seal the edges of the pie dough. Cut slits into the top center of the pie.
- In a small bowl whisk the egg with a tablespoon of water. Lightly brush the crust with a pastry brush with the egg wash. For the vegan, option brush the top with dairy-free milk. The wash step adds shine and helps the crust brown. Sprinkle the top of the pie with coarse sugar (optional).
Bake the Pie
- Place a baking sheet onto the bottom rack of the oven to catch any juices. Bake the pie on the middle rack at 400°F for 20 minutes, then reduce the oven temperature to 350°F. Continue to bake the pie for 40-50 minutes at 350°F. Check on the pie halfway through the baking time and cover it loosely with foil as needed to prevent the crust from over-browning. You can also Use pie shields to keep the edges of the pie crust from getting too brown. Or make your own pie shield by cutting a circular hole in the center of a large piece of aluminum foil and placing the foil loosely on top of the pie.
- To check for the doneness of the pie, use a cooking thermometer. The pie should be at 195°F degrees. You can also use a knife to pierce the pie. If the apples feel too crunchy, the pie needs more time to bake. Start at 5-10 minute intervals. It often depends on the type of apples you used and how thinly they were sliced.
Serve the Pie
- Allow the pie to cool at room temperature for at least 2 hours before serving. I like to let the pie cool for 1 hour at room temperature and then place it in the refrigerator for 1 hour. Waiting to slice the pie until cooled allows the filling to thicken and prevents soft pie slices. Enjoy!
- Cover with plastic wrap and store the leftover pie at room temperature for up to one day, or in the refrigerator for up to 5 days.
Notes
- For a dairy-free/vegan crust, I use Smart Balance butter and Bob’s Red Mill gluten-free egg replacer.
- Mix different apple varieties, like Granny Smith and Honeycrisp, for the best flavor. Adjust the sugar based on their sweetness.
- If the apples are sliced thick, they may need extra baking time. Use a knife to pierce the pie—if the apples feel too crunchy, continue baking in 5–10 minute intervals until tender.
Nutrition
Nutrition information is automatically calculated, so should only be used as an approximation.
How to Make Gluten-Free Apple Pie Step by Step

Gather the Ingredients: Gather all your ingredients together before starting.

Make the Pie Crust: Double my gluten-free pie crust recipe. Take the dough out of the bowl and shape it into a ball. Cut it in half, then form each piece into a disc. Wrap each disc in plastic wrap and refrigerate for 1 hour.

Make the Filling: Place 8 cups of peeled and sliced apples (about 6–8 apples, 3.5 pounds) in a large bowl. Drizzle with 1 tbsp of lemon juice and 1 tsp of vanilla extract, then stir to combine.

Coat the Apples: In a small bowl, mix 1/4 cup gluten-free all-purpose flour, 1/2 cup granulated sugar, 1/4 cup packed brown sugar, 1 tsp ground cinnamon, and 1/8 tsp ground nutmeg until well combined. Sprinkle the sugar mixture over the apples and stir until evenly coated.

Assemble the Pie: Preheat the oven to 400°F and roll out the first gluten-free pie dough ball into an 11-inch circle. To check the size, invert the pie dish over the dough—it should be 1–2 inches larger than the dish.

Add the Bottom Crust: Place the rolled-out dough into the bottom of a greased 9-inch pie pan.

Fill the Pie: Pour the apple filling into the dough-lined pie pan.

Add the Top Pie Crust: Roll out the second gluten-free pie dough disc into an 11-inch circle. Place the rolled-out dough over the apple filling, then seal the edges. Cut slits in the center of the top crust to allow steam to escape.

Make the Egg Wash: In a small bowl, whisk 1 egg with 1 tbsp of water. Lightly brush the crust with the egg wash using a pastry brush. For a vegan option, use dairy-free milk instead. This step adds shine and helps the crust brown. If desired, sprinkle the top with coarse sugar for added texture and sweetness.

Bake the Pie: Place a baking sheet on the bottom rack of the oven to catch any juices. Bake the pie on the middle rack at 400°F for 20 minutes, then reduce the oven temperature to 350°F. Continue baking for 40–50 minutes at 350°F.

Check the Pie: Check the pie halfway through baking and cover it loosely with foil if needed to prevent the crust from over-browning. You can also use pie shields to protect the edges from getting too dark or make your own by cutting a circular hole in the center of a large piece of aluminum foil and placing it loosely over the pie. To check for doneness, use a cooking thermometer—the pie should reach 195°F. You can also insert a knife into the filling; if the apples feel too firm, bake for an additional 5–10 minutes at a time. Baking time may vary based on the type of apples used and how thinly they were sliced.
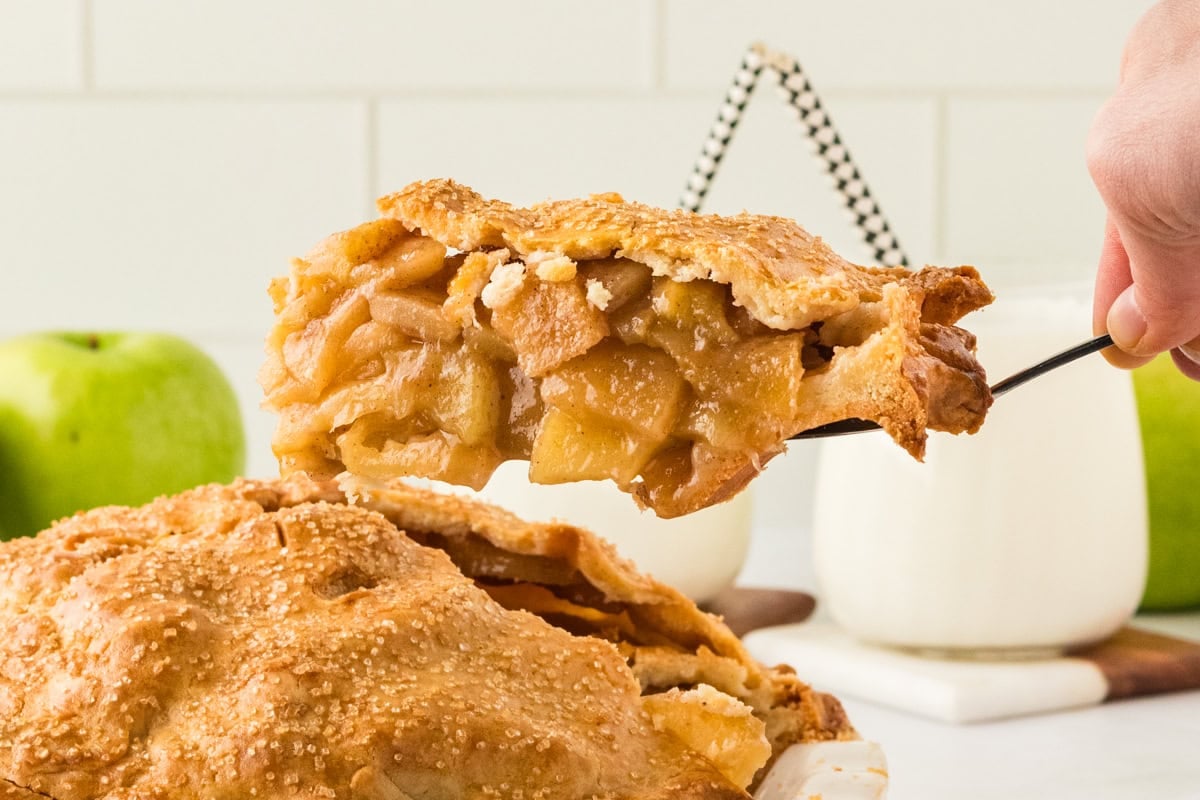
Serve and Enjoy: Let the pie cool at room temperature for at least 2 hours before serving. I like to cool mine at room temperature for 1 hour, then refrigerate for another hour. Allowing the pie to cool fully helps the filling thicken and keeps the slices from falling apart. Enjoy!

Serving Suggestions
I love serving this pie warm with a scoop of vanilla ice cream or a dollop of whipped cream—it just takes it to the next level. If I’m keeping it dairy-free, I go for coconut whipped cream or a scoop of almond milk ice cream. Of course, it’s just as delicious on its own with a hot cup of coffee or tea. However you serve it, let the pie cool completely first. Trust me, it makes all the difference in getting those perfect slices.
Storage Instructions
Cover with plastic wrap and store the leftover pie at room temperature for up to one day or in the refrigerator for up to 5 days.
To freeze the pie, flash-freeze the pie in the freezer. Once the pie is frozen solid, wrap the pie with plastic wrap or foil and place it back into the freezer. It can be frozen for up to 3 months. Defrost in the refrigerator overnight.


You mentioned that the apple pie can be frozen and then thawed overnight, but is this for an uncooked pie or already baked pie?
Hi Susan, I suggest freezing after baking. This keeps the ingredients stable and the apples from releasing water as the defrost and making the crust soggy.
hi thank you I’ve used many recipes and all have been wonderful! Quick question..how long can the dough stay in fridge before using ..can it last 3 days ?
Hi Lucy, You can store the dough disc (wrapped in plastic) in the refrigerator for up to three days. Don’t forget to let it sit at room temperature for 10-15 minutes before rolling.
I made this crust recipe twice and got the exact same result both times: a sticky peanut-butter-like paste. Most of the dough stuck to the wax paper the first time. Second time I was a little more ready for it and was able to add in enough flour so that I had something to work with. But it was quite a bit of flour in order to make it malleable. It seems like adding that much water to begin with is too much. Your dough looks perfect in the picture, of course but it just isn’t working for me.
Prior to being diagnosed I used the Betty Crocker recipe,a standby in my family and it was fool-proof. I have tried to use that and substitute but it doesn’t taste right.
Hi Carolyn, your results may vary depending on the brand of GF flour you use, since each brand has a different blend of ingredients. You may need to add more flour to compensate.
I’m am not exactly a baker, but this was super easy. It was so delicious!!! Thank you!
I make this every holiday and it is a hit every time!! I have never made pie before and it was super simple to make and an easy recipe to follow. This will be a recipe I keep going to for years and years!
Hi! I am planning on making this recipe in a few days, but I was wondering if I could lattice the pie using the crust recipe provided instead of just putting the crust on top and slitting it.
Sure!
How thick should the pie crust be?
We recommend aiming for 1/8 inch thick!
This was the best apple pie filling I have ever made. It was perfection.
The pie was delicious. I’m so thankful that I found you website. Now I’m eagerly awaiting the arrival of your cookbook!