Gluten-Free Coconut Cream Pie
Published
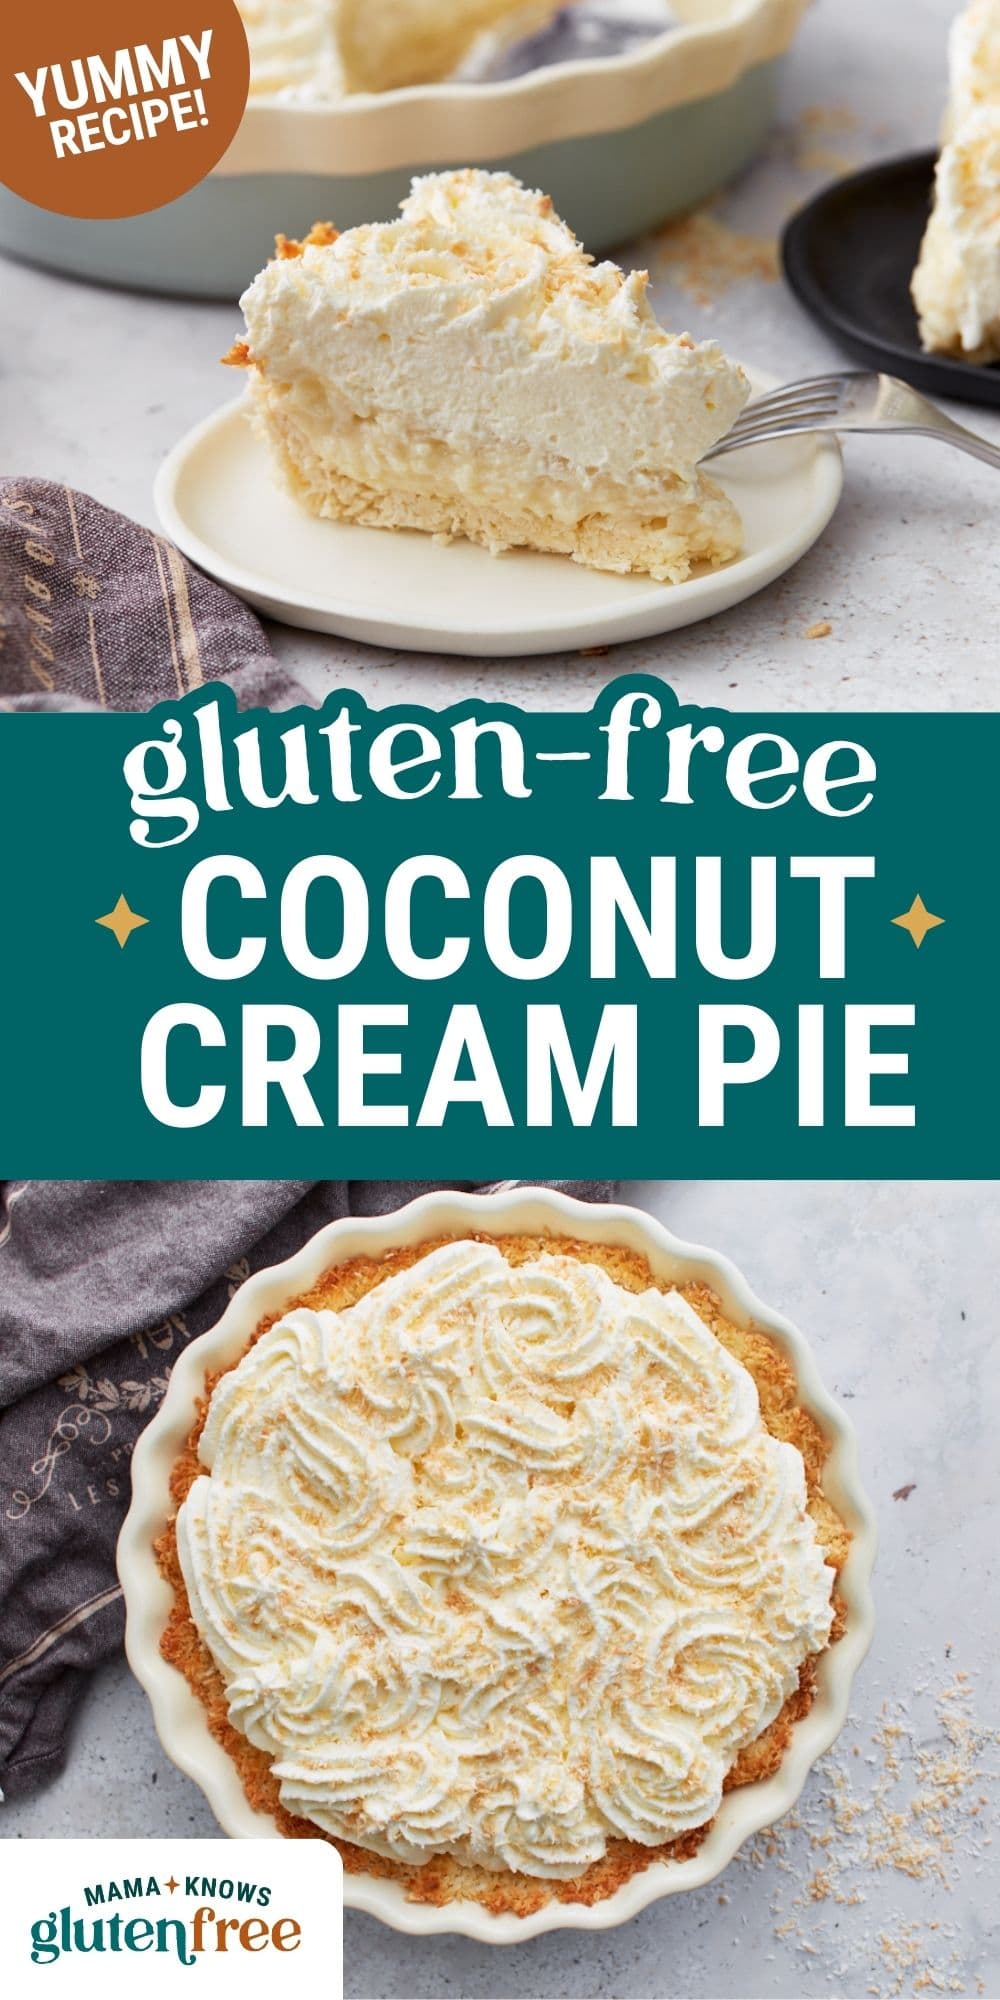
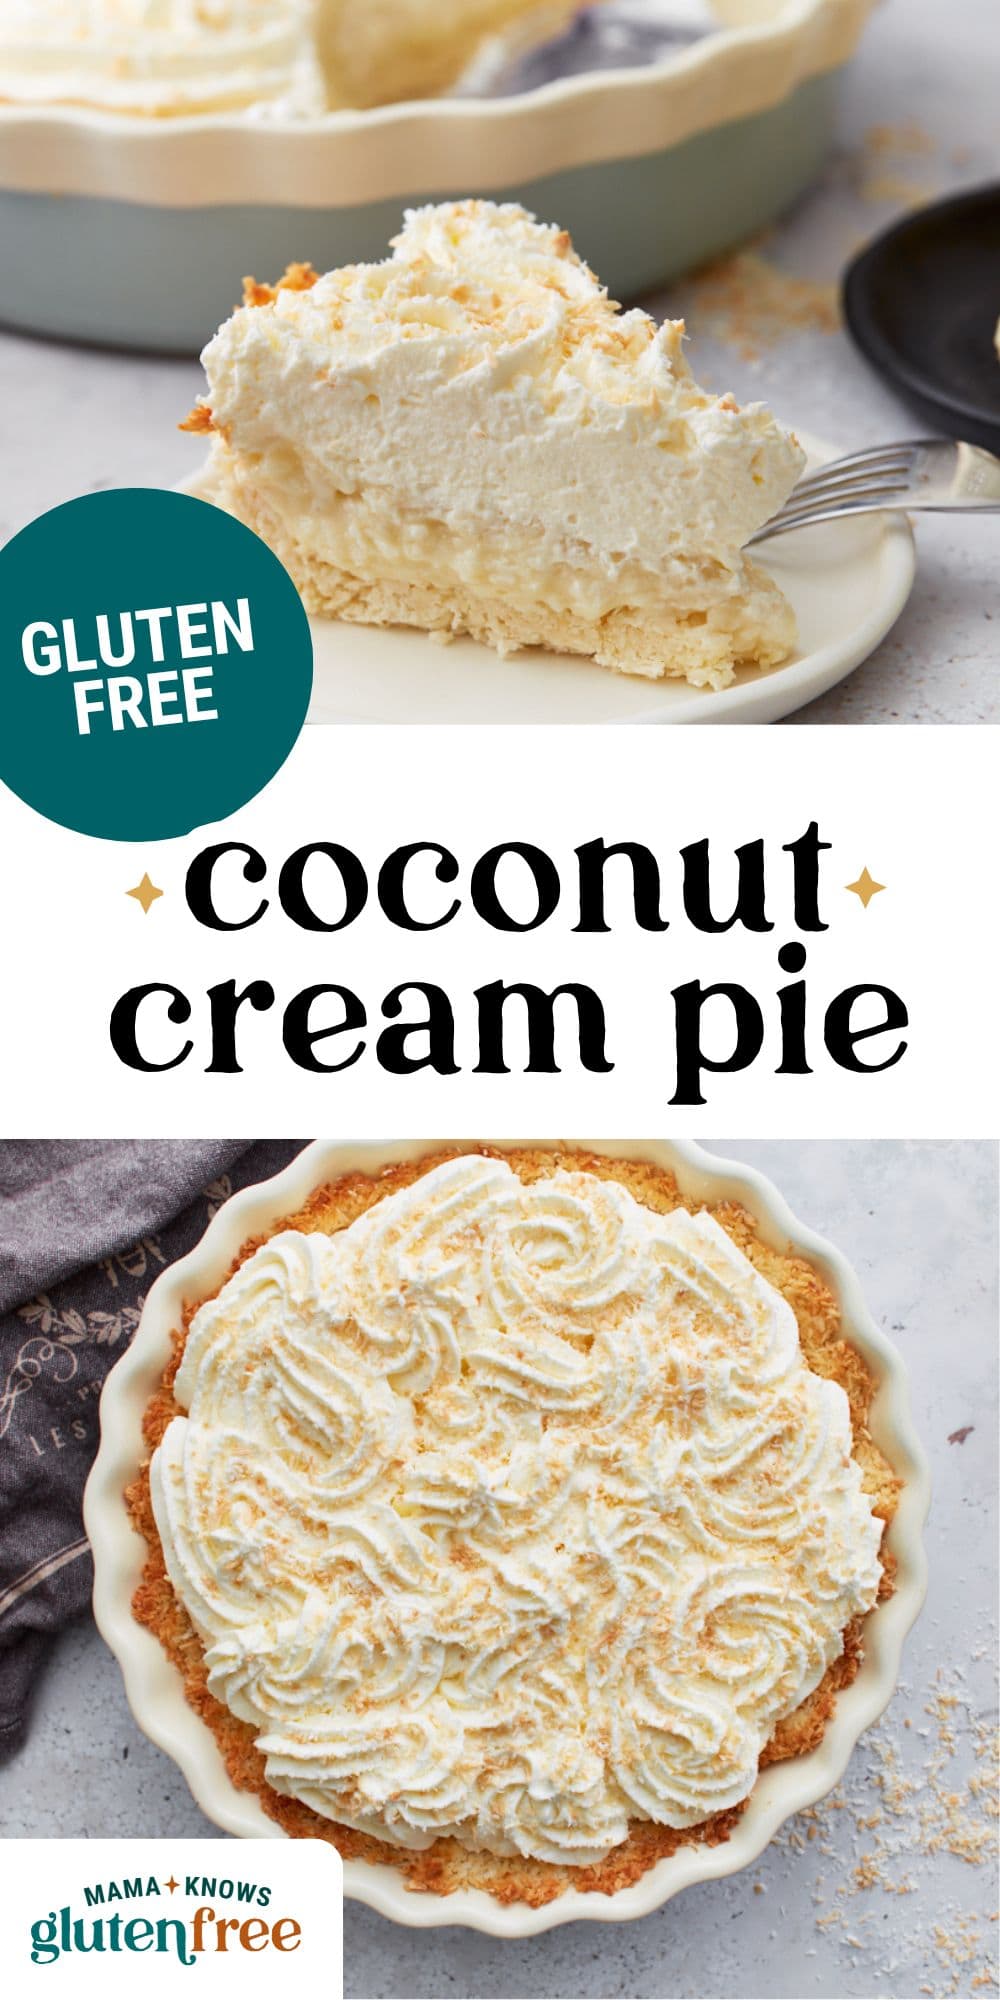
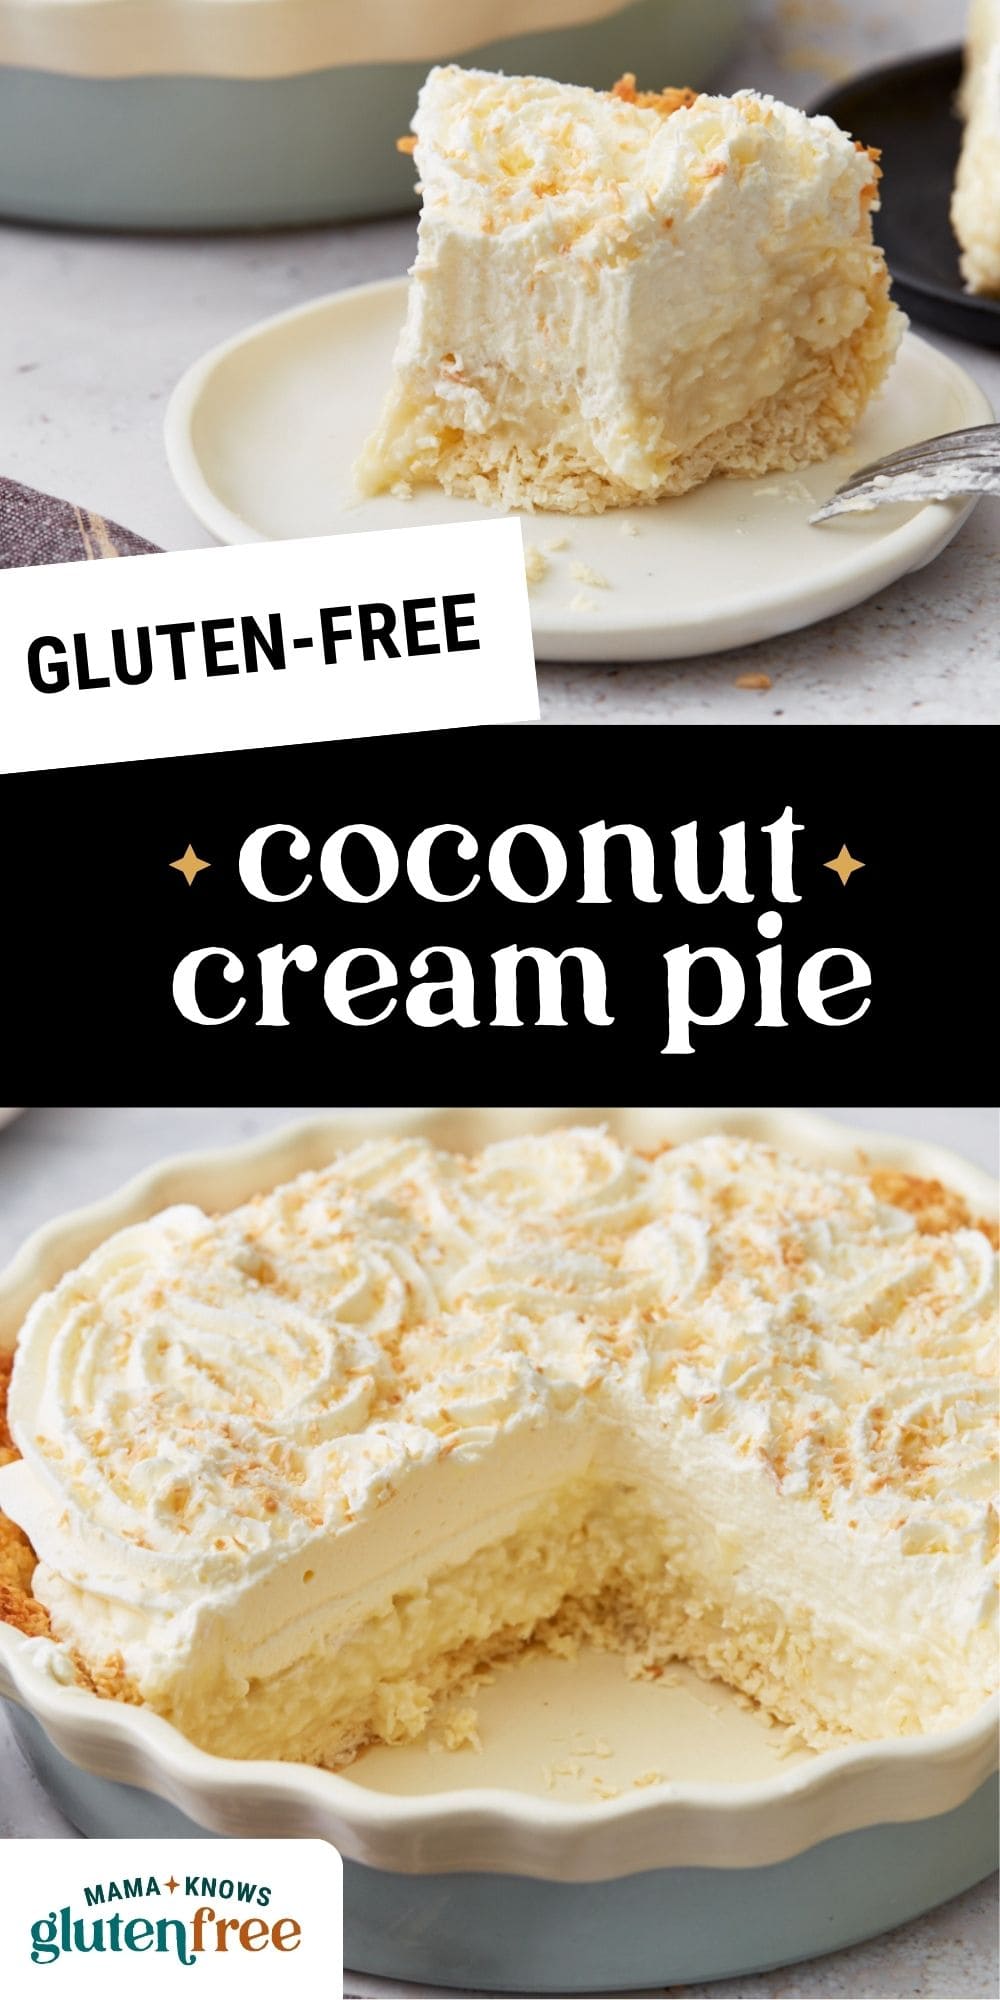
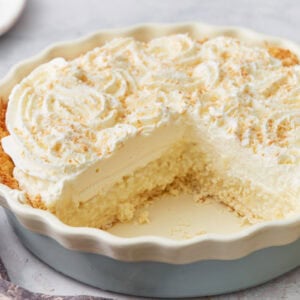
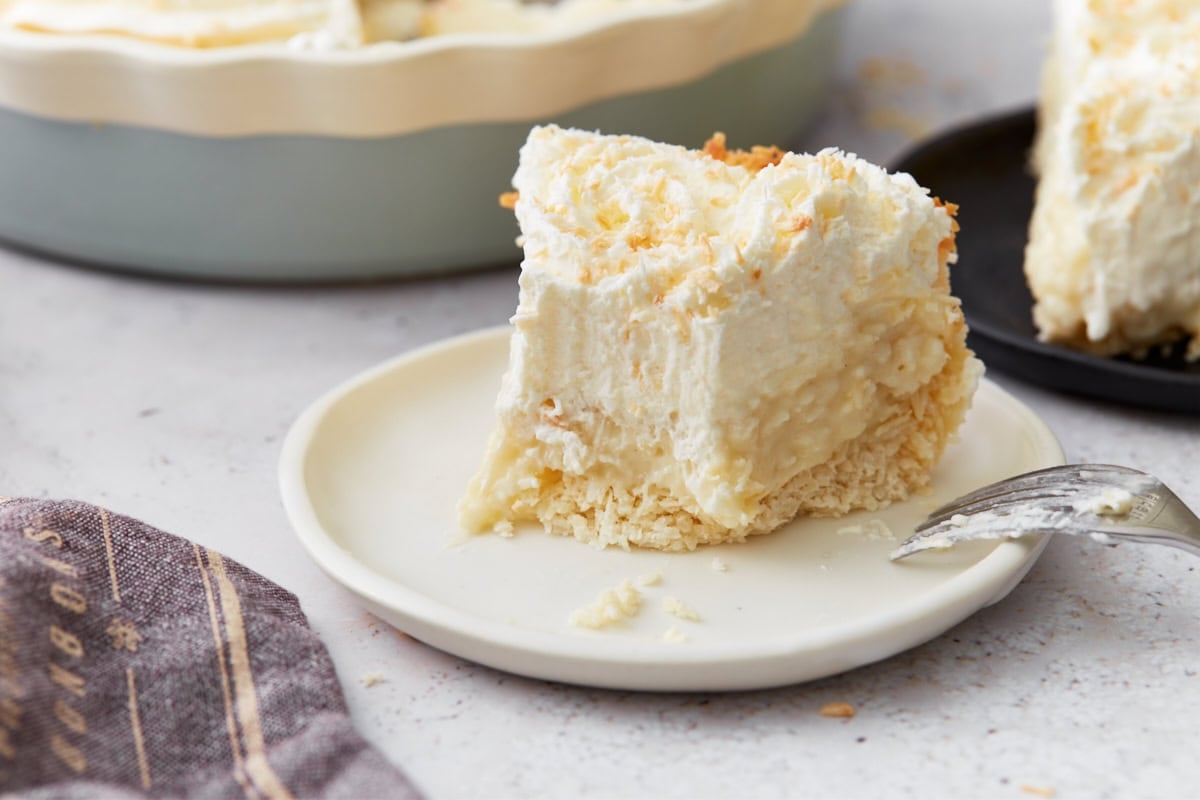
Coconut cream pie brings back all the cozy memories of family gatherings and summer potlucks. This gluten-free coconut cream pie keeps all the creamy, dreamy texture of the classic, with a naturally gluten-free coconut macaroon crust and smooth vanilla-coconut filling. It’s the perfect make-ahead dessert for holidays, summer get-togethers, or a laid-back Sunday treat.
Years ago, I tried a gluten-free coconut cream pie at a restaurant in Santa Fe that reminded me of classic diner desserts—rich, creamy, and full of nostalgic flavor. This version has everything you want: a smooth coconut custard with real coconut flavor, a light and flaky gluten-free crust (no complicated dough here), and a topping of fluffy whipped cream. I also include a dairy-free whipped topping option, so everyone can enjoy a slice. Best of all, it can be made ahead and chilled until you’re ready to serve.
Gluten-Free Baking Tips
- Stir constantly while the custard cooks to avoid lumps and keep the texture smooth and creamy.
- Use full-fat coconut milk for the richest, silkiest custard—light versions just don’t compare.
- Press plastic wrap directly onto the surface of the custard as it cools to keep a skin from forming.
Gluten-Free Coconut Cream Pie
Ingredients
CRUST
- 2 2/3 cups shredded sweetened coconut
- 3 tablespoons melted butter, dairy-free use Smart Balance butter
- 2 large egg whites
FILLING
- 2/3 cup granulated sugar
- 1/3 cup gluten-free all-purpose flour, (I like Pillsbury gluten-free)
- 2 cups milk, dairy-free use almond, cashew or coconut milk
- 2 large egg yolks
- 1 cup shredded sweetened coconut
- 1 tablespoon pure vanilla extract
- 1 teaspoon butter, dairy-free use Smart Balance butter
TOPPING
- 16 ounces heavy whipping cream
- 1 tablespoon pure vanilla extract
- 1/2 cup powdered sugar, I like my whipped cream sweet. Adjust to your liking
- If you want your whipped cream to be stabilized add 2 tablespoons of cornstarch.
Dairy-Free Topping
- 1 (14-ounce) can coconut cream, refrigerated overnight
- 3/4 cup powdered sugar
- 1 tablespoon pure vanilla extract
- 2 tablespoons corn starch
Instructions
CRUST
- Preheat oven to 350°F (177°C). Grease 9-inch pie pan with gluten-free cooking spray.
- In a large bowl combine egg whites, shredded coconut, and melted butter (or dairy-free butter) in a bowl.
- Pat coconut mixture into pie pan to make the crust.
- Bake crust for 20-25 minutes or until golden brown. Please watch your crust because all ovens are different.
FILLING
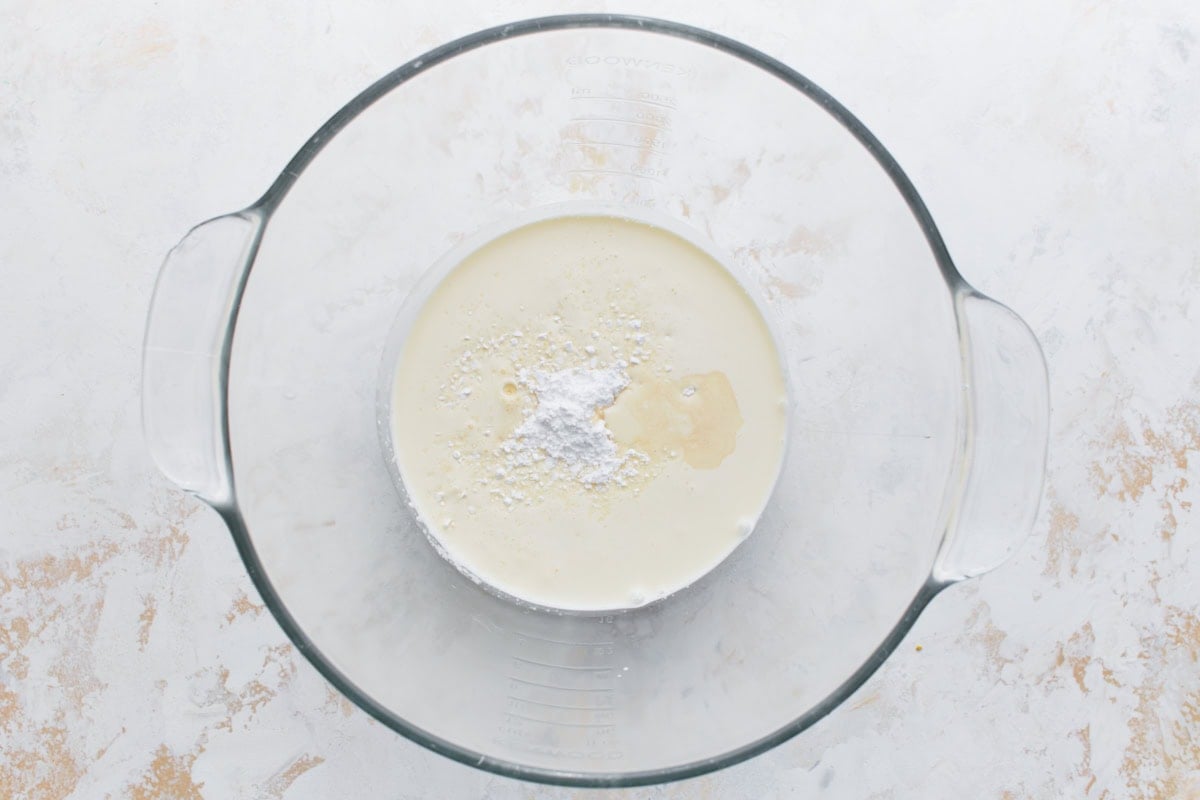
- In a medium saucepan mix gluten-free flour, sugar, milk (or dairy-free milk) and egg yolks.
- Cook and stir until mixture comes to a boil. Boil for 1 minute (use timer).
- Remove from heat and add shredded coconut, vanilla, and butter (or dairy-free butter).
- Pour the custard filling into crust. Cover and refrigerate for 3 hours.
TOPPING
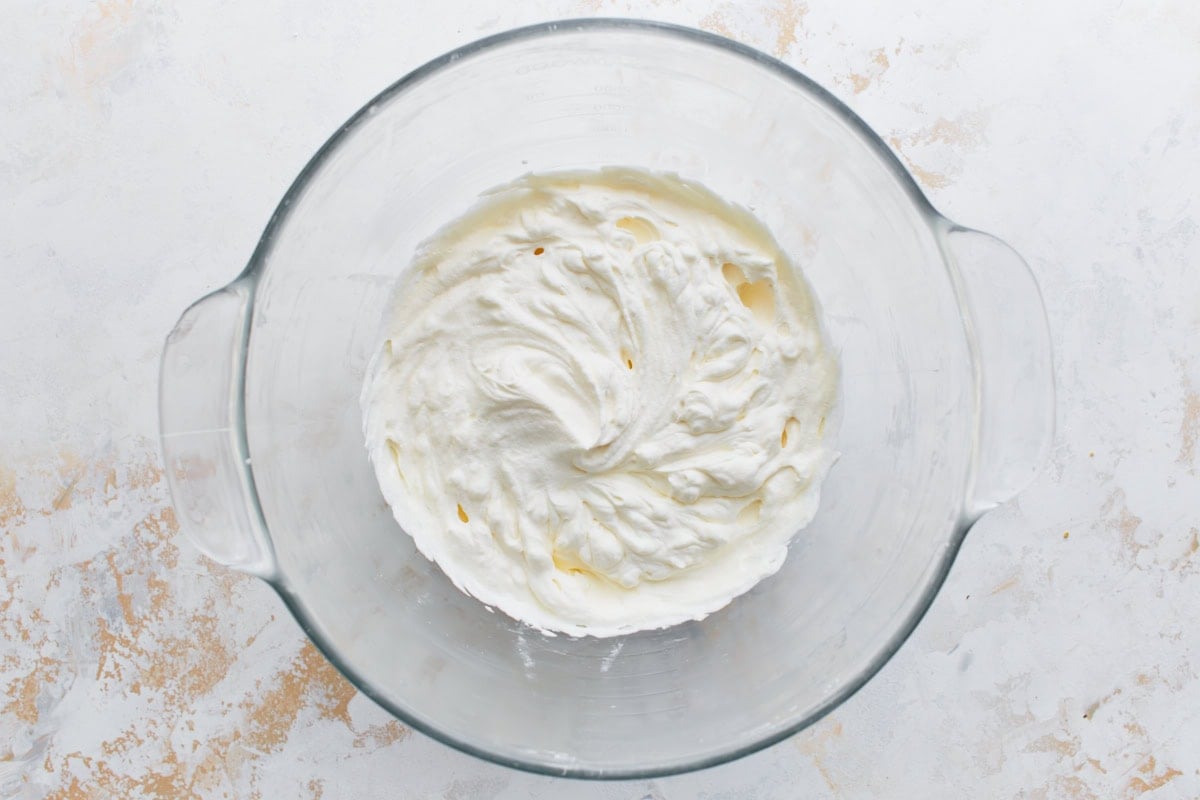
- Combine heavy whipping cream, vanilla, and powdered sugar in a large bowl.
- Use a mixer on high speed until stiff peaks form and it becomes firm. This pie works best with really firm whipped topping.
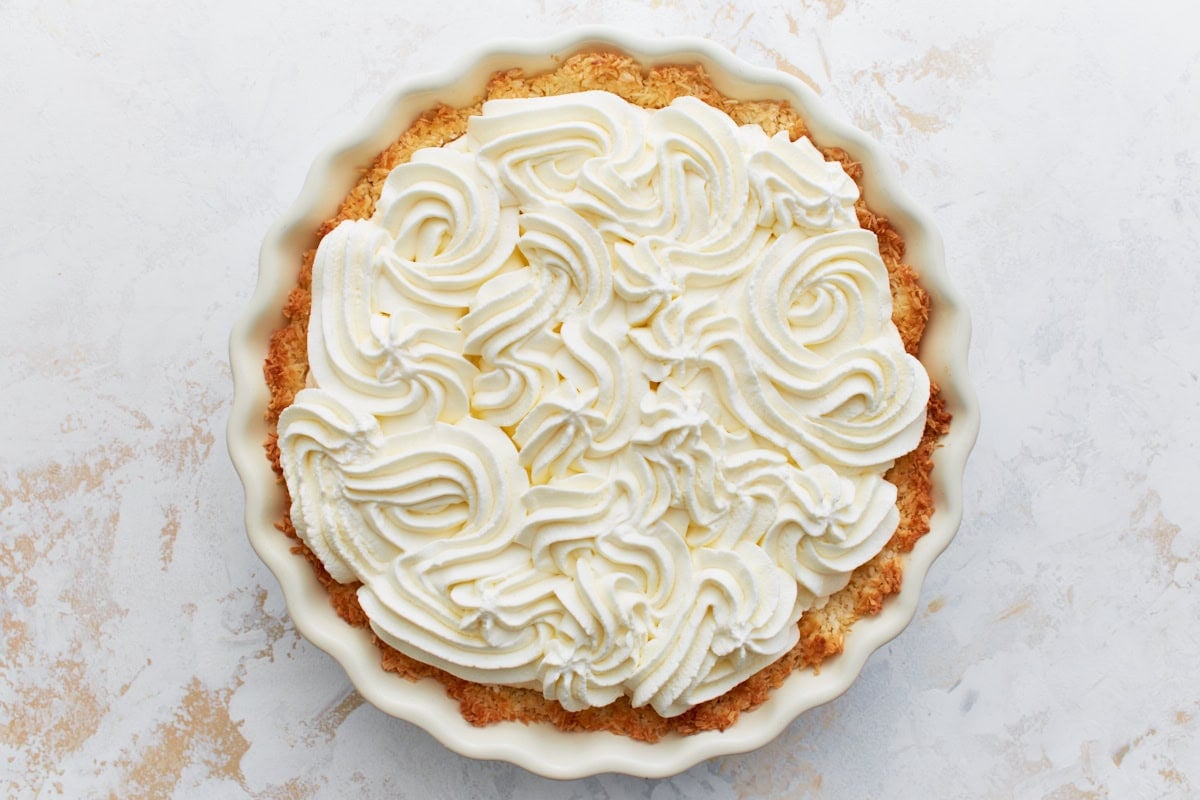
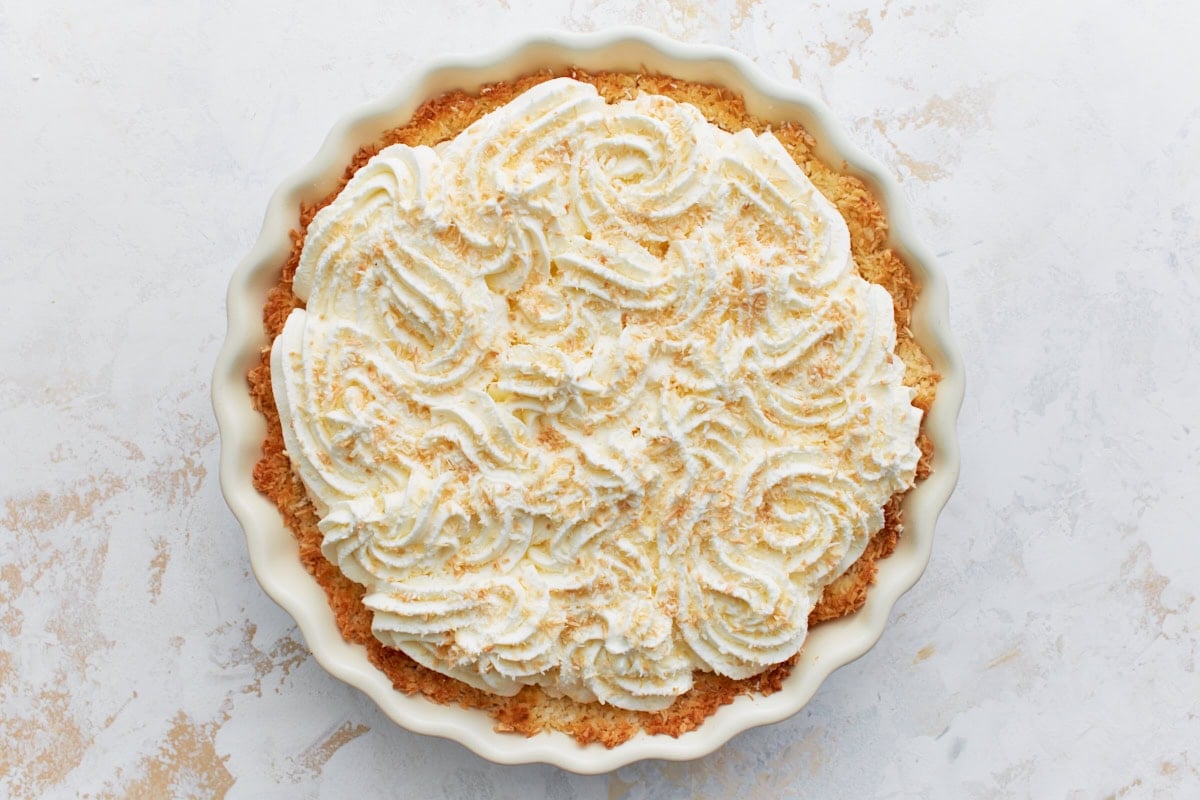
- Before serving, either spread or pipe the whipped cream on top of the pie.
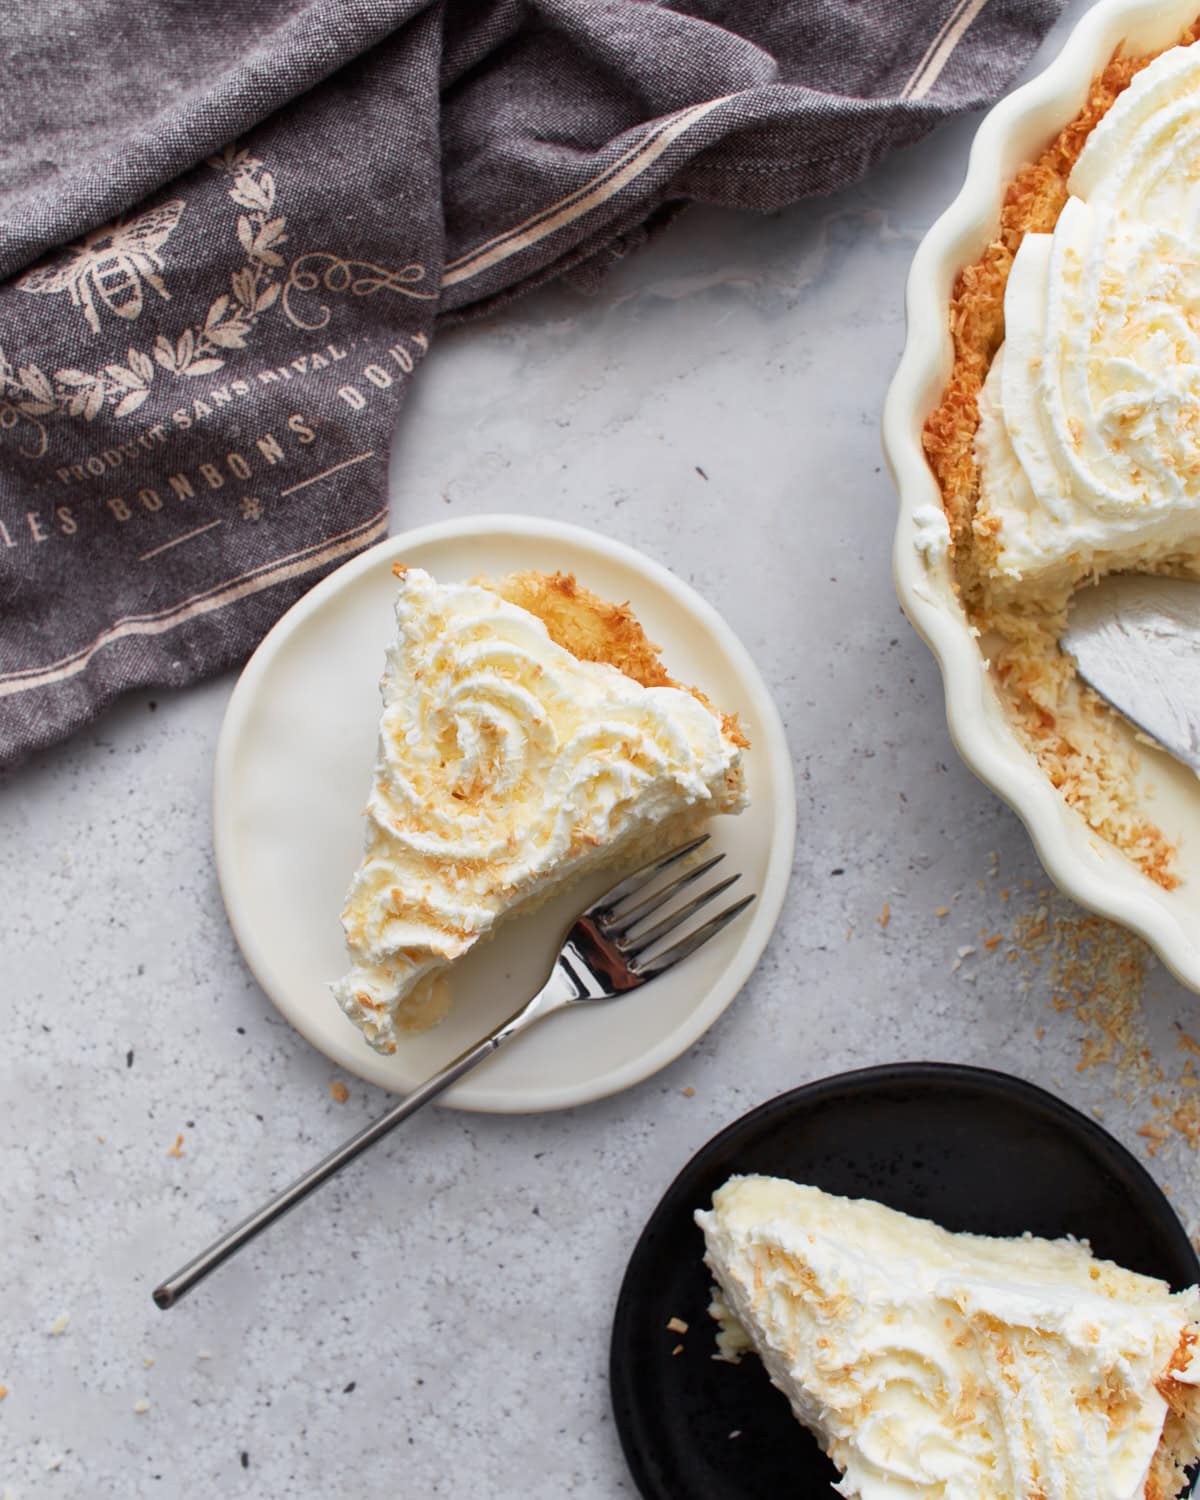
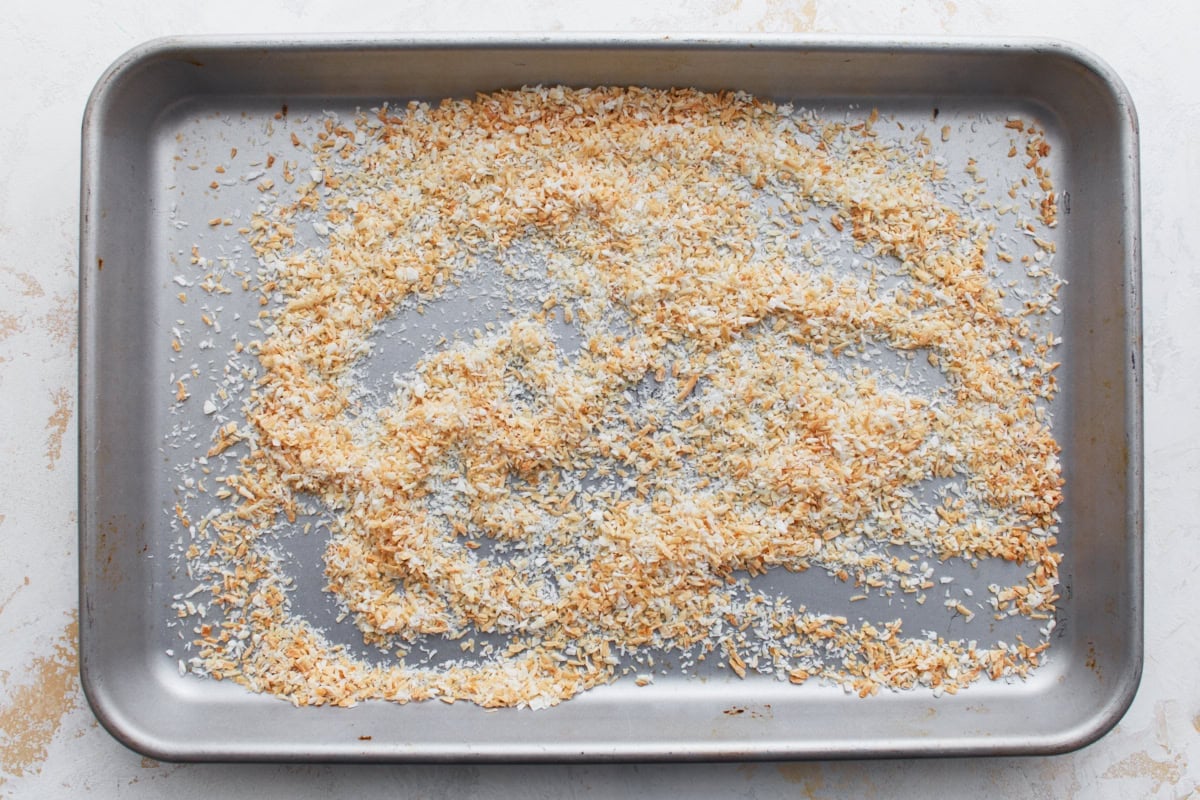
- Optional: sprinkle with toasted coconut. To toast coconut, spray a baking sheet with cooking spray. Sprinkle shredded coconut on pan and toast in the oven at 350 degrees for 5 to 10 minutes.
Dairy-Free Topping
- To make the topping: chill a large mixing bowl and whisk attachments of a mixer in the freezer for 10 minutes. Scrape out the top of the chilled and thickened coconut cream (leaving the liquid behind) and place the hardened coconut cream in your chilled mixing bowl. Beat for 30 seconds with a mixer until creamy. Then add vanilla, confectioners’ sugar, and corn starch and mix for 1 minute until creamy and smooth. Use immediately or cover and refrigerate. Place in an airtight container and refrigerate the coconut whip for up to 3 days. Before serving the pie, spread the coconut whip on top of the pie.
Notes
Nutrition
Nutrition information is automatically calculated, so should only be used as an approximation.
How to Make Gluten-Free Coconut Cream Pie Step-by-Step
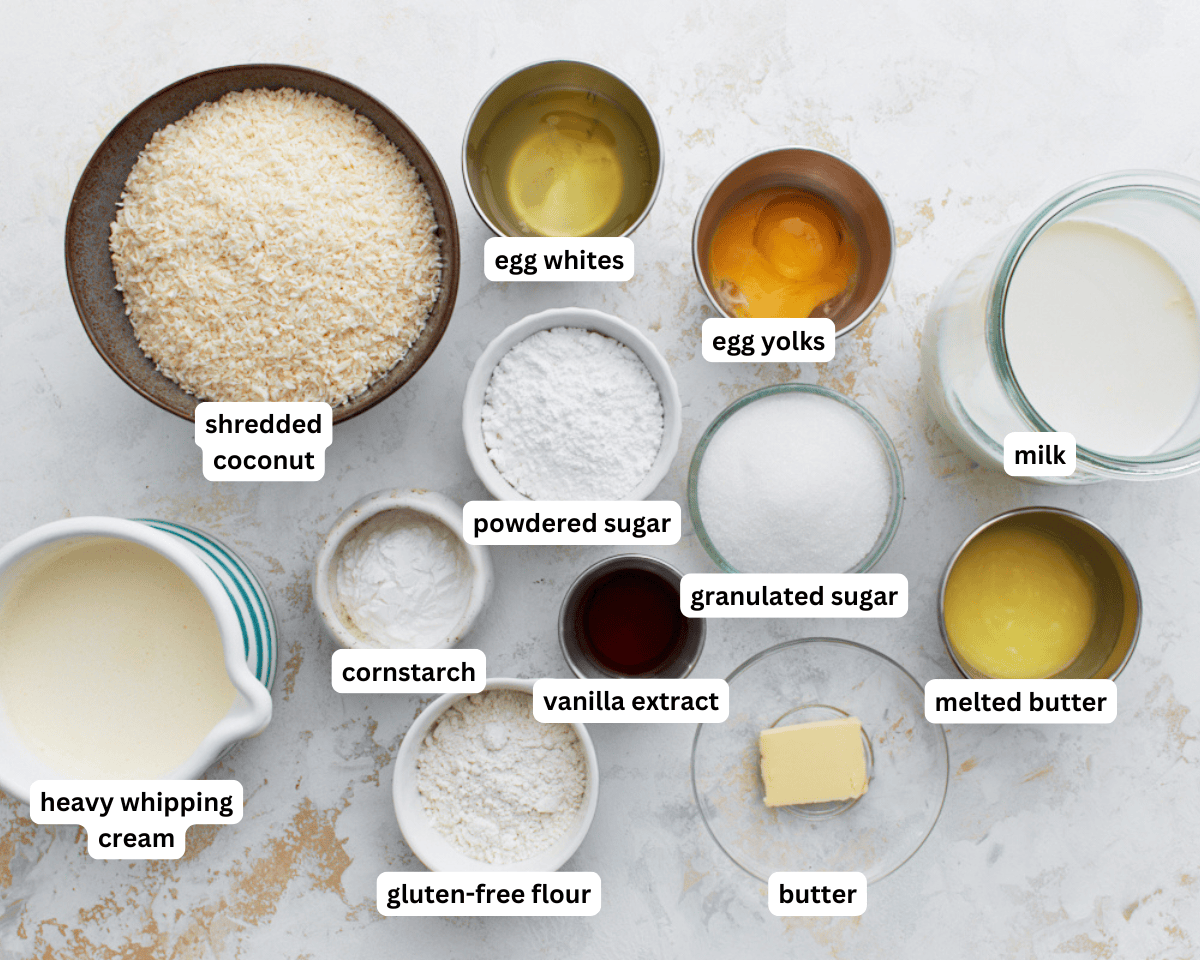
Gather the Ingredients: Gather all the ingredients together.
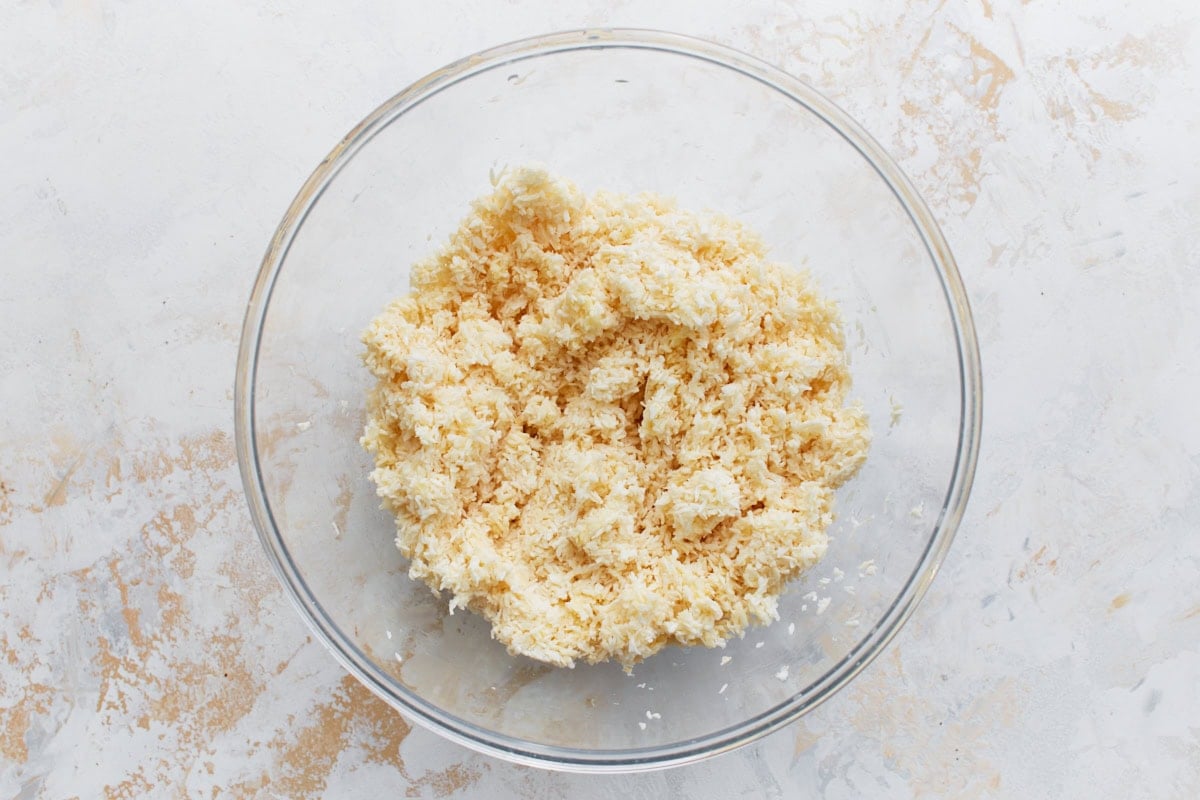
Make the crust: Preheat your oven to 350°F and lightly grease a 9-inch pie pan with gluten-free cooking spray. In a large bowl, stir together 2 large egg whites, 2 2/3 cups shredded sweetened coconut, and 3 tbsp melted butter (or Smart Balance for dairy-free).
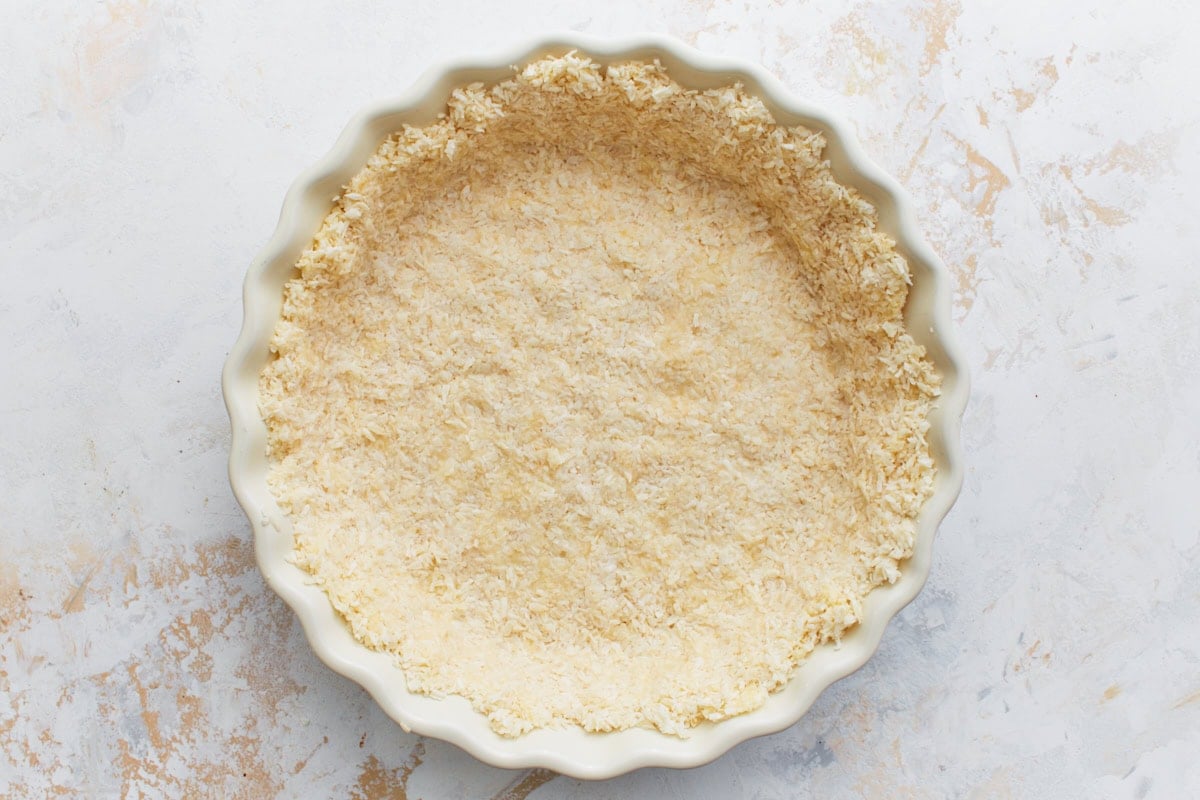
Press the crust into the pie pan: Press the coconut mixture evenly into the bottom and up the sides of the pie pan to form a crust.
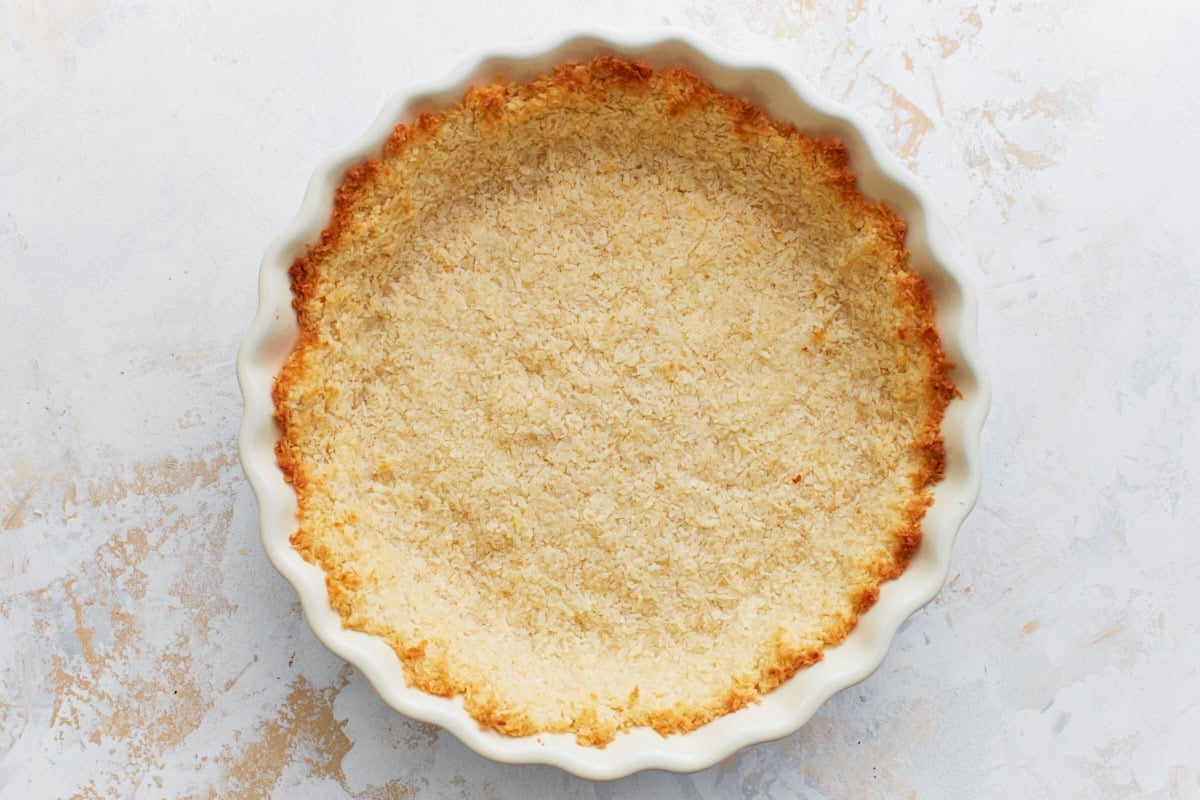
Bake the crust: Bake for 20 to 25 minutes, or until the crust is golden brown. Keep a close eye on it, as oven times can vary. Set aside to cool completely. The crust must be fully cooled before adding the filling.

Make the custard filling: In a medium saucepan, whisk together 2/3 cup granulated sugar, 1/3 cup gluten-free all-purpose flour (I like Pillsbury), 2 cups milk (use almond, cashew, or coconut milk for dairy-free), and 2 large egg yolks.
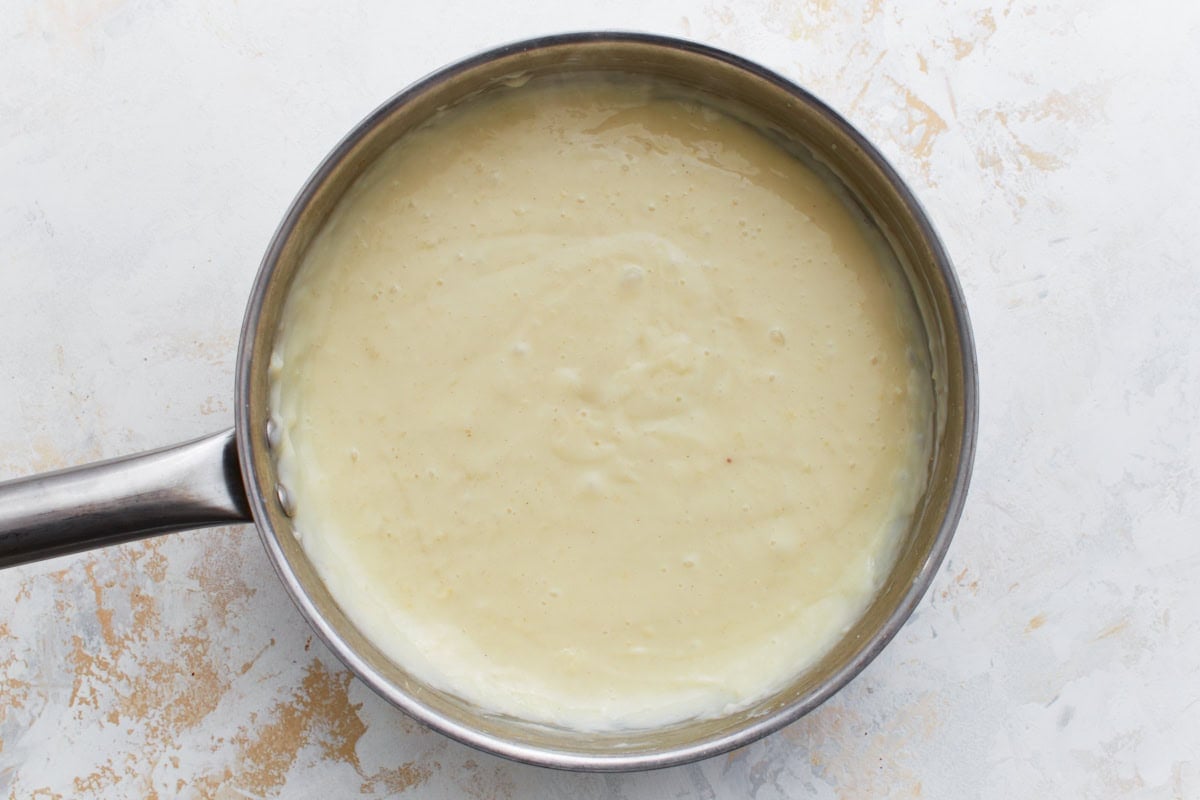
Boil the filling: Cook over medium heat, stirring constantly, until the mixture thickens and comes to a boil. Let it boil for 1 minute, stirring the whole time to prevent lumps.
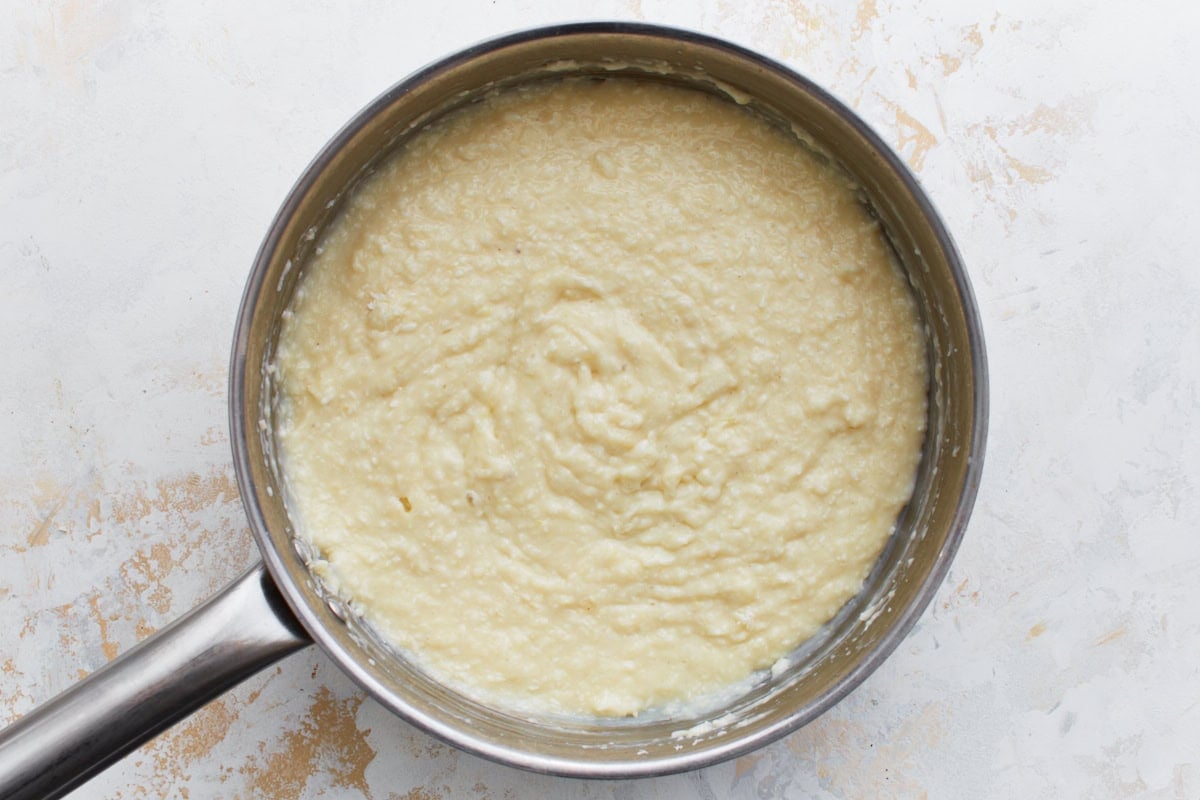
Finish the custard: Remove from the heat and stir in 1 cup shredded sweetened coconut, 1 tbsp pure vanilla extract, and 1 tsp butter (or dairy-free Smart Balance).
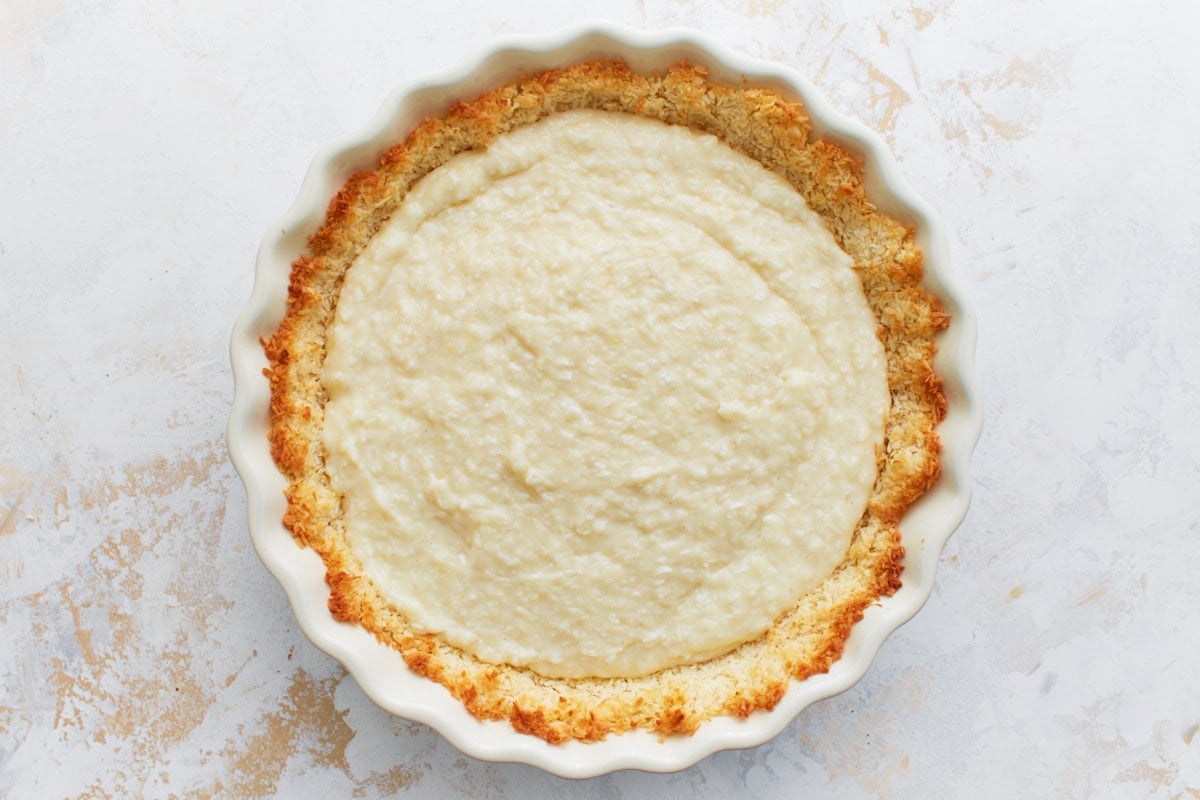
Pour the custard into the crust: Pour the custard into the fully cooled crust. Press plastic wrap directly onto the surface of the custard to prevent a skin from forming, then refrigerate for at least 3 hours until fully chilled and set.
Make the whipped topping: In a large mixing bowl, combine 16 oz heavy whipping cream, 1 tbsp pure vanilla extract, and 1/2 cup powdered sugar (adjust to taste).
Stabilize the whipped cream (optional): If you want a stabilized whipped cream, add 2 tbsp cornstarch.
Whip the ingredients: Beat on high speed with a hand or stand mixer until stiff peaks form and the whipped cream is firm.
Optional topping: For extra flavor and texture, sprinkle with toasted coconut. To toast, spread shredded coconut on a baking sheet sprayed with cooking spray and bake at 350°F for 5 to 10 minutes, watching closely to prevent burning.
Top the pie: Just before serving, spread or pipe the whipped cream over the chilled pie. Sprinkle the toasted coconut over the whipped topping, if using.
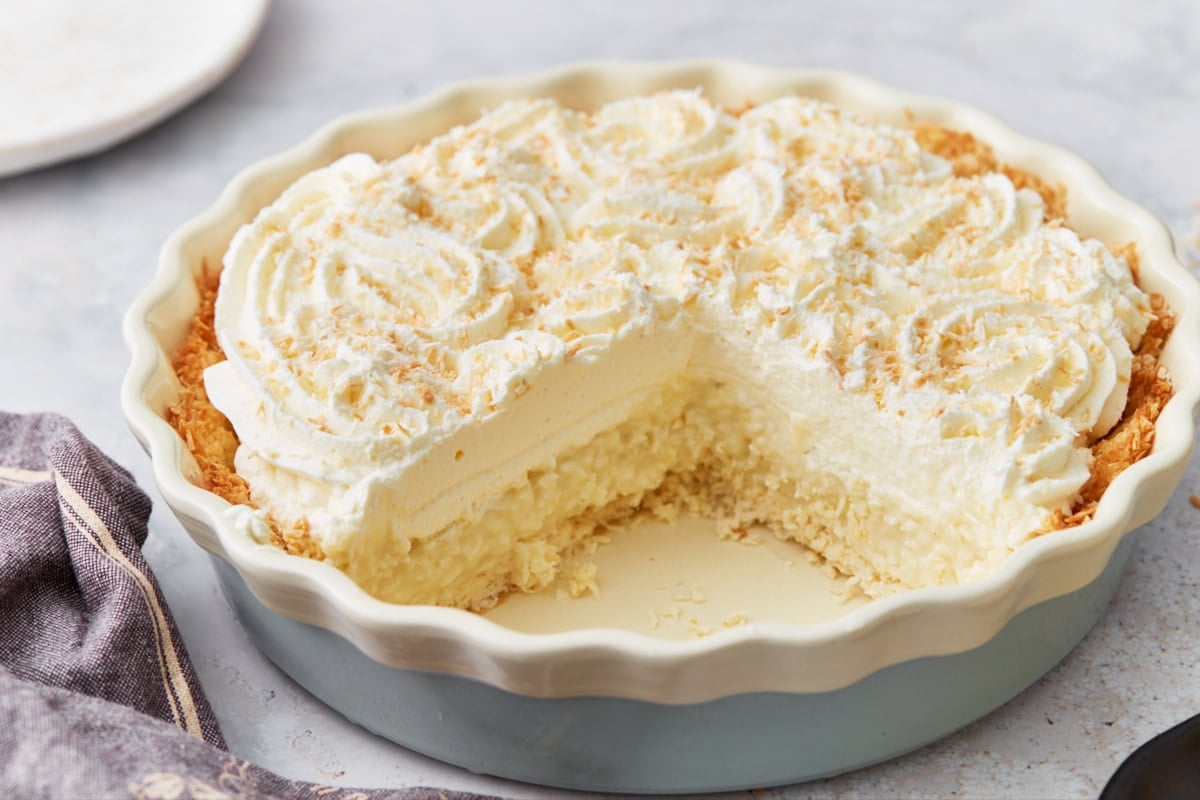
Serve and enjoy: Chill the pie for 10 minutes in the fridge before slicing. Serve and enjoy!
Dairy-Free Whipped Topping
- Place a large mixing bowl and the whisk attachment of your mixer in the freezer for 10 minutes.
- Open one 14-ounce can of coconut cream that has been refrigerated overnight. Scoop only the solid cream into the chilled bowl, leaving the liquid behind.
- Beat the coconut cream for about 30 seconds, until smooth and creamy.
- Add 3/4 cup powdered sugar, 1 tbsp vanilla extract, and 2 tbsp cornstarch, then beat for another minute until fully combined and fluffy.
- Use immediately or store in an airtight container in the fridge for up to 3 days. Spread the coconut whip over the pie just before serving.
Serving Suggestions
Serve this gluten-free coconut cream pie nice and cold, with an extra dollop of whipped cream and a sprinkle of toasted coconut for that perfect finishing touch—the flavor reminds me of my coconut macaroons in the best way. I love adding a handful of fresh berries on the side for a pop of color and a fruity twist—it makes the whole dessert feel a little more special. It’s especially good on warm days with a glass of iced coffee or even a tropical drink if you’re feeling festive. My family loves this for special occasions including Thanksgiving and Easter and my husband always requests it on Father’s Day!
Storage Instructions
Store the pie covered in the fridge for up to 4 days—it actually tastes even better after a day or two as the flavors meld together.
I don’t recommend freezing this one, since the custard can separate and lose its creamy texture. If you’re making it ahead, go ahead and prepare the crust and filling a day in advance, then add the whipped topping just before serving for the freshest flavor and best texture.
More Warm Weather Desserts
- Gluten-Free Key Lime Pie
- Gluten-Free Lemon Cake
- Gluten-Free Strawberry Shortcake
- Gluten-Free Strawberry Cake
- Gluten-Free Ice Cream Cake


Delicious. everyone loved it!
Made this tonight with help from my 4 yr old. She distracted me and I accidentally put ALL the filling ingredients in the pan at once. Also used coconut cream instead of coconut milk. Even with all my accidents it turned out PERFECT!! My hubs said it was the best one ever. This recipe is a keeper.
I see above you said 1tbsp. Vanilla extract and 1tsp of butter.did you mean that vice versa
Hi Janszan, nope 🙂
o my gosh. this is so darn good. we just lived it
I made this last night. This morning the filling was still runny. Any idea why this didn’t set up for me?
Hi Sue, Did you let the mixture come to a boil and then stir and boil for 1 minute?
Love all of the recipes I’ve made of yours so far! My wife has Celiac disease recently diagnosed and I do most of the cooking SO these nice treats I can make for her , and we help eat some 😉, are extremely helpful! Thank you for your time in helping us! I do hope it’s not to much vanilla . I do use cup4cup flour which seems to work in about everything I’ve made so far. Thanks again
Love the coconut crust ! It does seem like measurements may be a little skewed. The crust is pretty thick and the filling amount didn’t fill it up. I made and added a full cup more filling. My pie pan is deep dish. I should have made crust much thinner on bottom and much thicker all the way to top of sides. Or maybe recipe could call for less coconut and definitely more filling. Rich and delicious though!
After I made this recipe and looking at other recipes online, I think you meant to type 1 teaspoon of vanilla and 1 Tablespoon of butter. You reversed them in the above recipe. I haven’t tried the pie yet, but I hope I didn’t ruin it by putting in 1 T of vanilla.
This pie is delicious! This recipe has made me quite popular with my daughter-in-law who suffers from celiac decease. I was doing ok before, but now I’m golden! 💫
Thank you so much!
Question~Do I use a gf all-purpose flour with or without xanthan gum?
Hi Susan, use gf flour with xanthan gum!