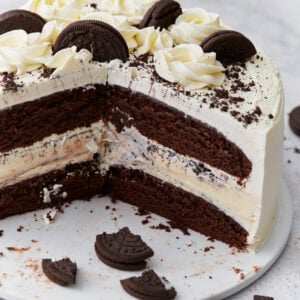
Gluten-Free Ice Cream Cake
Published


This easy gluten-free ice cream cake reminds me of the ones from my childhood! Creamy vanilla ice cream is sandwiched between two layers of chocolate cake, which I decorate with homemade whipped cream frosting and crumbled cookies. This recipe is entirely gluten-free, and I’ve also included a dairy-free option! I love making this recipe for my kids’ birthdays, but I think it’s the perfect treat for the summertime, too!

This recipe is fantastic! The detailed instructions helped me put together a wonderful cake for my grandson. Have also made your gf vanilla cake and it is the best ever. Thanks for making gf taste like a traditional cake. Best ever!
– Luanne Alessandrini
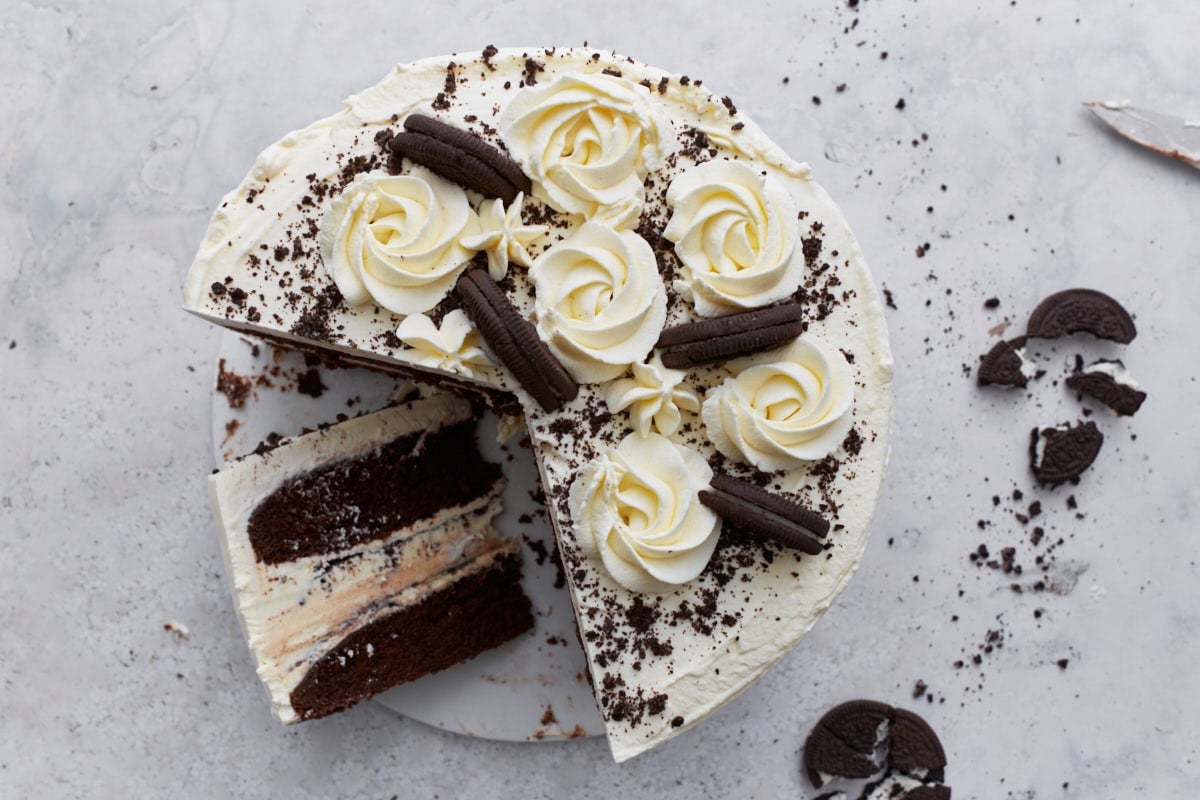
Gluten-Free Oreo Ice Cream Cake
When my eldest son asked me for a gluten-free Oreo ice cream cake for his birthday one year, I knew I couldn’t turn to the usual store-bought options.
Instead, I used my tried and true gluten-free chocolate cake recipe as inspiration and added a layer of creamy vanilla ice cream to the middle. Once it was decorated with my whipped cream frosting (or Cocowhip for a dairy-free option) and gluten-free Oreos, I couldn’t tell the difference between this cake and the ones I used to have as a kid! This recipe is honestly so easy to make, and it’s always a hit with my family.
Gluten-Free Ice Cream Cake Recipe
Ingredients
Cake
- 1 tablespoon white vinegar or lemon juice
- 1 cup milk, Dairy-free use unsweetened almond milk.
- 2 cups all-purpose gluten-free flour with xanthan gum*, I created this recipe with Pillsbury gluten-free flour. It won't work with almond, coconut, or oat flour.
- 1 teaspoon salt
- 1 teaspoon baking soda
- 1/2 teaspoon gluten-free baking powder
- 3/4 cup gluten-free cocoa powder
- 1/2 teaspoon ground cinnamon
- 9 tablespoons unsalted butter, softened (1/2 cup plus one 1 tablespoon), Dairy-free use Smart Balance butter.
- 2 cups granulated sugar
- 2 large eggs
- 1 teaspoon pure vanilla extract
- 3/4 cup boiling water
- 1 quart (48-ounces) gluten-free ice cream**
- 1 package gluten-free chocolate cookies, I used gluten-free Oreos. They are also dairy-free.
Whipped Cream Frosting (you can also skip this step and use Cool Whip)
- 2 cups heavy whipping cream,
- 1 tablespoon pure vanilla extract
- 1/2 cup powdered sugar
- 1/4 cup corn starch
Dairy-Free Frosting
- 9 oz. Cocowhip, 1x 9-ounce container. Or use this recipe from Go Dairy Free. Add cornstarch to stabilize.
Instructions
- Preheat the oven to 350°F (177°C).
- Cut parchment paper for the bottom of your two 9-inch cake pans and spray with gluten-free cooking spray. (I like coconut oil cooking spray.)
- Add the white vinegar (or lemon juice) to the milk to make the homemade buttermilk.
- In a medium-sized bowl, add the gluten-free flour with xanthan gum, salt, baking soda, gluten-free baking powder, cocoa powder, and cinnamon. Stir to combine the ingredients.
- In a large bowl, cream the softened butter and granulated sugar with a mixer until fluffy.
- Add the eggs and pure vanilla extract to the butter mixture and mix until fully combined.
- Add the gluten-free flour mixture to the butter mixture and mix until fully combined. Scrape down the sides if needed.
- Add the homemade buttermilk to the cake batter and mix until fully combined.
- Add the boiling water to the batter and mix until fully combined.
- Pour half of the batter into the first 9-inch cake pan and then pour the rest of the batter into the second 9-inch cake pan.
- Bake on the middle rack for 30-35 minutes. Please watch your cakes because all ovens are different. Check the center of the cake by inserting a toothpick to make sure it is done. You will also see the sides of the cake pulling away from the side of the pan.
- Allow the cakes to cool for 15 minutes. Remove them from the cake pans and allow to fully cool on a baking rack.
- Wrap the cakes in plastic wrap or foil and then place in a freezer bag. Freeze the cakes overnight or for a minimum of 6 hours.
Ice Cream Layer
- Take the gluten-free ice cream out of the freezer and allow it to soften for 5 minutes.
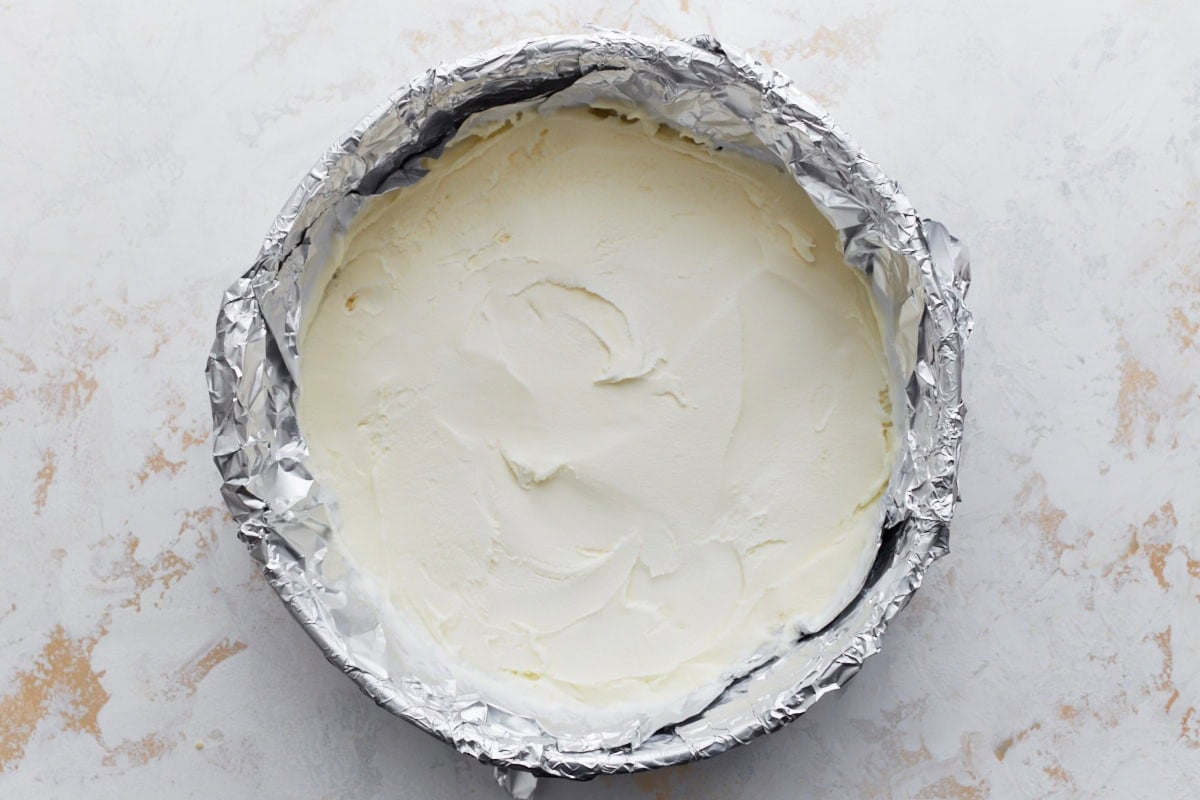
- Line a 9-inch cake pan with aluminum foil or plastic wrap. I like using foil because it does not lift up when you add gluten-free ice cream to the pan.
- Empty the entire container of softened, gluten-free ice cream into the cake pan and smooth it out with a spatula.
- Cover the smoothed top with foil or plastic wrap and freeze the ice cream overnight or for a minimum of 6 hours.
How To Assemble The Ice Cream Cake
- Crush the gluten-free cookies either in a food processor or place them in a plastic storage bag and crush them with a rolling pin.
- Make the whipped cream frosting.
- Place the first cake layer on top of the cake platter.
- Add a thin layer of whipped cream to the top of your cake layer and sprinkle with some of the crushed gluten-free cookies.
- Remove the frozen ice cream layer from the foil and place it on top of the first cake layer.
- Sprinkle the top of the ice cream layer with some crushed gluten-free cookies.
- Place the second cake layer on top of the ice cream layer.
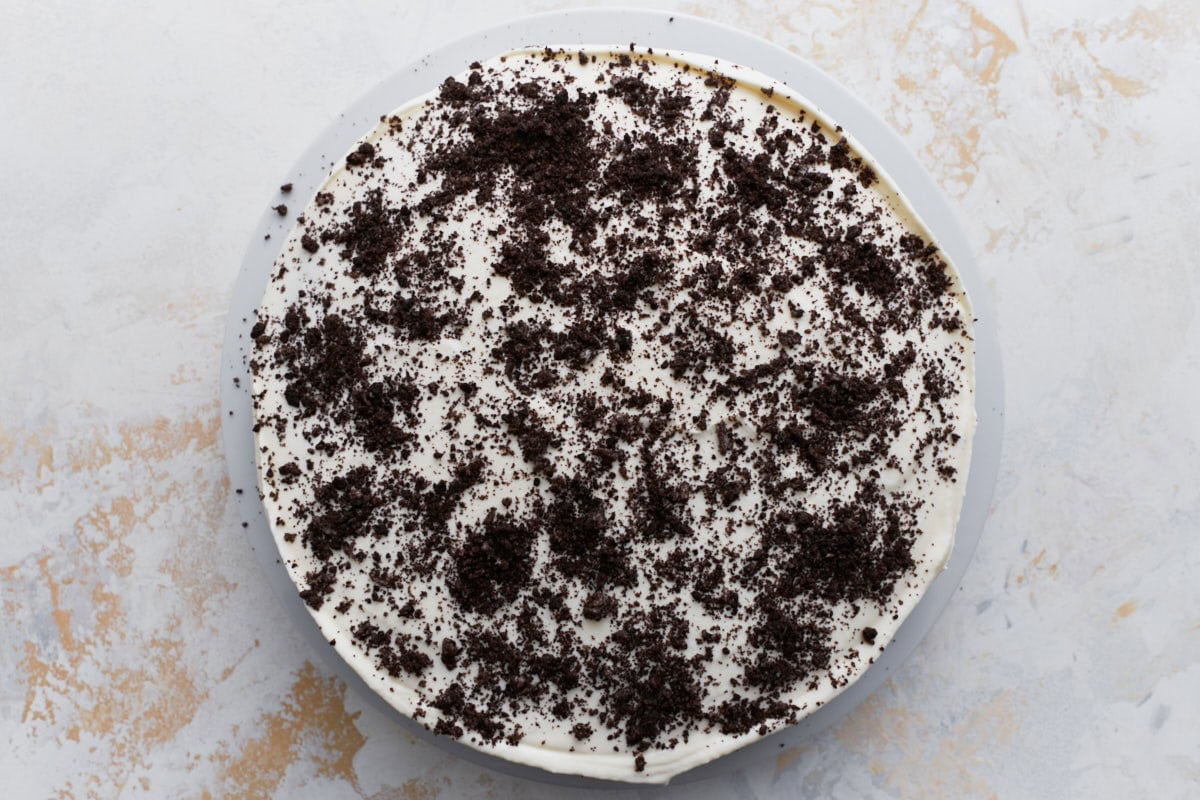
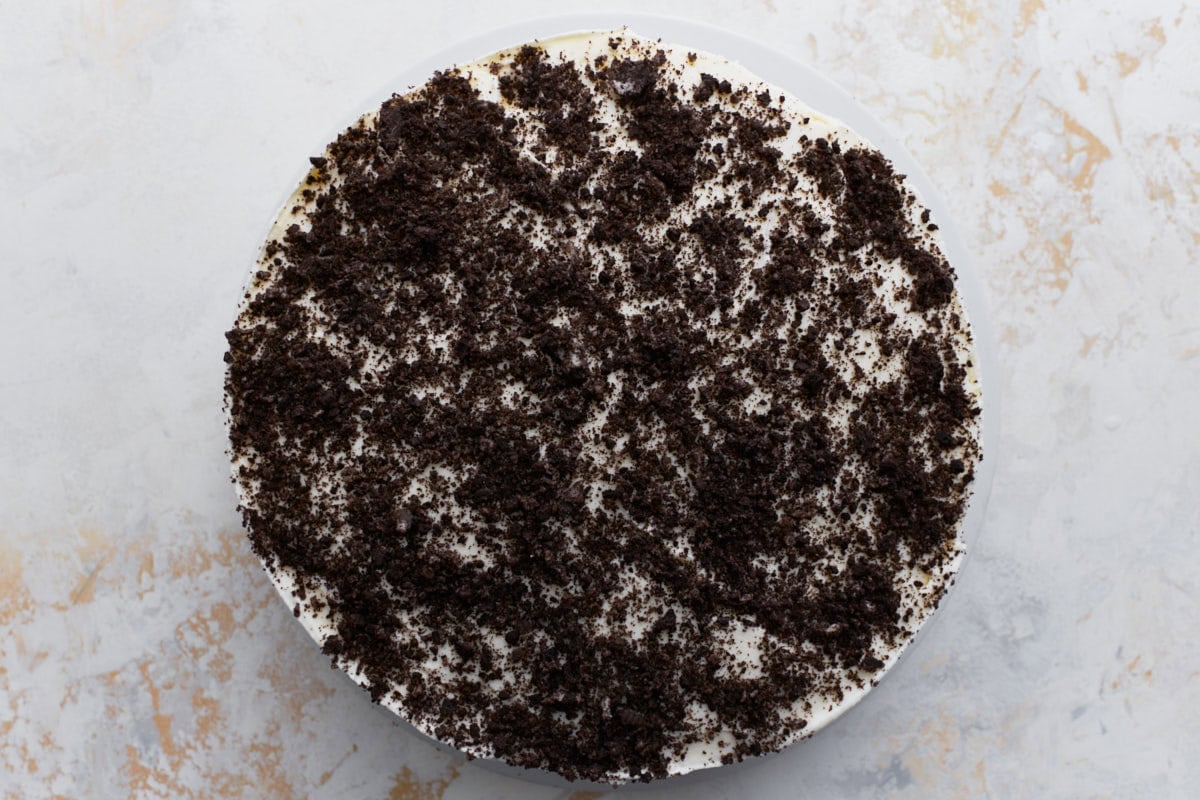
- Cover the whole cake with the whipped cream frosting. If using the dairy-free Cocowhip, it will be softer than the stabilized whipped cream. When using the dairy-free Cocowhip, I just frosted the top of the cake.
- Using a star tip (Wilton 1M tip), add some dollops of whipped cream on top of the cake. Finish decorating with additional whole gluten-free cookies and remaining crushed gluten-free cookies.
- Serve immediately or place the cake back into the freezer until ready to serve.
- Just before serving, take the cake out of the freezer and move it to the refrigerator for 30 minutes or let sit at room temperature for 15 minutes for easy slicing.
- Store leftovers in a freezer-safe container and place the cake back in the freezer.
Whipped Cream Frosting
- Place your mixing bowl in the refrigerator or freezer for a few minutes to chill.
- In the cold mixing bowl, whip the heavy whipping cream on medium speed for 15-30 seconds or until it's foamy.
- Add the pure vanilla extract, powdered sugar, and cornstarch and continue mixing at medium speed until stiff peaks form and it becomes firm.
- Refrigerate until ready to frost the cake.
Notes
Nutrition
Nutrition information is automatically calculated, so should only be used as an approximation.
How To Make Gluten-Free Ice Cream Cake Step By Step
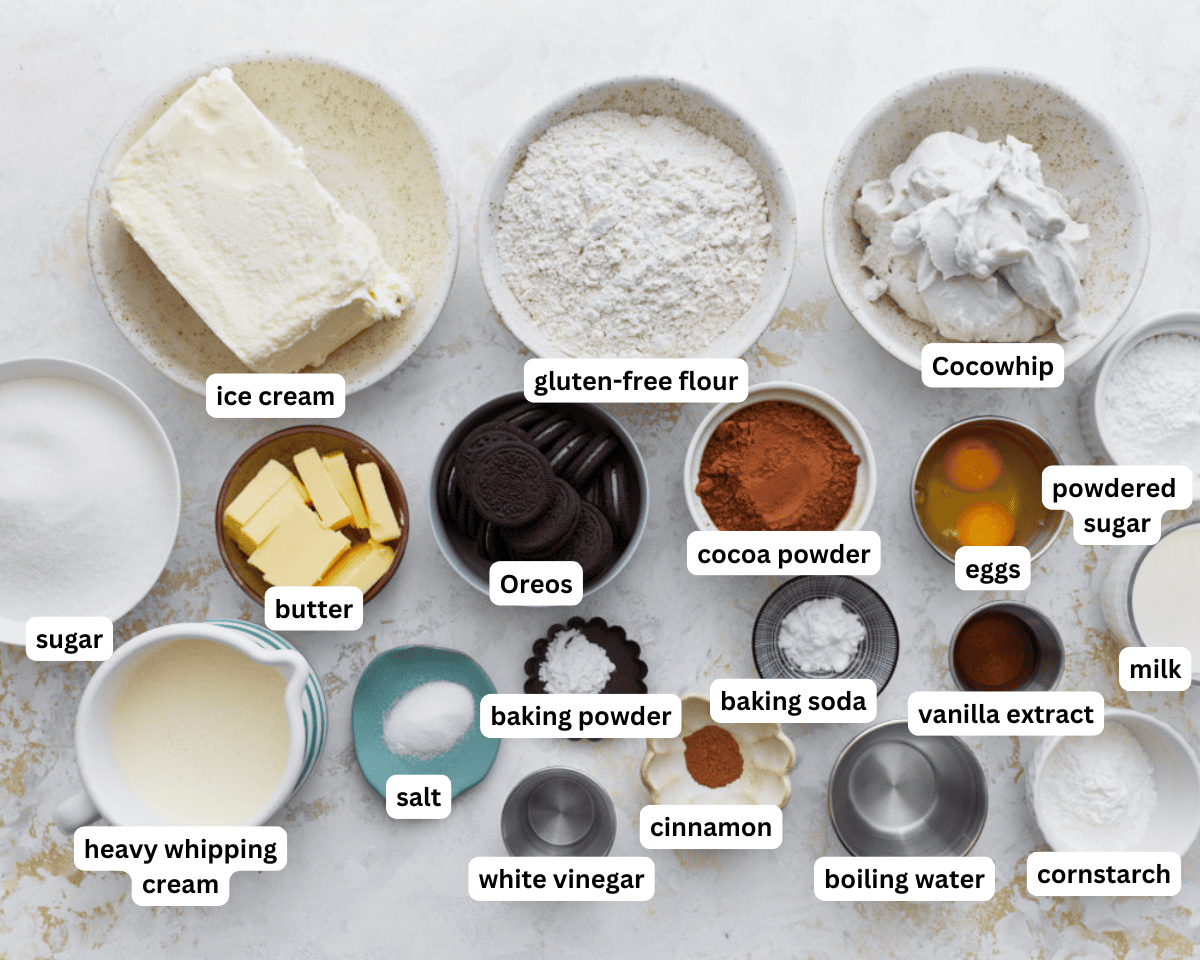
Gather the ingredients: Gather all the ingredients together.

Prep the oven and pans: Preheat your oven to 350°F. Line the bottoms of two 9-inch cake pans with parchment paper and spray with gluten-free cooking spray. I use coconut oil cooking spray.

Make the buttermilk: To make homemade buttermilk, pour 1 tablespoon of white vinegar or lemon juice into 1 cup of milk and let it sit while you prep the rest.

Mix the dry ingredients: In a medium bowl, whisk together 2 cups of gluten-free flour with xanthan gum, 1 teaspoon salt, 1 teaspoon baking soda, ½ teaspoon gluten-free baking powder, ¾ cup cocoa powder, and ½ teaspoon cinnamon.
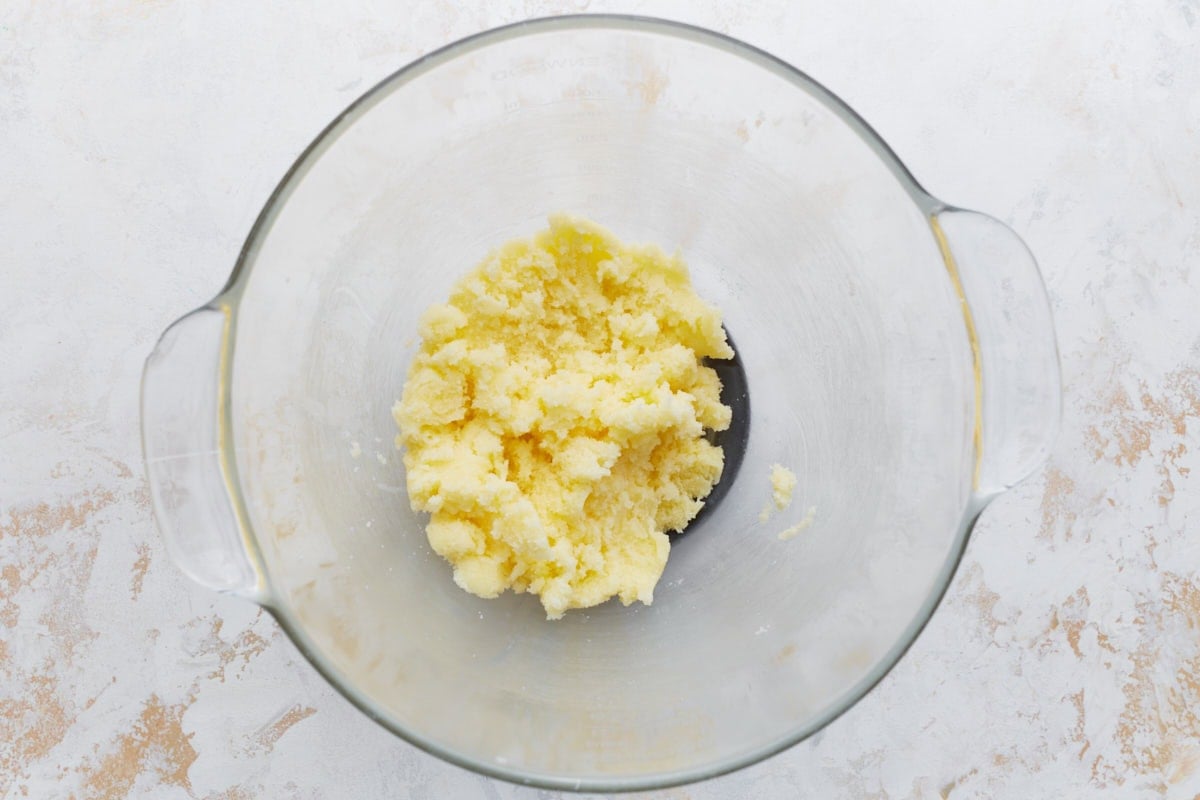
Cream the butter and sugar: Using a hand or stand mixer, beat 9 tablespoons of softened butter with 2 cups of granulated sugar until light and fluffy.

Mix in the eggs and vanilla: Add in 2 large eggs and 1 teaspoon of pure vanilla extract, and mix until smooth.

Combine the batter: Gradually add the dry ingredients to the butter mixture and mix until just combined, scraping down the sides as needed. Pour in the homemade buttermilk and mix again. Finally, carefully add ¾ cup of boiling water and mix until the batter is smooth.
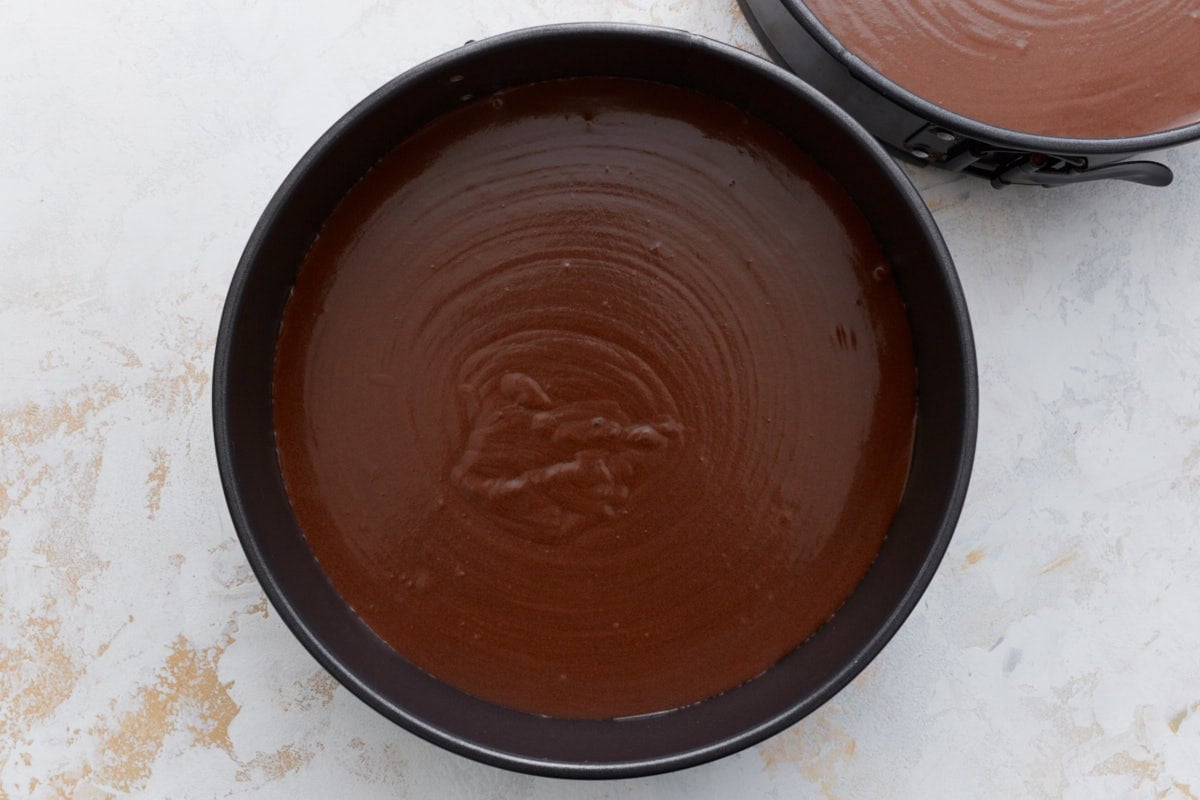
Fill the pans: Divide the batter evenly between the prepared pans.

Bake the cakes: Bake on the center rack for 30–35 minutes, or until a toothpick inserted in the center comes out clean and the edges begin to pull away from the pan. Let the cakes cool in the pans for 15 minutes, then transfer to a wire rack to cool completely.

Freeze the layers: Once cooled, wrap each cake layer tightly in plastic wrap or foil, then place in a freezer-safe bag. Freeze for at least 6 hours or overnight.
Prep the ice cream layer: Let a 1-quart (48-ounce) container of gluten-free ice cream sit at room temperature for about 5 minutes to soften. Line a 9-inch cake pan with foil or plastic wrap (foil works best). Scoop the softened ice cream into the pan and smooth the top with a spatula. Cover and freeze until firm—about 6 hours or overnight.
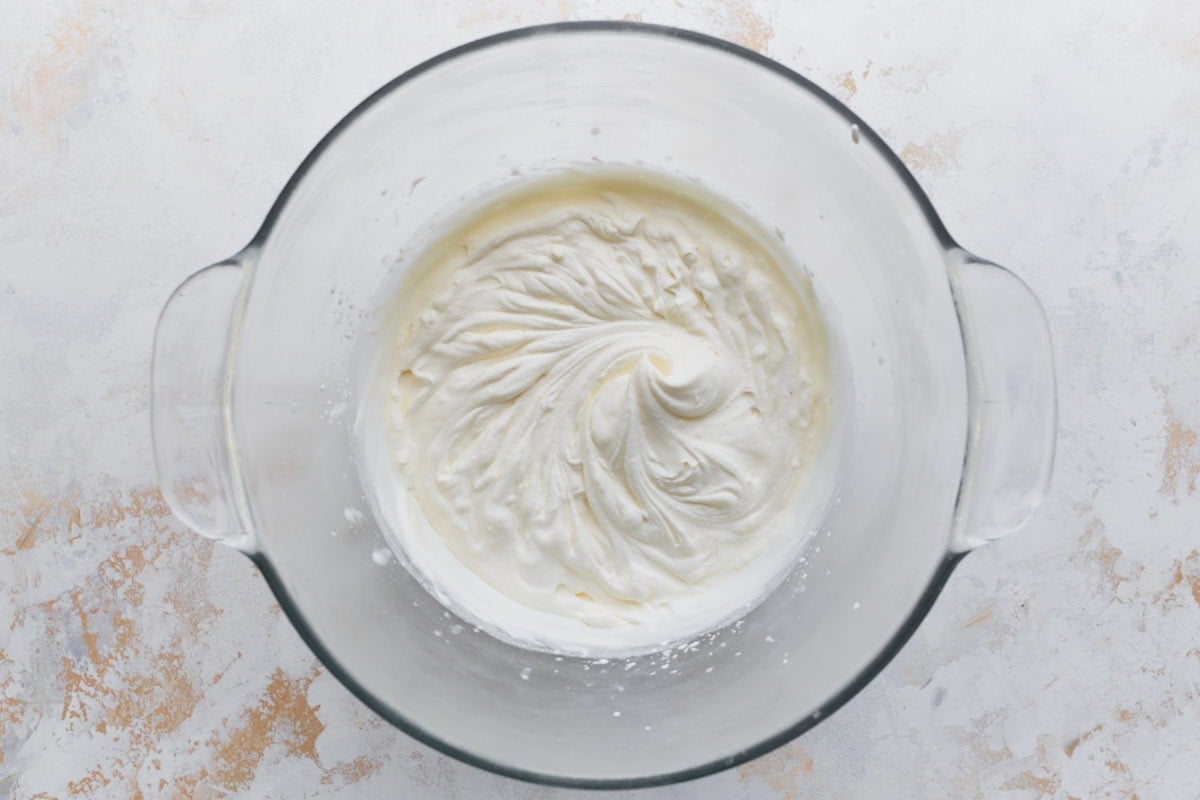
Make the whipped cream frosting: Chill your mixing bowl in the fridge or freezer for a few minutes. Then, beat 2 cups of heavy whipping cream on medium speed until foamy (about 15–30 seconds). Add 1 tablespoon vanilla extract, ½ cup powdered sugar, and ¼ cup cornstarch. Continue whipping until stiff peaks form. Store in the fridge until ready to use.

Crush the cookies: Crush 1 package of gluten-free cookies using a food processor or by placing them in a zip-top bag and crushing with a rolling pin.

Assemble the cake: Place one frozen cake layer on your serving platter.
Layer with whipped cream and cookies: Spread a thin layer of whipped cream on top and sprinkle with some of the crushed cookies.
Add the ice cream: Unwrap and place the frozen ice cream layer on top. Add more crushed cookies over the ice cream.

Add the final layer: Top with the second cake layer.

Frost and decorate: Frost the entire cake with the whipped cream (or just the top if using dairy-free Cocowhip). Decorate with dollops of whipped cream using a star tip, then finish with whole and crushed cookies.
Serve and enjoy: Serve immediately or return the cake to the freezer until ready to enjoy. To get clean slices, I let the cake sit out at room temperature for about 15 minutes and use a sharp knife dipped in hot water to slice through the ice cream layer.

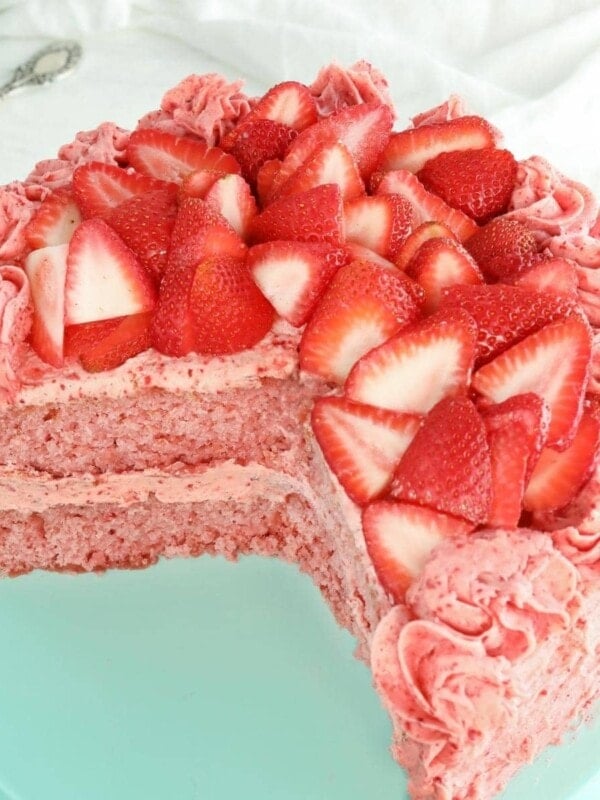
Flavor Variations to Try
You can use any flavor of ice cream, crushed cookies, or cake you like. Recently, I made this recipe using our gluten-free vanilla cake, filled it with strawberry ice cream, and topped it with crushed gluten-free shortbread cookies! Mint chocolate chip ice cream would also go really well with the chocolate cake in this recipe.
You really can’t go wrong with any flavor combination of ice cream and cake; just don’t forget to check the labels!
Storage Instructions
Leftover gluten-free ice cream cake slices can be popped into a freezer-safe container and kept in the freezer for 1-2 months. If making this cake ahead of time, I’d prepare the cake and ice cream layers and store them (unfrosted), wrapped in plastic wrap, for up to 3 months before using. Frost the cake while it’s still frozen, slice, and serve!


It was perfect. Used crushed Oreos mixed with a little melted butter for the base and crushed Oreos between layers. Had a little trouble with the whipped cream sliding down before I could make beautiful swirls but I put it back in the freezer for a couple of hours and then had no problem. I sprinkled a little colored sprinkles on top which looked gorgeous on the whipped cream. My family said it was delicious and looked very professional.
This recipe is fantastic! The detailed instructions helped me put together a wonderful cake for my grandson. Have also made your gf vanilla cake and it is the best ever. Thanks for making gf taste like a traditional cake. Best ever!
This recipe was delicious! I used store-purchased mint chocolate chip ice cream for the ice cream layer and it was a perfect compliment to the gluten free cake layers. The cake portions were a little on the dense side, but i’ve never made a gluten free cake that wasn’t. (I used King Arthur gluten measure-for-measure flour because Pillsbury was not available). Other than that i did not alter the cake recipe at all. The stabilized whipped cream icing held up beautifully even after being frozen for a couple of hours. I added the final dallops of icing on the top at the last minute due to space in the freezer and that made for a beautiful presentation (I just piped them directly from a ziplock bag with the corner snipped off. (So much easier than messing with a icing piper!) I’m made about a dozen gluten free cakes and this was the best tasting and looking.
So so so good. Perfect recipe. Icing was enough for a rustic, semi naked look. Probably would double it if I wanted a perfectly white cake. But OMG delicious!
Wonerful recipe, chocolate in cake was a treat for my birthday boy loved the step by step recipe and your article please do more made it easier for me