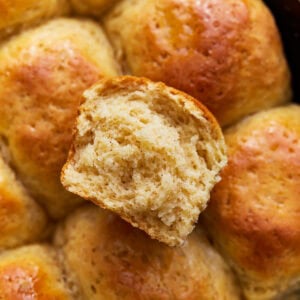
Gluten-Free Hawaiian Rolls
Updated


These soft and fluffy gluten-free Hawaiian rolls are one of my favorite things to serve at holiday dinners and family gatherings! This easy recipe uses gluten-free flour, cornstarch, instant yeast, eggs, sugar, and pineapple juice to create perfectly fluffy and slightly sweet rolls—they taste just how I remember them! My family loves them piled high with ham and cheese when I make sliders! This recipe also includes a dairy-free option.
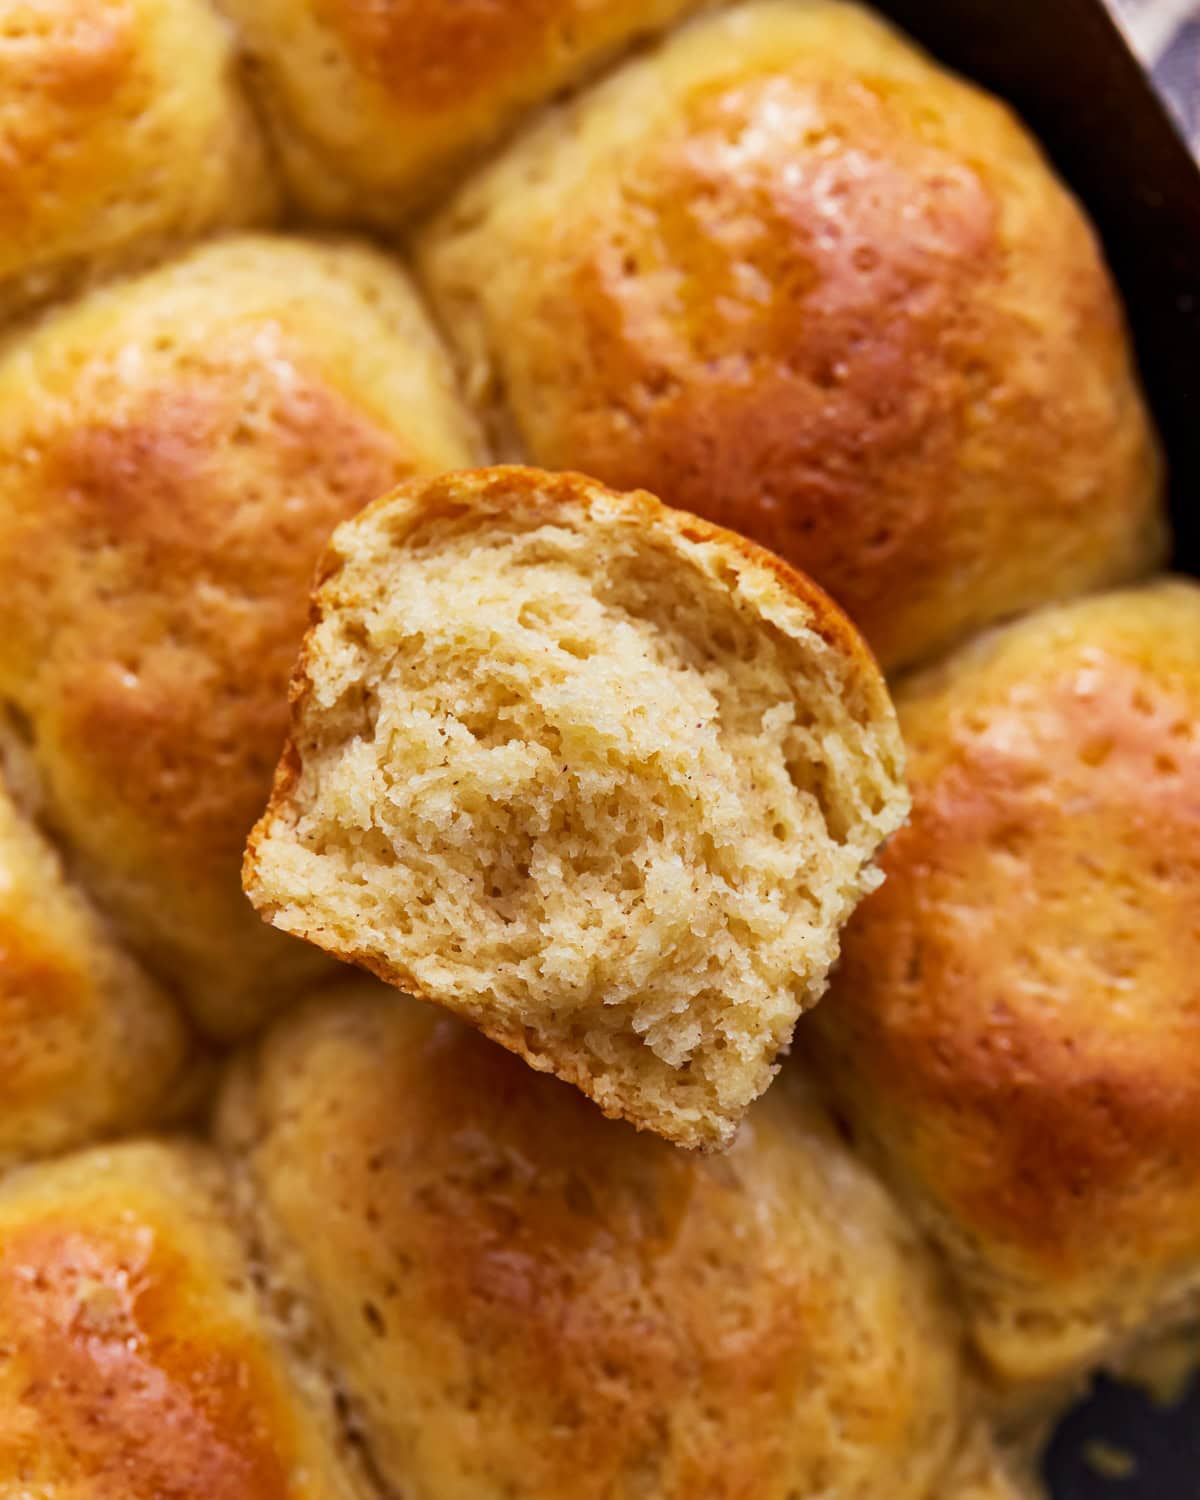
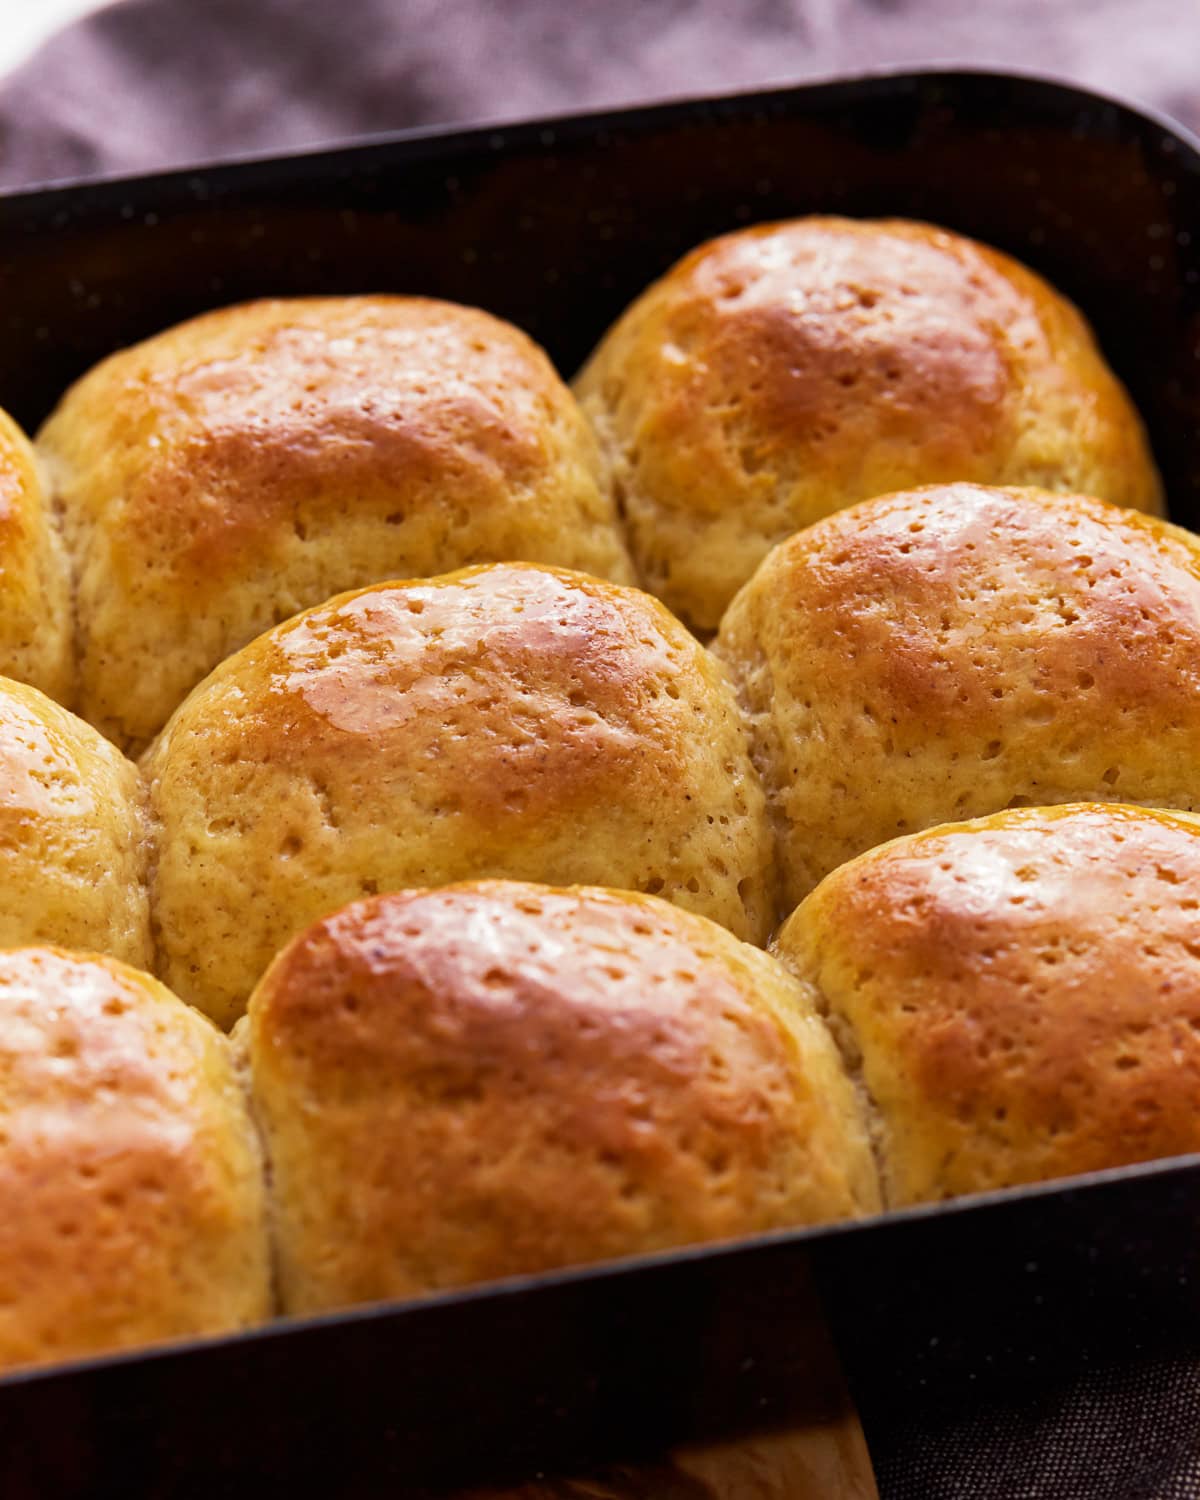
Homemade Gluten-Free Hawaiian Rolls
Hawaiian rolls are a classic snack or side dish, but gluten-free alternatives can be hard to come by. It feels like as soon as they hit the shelves, they’re gone! So, I decided it was time to create my own recipe for gluten-free Hawaiian rolls. I wanted it to be simple, fuss-free, and use ingredients that everyone can find in their local grocery store. And I’m so happy to share that’s exactly what I came up with! These are just as delicious as our gluten-free dinner rolls but sweetened with a little sugar and pineapple juice.
Gluten-Free Baking Tips
- I recommend using the spoon & level method to measure your gluten-free flour. Spoon the flour into your measuring cup, then level it off with a knife. Using a measuring cup to scoop the flour directly from the bag can pack in too much flour, resulting in dense and dry rolls.
- If desired, you can weigh each ball of dough to make sure they’re the same size before baking. I usually eyeball it because I’ve made this recipe many times, but weighing them means they all bake evenly and have a consistent size.
- Make sure your pineapple juice and eggs are at room temperature. Your butter should also be softened to help it mix into the dough easily.
- Different types of gluten-free flour have different hydration levels. If your dough seems really sticky, add 1 tablespoon of gluten-free flour at a time until it comes together into a smooth and pliable dough.
Gluten-Free Hawaiian Rolls Recipe
Ingredients
- 3 cups all-purpose gluten-free flour with xanthan gum*
- ¼ cup cornstarch
- 2 teaspoons instant yeast**
- 3 tablespoons sugar
- 1 teaspoon salt
- 2 large eggs, at room temperature
- 1 cup pineapple juice***, at room temperature
- 6 tablespoons unsalted butter****, softened
For Brushing (optional)
- 2 tablespoons melted butter
- 1 tablespoon honey
Instructions
- In a large bowl, whisk together the gluten-free flour, cornstarch, instant yeast, sugar, and salt.
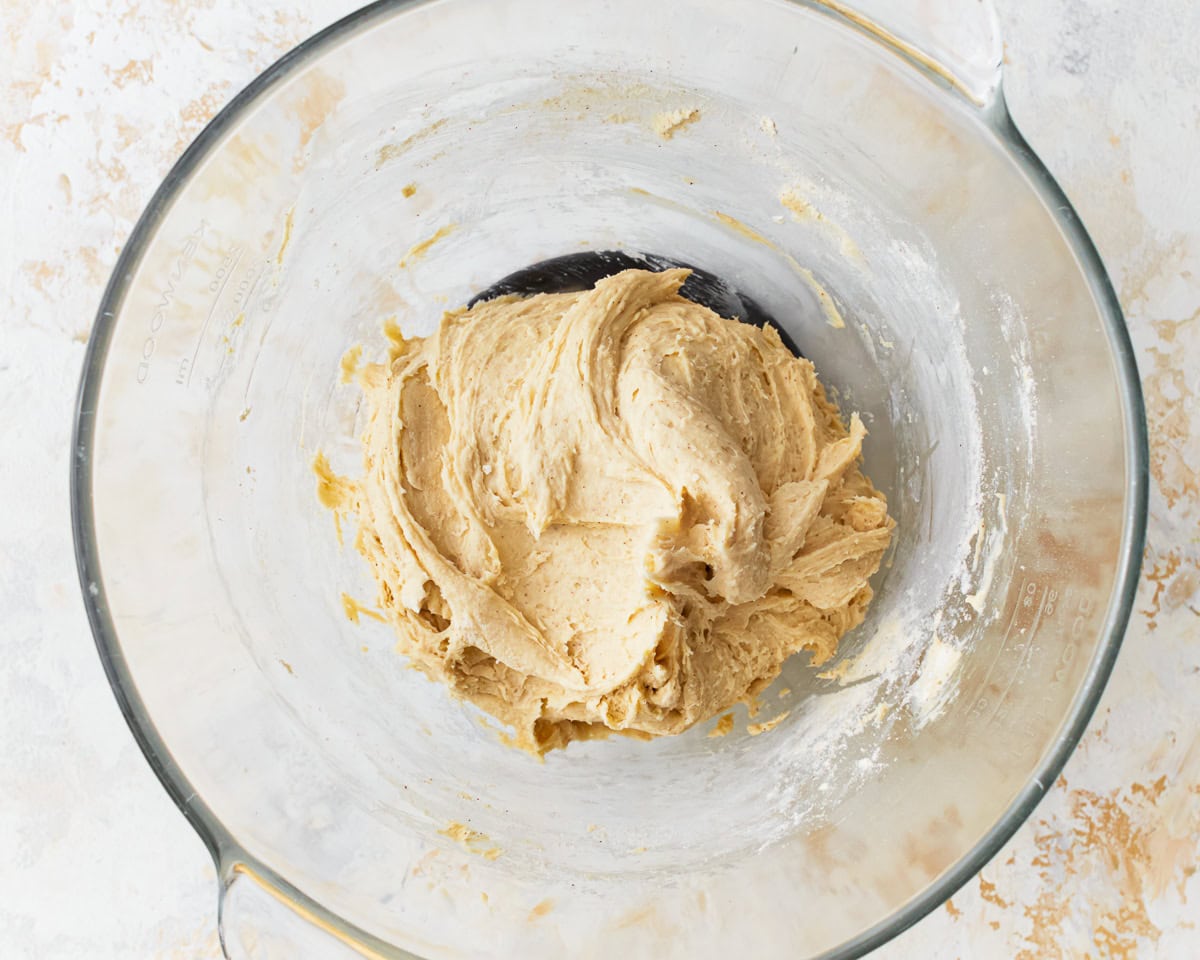
- Add the eggs and pineapple juice to the dry ingredients and mix to combine, using a sturdy spoon or stand mixer fitted with a paddle attachment. Add the softened butter and mix until all of the butter is incorporated and a sticky dough forms.
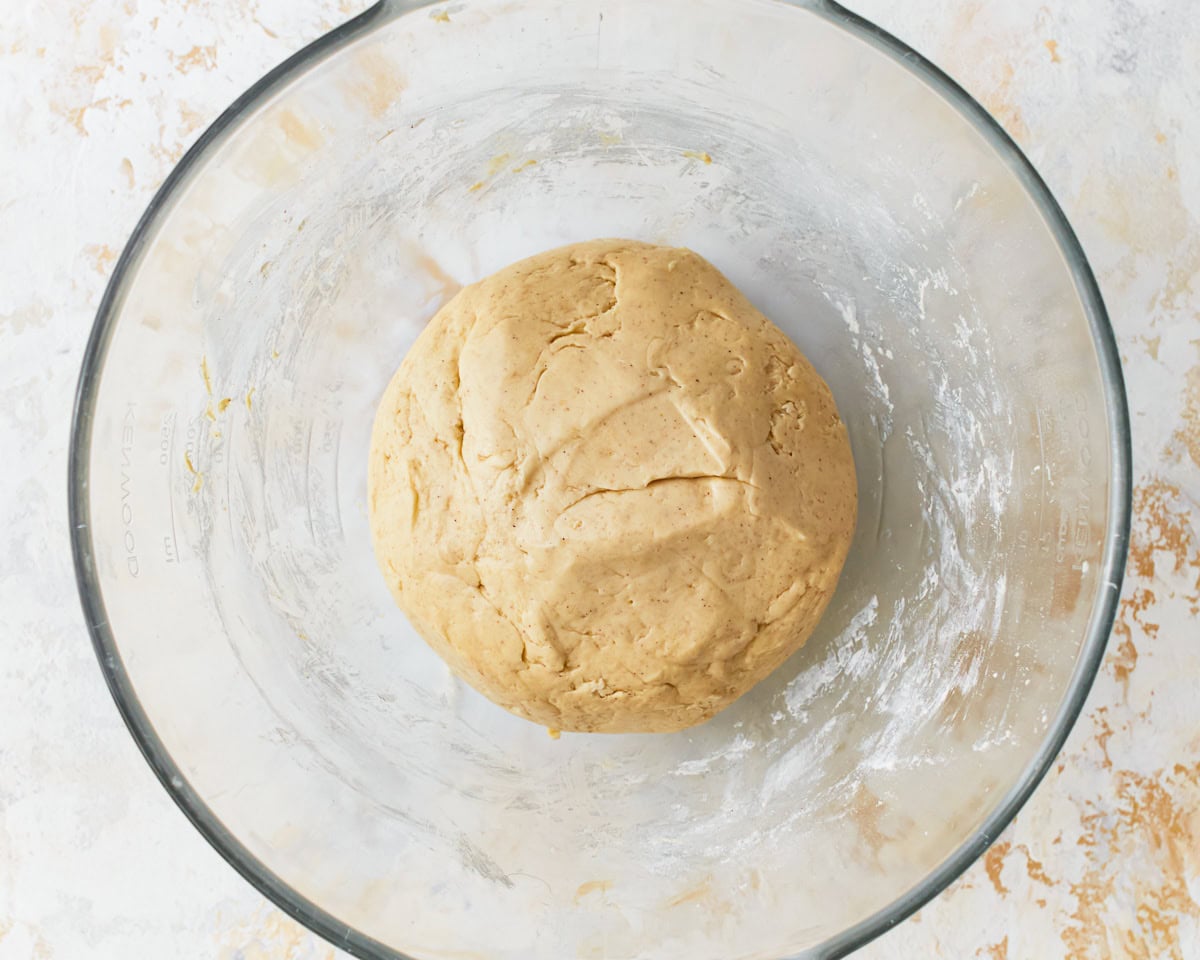
- Knead the dough for about 2-3 minutes until smooth and pliable, using a dough hook or knead by hand. If the dough seems too sticky, add a little more gluten-free flour, 1 tablespoon at a time.
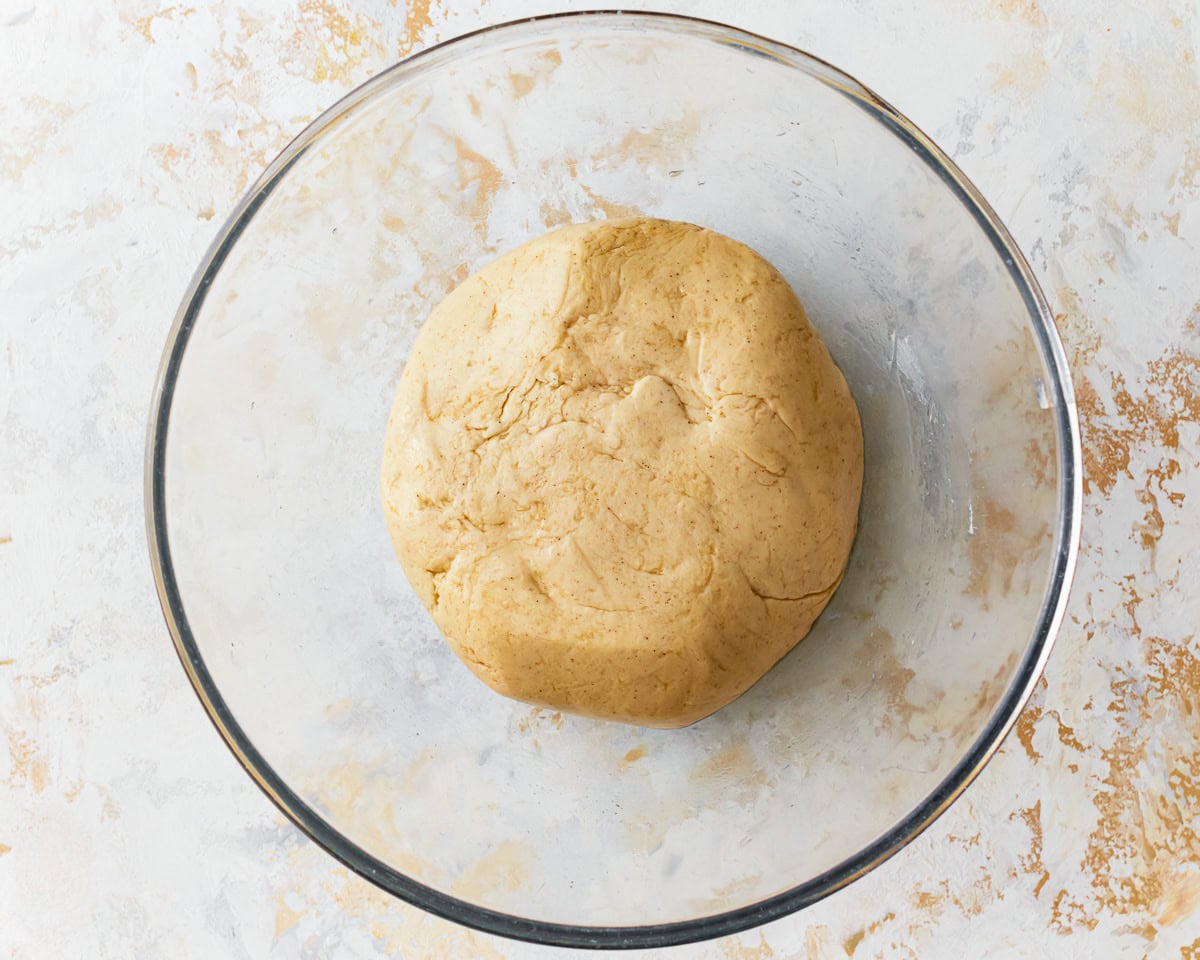
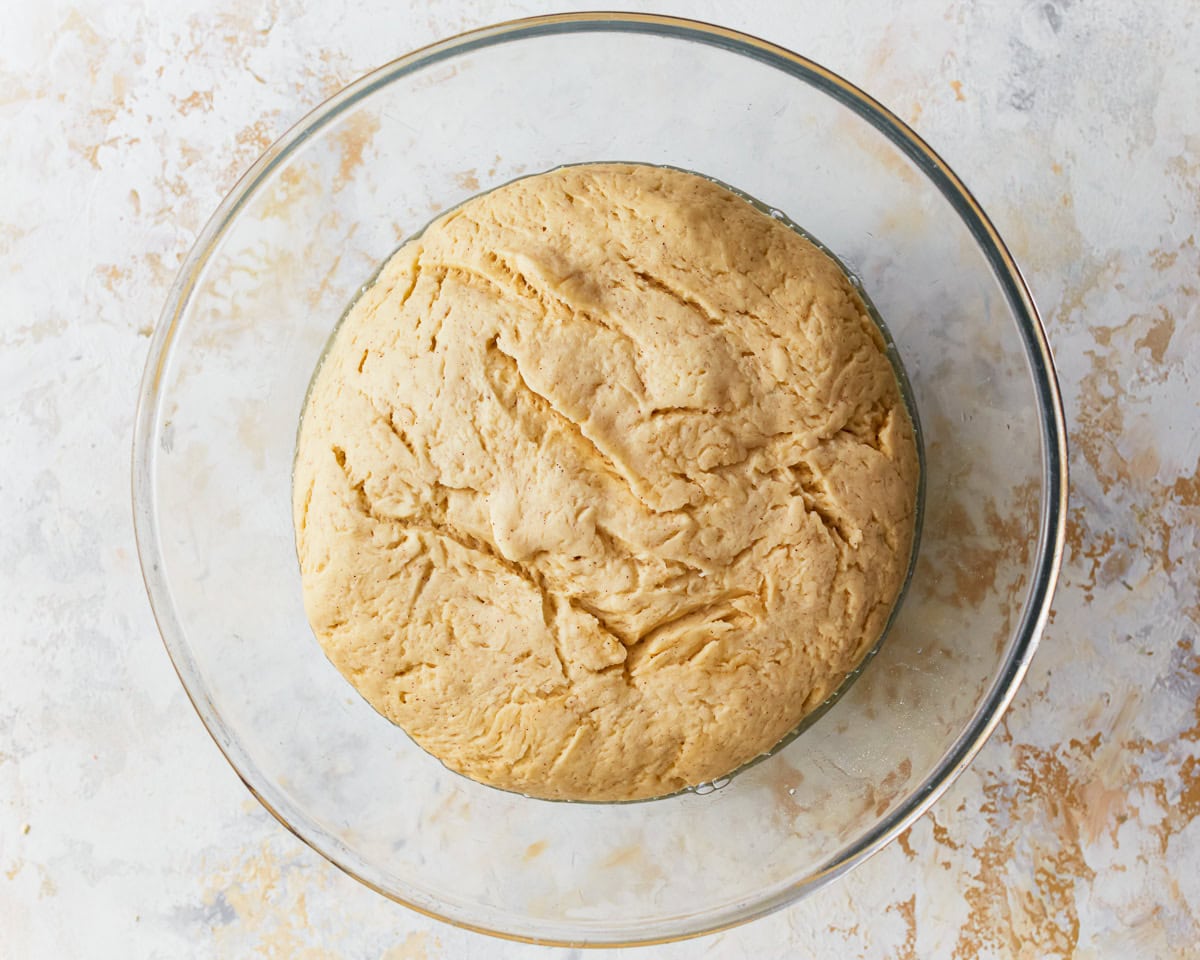
- Place the dough in a greased bowl and cover with a damp towel or plastic wrap. Let it rise in a warm, draft-free area for about 1 hour or until doubled in size.
- Punch down the risen dough to release air bubbles. Divide the dough into 12 equal pieces and shape each piece into a smooth ball.
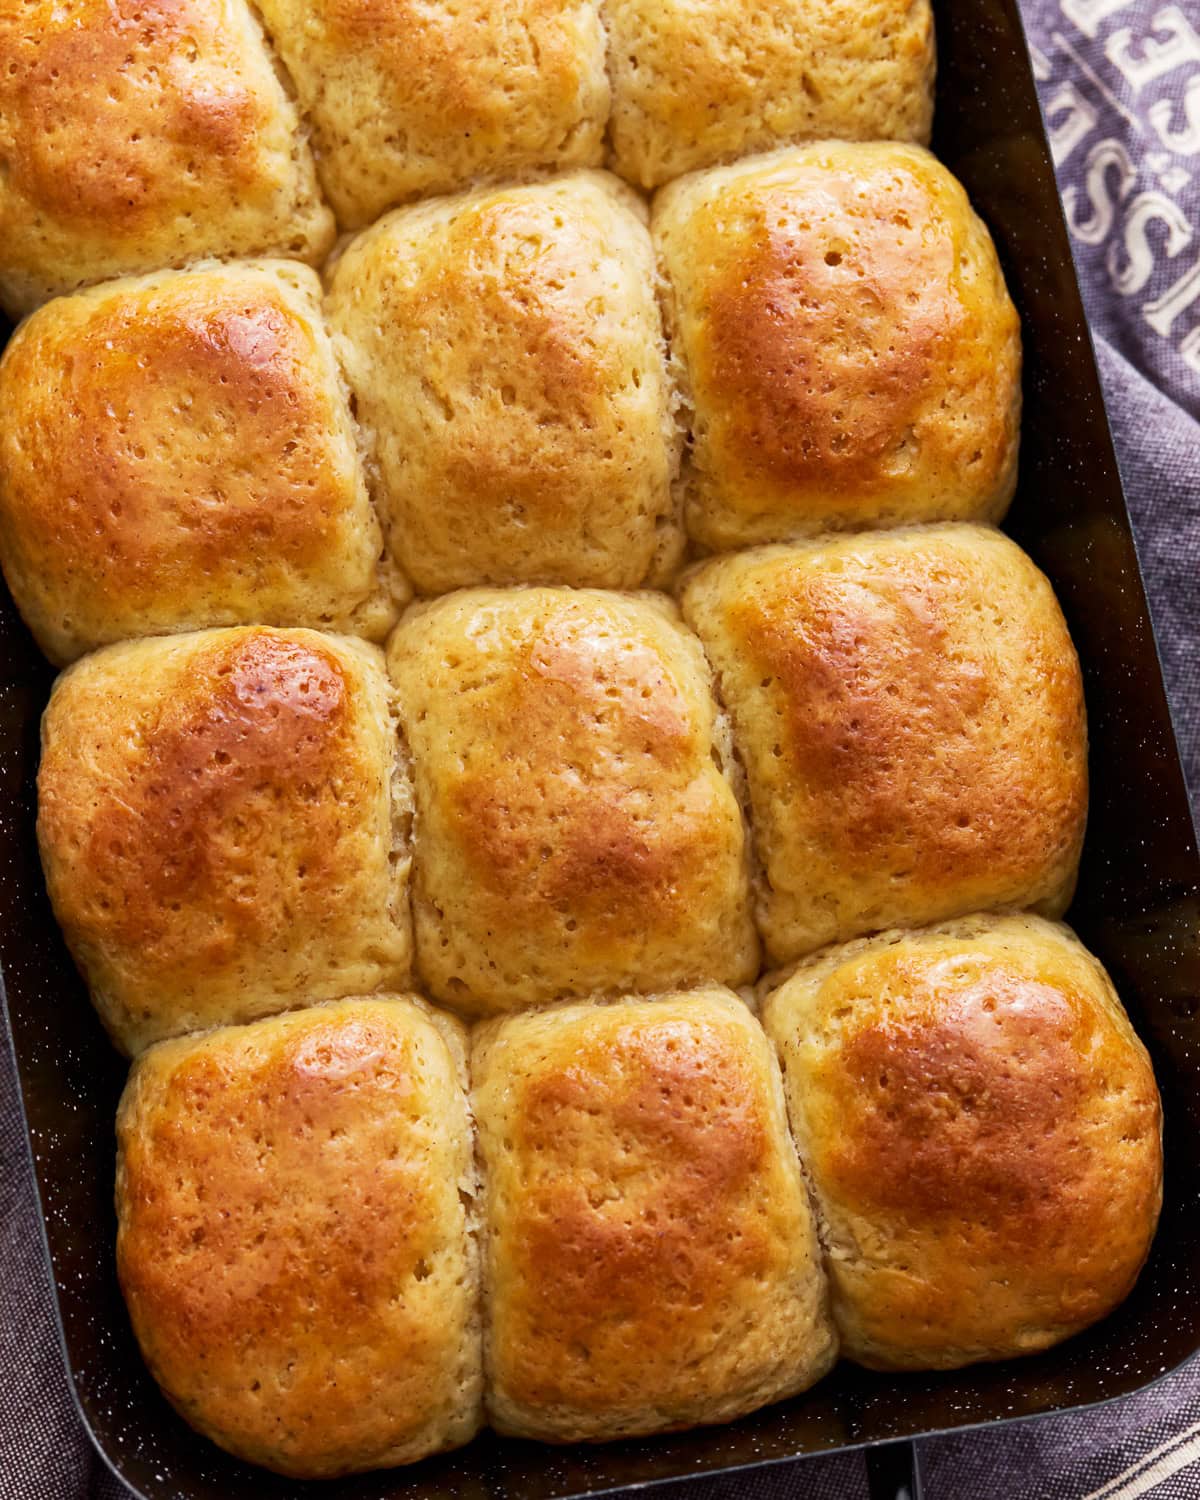
- Arrange the dough balls in a greased 9×13-inch baking pan. You want the dough balls to touch each other while they rise and bake so they have that classic pull-apart shape.
- Cover the rolls with a damp towel or plastic wrap and let them rise for another 30 minutes.
- Preheat your oven to 350°F (177°C).
- Remove the towel or plastic wrap and bake the rolls for 18-22 minutes, or until golden brown on top.
- Remove the rolls from the oven and brush them with melted butter and honey for a shiny finish, if desired.
- Serve warm and enjoy!
Notes
Nutrition
Nutrition information is automatically calculated, so should only be used as an approximation.
How to Make Gluten-Free Hawaiian Rolls Step-by-Step

Gather your ingredients together.
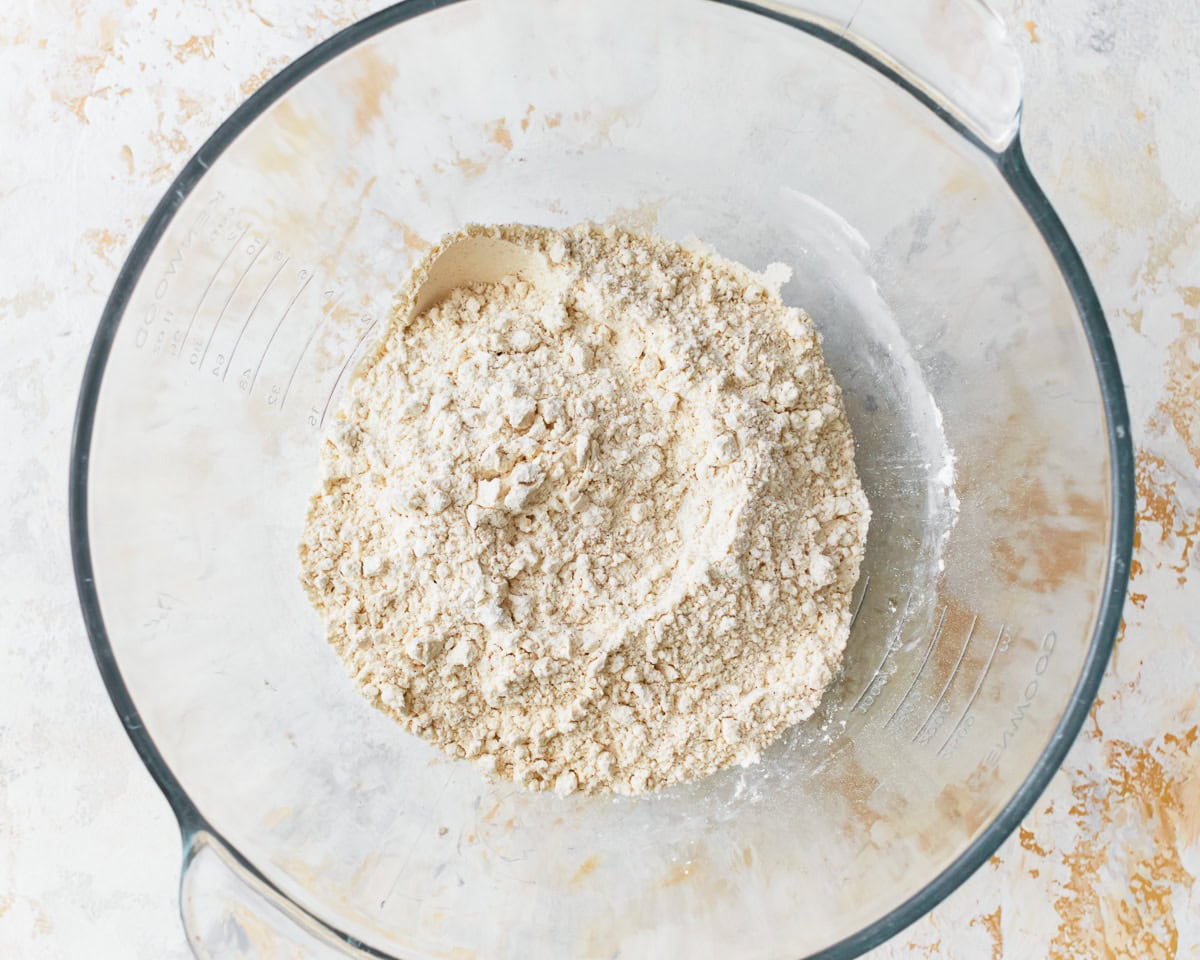
Mix dry ingredients: In a large bowl, whisk together 3 cups gluten-free flour, ¼ cup cornstarch, 2 teaspoons instant yeast, 3 tablespoons sugar, and 1 teaspoon salt.
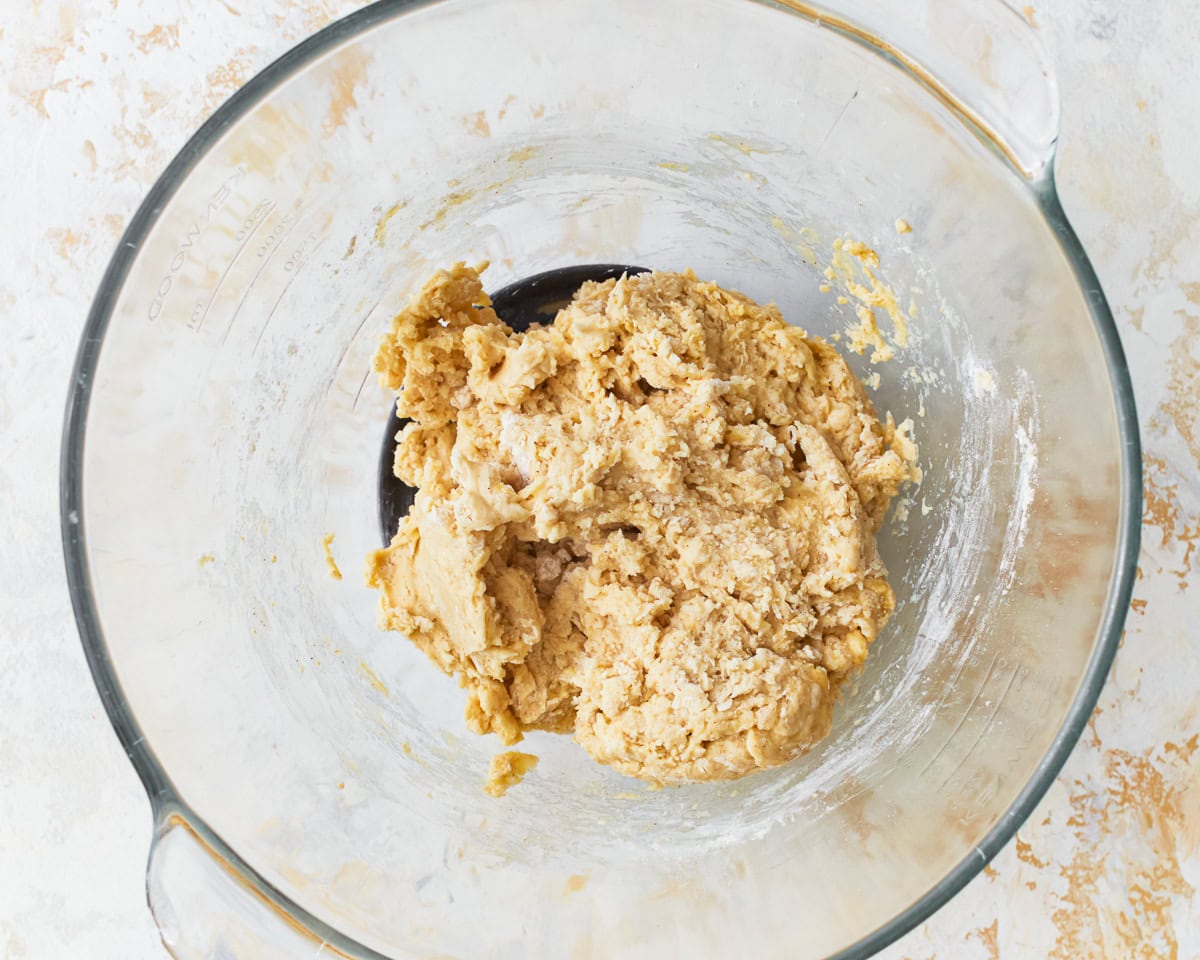
Add wet ingredients: Add 2 large eggs and 1 cup pineapple juice to the dry ingredients and mix to combine, using a sturdy spoon or stand mixer fitted with a paddle attachment.
Add 6 tablespoons softened butter and mix until all of the butter is incorporated and a sticky dough forms.
Knead the dough: Knead the dough for about 2-3 minutes until smooth and pliable, using a dough hook or knead by hand. If the dough seems too sticky, add a little more gluten-free flour, 1 tablespoon at a time.
Place the dough in a greased bowl and cover with a damp towel or plastic wrap.
Let it rise in a warm, draft-free area for about 1 hour or until doubled in size.
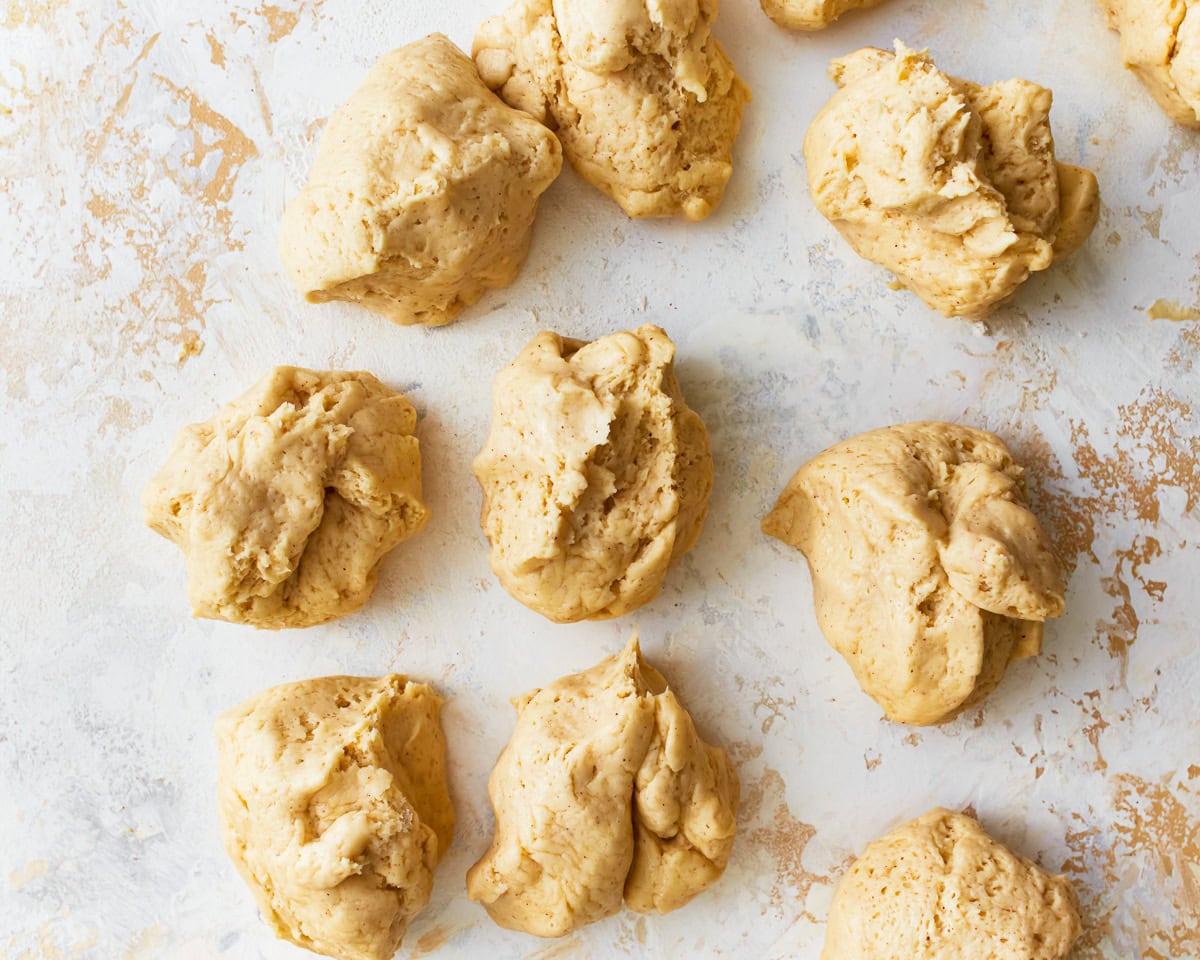
Form rolls: Punch down the risen dough to release air bubbles. Divide the dough into 12 equal pieces and shape each piece into a smooth ball. Like any gluten-free dough, it can be a little tricky to work with. To shape these rolls, I cup my hands around the dough ball and gently roll it in a circular motion on a clean surface.
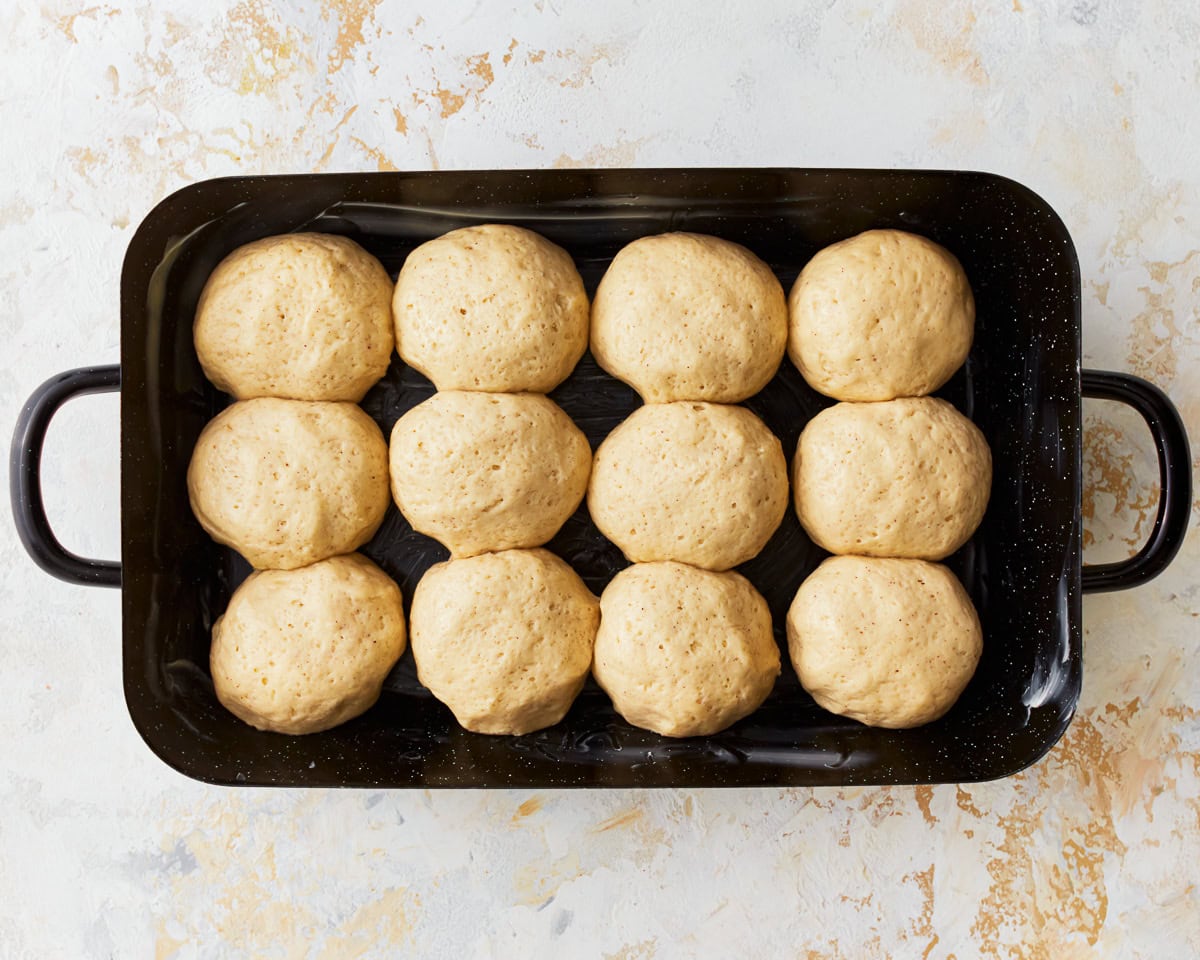
Arrange the dough balls in a greased 9×13-inch baking pan. You want the dough balls to touch each other while they rise and bake so they have that classic pull-apart shape.
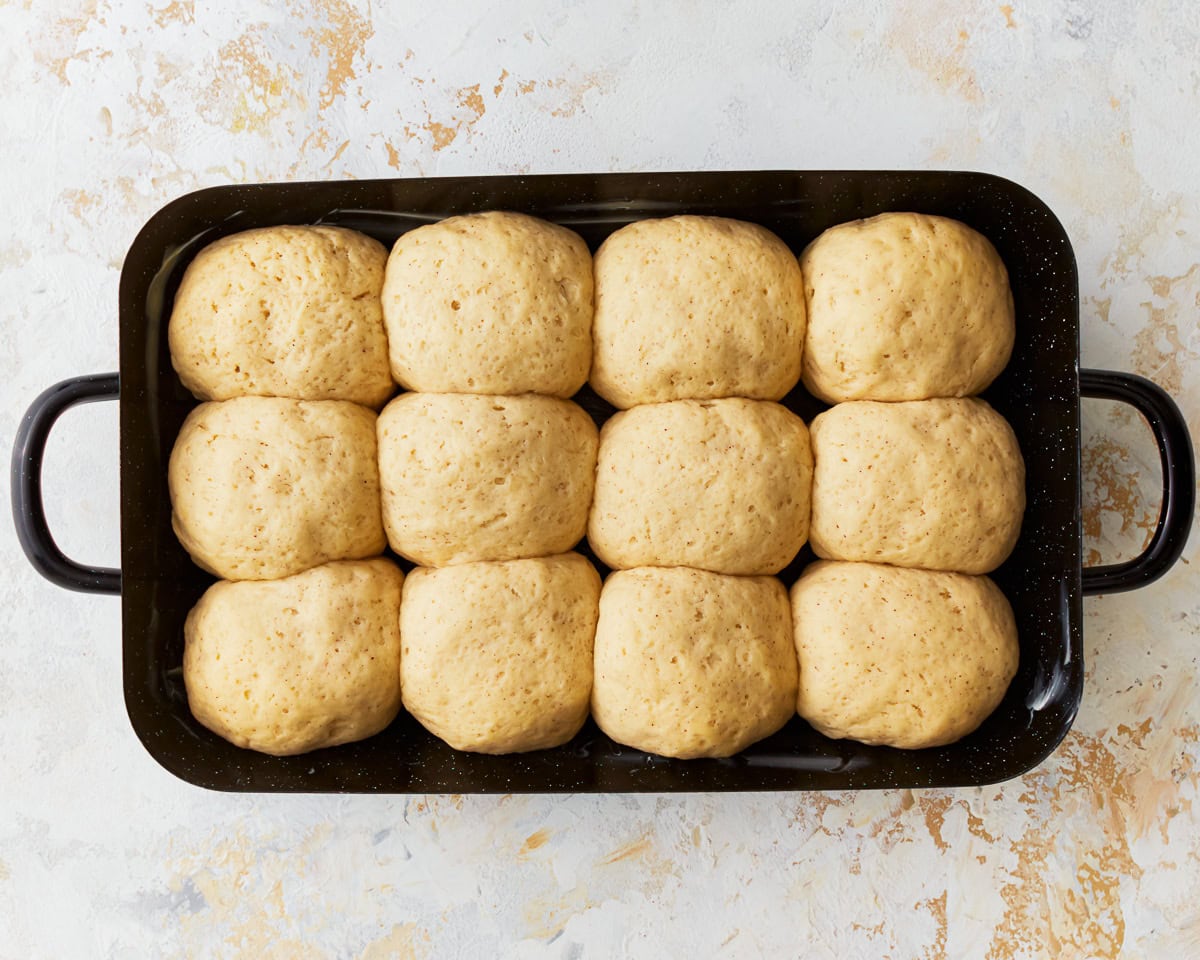
Cover the rolls with a damp towel or plastic wrap and let them rise for another 30 minutes. Preheat your oven to 350°F.
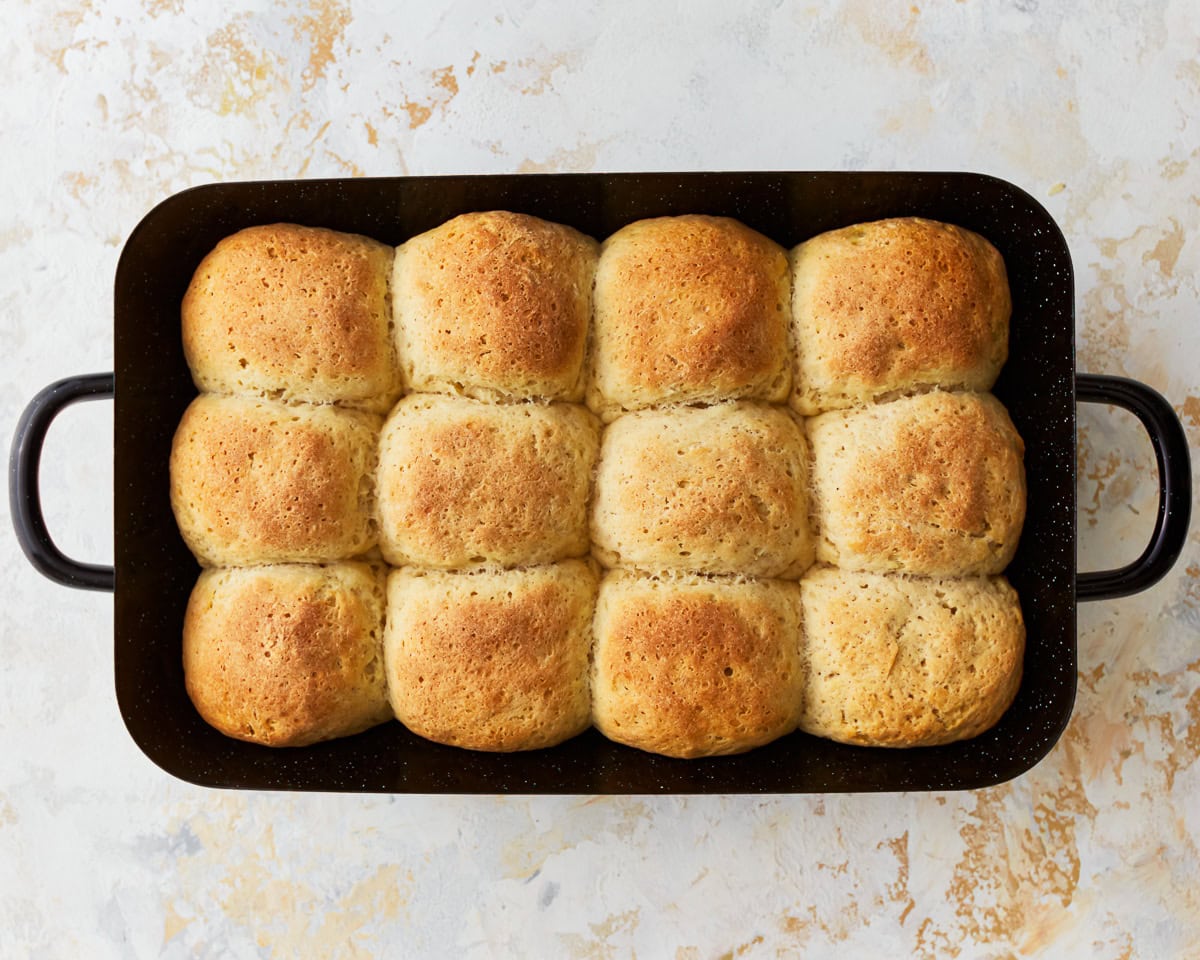
Remove the towel or plastic wrap and bake the rolls for 18-22 minutes, or until golden brown on top.

Remove the rolls from the oven and brush them with 2 tablespoons melted butter and 1 tablespoon honey for a shiny finish, if desired. Serve warm and enjoy!
Serving Suggestions
I like using these gluten-free Hawaiian rolls as a sweeter alternative to gluten-free hamburger buns, but they work well as gluten-free slider buns, as a side dish for your holiday meal, or for breakfast. My family loves them in place of regular gluten-free sandwich bread, too.
For lunch the other day, I slathered one of these rolls in butter and dipped it in gluten-free tomato soup, which was delicious!
Storage Instructions
Store leftover GF Hawaiian rolls in an airtight container at room temperature for up to 3 days. To reheat them, I either warm them in the microwave for 10-15 seconds or place them in a preheated oven at 300°F for 5-10 minutes.
To freeze, let the rolls cool completely, wrap them in plastic wrap, and store them in a freezer-safe container for up to 3 months. Thaw on the kitchen counter for 1-2 hours or in the fridge overnight.
I’ve made this dough ahead of time before with great results! Prepare the dough as directed, place it into a mixing bowl, cover it with plastic wrap, and store it overnight in the fridge. The next day, shape the rolls and continue with the instructions.


Can I use anything else besides cornstarch?
Yes, you can replace the cornstarch with arrowroot, potato starch, or tapioca starch in these gluten-free Hawaiian rolls, using a 1:1 swap. Just keep in mind that tapioca can make the rolls slightly chewier, while arrowroot and potato starch keep the texture closest to the original.
What gf flour do you suggest using?
We like Pilsbury best!
I was very excited to make these and did so for Christmas dinner. However, they were a cornbread consistency and I was embarrassed because my family raves about my lifelong cooking and baking skills. Long story short, this recipe is seriously disappointing and frankly gross! Ended up in trash can, what a waste of money and time.
Hi Suzanne, what brand of GF flour did you use? Different brands can yield wildly different results.
King Arthur one to one all purpose gluten free flour.
Hi Suzanne, you will definitely need more moisture with that brand!
I love them, my gluten eating family wasn’t so sure lol but they still ate them! soft and great to make the little ham sliders sandwiches with. I will make again and keep some frozen for an easy quick sandwich.
Love the recipe!!! So easy to follow! My rolls did not come out well at all and I followed it step by step! They didn’t turn golden, they are very dense (more like biscuits) and they didn’t proof, which reading the other comments is probably because my kitchen was too chilly. Any words of advice?
We use so many of your recipes and love them all!
Help, this is my second batch and is not rising. I even bloomed my yeast this time to make it was active. it mixes really nice, just not rising. its been two hours now.
Hi Beverly, first and foremost, did you use instant yeast or active dry yeast? We used instant in this recipe, and that significantly cuts down on the proof time needed for the rolls to rise. It could also be a bit too chilly in your kitchen this time of year, so we recommend placing the bowl in your turned-off oven with just the light on to provide some extra warmth.
The flavor is good but the texture is nothing like normal hawaiian rolls. Maybe I just had too high of expectations reading “Hawaiian rolls.”
They look so good ! Definitely going to try these !!