Pupusas
Published
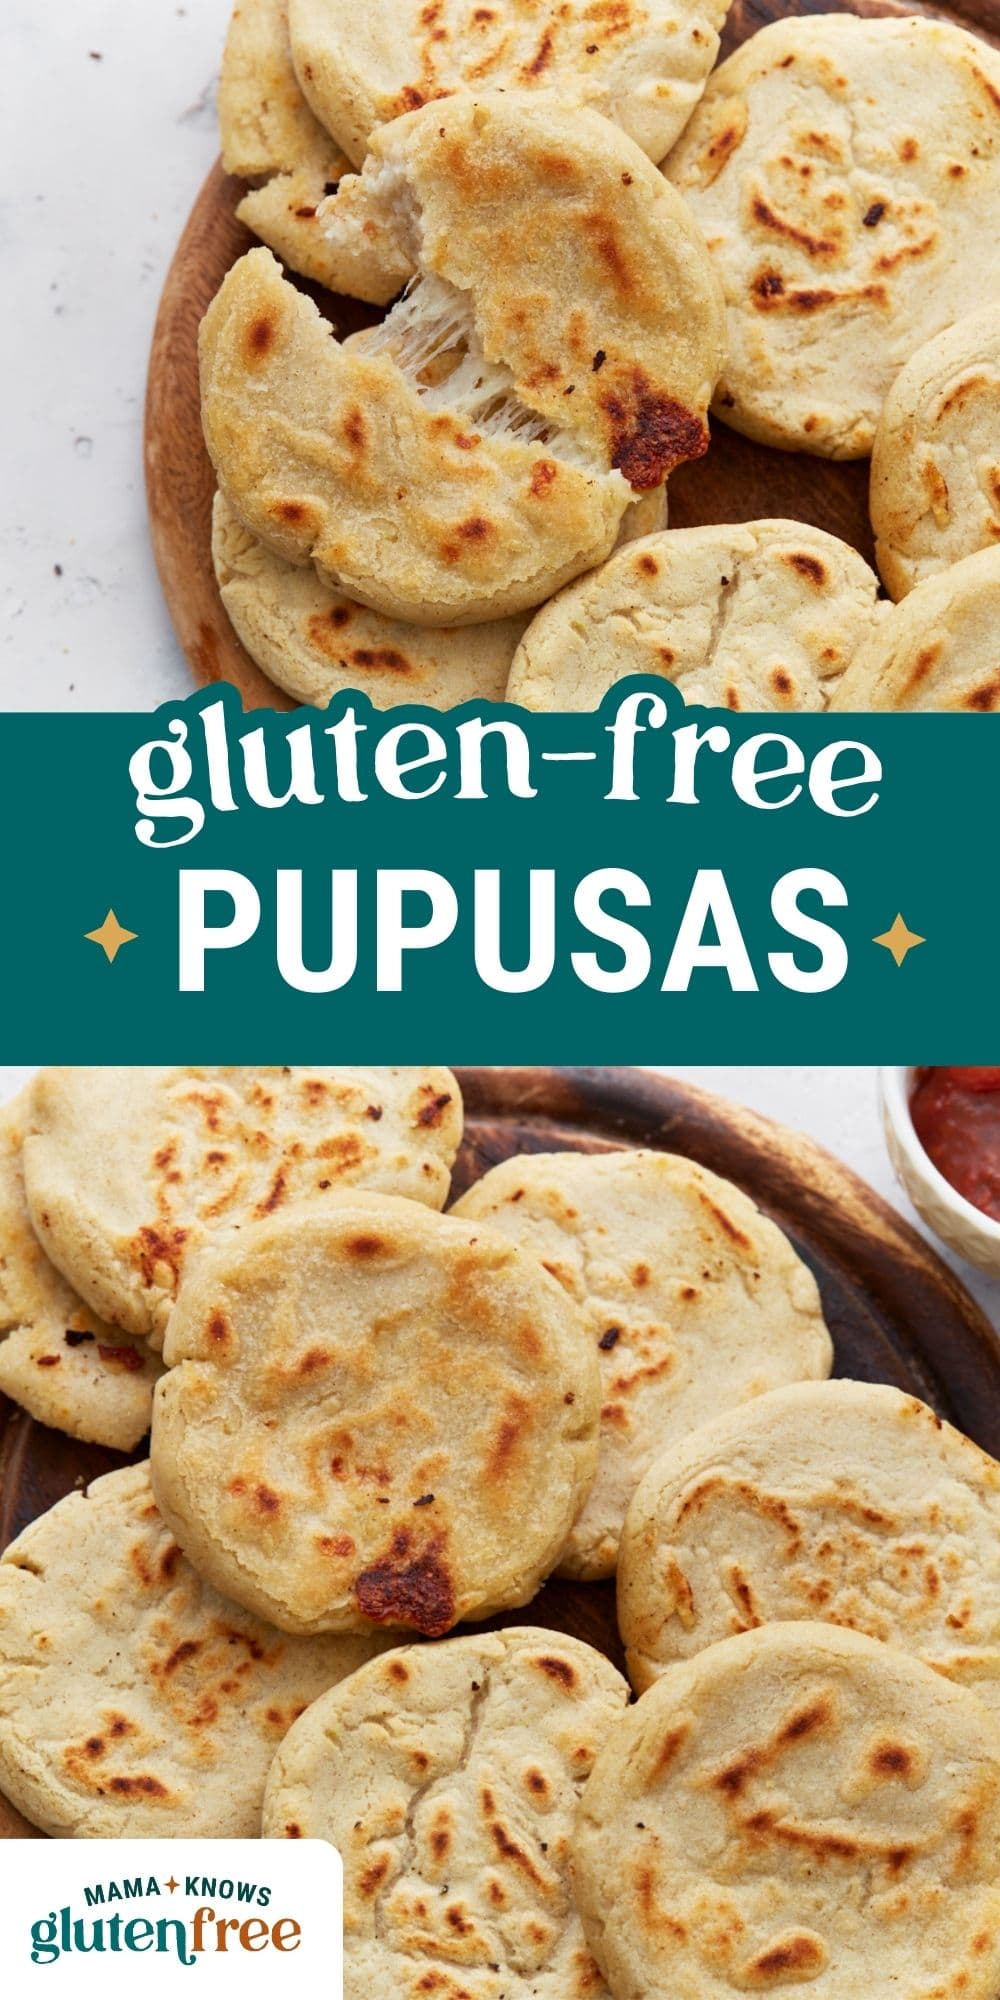
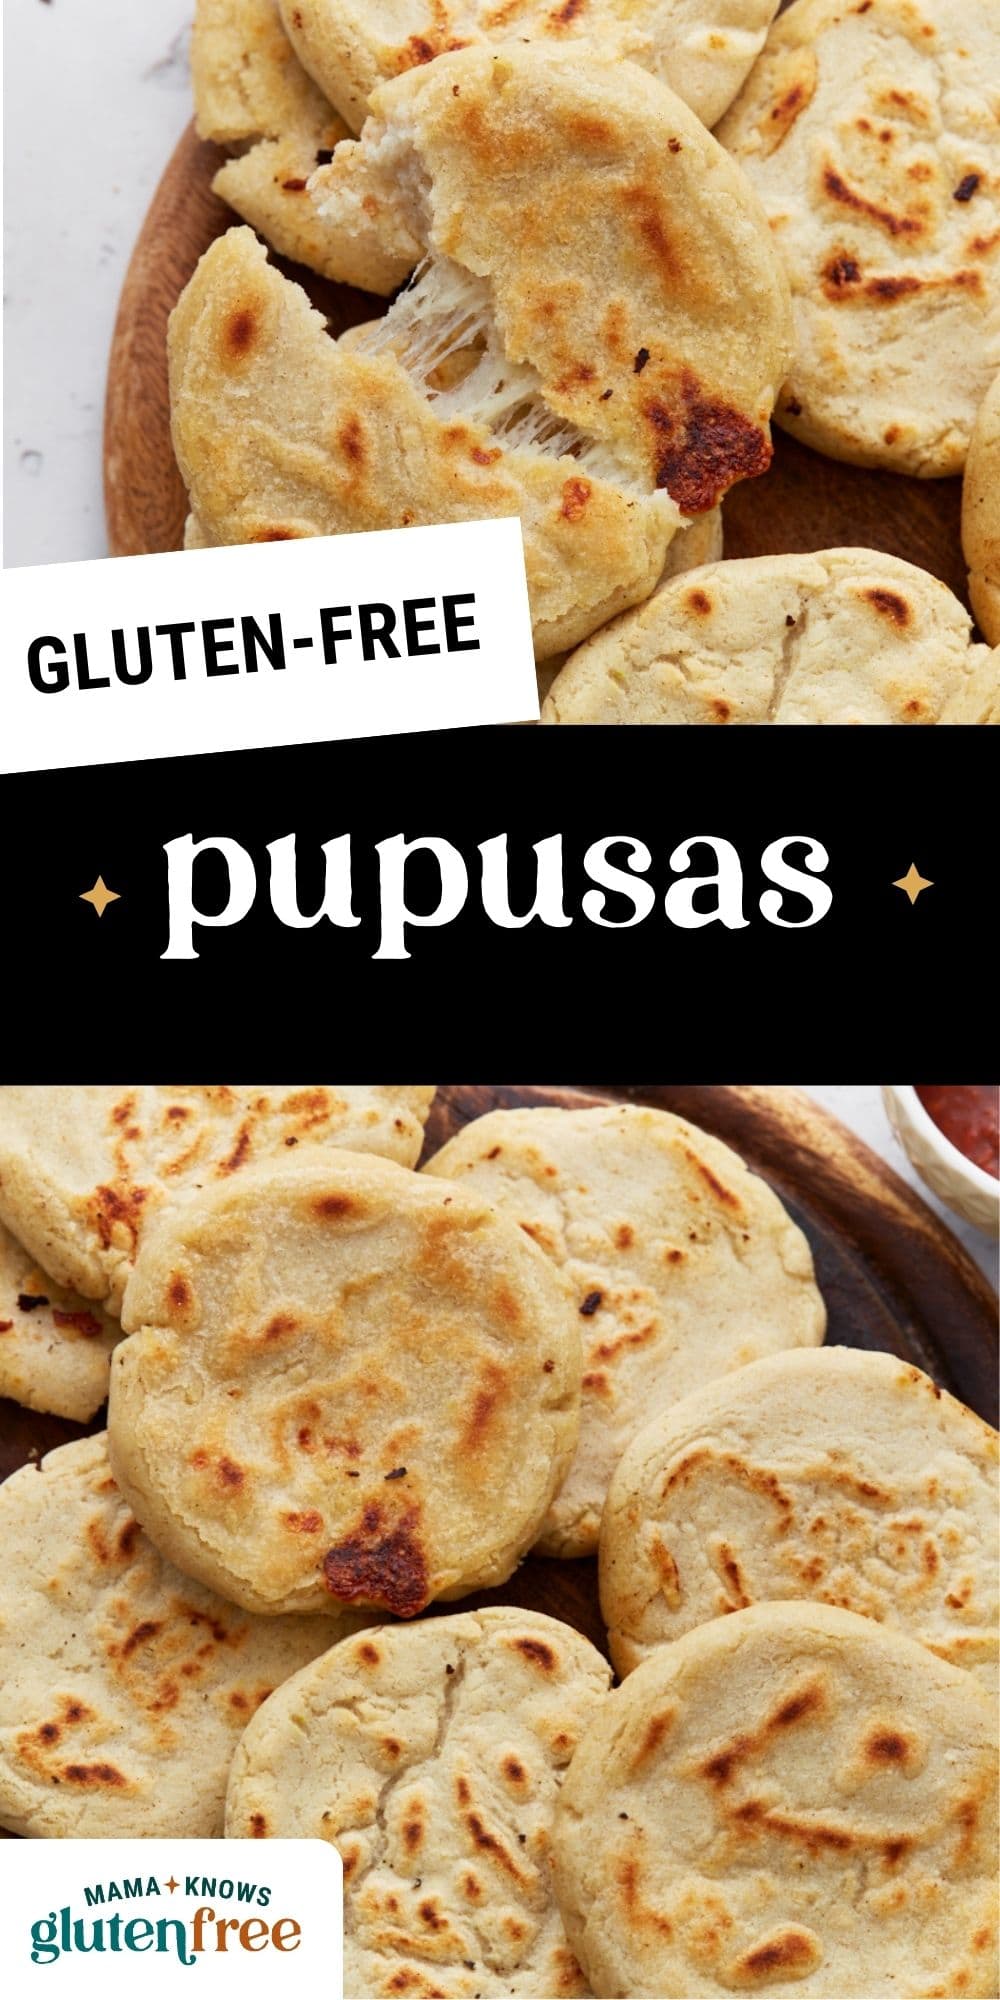
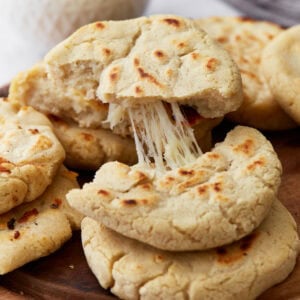
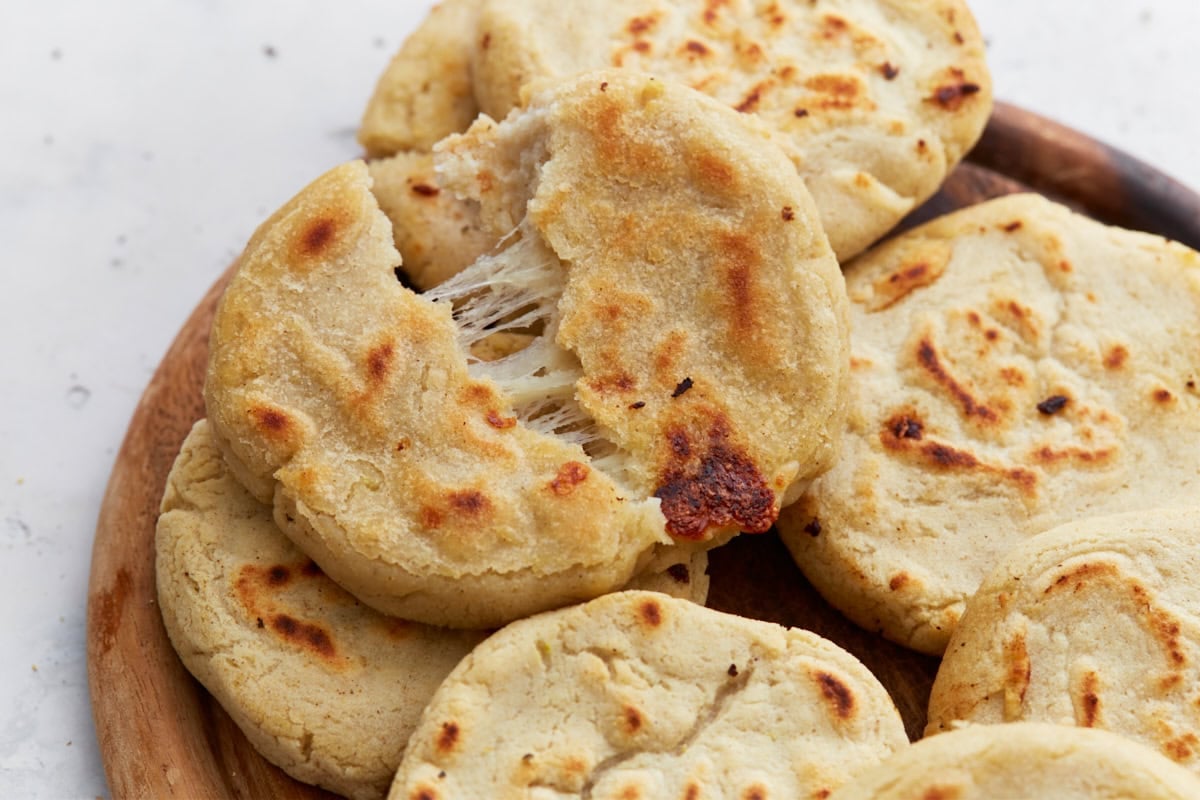
If you’ve never enjoyed a crispy, gooey pupusa, you’re missing out. Seriously, these are some of my favorite snacks to whip up to impress my friends. Pupusas are a beloved Salvadorian street food, and once you make them at home, you’ll see why. These stuffed corn cakes are crispy on the outside, gooey in the center, and deeply comforting. I make them with just 4 ingredients that are all naturally gluten-free. They’re perfect for a quick lunch or snack.

I love making these simple Salvadoran corn cakes the traditional way with just masa harina, water, salt, and cheese. They’re crisp on the outside, melty in the middle, and totally comforting. Masa harina is a finely ground corn flour made from corn that’s been soaked in lime water—it’s what gives these their signature flavor and texture. They’re kind of like cousins to arepas, except they’re stuffed before being cooked. They’re fun to make (especially with kids or friends around), and the masa harina gives them that authentic flavor I can’t get enough of.
What I Learned While Testing
- Use masa harina. Cornmeal won’t absorb water or hold together like masa harina. You need masa harina specifically for authentic texture and pliability.
- Avoid cracked dough. If the the dough is cracking, that usually means the dough is too dry. Add warm water just 1 tsp at a time and knead gently until it feels soft, smooth, and pliable—like playdough.
- Be sure not to overfill the pupusas. Try using a little less cheese and be sure to pinch and seal the edges well before flattening. A few leaks are okay, they’ll crisp up on the skillet and still taste amazing!
Pupusas
Equipment
- 1 Cast iron skillet, non-stick pan, or griddle
Ingredients
- 2½ cups masa harina, corn flour, such as Maseca (plus more as needed)
- 2¼ cups warm water, plus more as needed
- 1¼ tsp salt
- 1 cup shredded mozzarella
Instructions
- In a large bowl, mix masa harina, warm water, and salt until a soft, pliable dough forms. Let sit for 5–10 minutes to hydrate.
- Divide dough into 8 equal pieces and roll into balls. This works best with lightly wet hands. If the dough is too crumbly, add a little bit more water, if it’s too soft and sticky, add more masa harina as needed. The dough should be smooth and pliable like playdough.
- Flatten a dough ball into a disc in your palm. Add about 2 tbsp of cheese in the center.
- Gently fold the edges over the filling to seal, then pat it back into a 4–5 inch disc. Repeat with remaining dough.
- Heat a lightly greased skillet or griddle over medium heat. Cook each pupusa for 4–5 minutes per side, until cooked through and golden brown with some charred spots and the cheese is melted. Serve warm and enjoy!
Notes
- You can swap in Oaxaca cheese for a more traditional option, or mix in a little feta or queso fresco if you want a tangier bite.
- Try stirring in chopped jalapeños, black beans, or some cooked pork (like carnitas or chorizo) to the cheese filling for a heartier, more flavorful twist.
- Most brands like Maseca are naturally gluten-free, but always check for certified labeling if needed.
Nutrition
Nutrition information is automatically calculated, so should only be used as an approximation.
How to Make Pupusas Step by Step
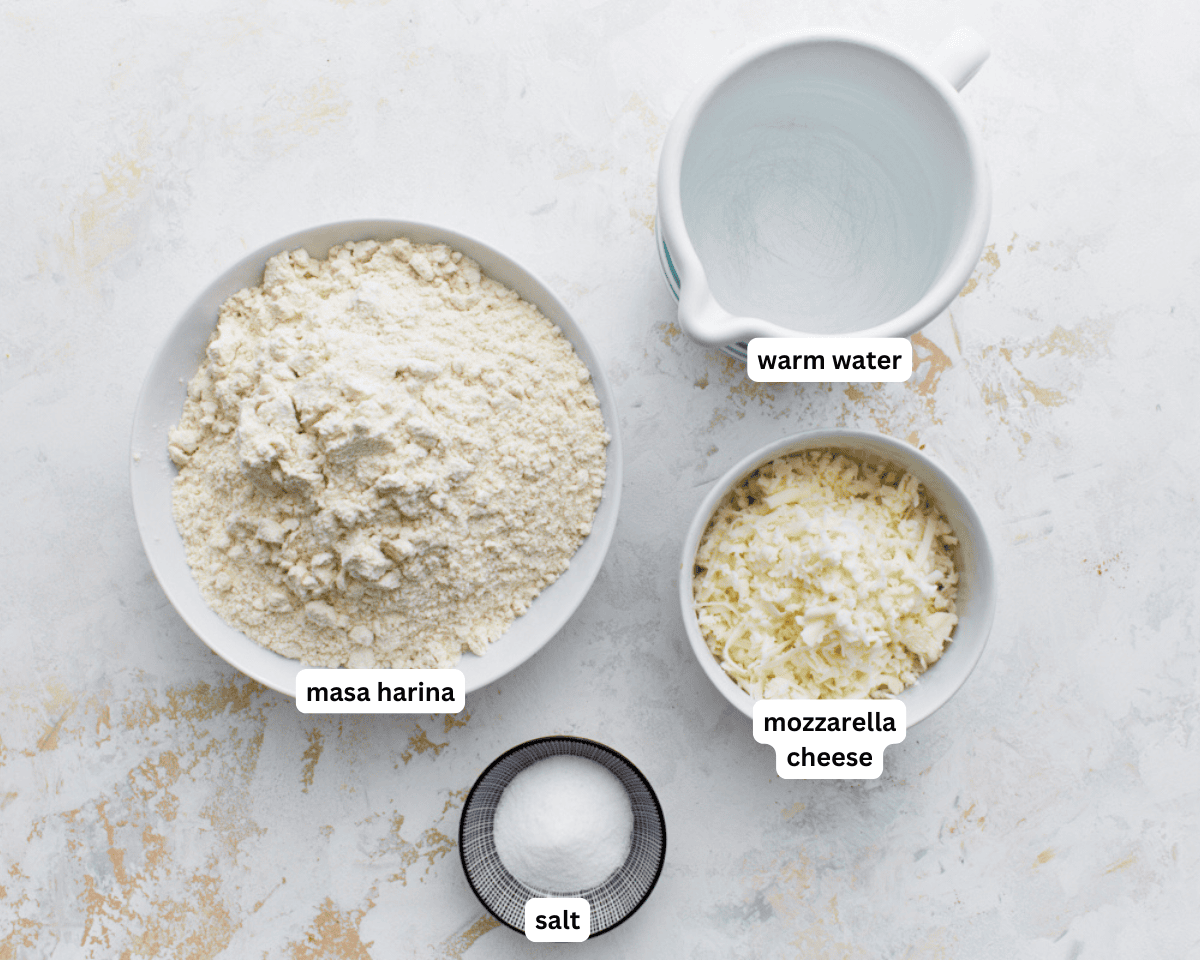
Gather the Ingredients: Gather all the ingredients together.
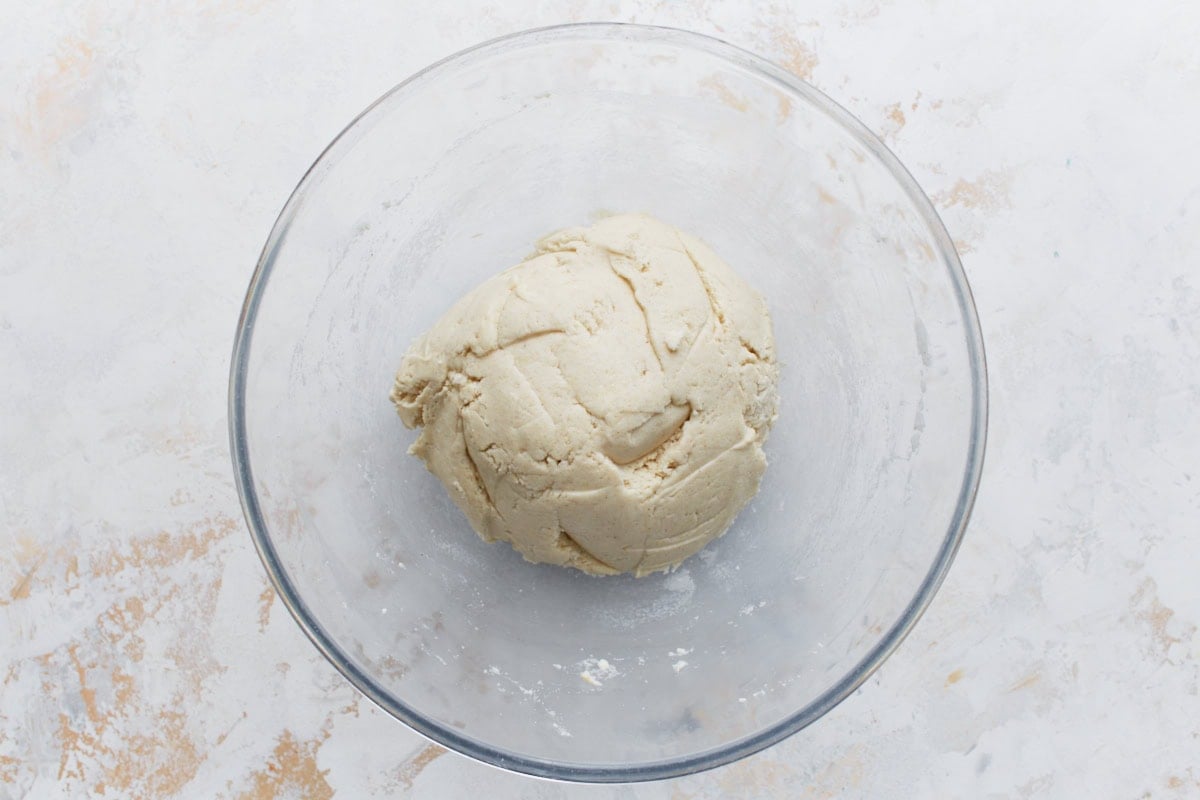
Make the dough: In a large bowl, mix 2½ cups of masa harina, 2¼ cups of warm water, and 1¼ tsp of salt until a soft, pliable dough forms. Let the dough sit for 5–10 minutes to fully hydrate.
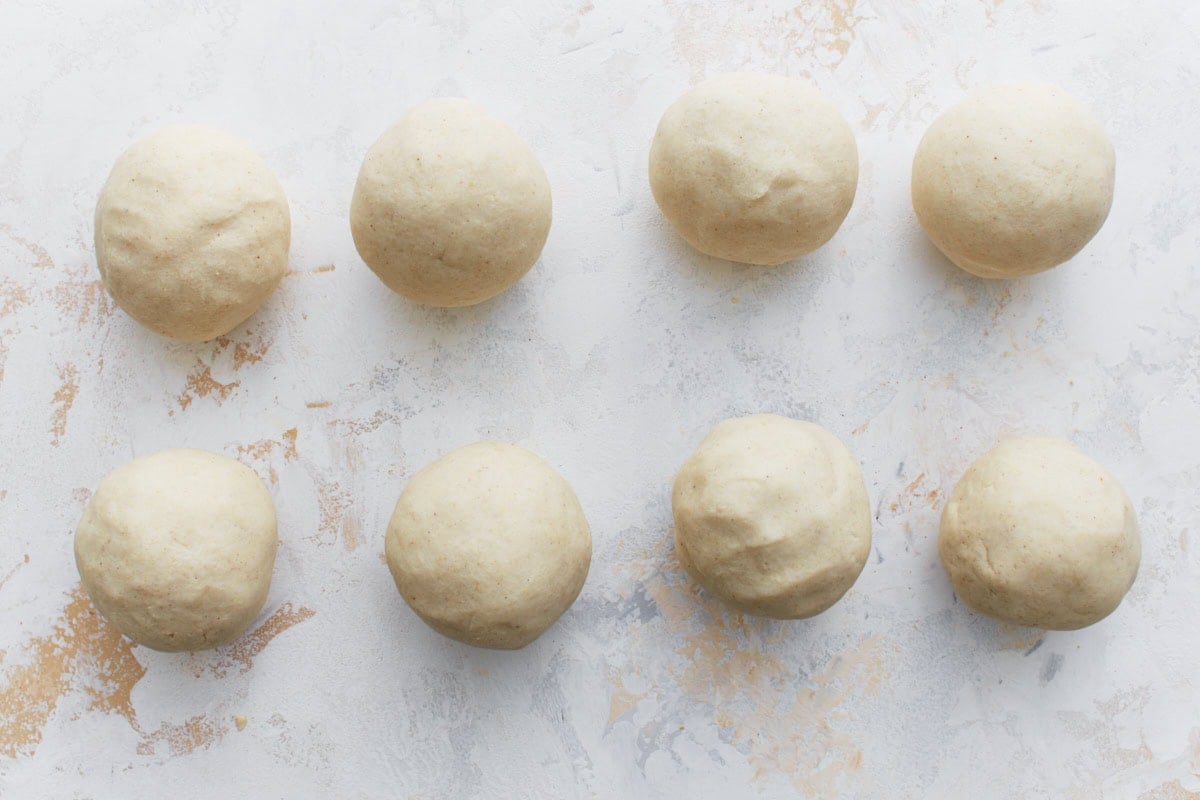
Shape the dough balls: Divide the dough into 8 equal pieces and roll each into a ball. Lightly wet your hands to make this easier. If the dough feels too dry or crumbly, add a splash of warm water; if it’s too sticky, sprinkle in a bit more masa harina. The texture should be smooth and pliable, like playdough.
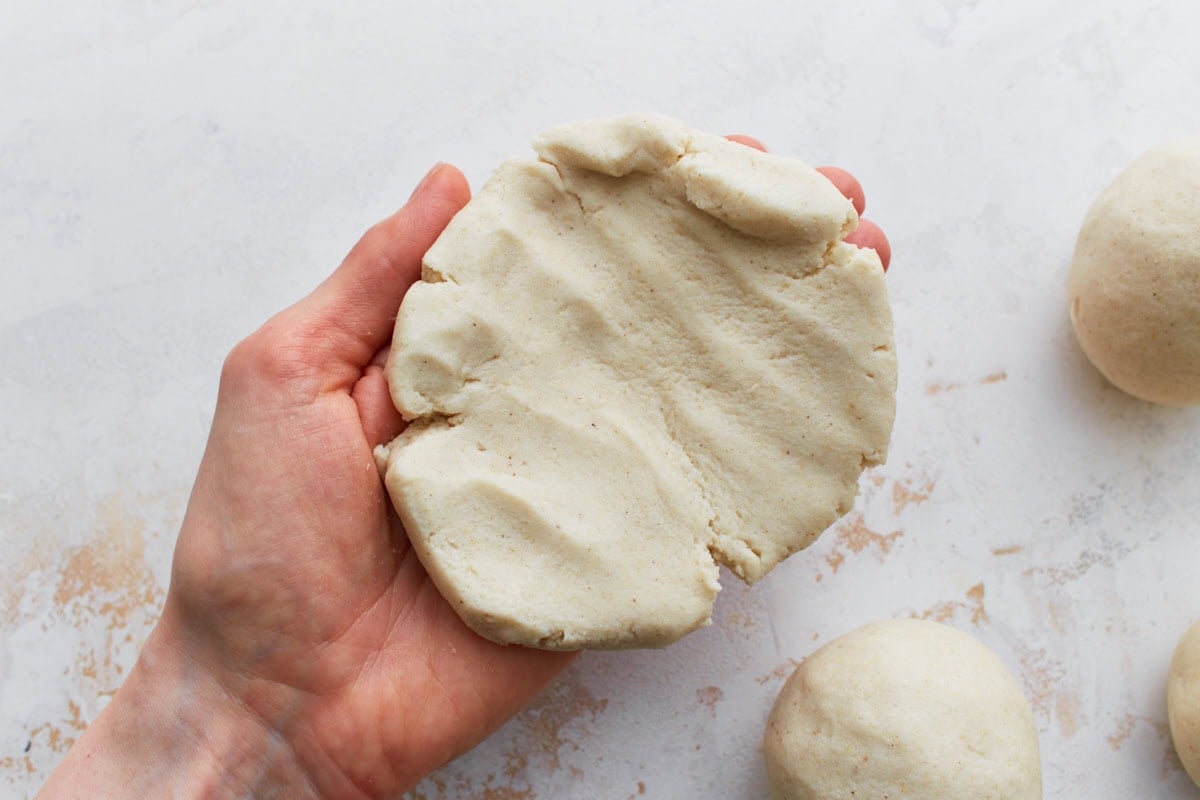
Flatten the dough balls: Take one dough ball and flatten it into a disc in the palm of your hand.
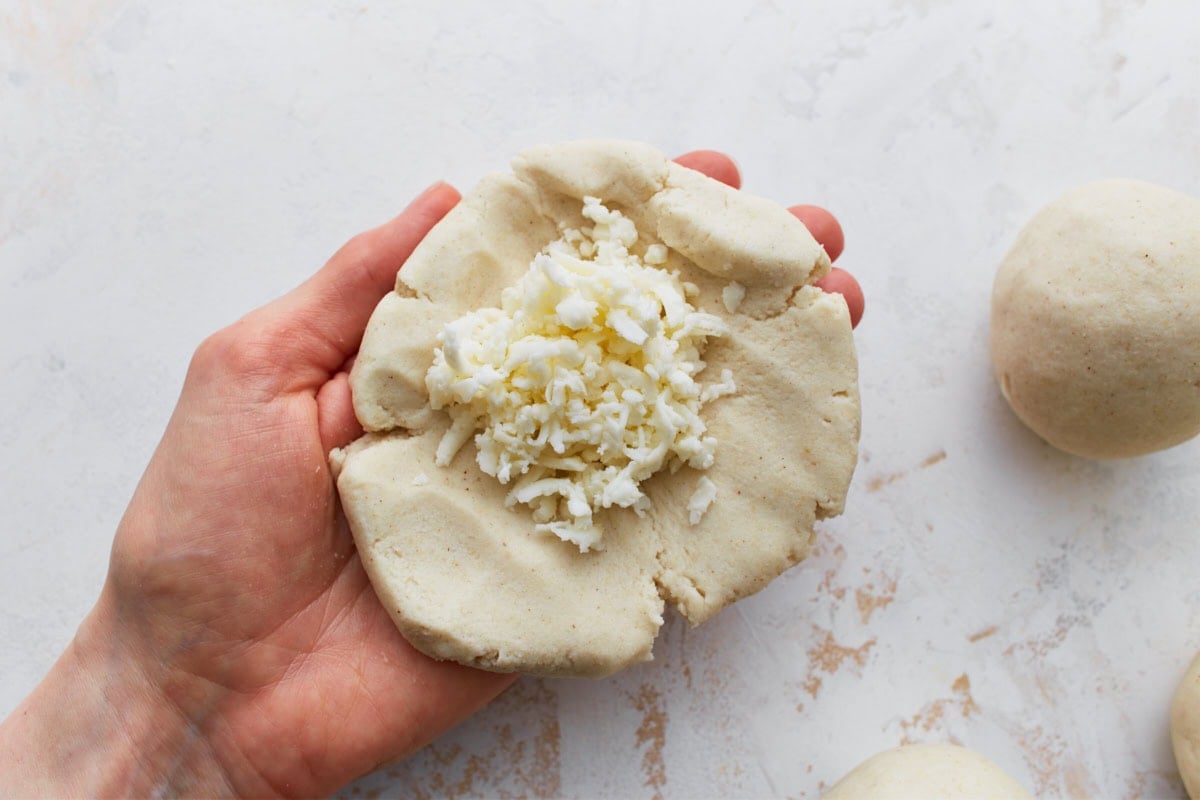
Fill with cheese: Add about 2 tbsp of shredded mozzarella (from the total 1 cup) to the center.
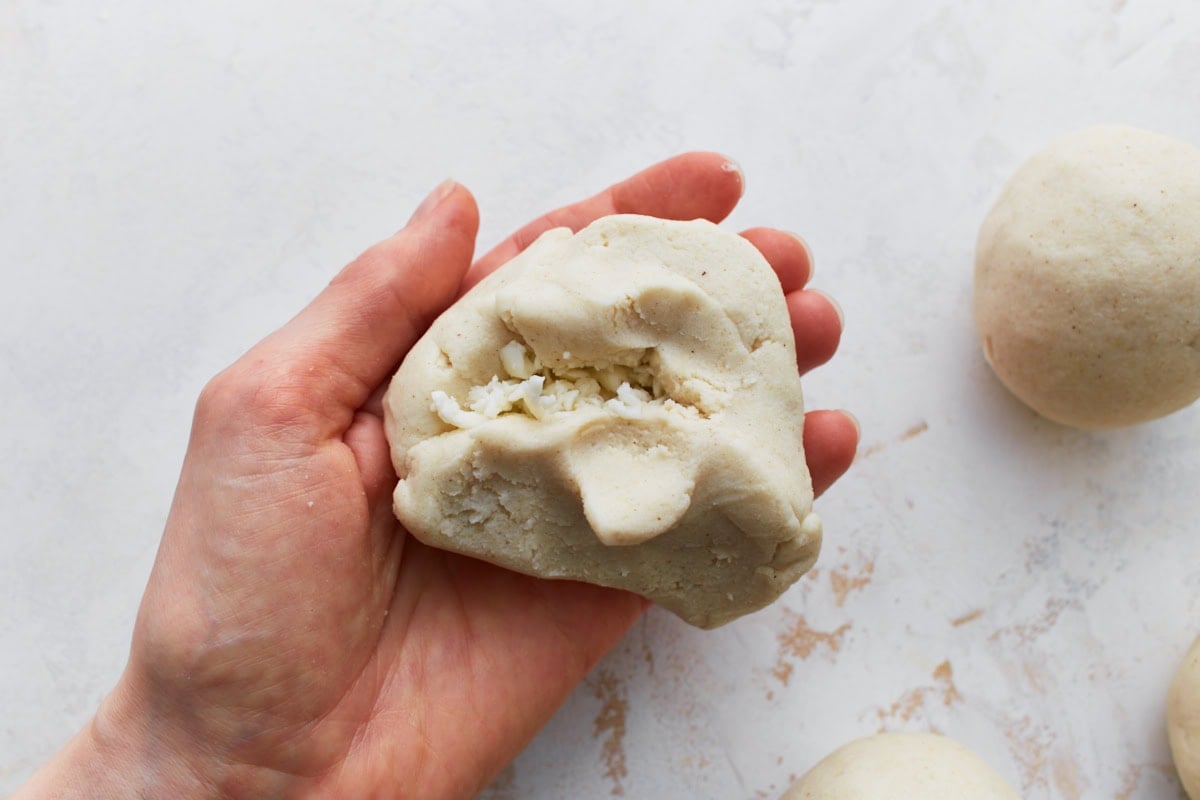
Seal the edges: Gently fold the edges of the dough over the cheese to seal.
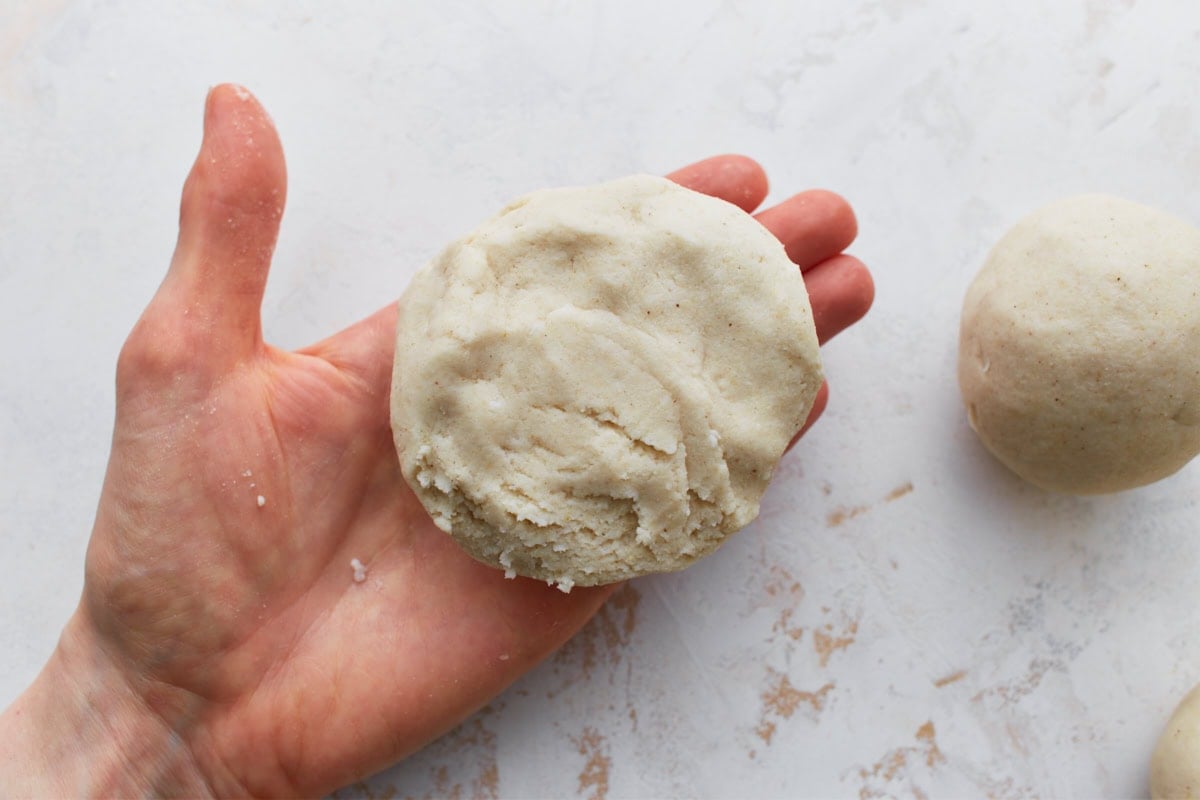
Flatten into a disc: Pat it back into a flat disc about 4–5 inches wide. Repeat with the remaining dough and cheese.
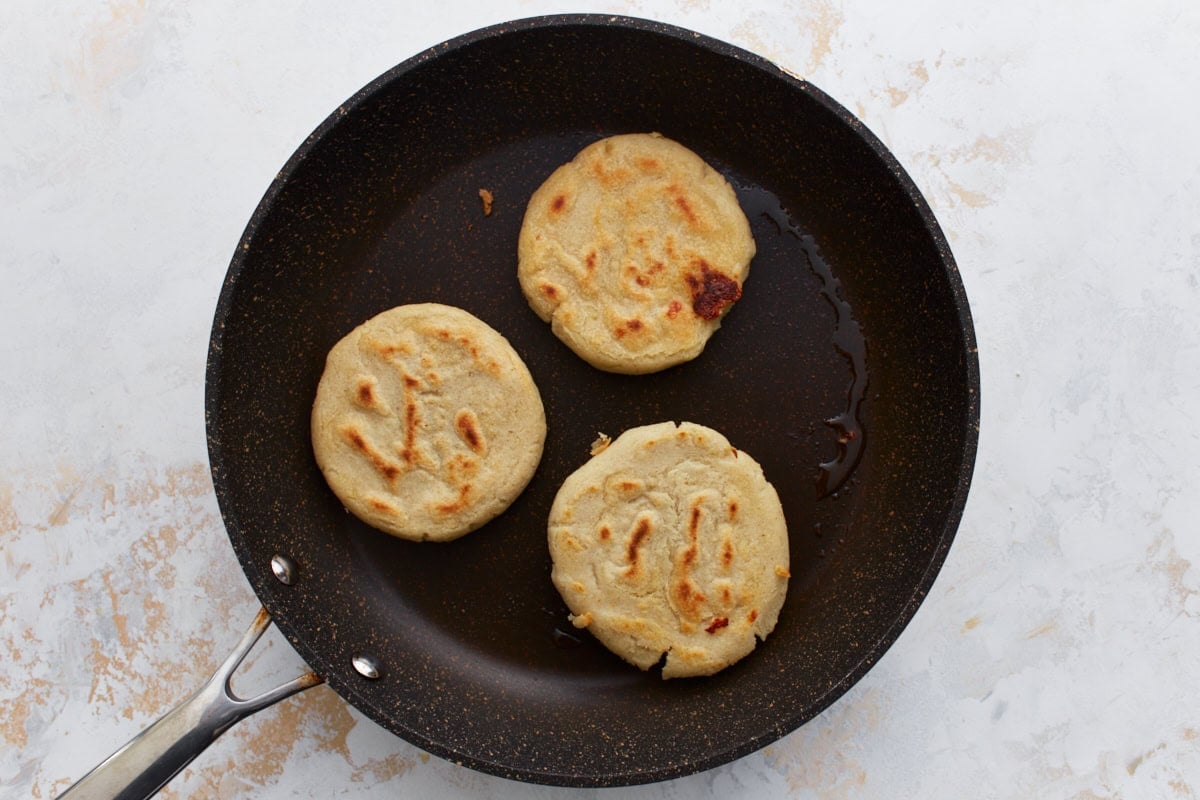
Cook the pupusas: Heat a lightly greased skillet or griddle over medium heat. Cook each pupusa for 4–5 minutes per side, until golden brown with a few charred spots and the cheese is melted inside.
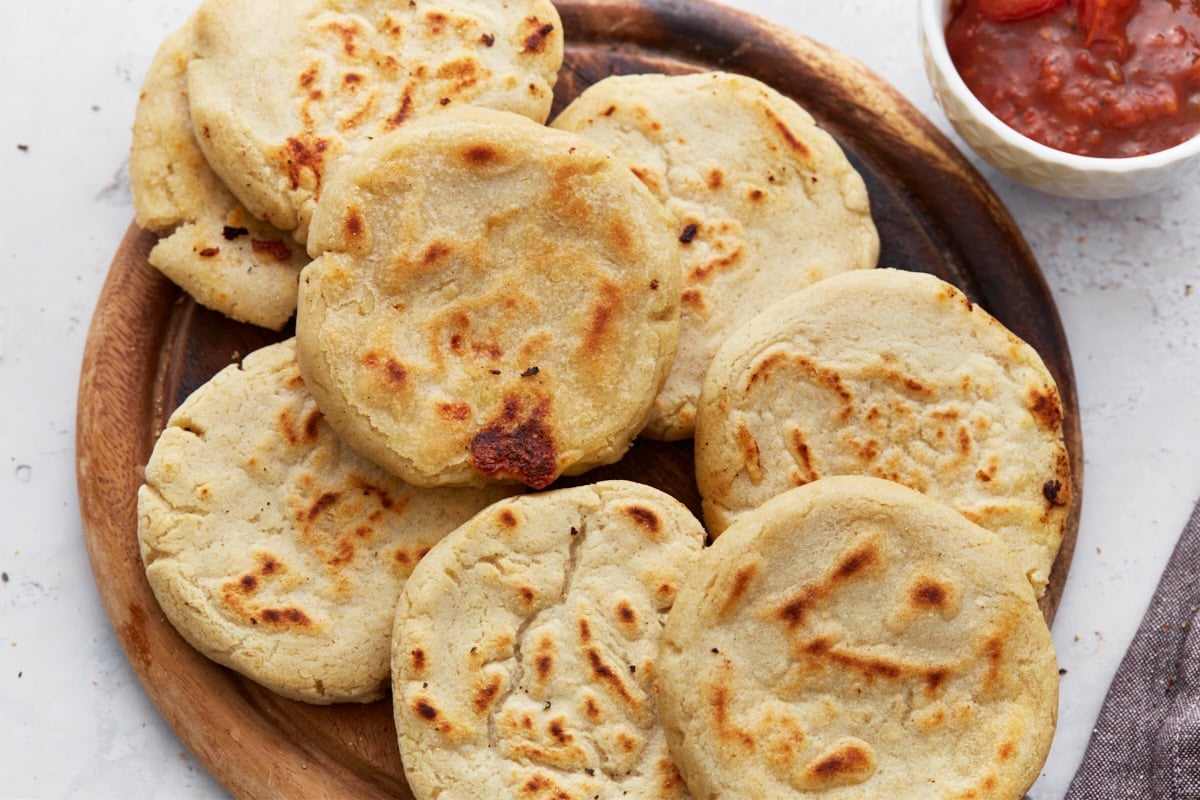
Serve and enjoy: Serve warm and enjoy!
Serving Suggestions
I love serving pupusas hot off the griddle with a scoop of curtido, tangy Salvadoran cabbage slaw, and a drizzle of salsa roja. If I’m keeping things simple, a little sour cream on the side works too. They make a cozy lunch, a fun appetizer, or even a laid-back dinner with friends.
Storage Instructions
To store leftovers, I let the pupusas cool completely, then stack them with parchment paper in between and keep them in an airtight container in the fridge for up to 3 days. When I’m ready to reheat, I just warm them in a skillet over medium heat until hot and crispy again.
I also freeze them uncooked or cooked, separated with parchment, then reheat straight from frozen, adding a few extra minutes to the cook time.