Gluten-Free Pop Tarts
Published


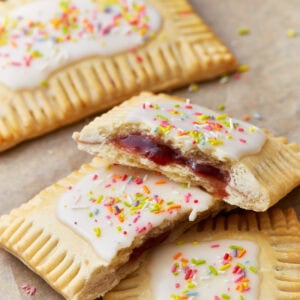
Homemade gluten-free pop tarts feature a classic flaky pastry filled with sweet strawberry jam and topped with a vanilla glaze. Each bite is buttery, tender, sweet, and nostalgic.

Gluten-Free Pop Tart Recipe
The Pop Tart, also known as a toaster pastry, is one of the breakfast treats from my childhood that I’ll always remember. I could never find a good store-bought option that was gluten-free, and since my kids are all gluten-free they’ve never been able to try these tasty treats I loved so much at their age.
I decided I would try to make homemade gluten-free pop tarts with my Gluten-Free Pie Crust recipe. I made a few tweaks, and sure enough, the classic crumbly soft dough came out just right. It’s actually so easy. I used a mix of cold butter and shortening to give the pastries their signature flaky crumbs, filled them with a sweet strawberry jam, and drizzled them with their signature vanilla glaze. These kid-friendly gluten-free snacks are worth a try.
Gluten-Free Pop Tarts
Ingredients
- 2 3/4 cup gluten-free all-purpose rice flour blend with xanthan gum. , I like Pillsbury gluten-free flour. Not all gluten-free flours are created equal. You may experience different baking results depending on the gluten-free flour blend you choose.
- 1/4 cup granulated sugar
- 1/2 teaspoon salt
- 1/2 cup very cold unsalted butter, dairy-free use Smart Balance butter
- 1/2 cup very cold shortening
- 2 large eggs
- 1/2 teaspoon apple cider vinegar
- 6 tablespoons ice cold water
- 16 teaspoon gluten-free seedless strawberry jam
Egg Wash
- 1 large egg
- 1 tablespoon water
Glaze
- 1 cup powdered sugar
- 1/4 teaspoon pure vanilla extract
- 2 tablespoons water
Instructions
TO MAKE THE PASTRY DOUGH
- Chop the butter into small chunks and place in a small bowl. Put the butter, shortening, and water into the freezer for about 5 minutes or until really cold.
- Add the gluten-free flour, sugar, salt in a large bowl and stir to combine the ingredients.
- Add the butter and shortening to the flour mixture and mix until the butter and shortening are incorporated into the flour. I use my stand-up mixer with the paddle attachment, but you can use a hand mixer or a pastry cutter.
- Add in the eggs, water and apple cider vinegar and mix until the dough starts to form and all the ingredients are combined. The dough will be sticky.
- Shape the dough into a ball, wrap in plastic wrap and refrigerate for at least 45 minutes.
TO ASSEMBLE THE PASTRIES
- Preheat your oven to 350°F (177°C).
- Unwrap the dough ball, cut the dough ball in half and place the half onto parchment paper lightly floured with gluten-free flour.
- Shape the dough half into a rectangle. Lightly flour the pastry with gluten-free flour, and using a rolling pin, roll out the dough to about 1/4-inch thick.
- Using a pizza cutter, cut the 9-inch by 8-inch rectangle.
- Cut out the dough into 3-inch by 4-inch rectangles. I used a ruler as a guide.
- Place the dough rectangles onto a parchment-lined baking sheet.
- Repeat the steps with the other half of the dough ball to make 8 more rectangles. These will be the tops of the pastries. You will have 16 rectangles in total (8 for the bottom and 8 for the tops).
- Spread 2 teaspoons of seedless jam of the top of each dough rectangle.
- Place the dough rectangles on top of the filling-topped dough rectangles.
- Use a fork to crimp the sides of the dough together.
- Use a fork to poke the tops of the pop tarts 3 times. This allows the steam to escape.
EGG WASH
- In a small bowl whisk together the egg and stir in the water.
- Brush egg wash on the tops of the pop tarts. If you skip this step your pastries will not be golden.
- Bake for 20-25 minutes until the pastries are golden and browning on the edges.
- Let the baked pop tarts cool on the pan for 5 minutes, then transfer to a wire rack to cool completely before glazing.
GLAZE
- In a small bowl whisk together the ingredients for the glaze until smooth.
- Use a spoon or small spatula to glaze each pop tart. The glaze will slightly harden.
- Store pop tarts in an airtight container at room temperature for 3 days or in the refrigerator for 6 days.
Notes
- I have found that the best way to measure gluten-free flour is to use the “spoon & level” method. Use a spoon to scoop the flour out of the bag into a dry measuring cup (not a Pyrex measuring cup used for liquid). After spooning the flour into a measuring cup, use the back of a knife to level the flour off the measuring cup.
- Do not substitute butter for the shortening. Shortening is key to maintaining the moisture of the dough.
Nutrition
Nutrition information is automatically calculated, so should only be used as an approximation.
How to Make Gluten-Free Pop Tarts Step by Step

Gather your ingredients together.

Cut ½ cup cold butter into even cubes and place in the freezer in a bowl. Also put the 6 tbsp water and ½ cup shortening (all separate) in the freezer for 5 minutes.

Mix ingredients: In a large mixing bowl, add 2 ⅔ cups gluten-free flour, ¼ cup granulated sugar, and ½ tsp salt. Stir to combine the ingredients.

Add the cold ½ cup of cubed butter and ½ cup cold shortening to the flour mixture and mix using a stand mixer and paddle attachment until the butter and shortening are fully incorporated. You can also use a hand mixer or pastry cutter.

Form the dough: Add 2 large eggs, 6 tbsp ice-cold water, and ½ tsp apple cider vinegar. Continue mixing until the ingredients are combined, and the dough starts to form. The dough should be sticky. Shape the dough into a ball and wrap it tightly with plastic wrap. Place in the refrigerator to chill for 45 minutes.

Preheat the oven to 350°F. Unwrap the dough ball and cut it in half. Lightly flour a piece of parchment paper and add one-half of the dough to it.

Shape the dough: Do your best to shape the dough half into a rectangle. Lightly dust the dough and use a rolling pin to roll the dough out to ¼-inch thickness.

Using a pizza cutter, trim the edges of the dough into a 9-inch by 8-inch rectangle.

Shape dough into pop tarts: Using a ruler, cut out 8 equal 3-inch by 4-inch rectangles and place them on a parchment paper-lined baking sheet.

Repeat these steps with the other half of the dough to make 8 more rectangles for the top of the pastries. You should have 16 dough rectangles for 8 pop tarts.

Spread 2 tsp of jam onto the 8 bottom dough rectangles.

Add the top layer of the pastry dough and crimp the dough edges together using a fork.

Use the fork to poke the top of the pop tarts 3 times to allow steam a path to escape.

Brush each pastry: Whisk 1 large egg and 1 tbsp water together in a small bowl. Brush the top of each pastry and the sides with the egg wash. This step gives the pastries their golden brown color. Add the pastries to the oven and bake for 20-25 minutes.

Take the pop tarts out of the oven and let them cool on the baking sheet for 5 minutes before transferring them to a wire rack. Let the pastries cool completely before glazing or the glaze will just fall off.

Make the glaze: In another small bowl, whisk together 1 cup powdered sugar, ¼ tsp vanilla, and 2 tbsp water until you have a smooth glaze.

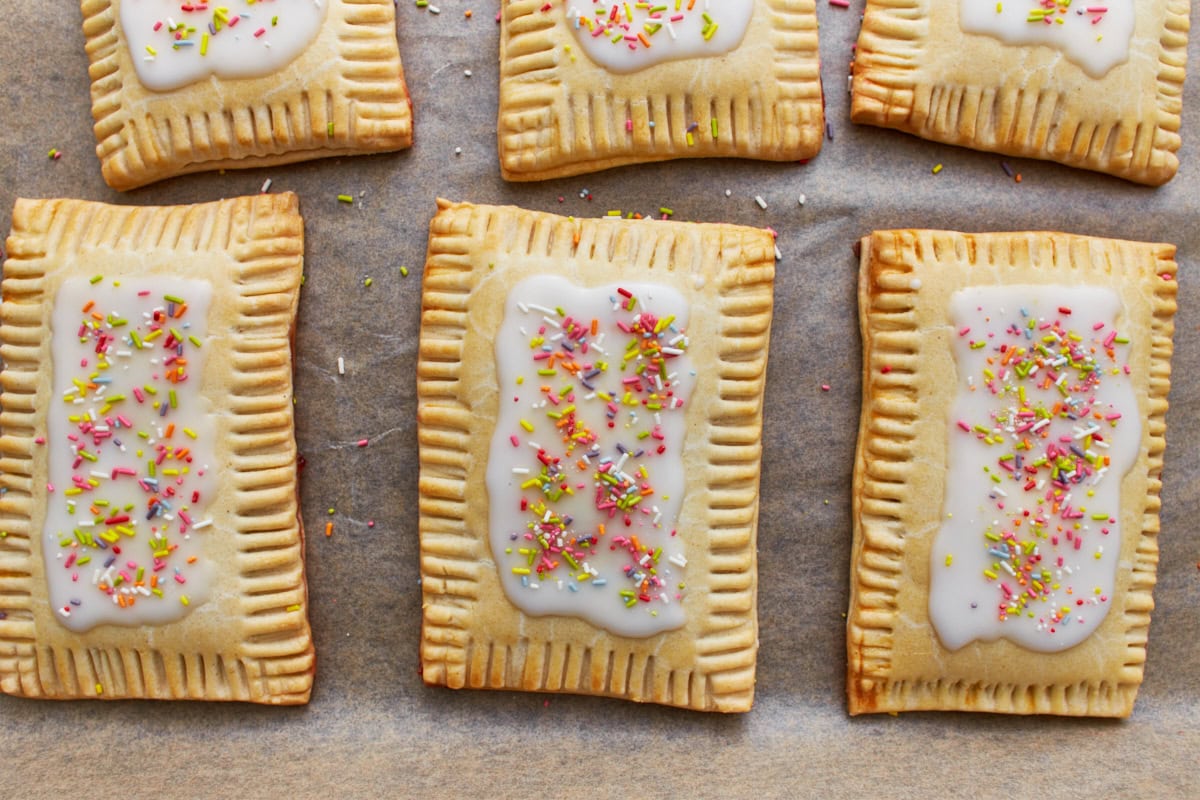
Top with glaze: Using a spoon or spatula, drizzle the top of each pastry with the sweet glaze. The glaze should harden for the signature frosted pop tart look. Sprinkle with gluten-free sprinkles before the glaze hardens, if desired. Serve and enjoy!
Serving Suggestions
I love serving these gluten-free pop tarts for my kids as a morning treat. We also enjoy them as an after-school snack or dessert!
Storage Instructions
Make the dough ahead of time, and when you are ready to make the pop tarts, just allow the dough to warm up on the counter for 5-10 minutes before you roll it out. Store pop tarts in an airtight container at room temperature for 3 days or in the refrigerator for 6 days.
You can freeze the pop tarts for up to 3 months. Once the pop tarts are completely cooled, place the pastries into a freezer bag. Thaw the pop tarts in the refrigerator overnight.


Five Star recipe for sure. I’ve made the pie crust twice, and just made the pop tarts tonight. Cannot wait for my son, who hasn’t had a good pop tart in years…to have these. The pie crust recipe is the best gf pie crust I have found. I use King Arthur’s 1 to 1 gf flour, fyi. I made the pop tarts heart shaped using a cookie cutter …it was labor intensive but they are really cute and yummy for our Valentine’s Day Super Bowl party. Thank you!
Hi Debbie, How adorable! So glad you enjoyed the gluten-free pop tarts and we hope your son loves them!
I would love to try this recipe, but I cannot find the pillsbury flour. It would be helpful, if weight were included with measurements to be able to substitute another flour. Thank you.
Christine
Hi Christine, Some other reviewers have had success with Bob’s Red Mill 1:1.
We used Bob’s Red Mill 1:1 and Melt dairy free butter. My 9 and 12 year olds made this with me doing a little management. The kids did all the dough handling and even with their slow roll out/ multiple roll outs, they still turned out flakey and delicious. The ones sprinkled with cinnamon sugar were the best. We’ll definitely use this recipe again. We also did this all by hand. No stand mixer, no pastry cutter)
Hi Audrey- I LOVE your pop tart recipe it is always a big hit. I make it with so many different fillings it is so fun to experiment with.
Here is my question, I wam wanting make a chocolate dough so I can make a chocolate pop tart… how much cocoa powder would you add 1/4 cup? And then subtract that amount of flour from the over all flour amount? So 2/12 cups flour + 1/4 cocoa powder? What do you think?
Hi Kelly! So glad you love this recipe! I’d say that’s a good starting place. You may end up wanting to increase the amount of cocoa powder for a more chocolate-y flavor, but I think better to start with less.
Thank you so much! They came out great and agree a little more cocoa would be good.
I do have another question that has been driving me nuts… my dough puffs up during baking. So they end up not being completely flat(ish) like a pop tart and thus there is air in them and so it feels like there is not enough jam because the tops are not laying flat on the jam – does this make any sense? Am I doing something wrong? I have tried putting in more jam but that then tends to explode in the oven and oozes out..I have tried different sizes, I have tried gently smoothing out pushing down on the top right before I add egg wash etc. Anyway, any suggestions? In your pics they look relatively flat where the jam would be in every bite. Thank you!!!!
These were fantastic! My daughter used to LOVE pop tarts as treat and has missed them so much that she’s eaten one occasionally (and paid the price). We used Pamela’s 1:1 GF flour – small town and it’s what the store carries. It worked great. Her friend couldn’t even tell they were gluten free! 16 year olds are hard to please but this recipe won them over.
Easy to make. Tasted great. Will definitely make again. We got 10 poptarts out of the dough. Haven’t tried to heat in a toaster- does the icing burn
Hi Scarlett! Thanks so much! Glad to hear that you liked these. I wouldn’t recommend heating in the toaster.
I am going to try this recipe with the substitute options some of the comments above mention. Your subscribers are great, as some of them are very creative and experienced with dairy/gluten/egg white free cooking. So good to find a recipe for a long missed treat!
Did anyone use the following flours successfully in this recipe? GF Jules All Purpose, King Arthur’s GF 1-1, Bobs Red Mill GF 1-1, Namaste?
Made these today! They were amazing! My son said they are better than store bought! Love your recipes! I am planning on making these again soon and will switch it up and fill with Nutella!💙💙💙
This was so much easier than I had imagined. We loved these pop tarts. I will make them again soon. Might also use the crust for a pie!
I stumbled across the YouTube video for these very randomly and was super excited. My brother and I made these for a family gathering. Thumbs up from GF and non GF people alike. Next time, I need to remember to double the recipe. There weren’t any leftovers.