Gluten-Free Challah Bread
Published
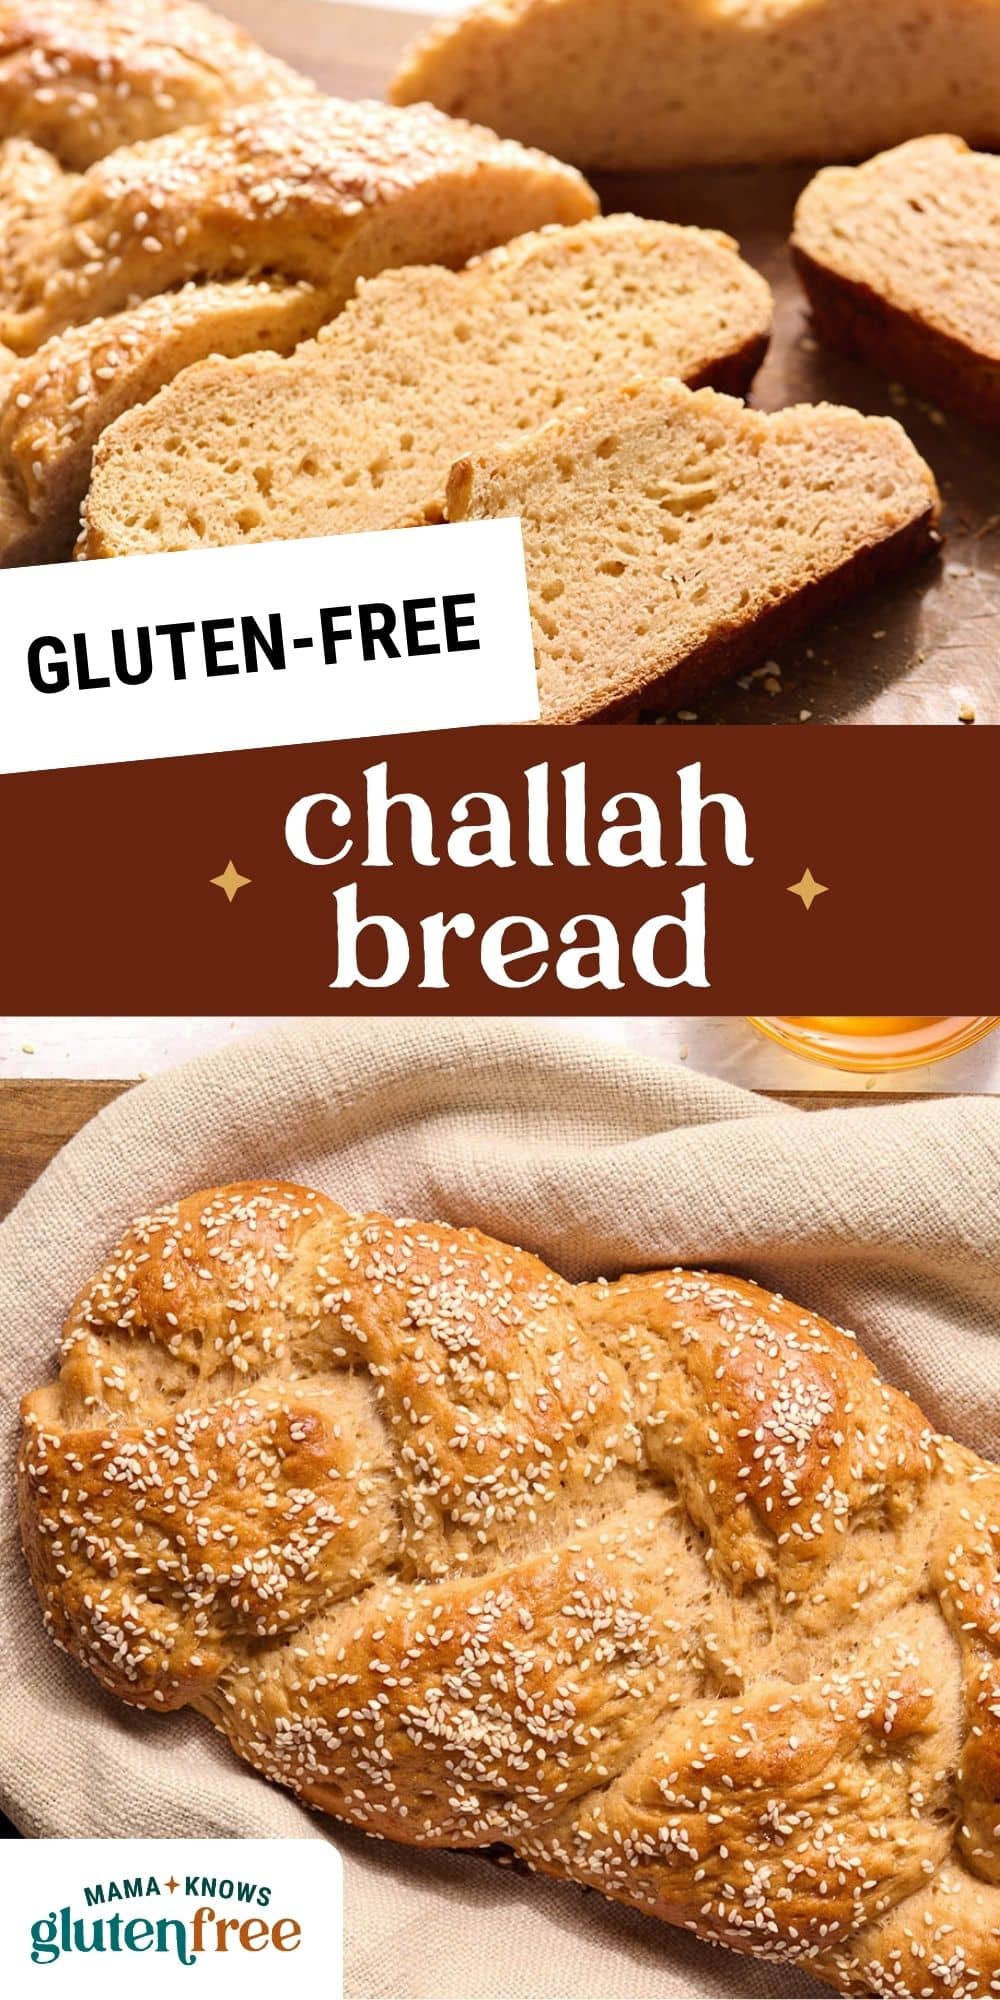
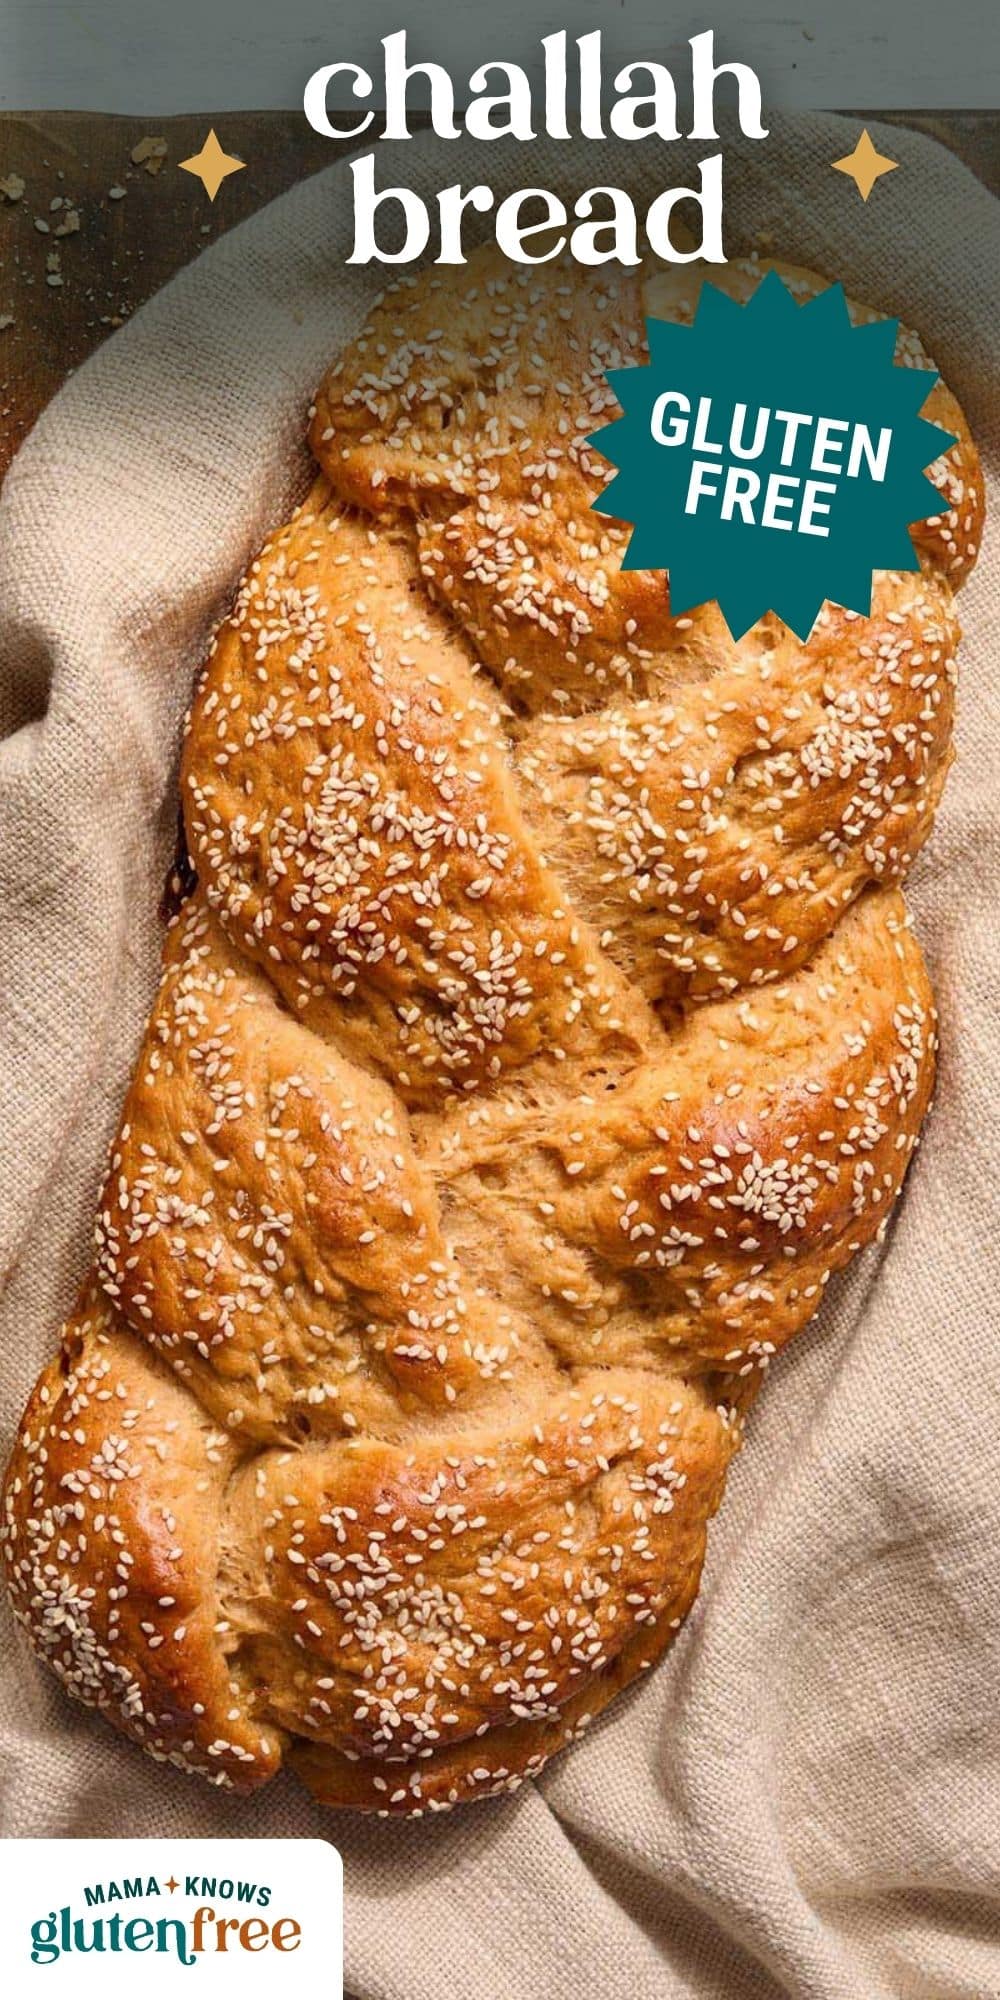

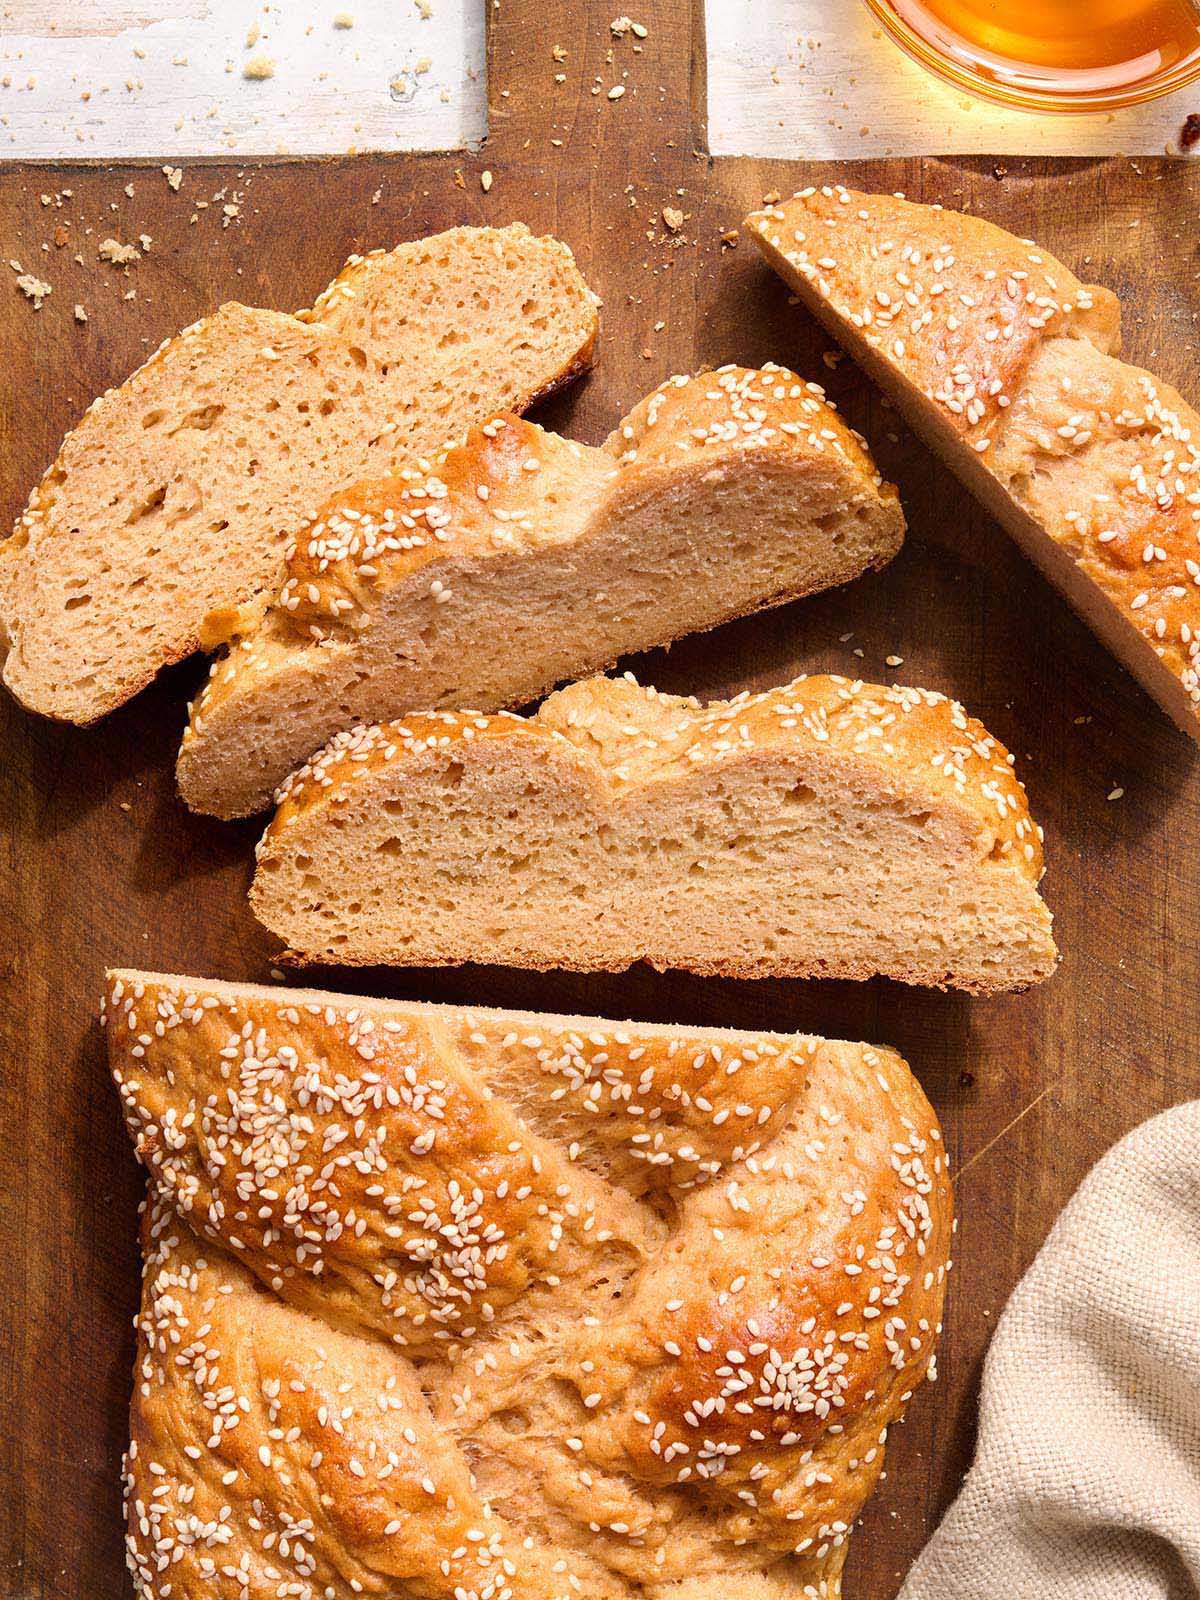
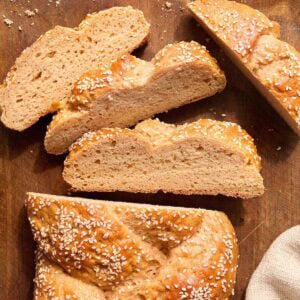
Gluten-free challah bread is a soft, slightly sweet braided loaf with a golden crust and tender, pillowy crumb. Traditionally made for Jewish holidays and celebrations, challah is an enriched bread made with eggs, honey, and oil that gives it its rich flavor and signature texture. This homemade gluten-free challah recipe recreates the classic braided bread using gluten-free flour and psyllium husk to build structure without wheat. The result is a beautifully braided loaf that’s dairy-free, flavorful, and perfect for holidays, brunch, or everyday baking.
I wanted to create a gluten-free challah bread that truly captured the texture and beauty of the traditional loaf. The dough is enriched with eggs, honey, and oil, which helps create that soft, tender crumb that challah is known for. While the process takes a few hours, most of the time is hands-off while the dough rests, rises, and chills so it can hydrate properly and hold its braided shape. I love serving this loaf fresh for holiday meals, weekend brunch, or slicing it the next day for French toast. If you try this gluten-free challah bread, I’d love to hear how it turned out for you in the comments.
What I Learned While Testing
- Use psyllium husk powder for structure. Do not reduce the 17 g of psyllium husk powder in this recipe. Psyllium acts as the structure builder in gluten-free bread, mimicking the elasticity that gluten normally provides. It allows the dough to hold together, rise properly, and maintain the braided shape during baking.
- Expect a sticky dough. Gluten-free challah dough will not feel like traditional wheat dough. After mixing, it should be thick and sticky, resembling a very tacky batter that holds its shape when scooped and can be handled with well-oiled hands. The dough should not be dry or crumbly, pour like cake batter, or feel stiff like traditional bread dough. If the dough feels too stiff, mix in 1 tablespoon of warm water at a time until it becomes soft and tacky. If it feels too loose, sprinkle in 1 tablespoon of flour at a time, mixing and checking the texture before adding more.
- Chilling the dough makes shaping much easier. A short refrigeration step firms the dough and makes it far easier to roll into ropes and braid without sticking to your hands or spreading too much.
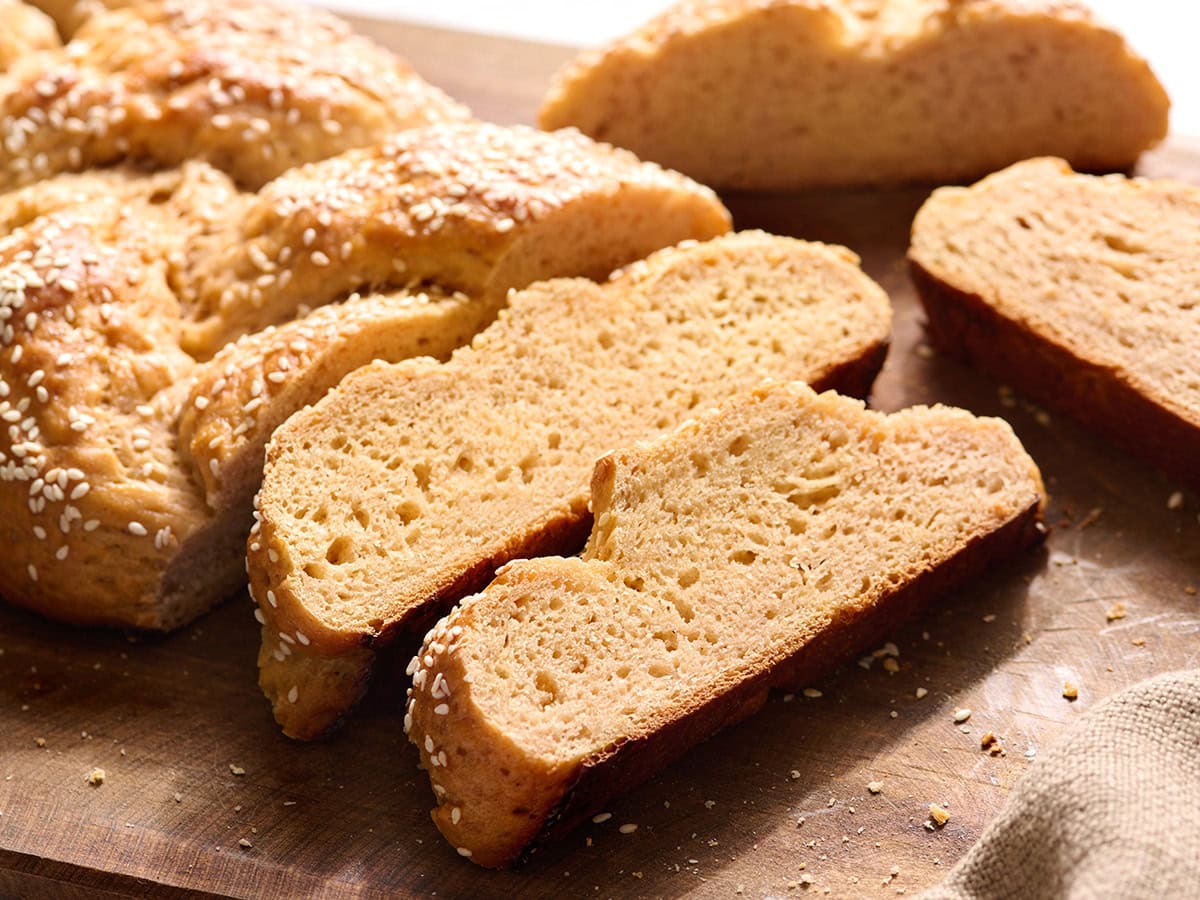
- Allow the bread to cool completely before slicing. Gluten-free bread continues to set as it cools. Cutting too early can cause the crumb to become gummy or compressed. Let the loaf cool fully on a wire rack for the best texture.
- Add raisins or chocolate chips for a sweeter variation. Gently mix 1/3 cup into the dough after the first rise or press them lightly into the strands before braiding to prevent tearing the dough.
Gluten-Free Challah Bread
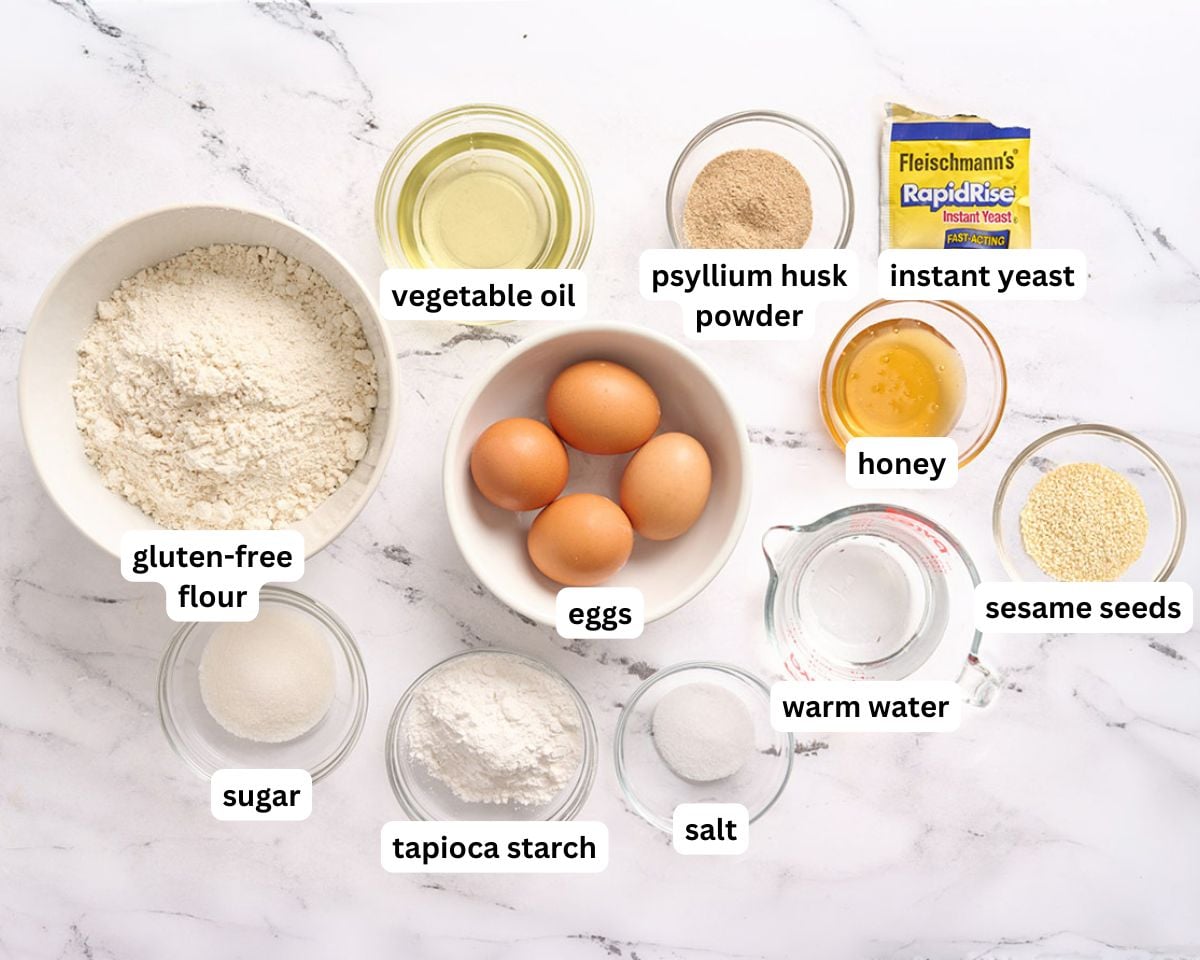
Ingredients
- 2¼ cups King Arthur gluten-free bread flour
- ⅓ cup tapioca starch
- 2 tsp kosher salt
- 3 tbsp granulated sugar
- 2 tsp instant yeast
- 2 tbsp psyllium husk powder
- 2 large eggs
- 1 large egg yolk
- 1 cup warm water, (about 105-110°F / 40–43°C)
- ¼ cup vegetable oil
- 2 tbsp honey
For the Egg Wash & Topping
- 1 egg
- 1 tbsp water
- sesame seeds*, optional
Instructions
- Gather and measure all ingredients.
- In a small bowl, combine the warm water, sugar, and yeast. Stir and let sit for 5-10 minutes until foamy.
- Stir in psyllium husk powder to foamy yeast mixture and let set for 5 minutes to create a thick gel. This step is key for structure in gluten free Challah dough.
- In the bowl of a stand mixer, whisk together the GF bread flour, tapioca starch, and salt.
- Lightly beat the eggs and yolk. Add to the flour mixture along with the oil, honey, and yeast mixture. Mix using the paddle attachment on medium speed for 4-5 minutes, until the dough is smooth, sticky, and cohesive. It will resemble a thick tacky batter more than a traditional bread dough. Let the dough rest at room temperature for 10-15 minutes to fully hydrate.
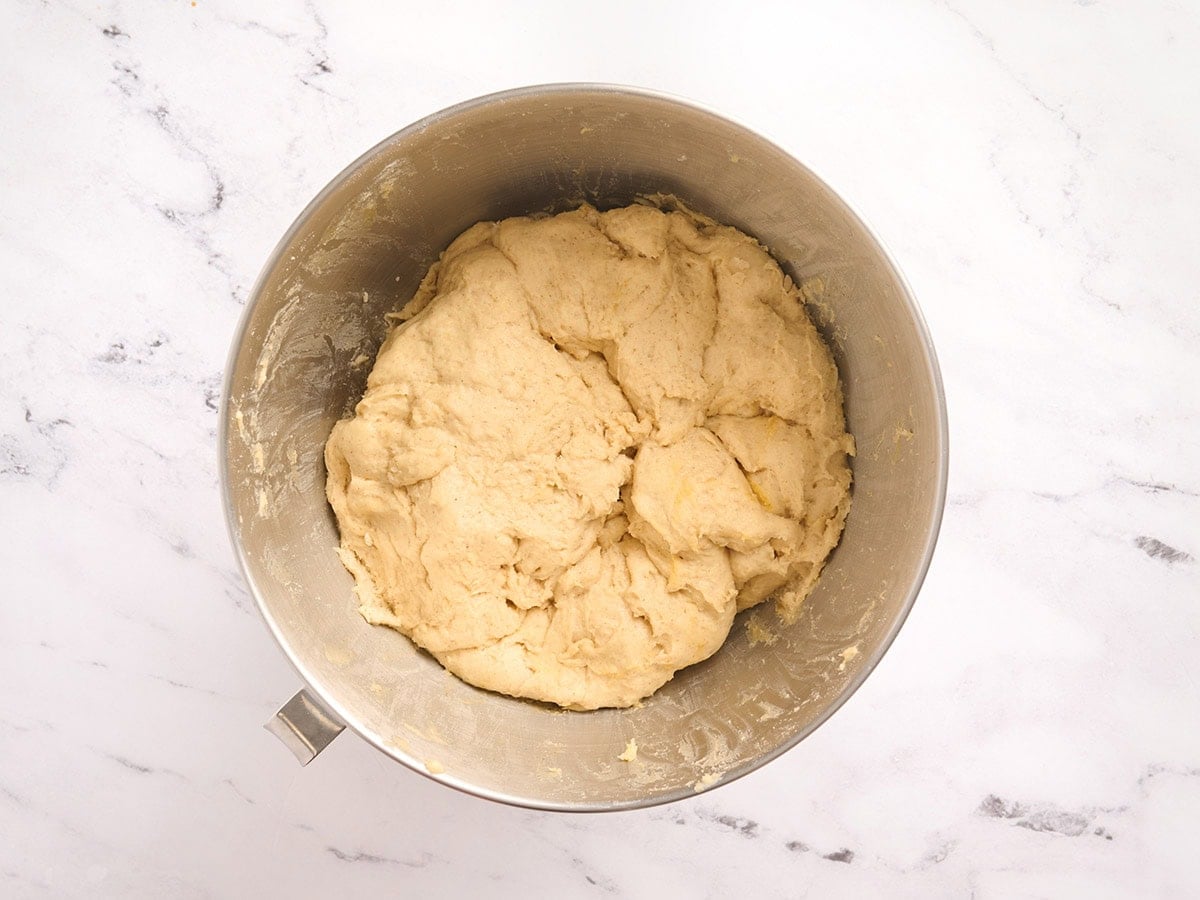
- Cover dough with plastic wrap or a clean towel and let rise in a warm, draft-free spot for 45-60 minutes. The dough will look visibly puffed but will not double in size.
- Refrigerate the dough for 20-30 minutes. This firms it up and makes shaping much easier.
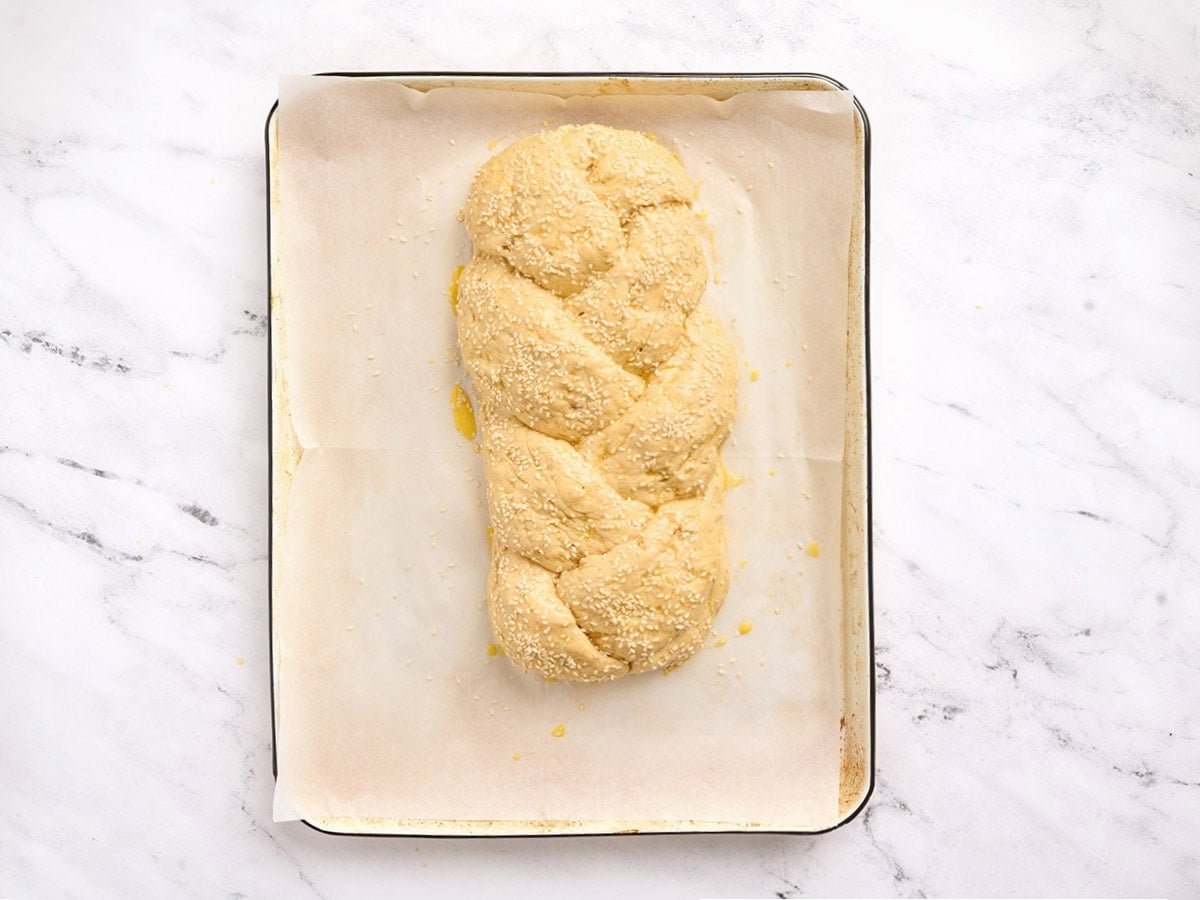
- Oil your hands generously. Divide the dough into 3 equal portions, about 270g each. On a parchment lined baking sheet, gently roll and pat each portion into a 12-14 inch rope.
- Gently braid ropes together***:– Pinch the tops of all three strands together.– Cross the right strand over the center.– Then cross the left strand over the new center strand.– Repeat, alternating sides, until loosely braided.– Pinch and tuck the ends underneath to finish.
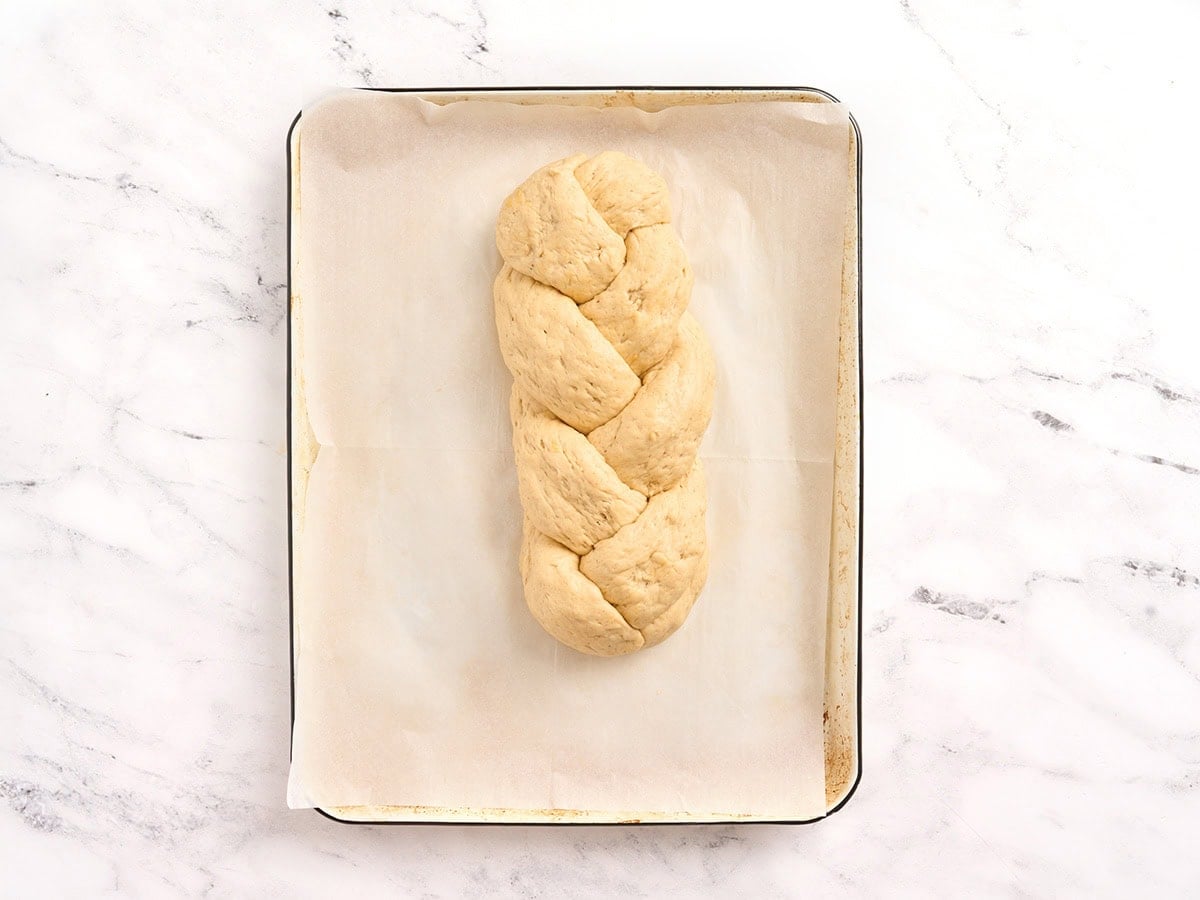
- Cover braided loaf loosely with plastic wrap and let rise for 30-45 minutes, until slightly puffed. Meanwhile, preheat oven to 350°F (180°C).
- Whisk together the whole egg and water to create the egg wash and gently brush over the loaf and sprinkle with sesame seeds if using.
- Bake for 25-30 minutes, until golden brown and the loaf sounds hollow when tapped. Tent loosely with foil if browning too quickly.
- Transfer to a wire rack and let cool fully before slicing. This is essential for proper crumb structure in gluten free bread.
Notes
Nutrition
Nutrition information is automatically calculated, so should only be used as an approximation.
How to Make Gluten-Free Challah Bread Step by Step
Gather all the ingredients together.
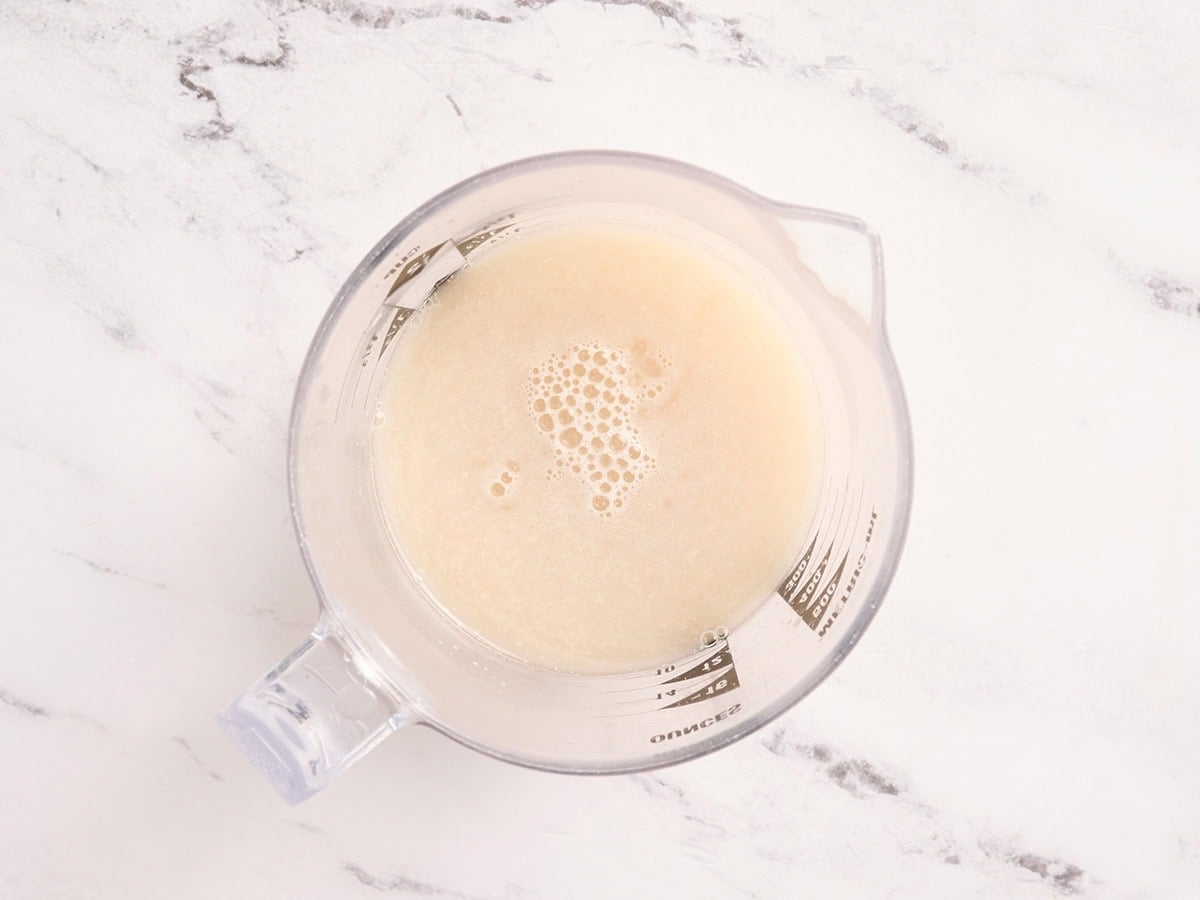
Activate the yeast. In a small bowl, combine 1 cup warm water (240 ml, about 105–110°F / 40–43°C), 3 tbsp granulated sugar (40g), and 2 tsp instant yeast (6g). Stir gently and let the mixture sit for 5–10 minutes. The surface should become foamy and bubbly, which means the yeast is active.
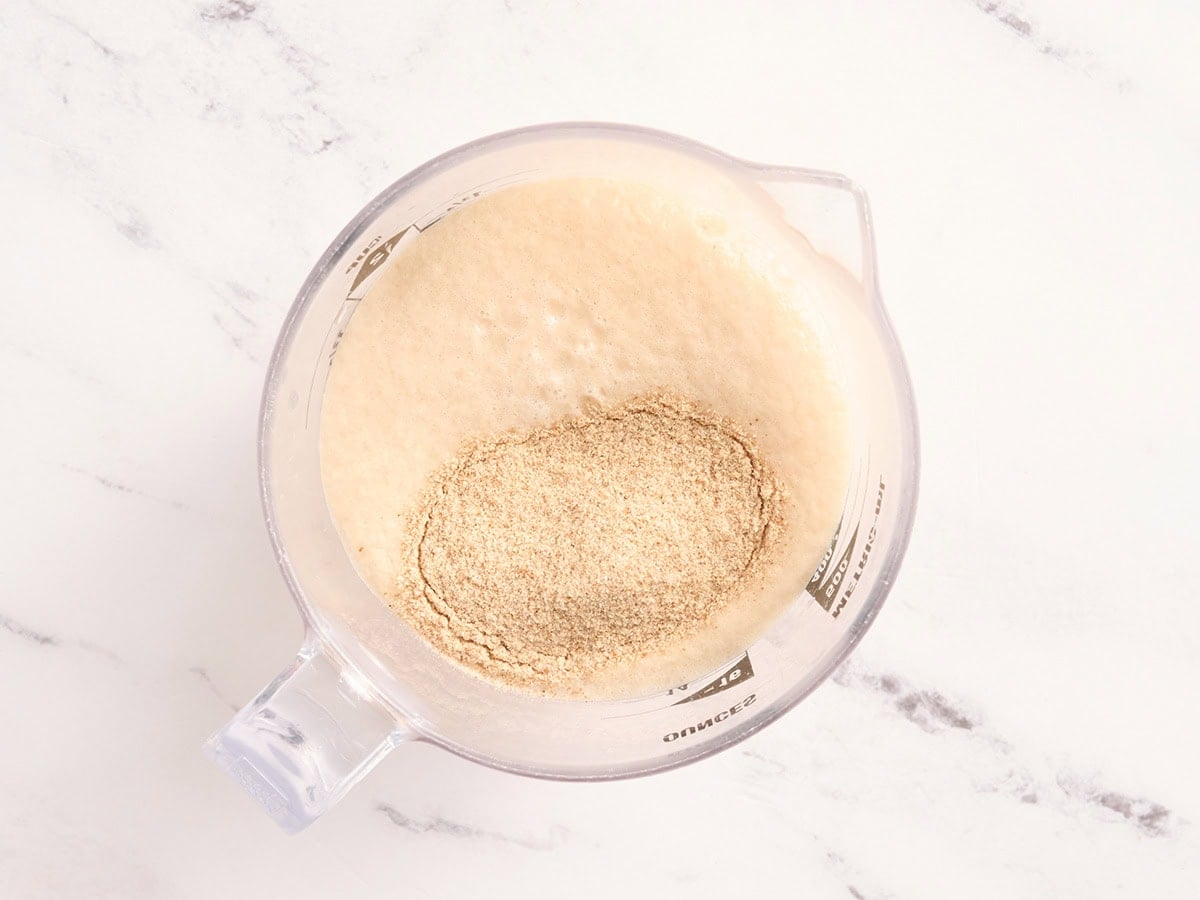
Form the psyllium gel. Stir 17 g psyllium husk powder into the foamy yeast mixture and let it sit for about 5 minutes. The mixture will thicken into a gel-like consistency. This gel is essential in gluten-free bread because it helps mimic gluten’s structure and gives the challah its elasticity and strength.
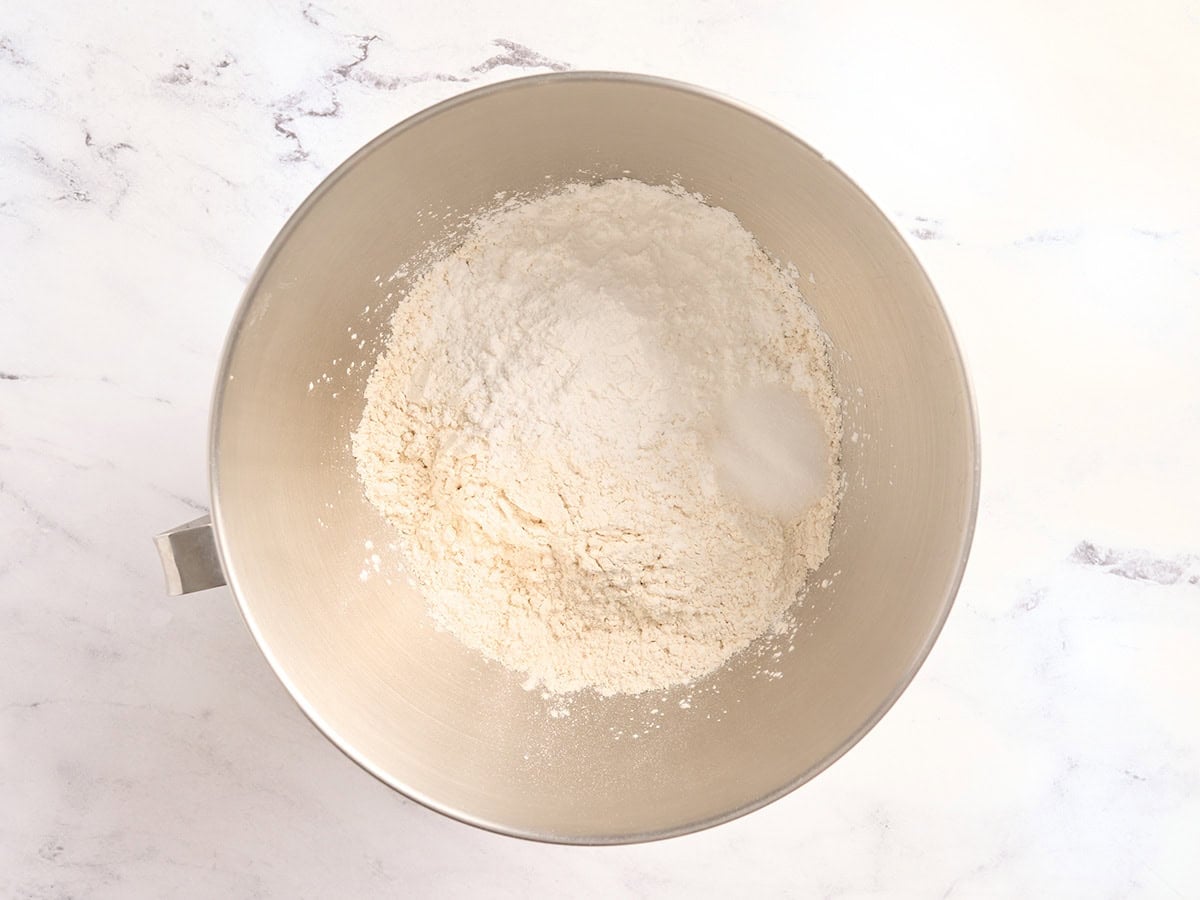
Mix the dry ingredients. In the bowl of a stand mixer, whisk together 2¼ cups (320g) King Arthur Gluten-Free Bread Flour, ⅓ cup tapioca starch (45g), and 2 tsp kosher salt (10g) until evenly combined with no visible streaks of starch.
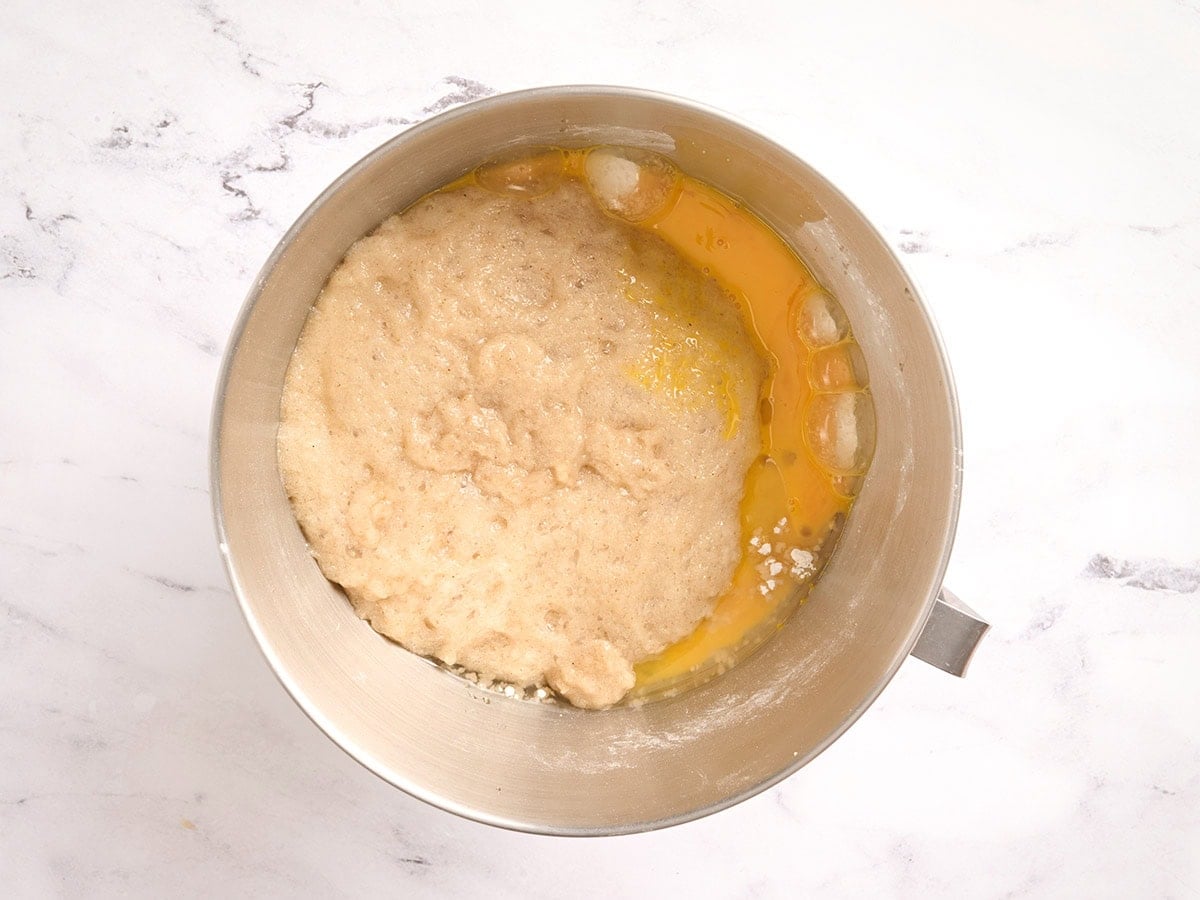
Combine the wet ingredients. Lightly beat 2 large eggs and 1 large egg yolk in a small bowl until smooth. Add the eggs to the flour mixture along with ¼ cup vegetable oil (55 ml), 2 tbsp honey (40g), and the prepared yeast–psyllium mixture.
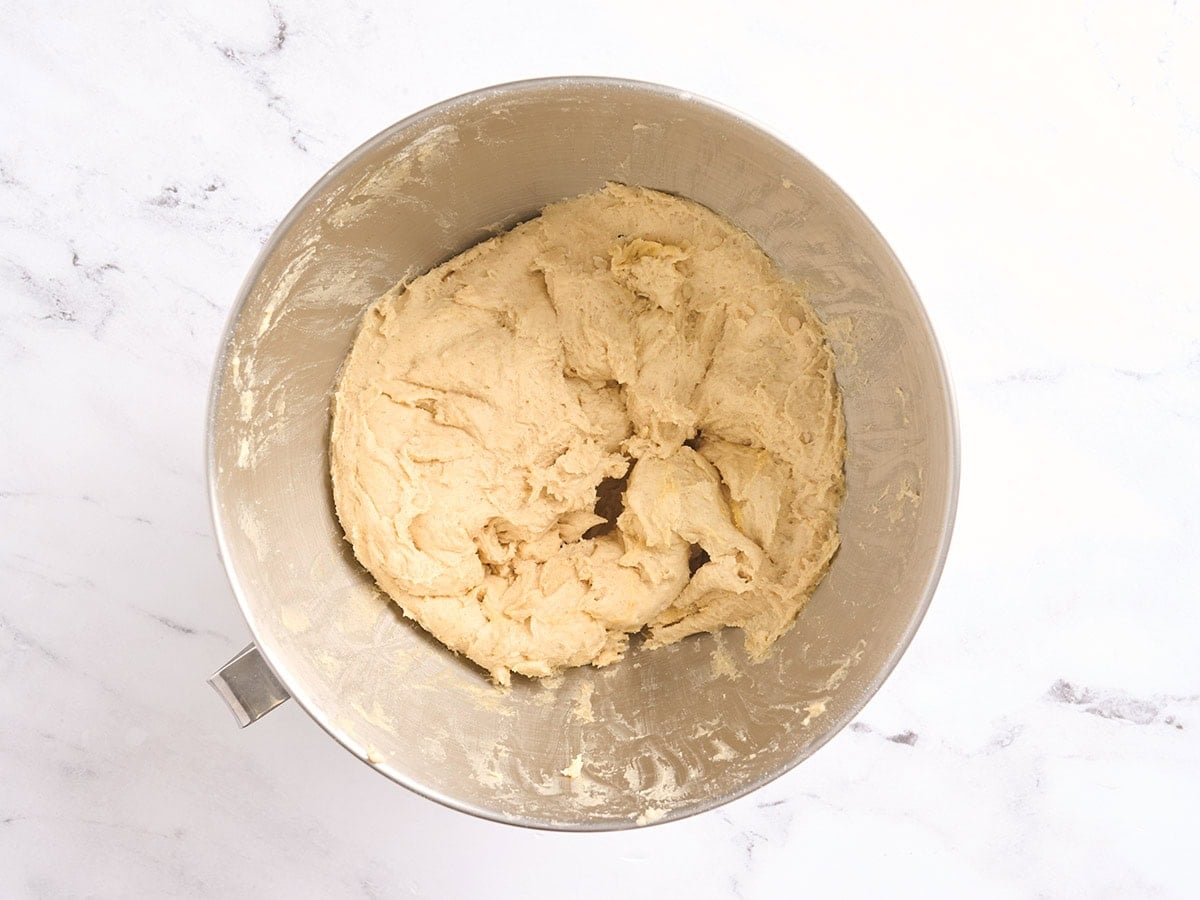
Mix the dough. Using the paddle attachment, mix on medium speed for 4–5 minutes, scraping down the sides of the bowl once or twice. The dough will become smooth, thick, and sticky. It will look more like a thick, tacky batter than traditional bread dough. This texture is normal for gluten-free challah. Let the dough rest in the bowl for 10–15 minutes at room temperature. During this time, the flour and psyllium will absorb the moisture, and the dough will become slightly thicker and easier to handle.
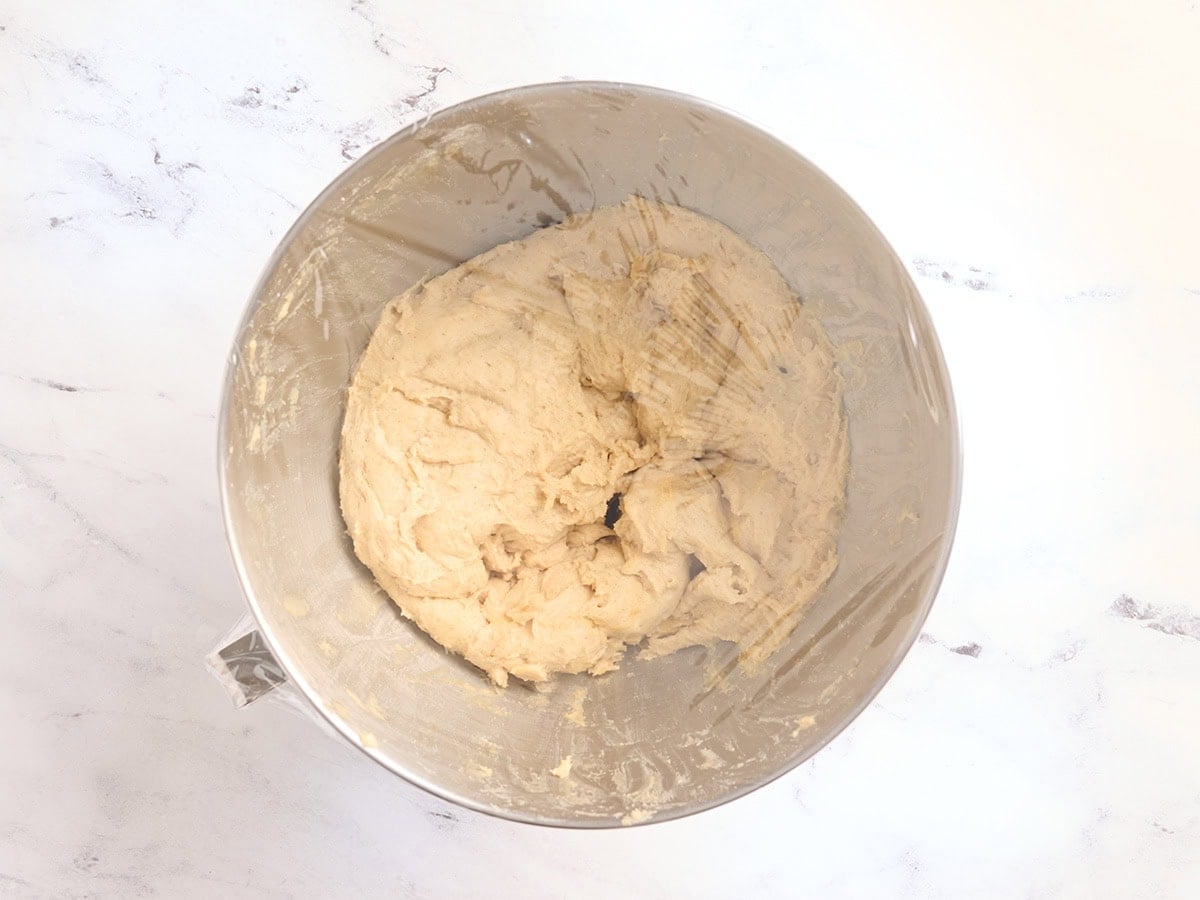
First rise. Cover the bowl with plastic wrap or a clean towel and let the dough rise in a warm, draft-free place for 45–60 minutes. The dough will look visibly puffed and aerated, though it may not fully double in size.
Chill the dough. Transfer the bowl to the refrigerator and chill the dough for 20–30 minutes. This firms the dough slightly and makes shaping much easier since gluten-free dough is naturally soft and sticky.
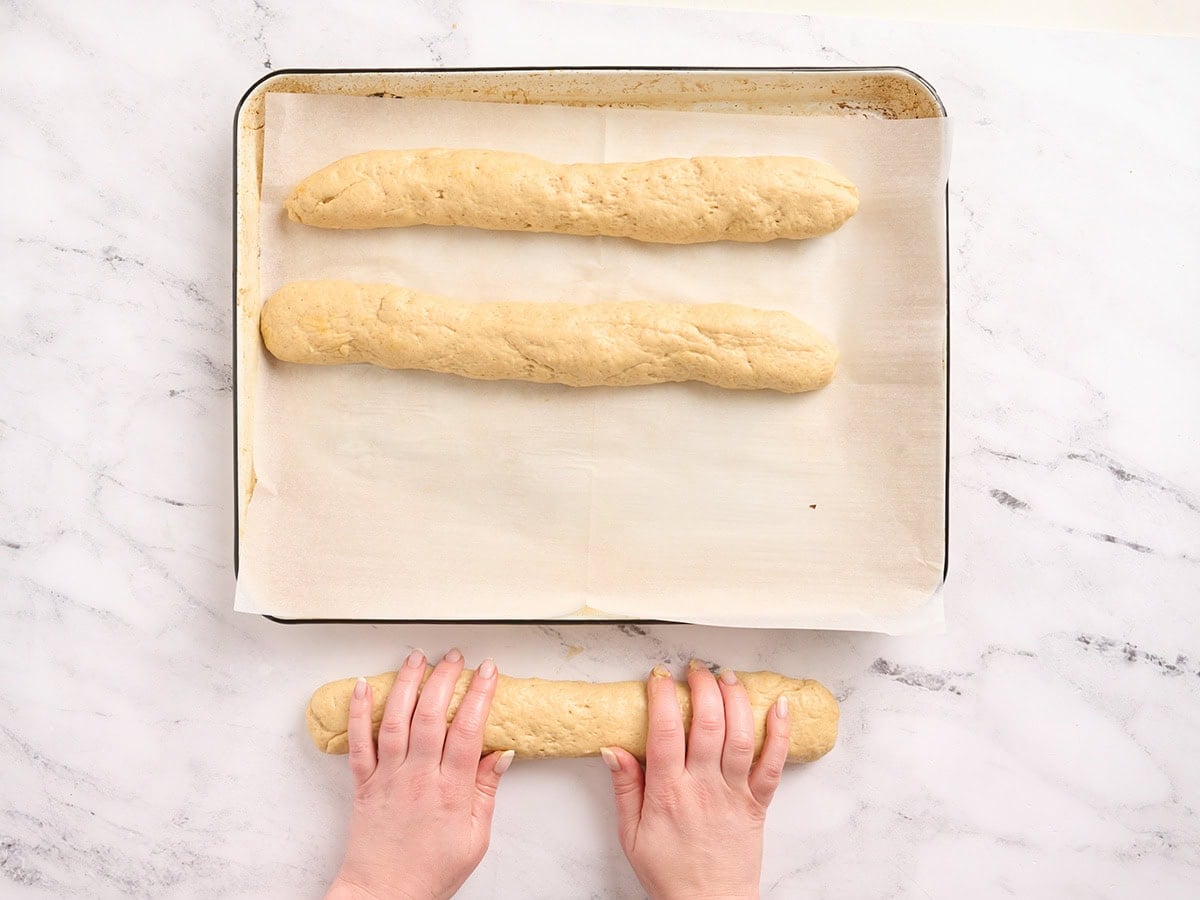
Shape the strands. Generously oil your hands to prevent sticking. Divide the dough into 3 equal portions, about 270g each. On a parchment-lined baking sheet, gently roll and pat each portion into a rope about 12–14 inches long. The ropes should feel soft and slightly tacky but still hold their shape.

Pinch the strands together: Arrange the three ropes side by side. Pinch the tops of all three strands together to seal. Cross the right strand over the center strand.
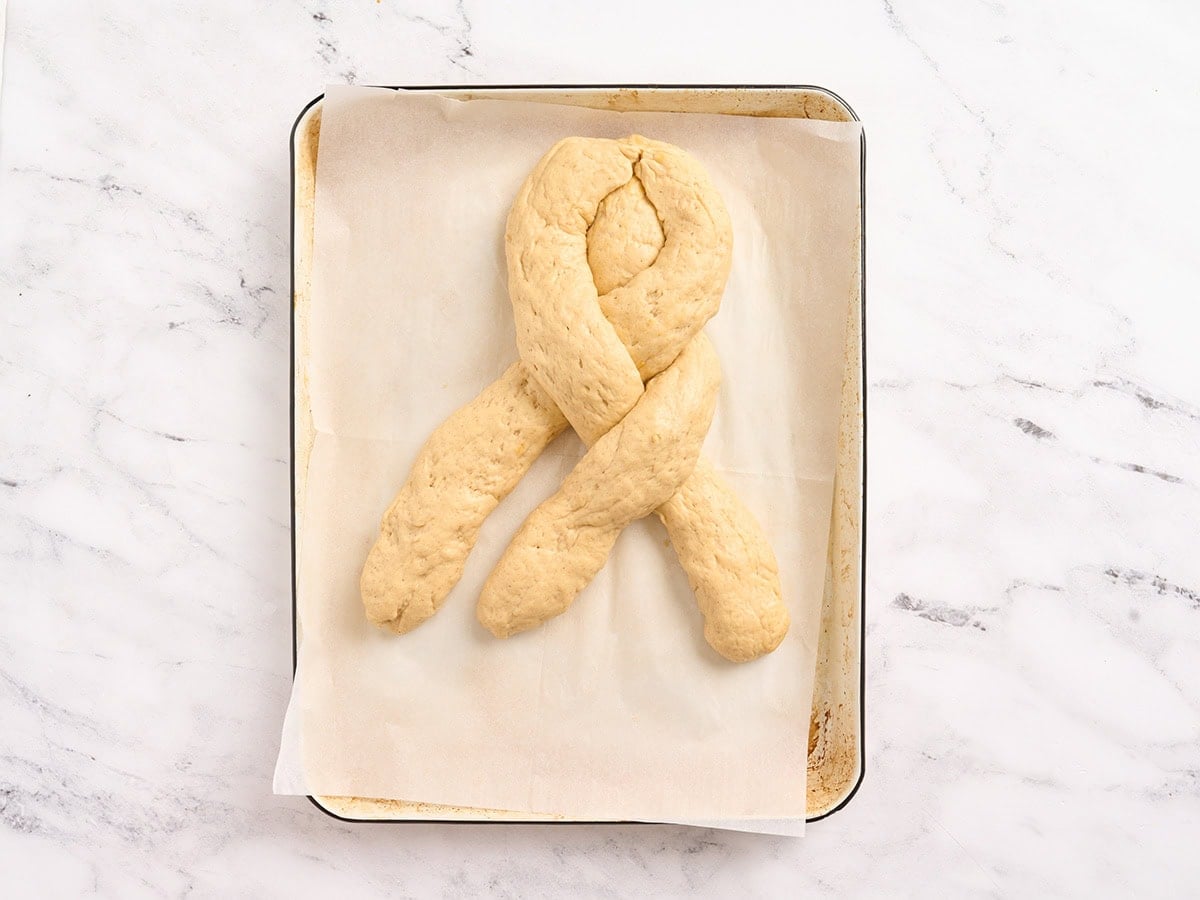
Keep braiding: Then, cross the left strand over the new center strand.
Finish the braid: Continue alternating sides until the loaf is loosely braided. Pinch the ends together and tuck them underneath to secure.
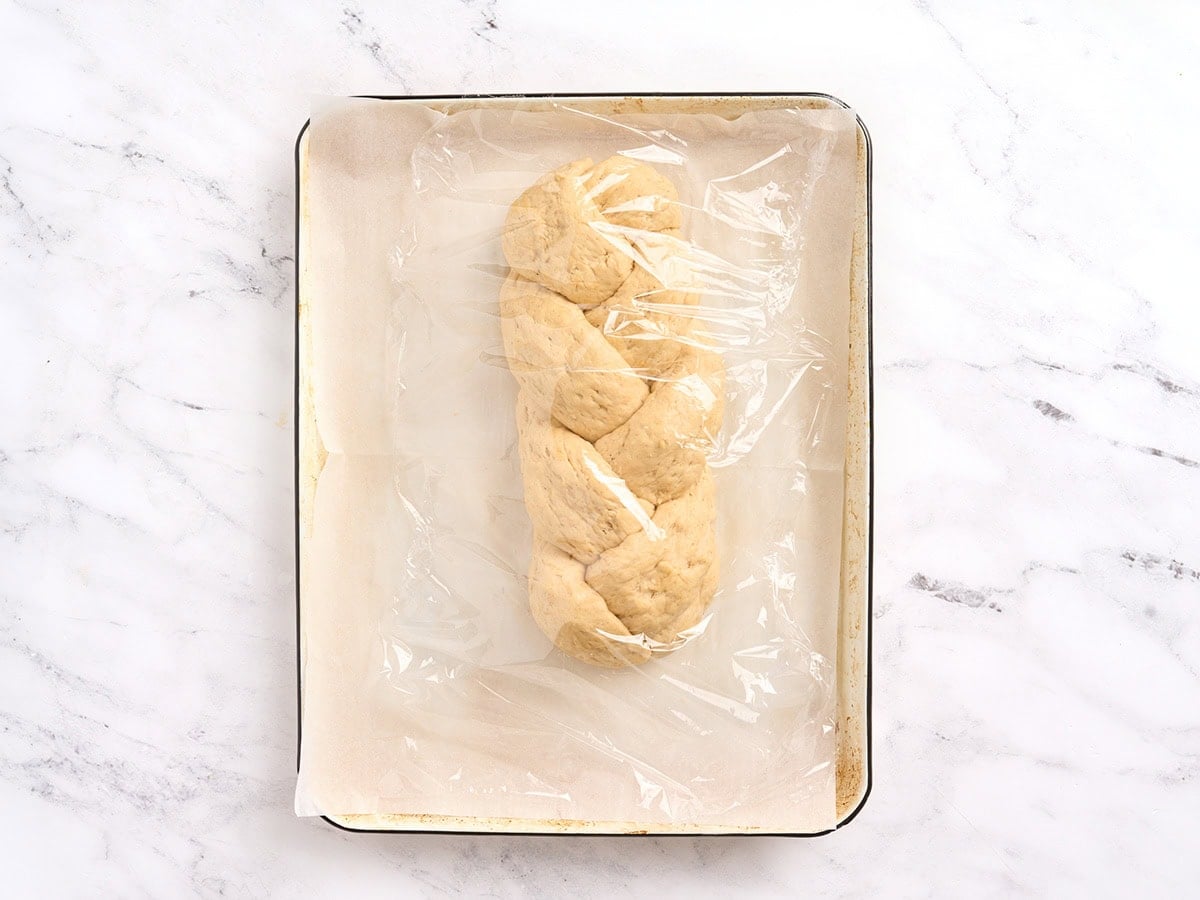
Second rise. Cover the braided loaf loosely with plastic wrap and let it rise for 30–45 minutes, until slightly puffed and airy. The braid should look fuller but still hold its shape. Meanwhile, preheat the oven to 350°F (180°C).
Apply the egg wash. In a small bowl, whisk together 1 egg and 1 tbsp water (15 ml) until smooth. Gently brush the egg wash over the surface of the loaf using light strokes. If desired, sprinkle sesame seeds evenly over the top.
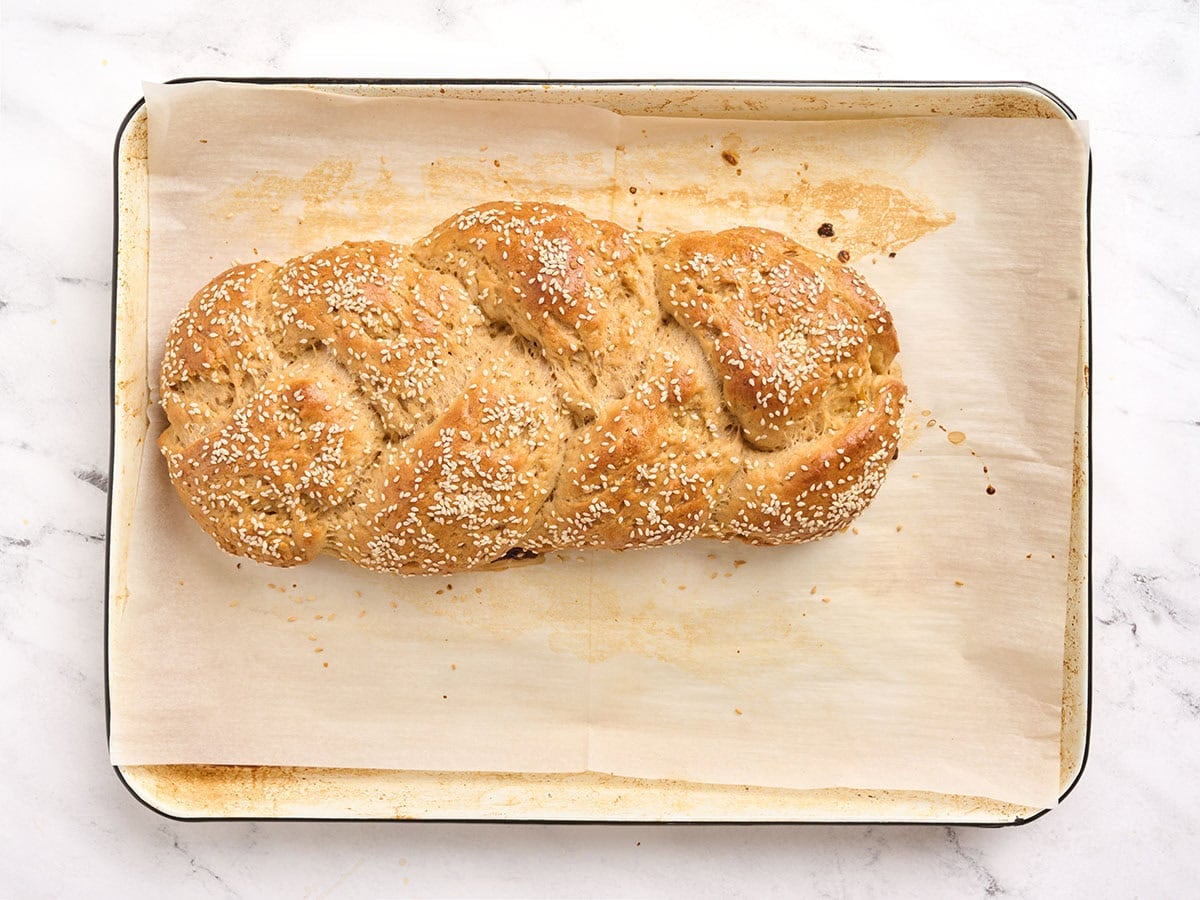
Bake the challah. Bake at 350°F (180°C) for 25–30 minutes, or until the loaf is deep golden brown and sounds hollow when tapped on the bottom. If the top begins browning too quickly, loosely tent the loaf with foil during the last part of baking.
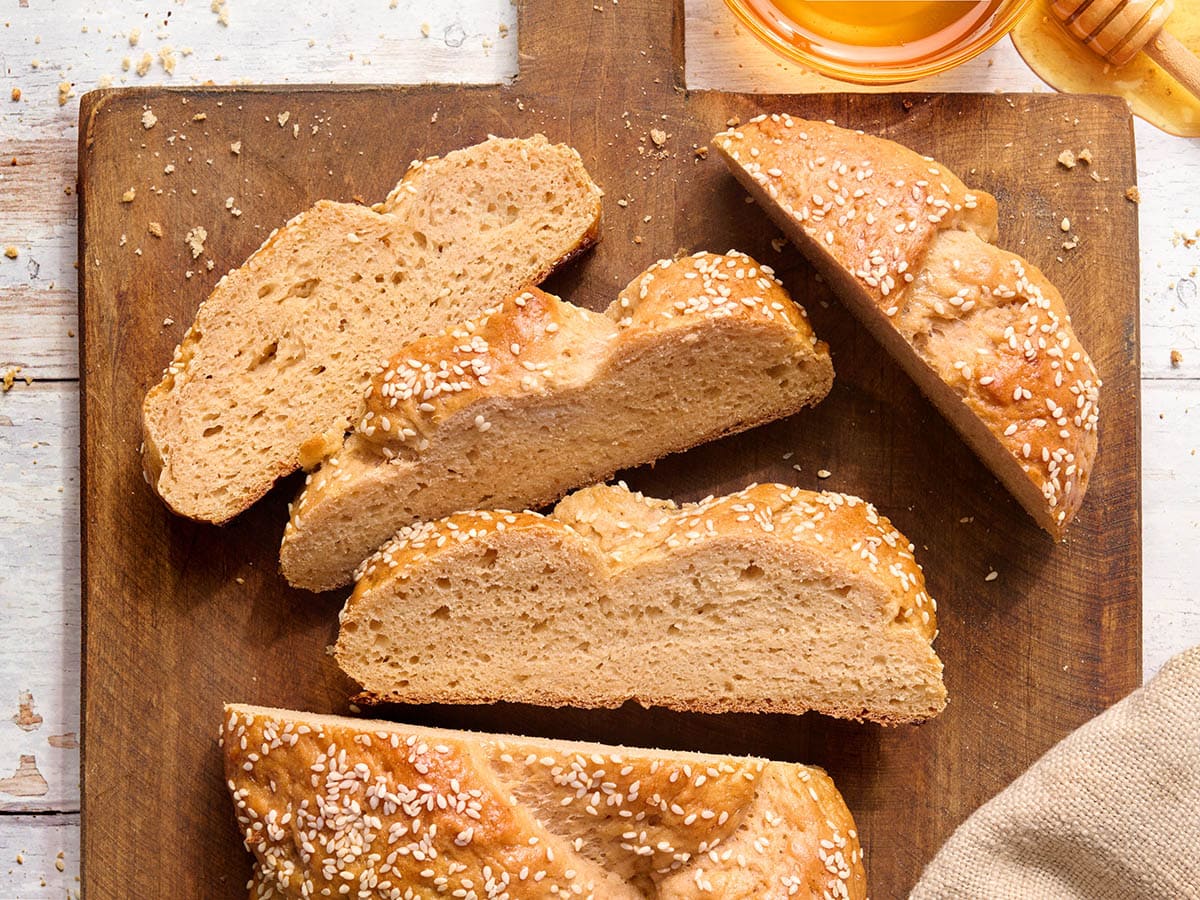
Cool completely. Transfer the challah to a wire rack and let it cool completely before slicing. This step is essential for gluten-free bread because the crumb continues to set as it cools. Cutting too early can result in a gummy interior.
Flour Notes
This recipe was developed using King Arthur Gluten-Free Bread Flour, which is widely available at most major grocery stores. It already contains structure-building ingredients, making it ideal for enriched yeast dough like challah.
GF Flour Alternatives:
King Arthur Measure-for-Measure Flour
- Use 320g Measure-for-Measure in place of the Bread Flour
- Keep the 45g tapioca starch
- Keep the full 17g psyllium husk powder
- Reduce warm water to 220-230ml to start
Why: This blend absorbs slightly less liquid. Starting lower prevents a loose dough.
Expect: Slightly softer crumb and slightly less defined braid, but still rich and tender.
Bob’s Red Mill 1-to-1 Baking Flour
- Use 320g Bob’s 1-to-1
- Keep the 45g tapioca starch
- Keep the full 17g psyllium husk powder
Increase warm water slightly to 250-260 ml
Why: This blend tends to absorb a bit more liquid and benefits from slightly higher hydration in enriched dough.
Expect: Tender interior. Shape the loaf slightly taller before the second rise to help maintain braid definition.
Serving Suggestions
I love serving this gluten-free challah bread for special occasions like Sabbath dinners, holiday meals, and Easter brunch, but it’s just as perfect for weekend baking or family dinners. It’s especially delicious served warm with butter, honey, or your favorite jam, which melts right into the soft, fluffy slices. I also use it to make gluten-free French toast, where the enriched dough creates a rich, tender texture that crisps beautifully on the outside. It pairs wonderfully alongside comforting dishes like gluten-free potato soup or a gluten-free breakfast casserole, and the sturdy yet soft slices are perfect for sandwiches, whether sweet or savory.
Storage Instructions
Wrap the cooled loaf tightly in plastic wrap or place it in an airtight container. It will stay fresh for 2-3 days. Not recommended for long-term storage, as gluten-free bread can dry out faster in the fridge.
To freeze, slice the loaf and wrap pieces individually or in portions in plastic wrap and a freezer-safe bag. Freeze up to 2-3 months. Thaw at room temperature or gently warm slices in the oven or toaster before serving.
More Gluten-Free Bread Recipes
- Gluten-Free Baguette: This gluten-free baguette has a crisp crust and soft interior, making it perfect for sandwiches or serving alongside dinner.
- Gluten-Free Dinner Rolls: These gluten-free dinner rolls are soft, fluffy, and easy to make, perfect for holidays or everyday meals.
- Easy Gluten-Free Bread: This gluten-free sandwich bread is soft, sliceable, and perfect for toast, sandwiches, or meal prep.


What about King Arthur GF Bread Flour? I can’t find those other brands mentioned in the comments. This might be a bigger asterisk in the recipe–not sure what “good for yeast baking” means without further instruction.
Hi Robert, it looks like some have had success with King Arthur GF Bread Flour!
Followed the recipe exactly using King Arthur GF Bread Flour. Gorgeous loaf is in the oven now so I haven’t tasted it yet and can’t speak for the texture which is so difficult to perfect with GF breads but as far as results so far, every step looked exactly like yours and braiding was simple!
Hi Lucy, we often talk about our favorite flours. Here is a guide: https://www.mamaknowsglutenfree.com/best-gluten-free-flours/
Hi Rose, what brand of GF flour did you use? Not all brands are suitable for yeast baking and can cause some pretty funky results. We recommend looking at the step-by-step photos for reference on how the dough should look at each stage. It sounds like you may have added too much water for the brand of GF flour you used!
I used great value all purpose flour and the dough was very hard to work with . Very soft and hard to braid . Ended up with a very dense bread but tasted good.
What did I do wrong .
I used the paddle maybe I should use the dough hook next time .
Hi Sonia, we do recommend the dough hook for doughs, but we do not recommend Great Value flour for yeast breads, so that is likely the biggest culprit here.
hi, I used Bob’s red mill 1 to 1 gf flour blend. I used less than 1 cup water in total, and I have used this flour with yeast successfully before. the dough looked just like the pictures up until the braiding step, I was able to roll it out into logs after it had been refrigerated that looked just like your pictures, but braiding it was impossible. adding less water would have been a very dry dough, I don’t think it was a matter of hydration, I think it was that this recipe doesn’t work, except for maybe very specific gf flour blends. in which case, I feel you should specify what gf flour blends will work
Hi Shoshi, I’m not sure how you were able to roll it out into logs but not braid it? Was the dough not holding the braid? We have not run into this issue before, so we would need more specifics in order to help.
Hi Lea, I think your instincts are correct. Depending on the brand of GF flour used, you may need more or less water to properly hydrate the dough!
Can this recipe be made with an egg substitute? We have gluten, dairy & egg sensitivities… If so, what would be the amounts?
Hi Sue, we have not tried but would love to hear your results if you do!
What if my gluten free flour already has tapioca starch do I omit that?
Hi Rachel, we do not recommend omitting the tapioca starch!
Oh, I’m sorry, I somehow missed that you had answered Rachel! I guess I gave the right answer then. I can’t wit to try it! I’ll have to go through my pantry and see if I still have some tapioca starch…
I saw there was no answer yet, so I thought I would try to help. I’m not an expert, but I’m pretty sure that your gluten-free all-purpose flour will have only a small amount of tapioca starch in it. This recipe adds quite a bit more because tapioca starch has this wonderful quality that adds a kind of elastic feel that other gluten-free flours are missing. And that is so important in a yeast bread – especially a braided one. It is an expensive ingredient, though, but quite necessary in this recipe to get the results you want. I think I’m going to try it for my husband! Good luck to you!!
what gluten-free flour do you recommend or did you use?
thank you
Hi Michele, we like Pillsbury or Better Batter for yeast baking.
how would you make this vegan? could I substitute the egg for a vegan versation?
Hi Anna, unfortunately, we haven’t tested this recipe with an egg replacement, but please let us know your results if you do!
all recipes are truly good.