Gluten-Free Uncrustables
Published
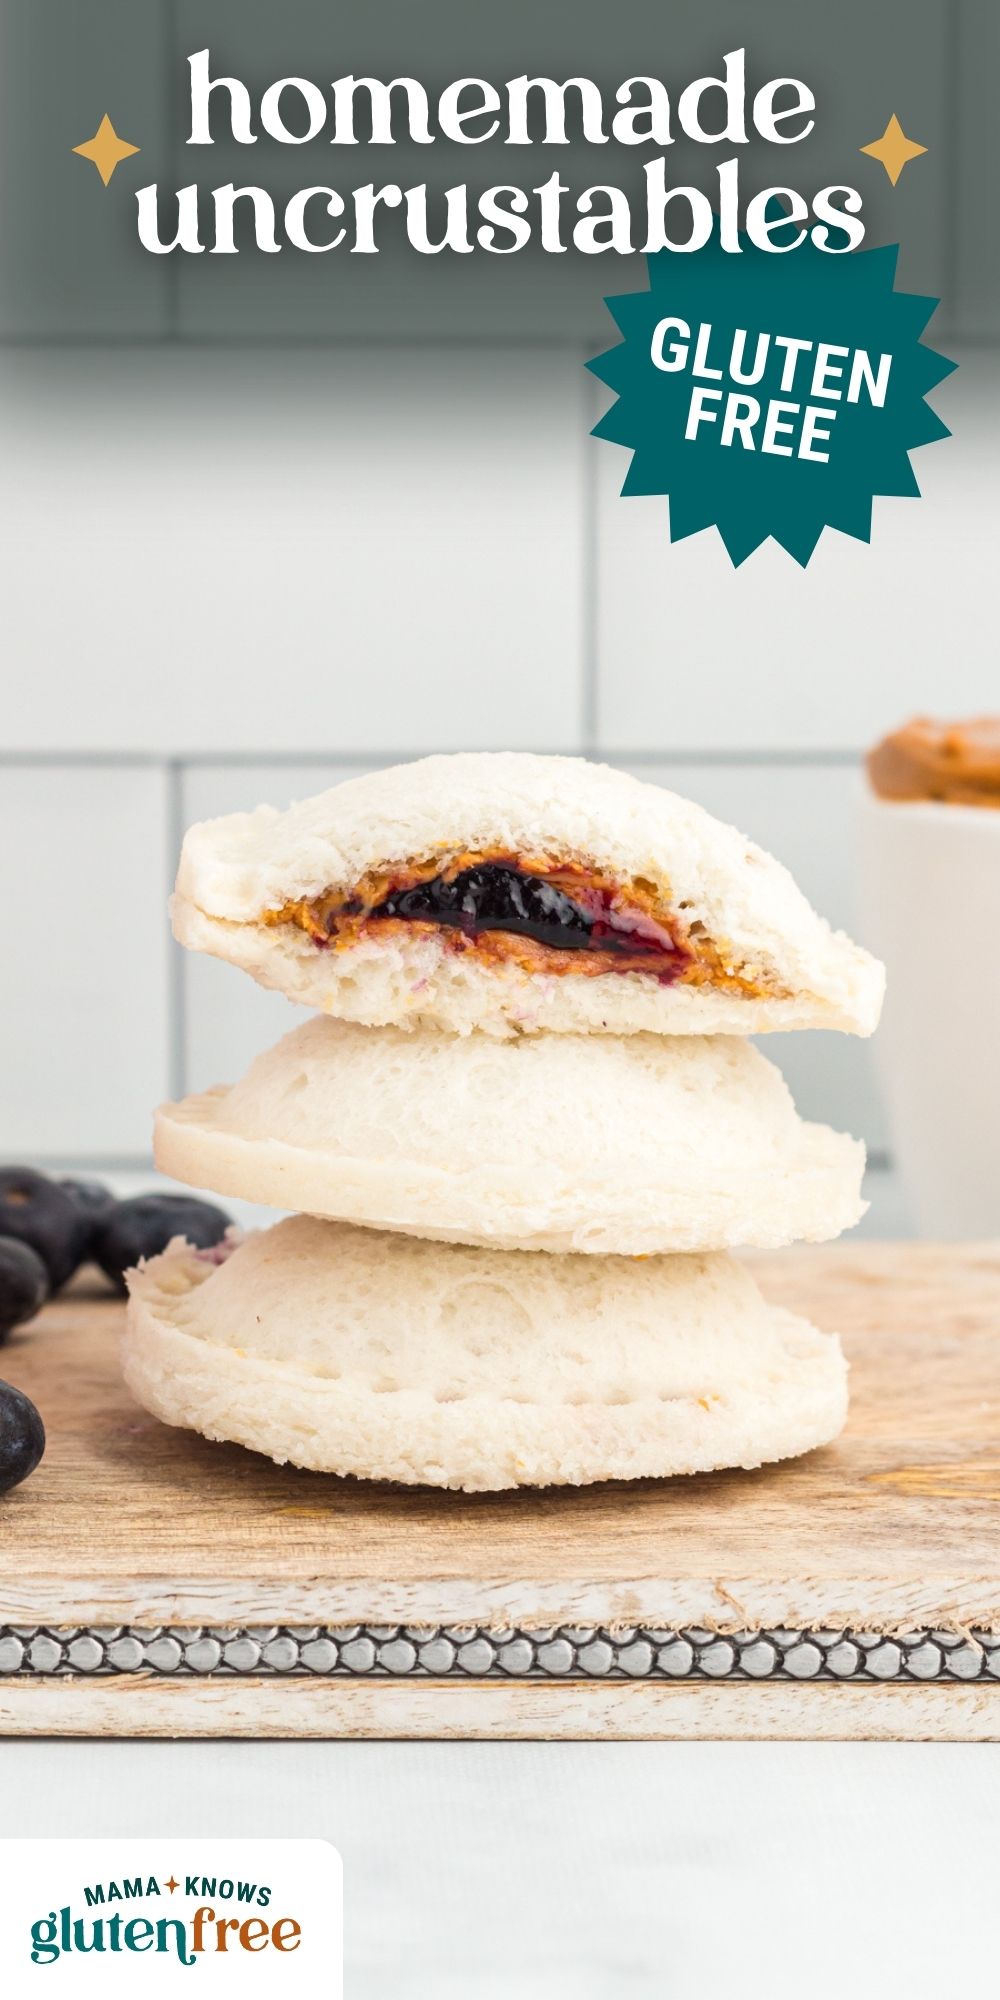
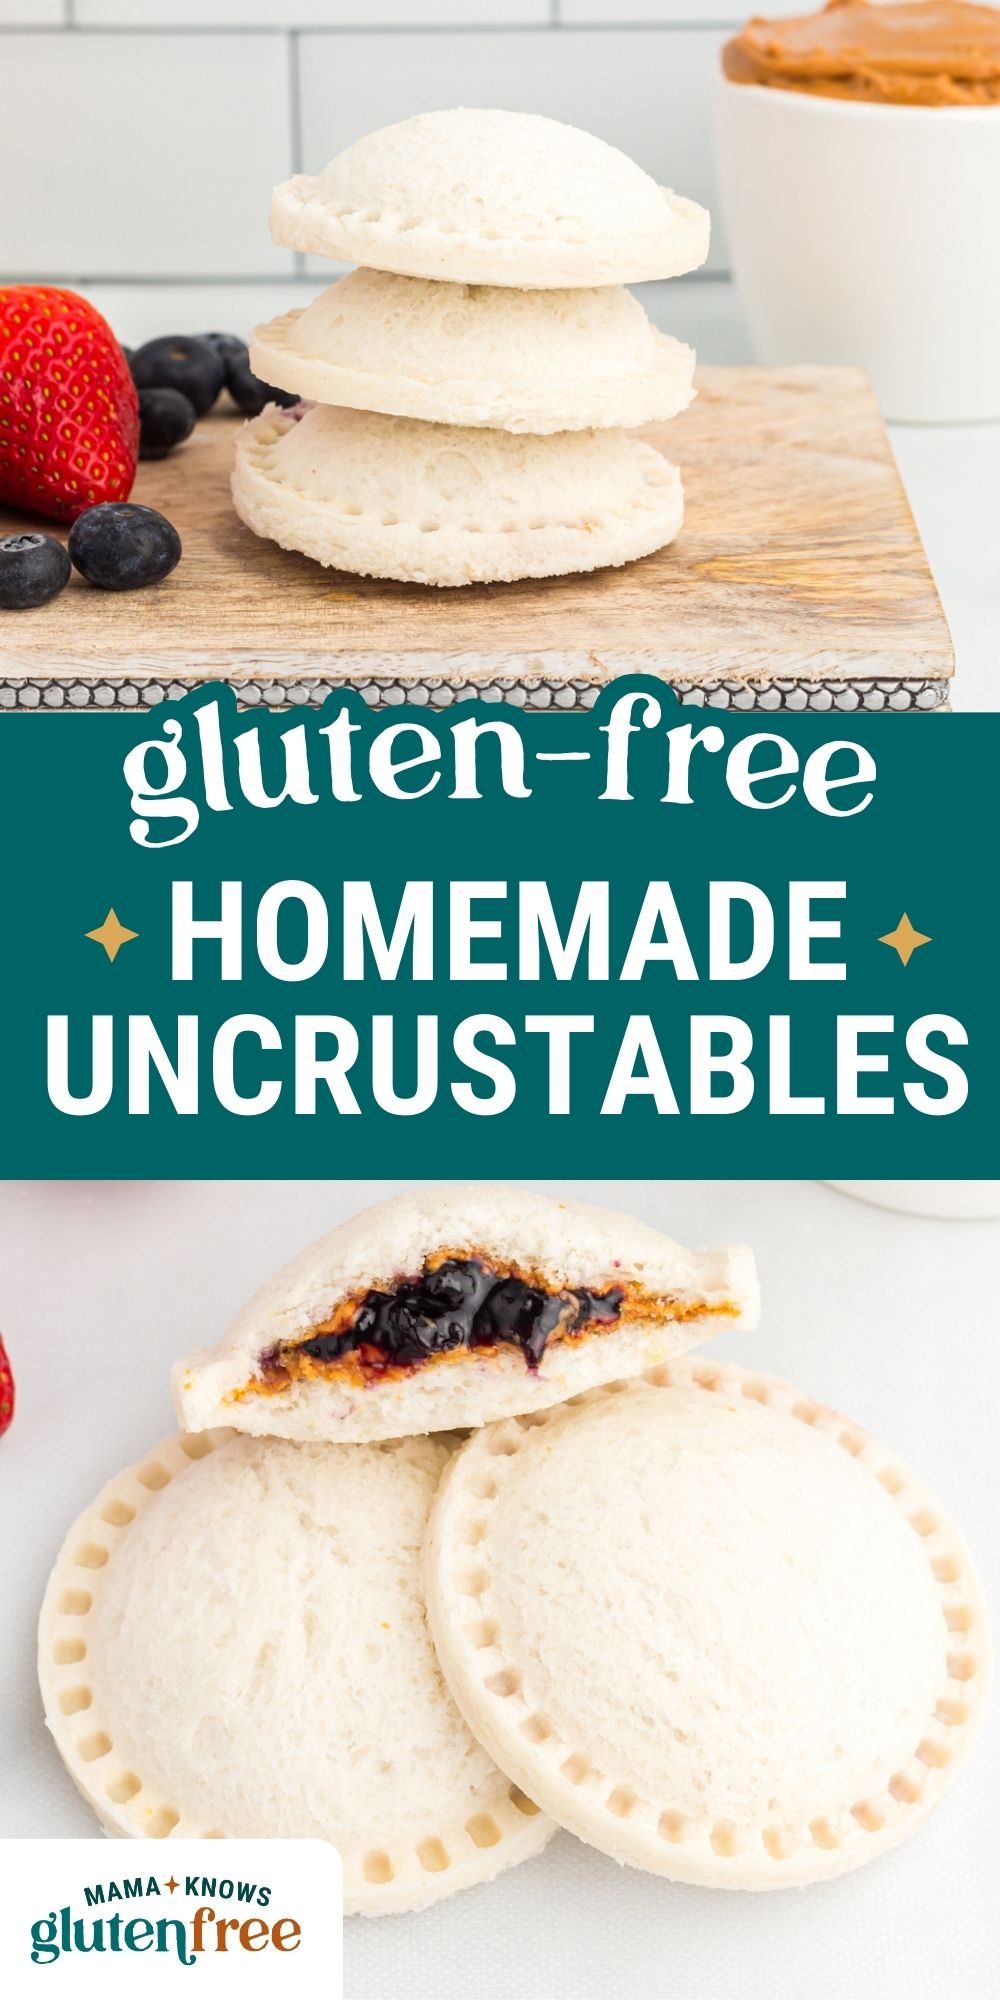
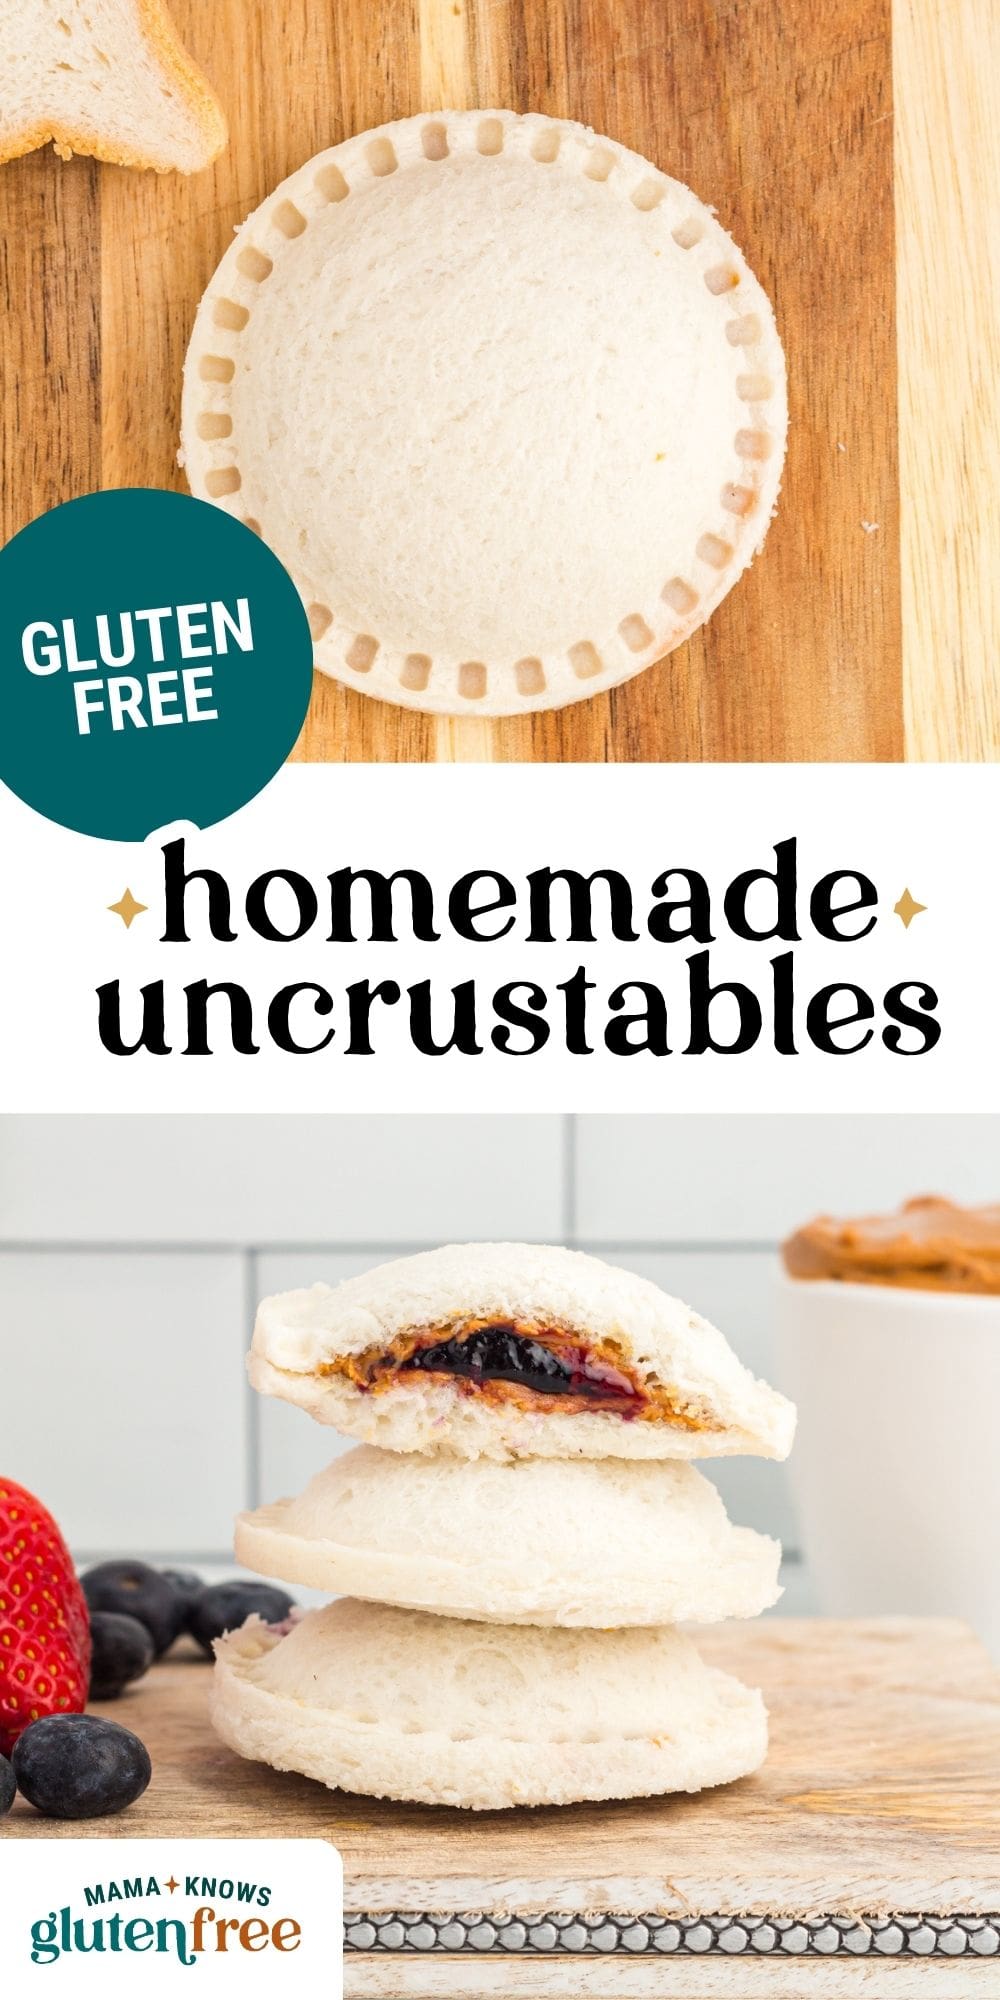
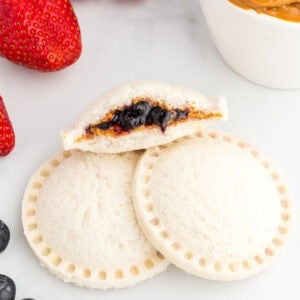
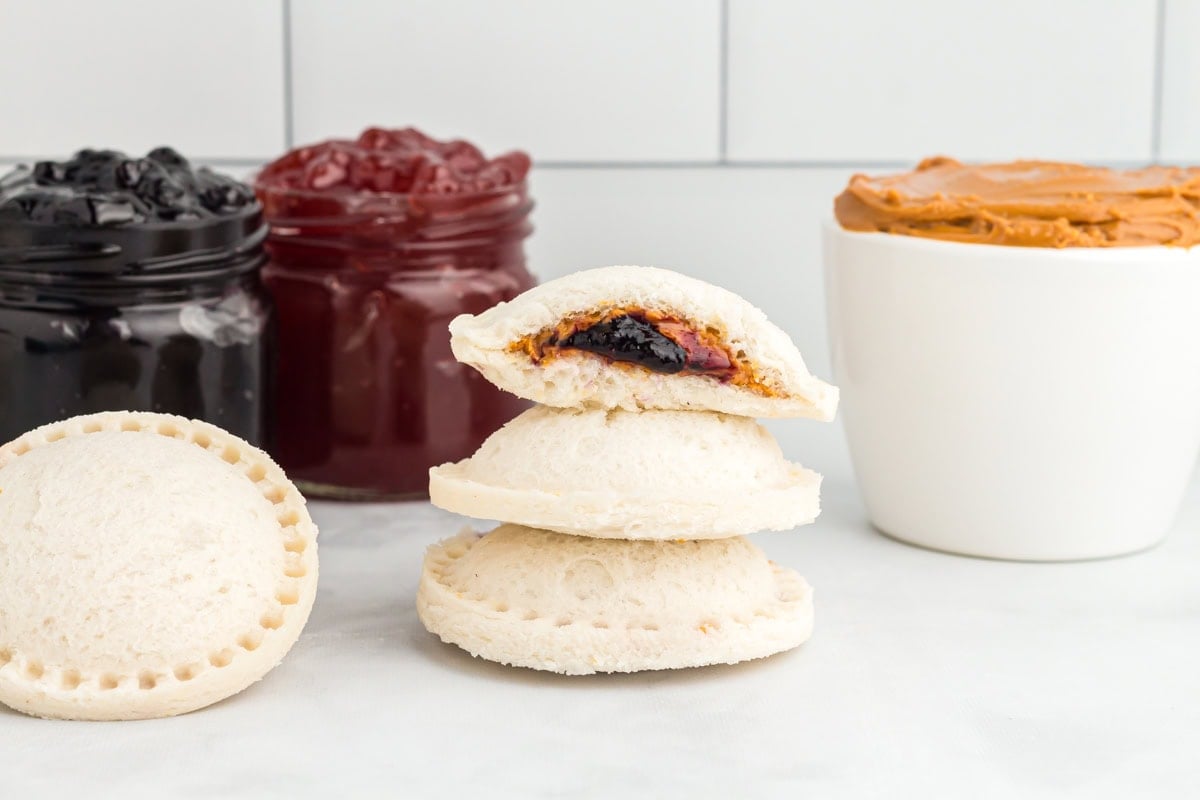
I’ll admit Uncrustables were a guilty pleasure of mine before going gluten-free. That’s why I had to come up with a homemade version that’s just as simple, customizable, and perfect for freezing. These gluten-free uncrustables take just 15 minutes to make and are a total lifesaver for busy days. Whether you’re meal prepping for the week, packing school lunches, or just need a quick snack you can grab from the freezer, these little sandwiches have you covered.
Quick and Freezer-Friendly Snack
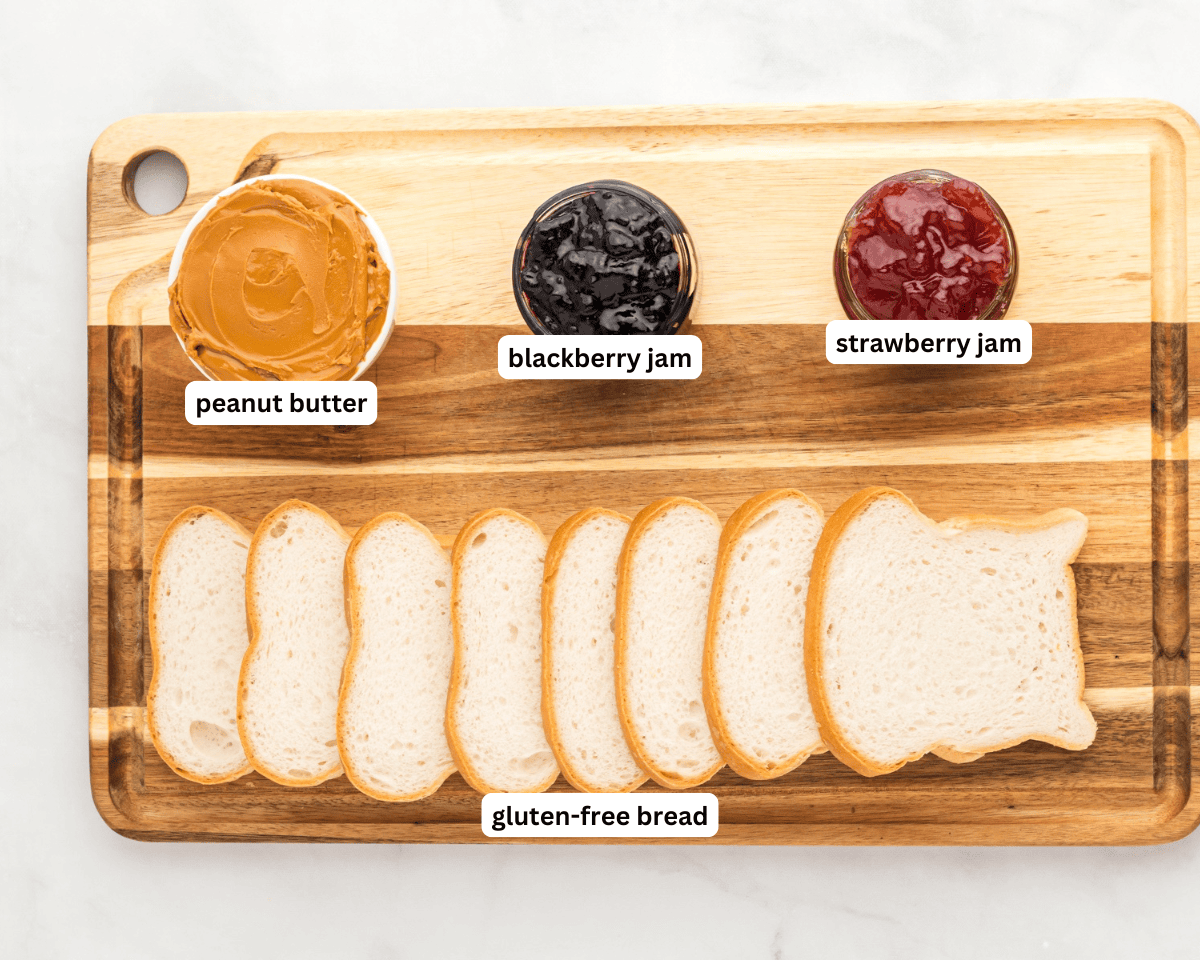
If you’re looking for easy gluten-free snacks to pack in your kids’ lunches—or even for yourself—these homemade gluten-free uncrustables are a total game-changer. They’re budget-friendly, allergy-friendly, and so easy to customize with your favorite fillings. I used homemade gluten-free bread and my favorite peanut butter and jam. I love that they’re not only freezer-friendly for quick grab-and-go meals, but they’re also a great gluten-free alternative to store-bought snacks.
Gluten-Free Tips
- Use a soft gluten-free bread. Breads that are too dry or stiff will crack when you try to seal them. A soft, fresh loaf makes a huge difference and gives you that classic Uncrustable feel.
- Pick the right size sandwich press. Depending on how big your bread slices are, you might be able to use a press that’s a little larger than 3 inches. Just make sure your bread isn’t too small—you want enough room to fit a good spoonful of filling without it squeezing out the sides.
- If your bread feels a little dry, I like to pop it in the microwave for just 2–3 seconds. It makes it so much easier to work with. Just don’t overdo it, or it’ll get too soft and fall apart when you spread the filling.
- If you’re using a fork to seal the edges (I usually do when I’m making a bunch at once), just use the very tips of the prongs to press down firmly and create a tight seal without squishing the sandwich too much.
Gluten-Free Uncrustables
Ingredients
- 8 slices gluten free bread
- 1/4 cup total of fillings, peanut butter, jam, Nutella, etc.
Instructions
- Using a 3” cookie cutter or a sandwich press, cut out circles in two slices of bread.
- Place a thin layer of peanut butter on each of the two bread circles. This keeps the jam from soaking through and making everything soggy. Don’t go too close to the edges or it will leak out of the sides.
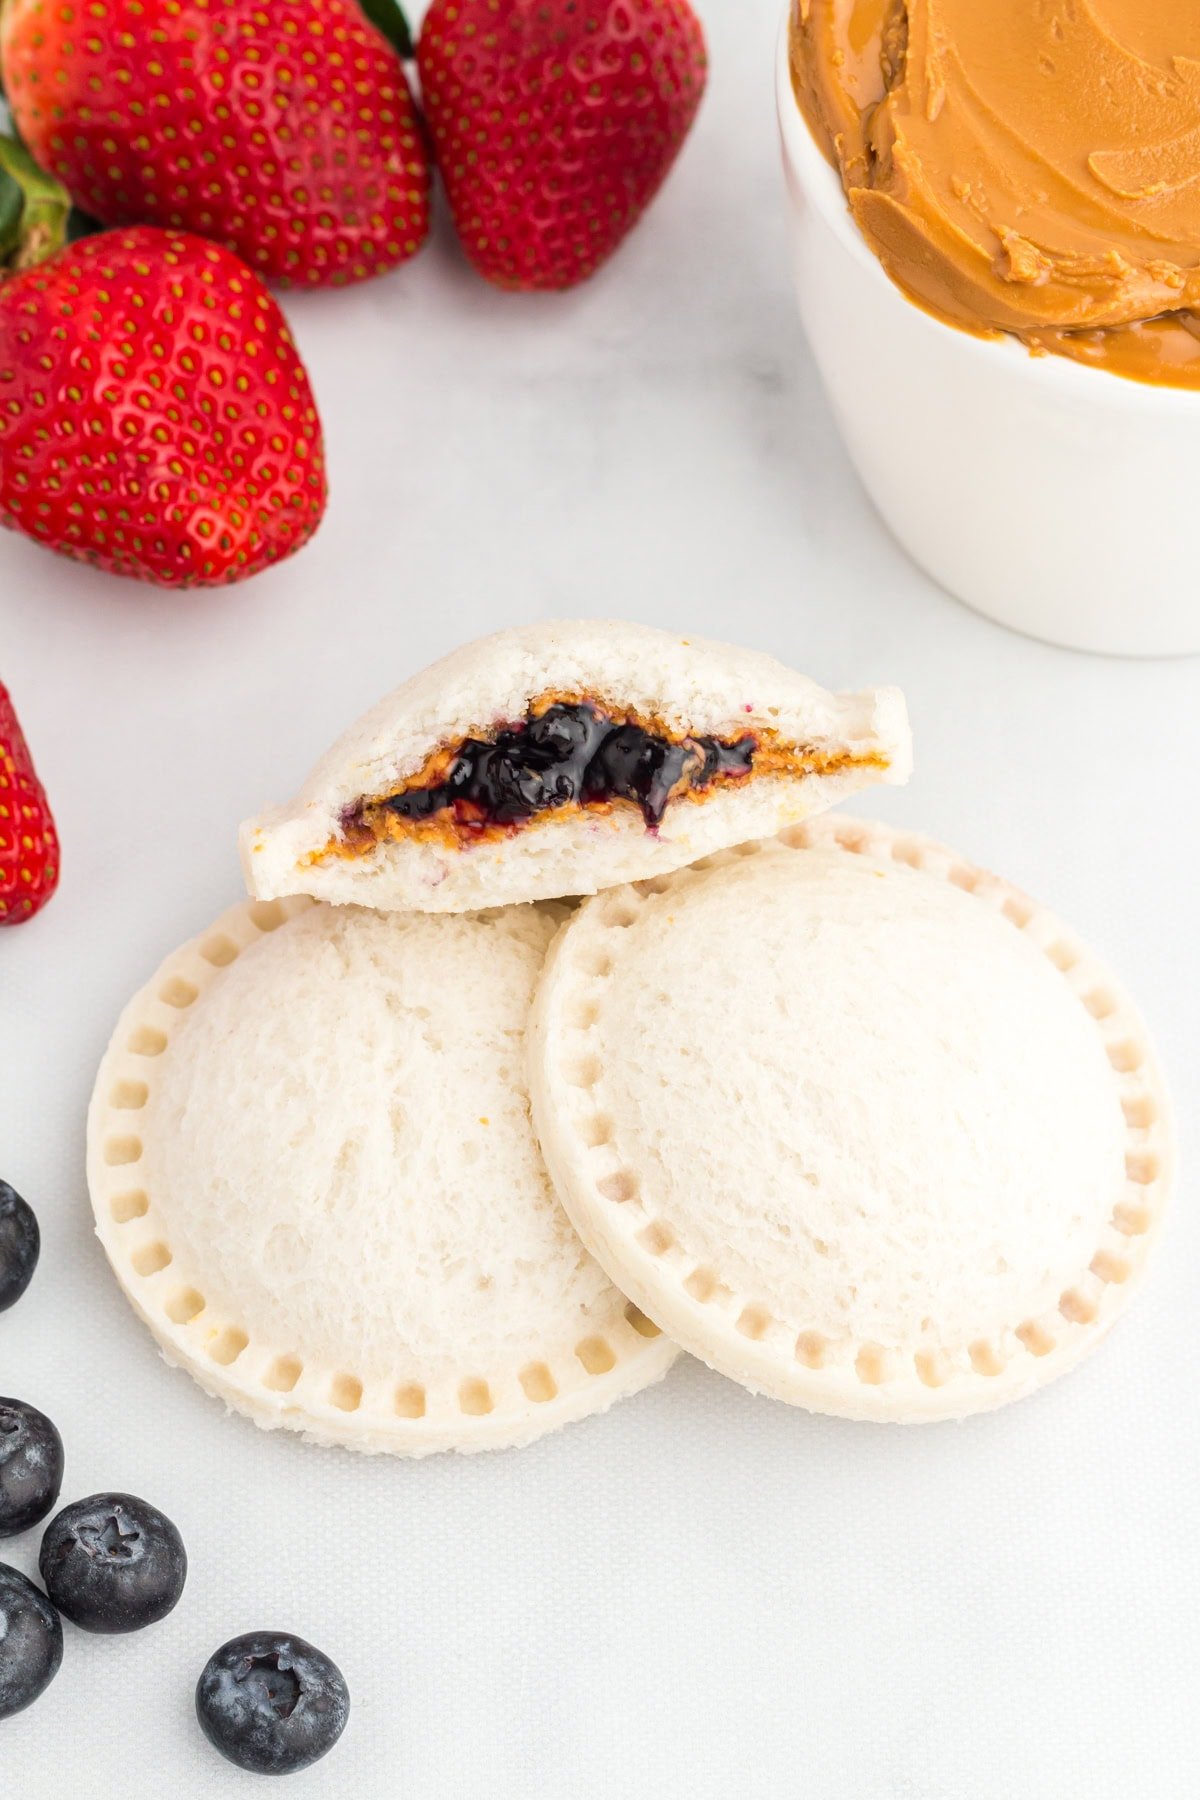
- Place a small amount of jam in the middle of one of the circles. Don’t add too much filling or it will spill out of the edges. For a 3” circle, about 1 tablespoon of filling total for each uncrustable.
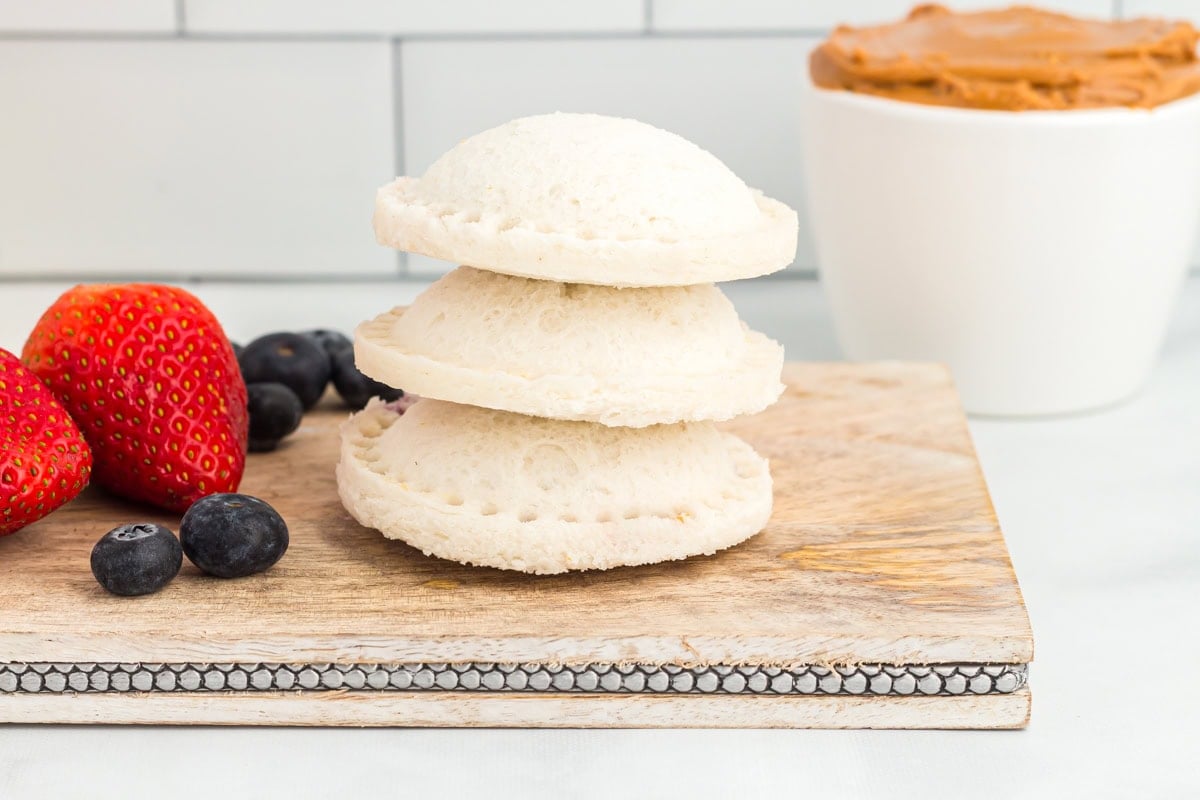
- Place the two circles together like a sandwich with the filling in the middle. Using a sandwich press sealer or a fork, press down around the edges firmly to create a tight seal.
- Repeat steps with the remaining bread and fillings.
- Store uncrustables in individual sandwich bags and place in the freezer for up to 3 months. Having each uncrustable in its own sandwich bag prevents them from sticking together.
Nutrition
Nutrition information is automatically calculated, so should only be used as an approximation.
How to Make Gluten-Free Uncrustables Step by Step
Gather the Ingredients: Gather all the ingredients together.

Cut out the bread circles: Take 2 slices of gluten-free bread and use a 3-inch cookie cutter or sandwich press to cut out two circles. Repeat this step until all 8 slices are used.
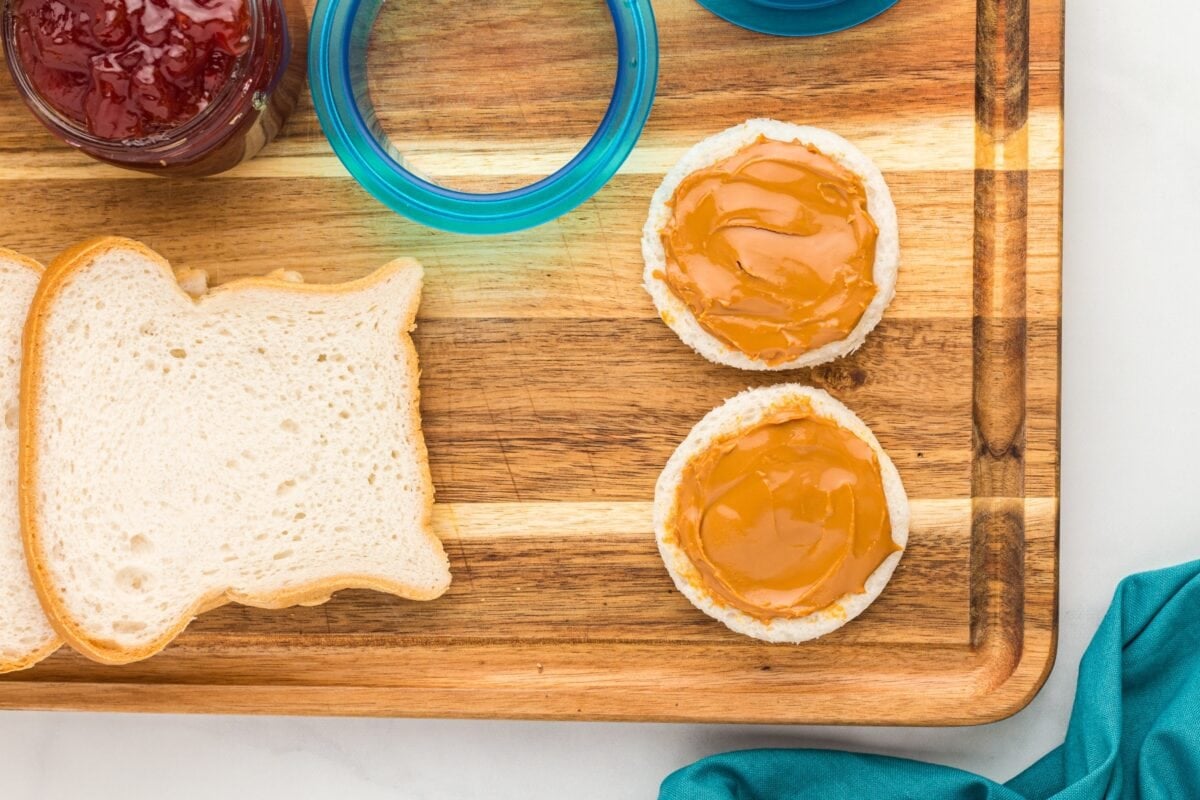
Spread the peanut butter: Spread a thin layer of peanut butter on each bread circle. Be sure to stay away from the very edges to help keep the filling from leaking out during sealing. This keeps the jam from soaking through and making everything soggy.

Add the jam or other filling: Spoon about 1 tablespoon of your chosen filling (jam, Nutella, etc.) into the center of one bread circle. Avoid overfilling to prevent it from squeezing out when sealed.

Seal the sandwich: Place the second bread circle on top to create a sandwich, with the peanut butter and filling in the middle. Using a sandwich press or the back of a fork, press firmly around the edges to seal them tightly.

Repeat with the remaining bread: Continue assembling the rest of your uncrustables using the remaining bread circles and fillings.
Store and enjoy: Freeze uncrustables in a single layer, thaw in the fridge or at room temperature, and enjoy!
Serving Suggestions
These homemade uncrustables are perfect for packing into school lunches—they’re always a hit. I also love keeping a few in the freezer for an easy snack on busy afternoons when I need something quick. They’re great to toss into a cooler for road trips or picnics, too. You can even mix things up by trying different fillings like almond butter, chocolate spread, or even a little cream cheese and jam combo to keep things fun and interesting.
Storage Instructions
Uncrustables are best kept frozen. To freeze, I lay all the uncrustables in a flat layer on a parchment-lined baking sheet and pop them in the freezer for about 2 hours. Once they’re frozen, I just move them all into one big container. Freeze for up to 3 months. When you’re ready to eat, thaw at room temperature or in the refrigerator.


Do you have a good gluten free bread recipe that you use for these? Everything I’ve tried seems too dense. Thanks
Hi Joanne, yes here is the gluten free bread recipe: https://www.mamaknowsglutenfree.com/easy-gluten-free-bread/
I’m new to being a celiac and I can’t find any bread that taste good to me or looks nice and white like your bread. What bread do you use?
Hi Christina, This is the bread we use:
https://www.mamaknowsglutenfree.com/easy-gluten-free-bread/