Gluten-Free Brownies
Published
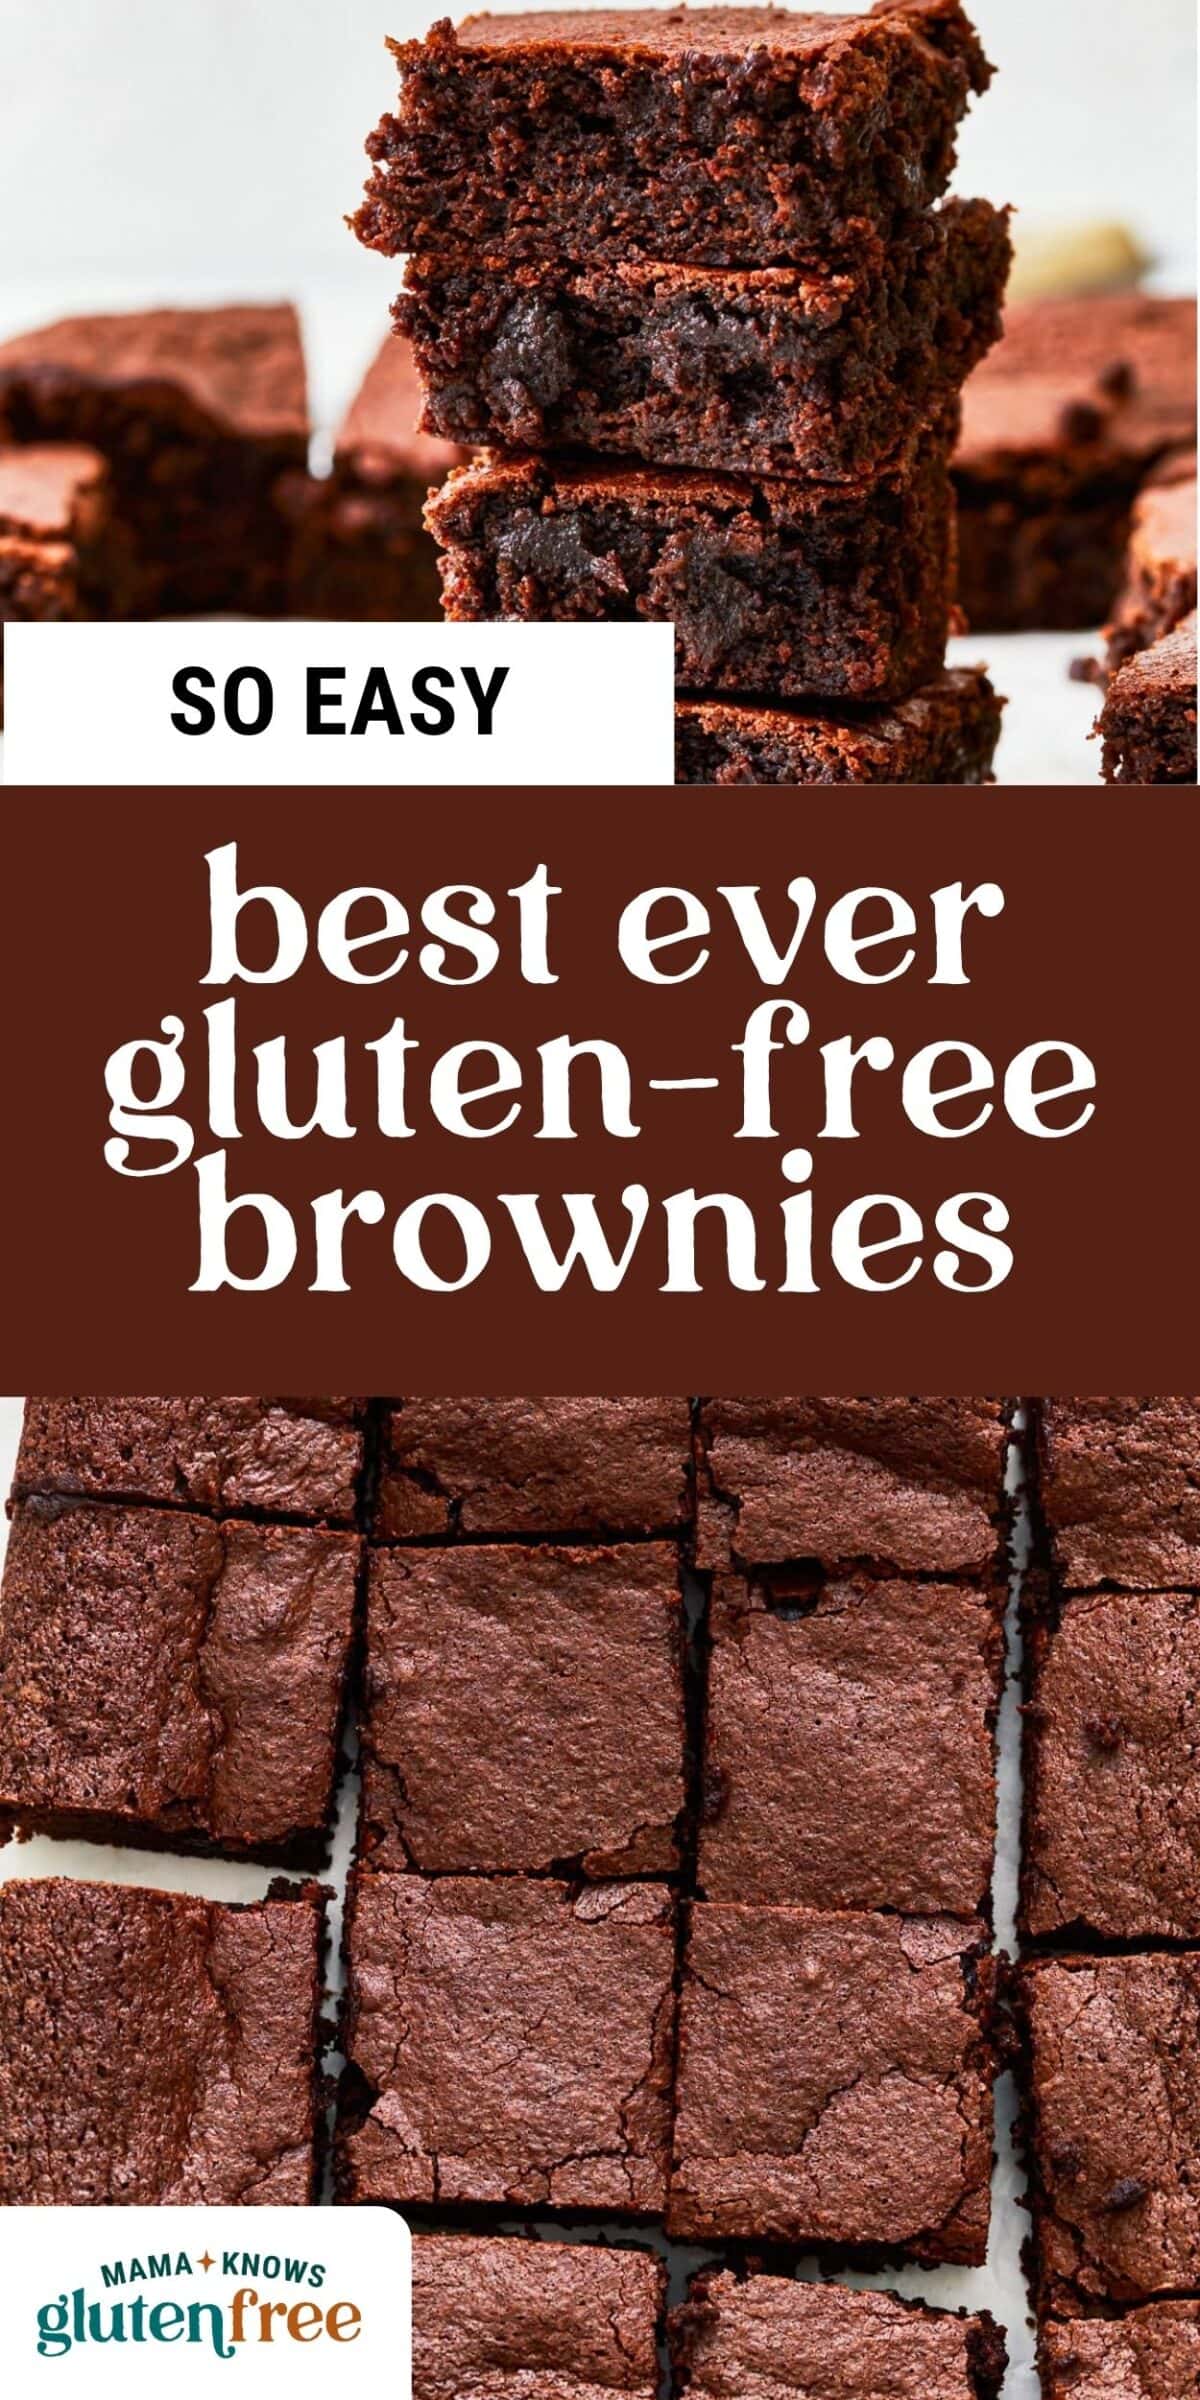
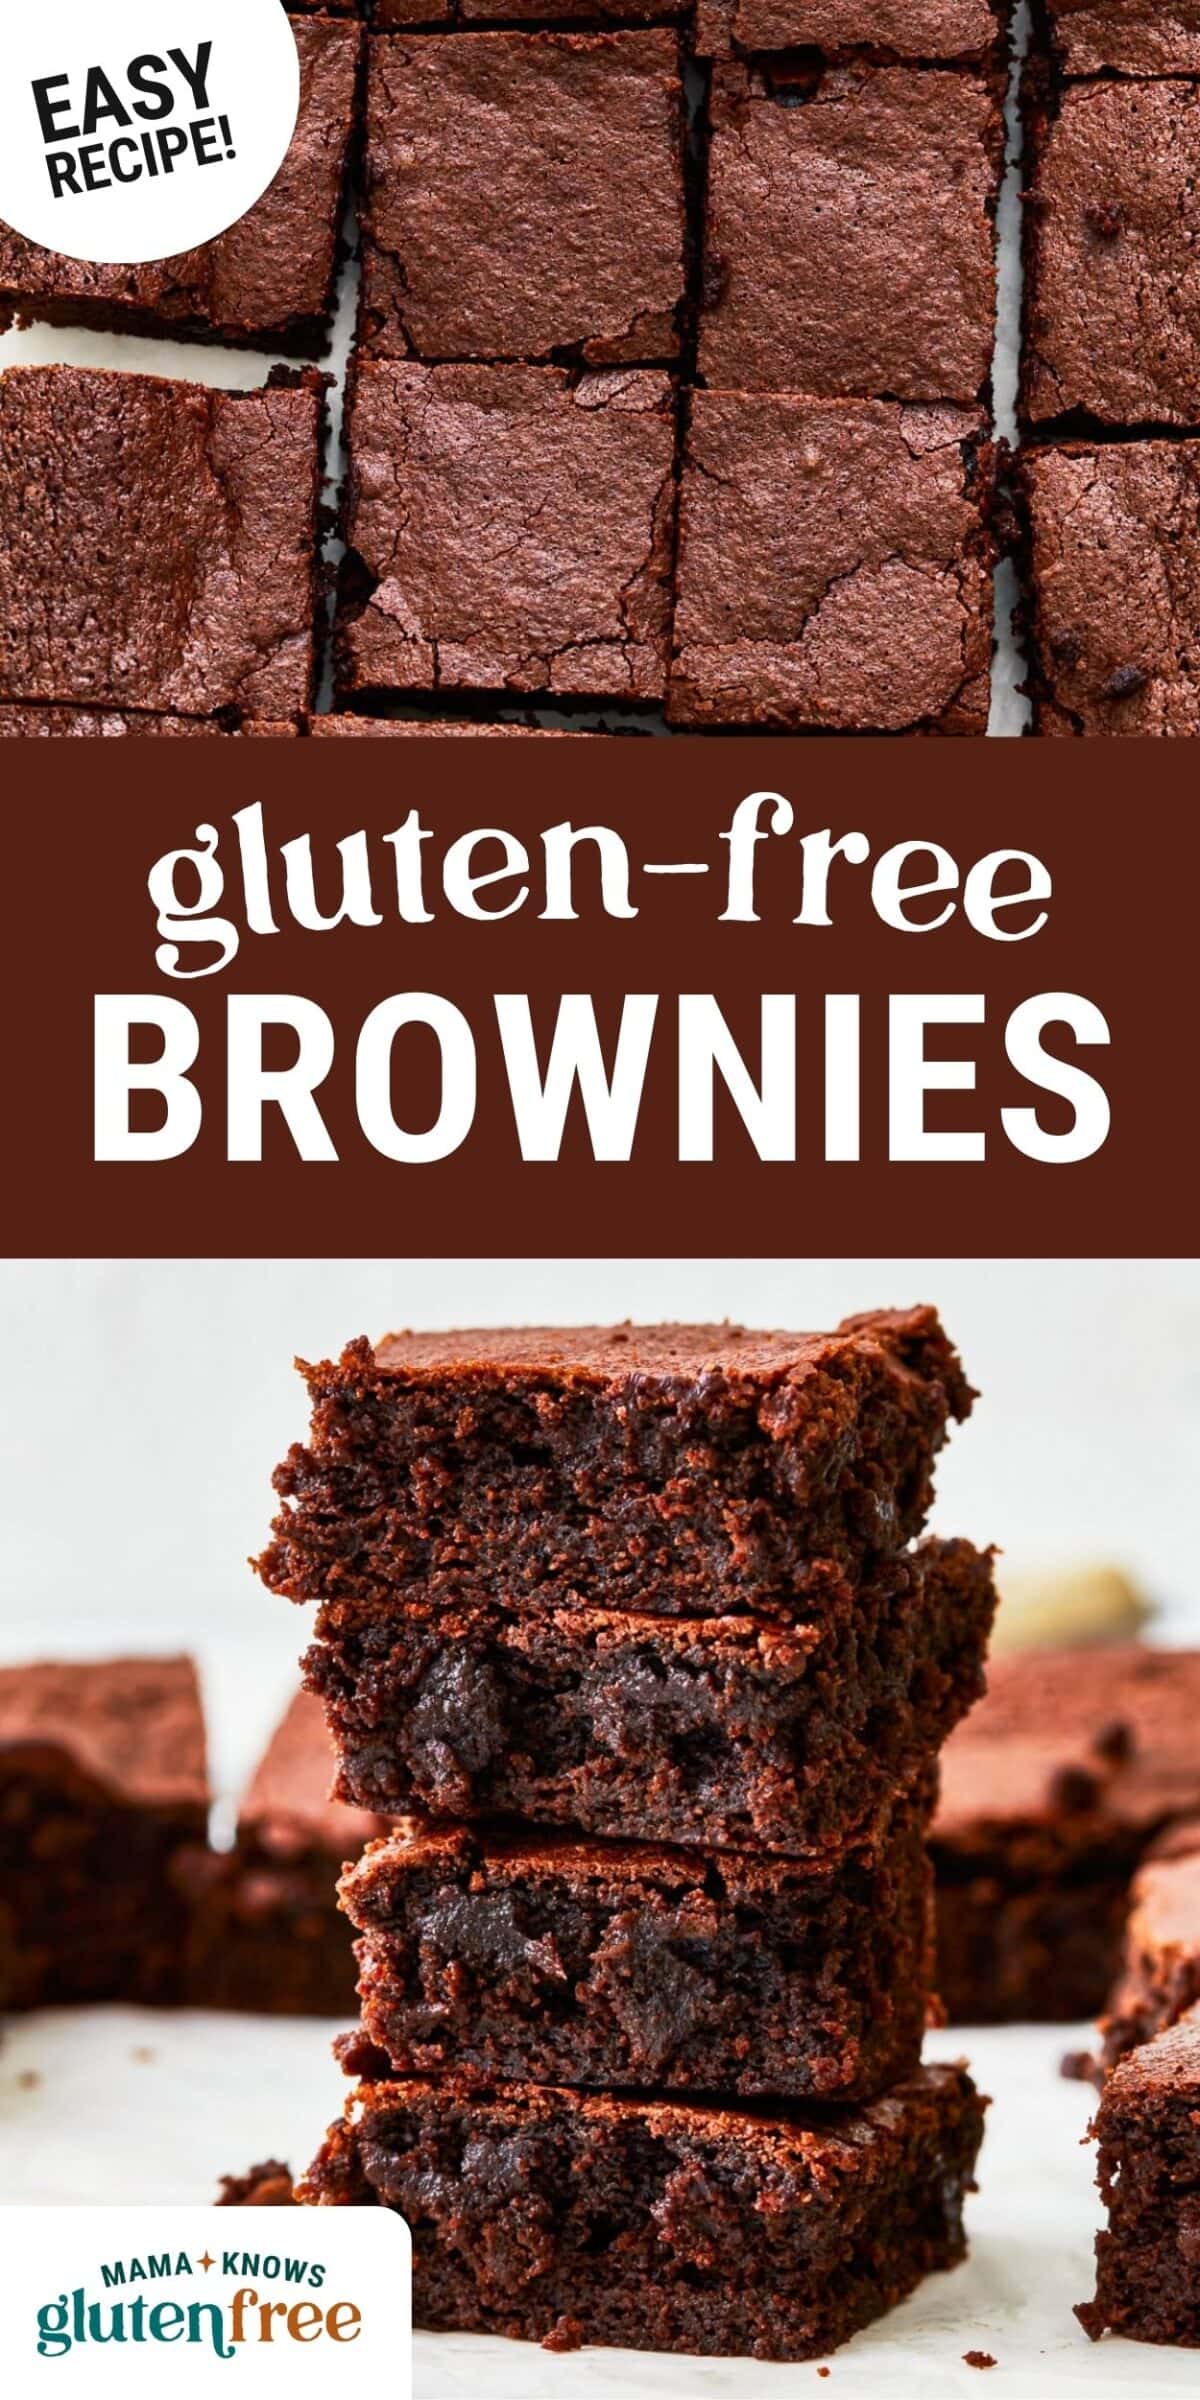
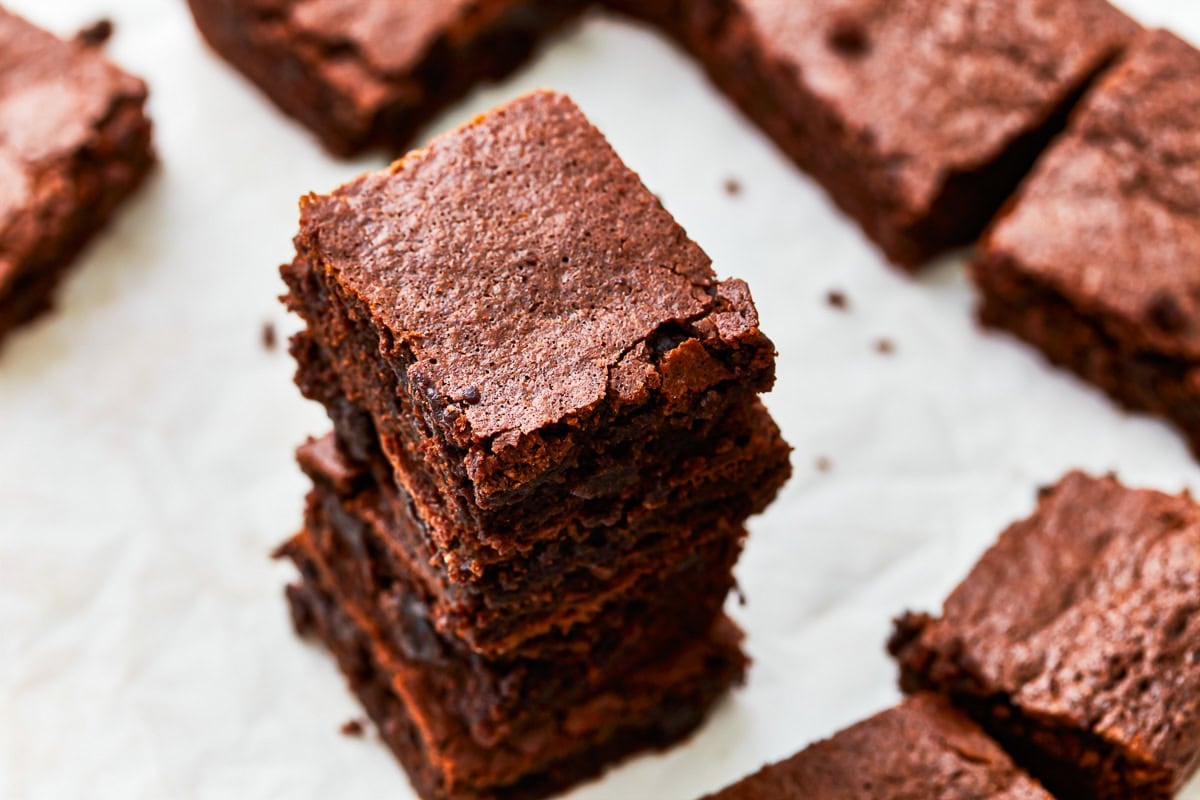
If you are a chocolate lover like me, you are going to be taken to chocolate heaven when you bite into these gluten-free brownies! I like brownies to have a flaky crust and be light like a cake but also chewy inside. But most of all, I want to taste the chocolate. These are the ultimate easy, gluten-free brownies made from scratch. Seriously, you are not going to want to buy a gluten-free brownie mix again!

Gluten-Free Brownie Recipe
There is something just magical about brownies. For any chocolate lover, it’s an easy chocolate dessert that can be made in a little over 30 minutes.
Better than box-mix, these homemade gluten-free brownies are fudgy, chewy, and soft. I promise you won’t go back to your favorite gluten-free boxed brownie mix when you see how easy it is to make gluten-free brownies from scratch! These brownies truly are a one-bowl wonder recipe, you don’t even need a mixer!
Ingredients
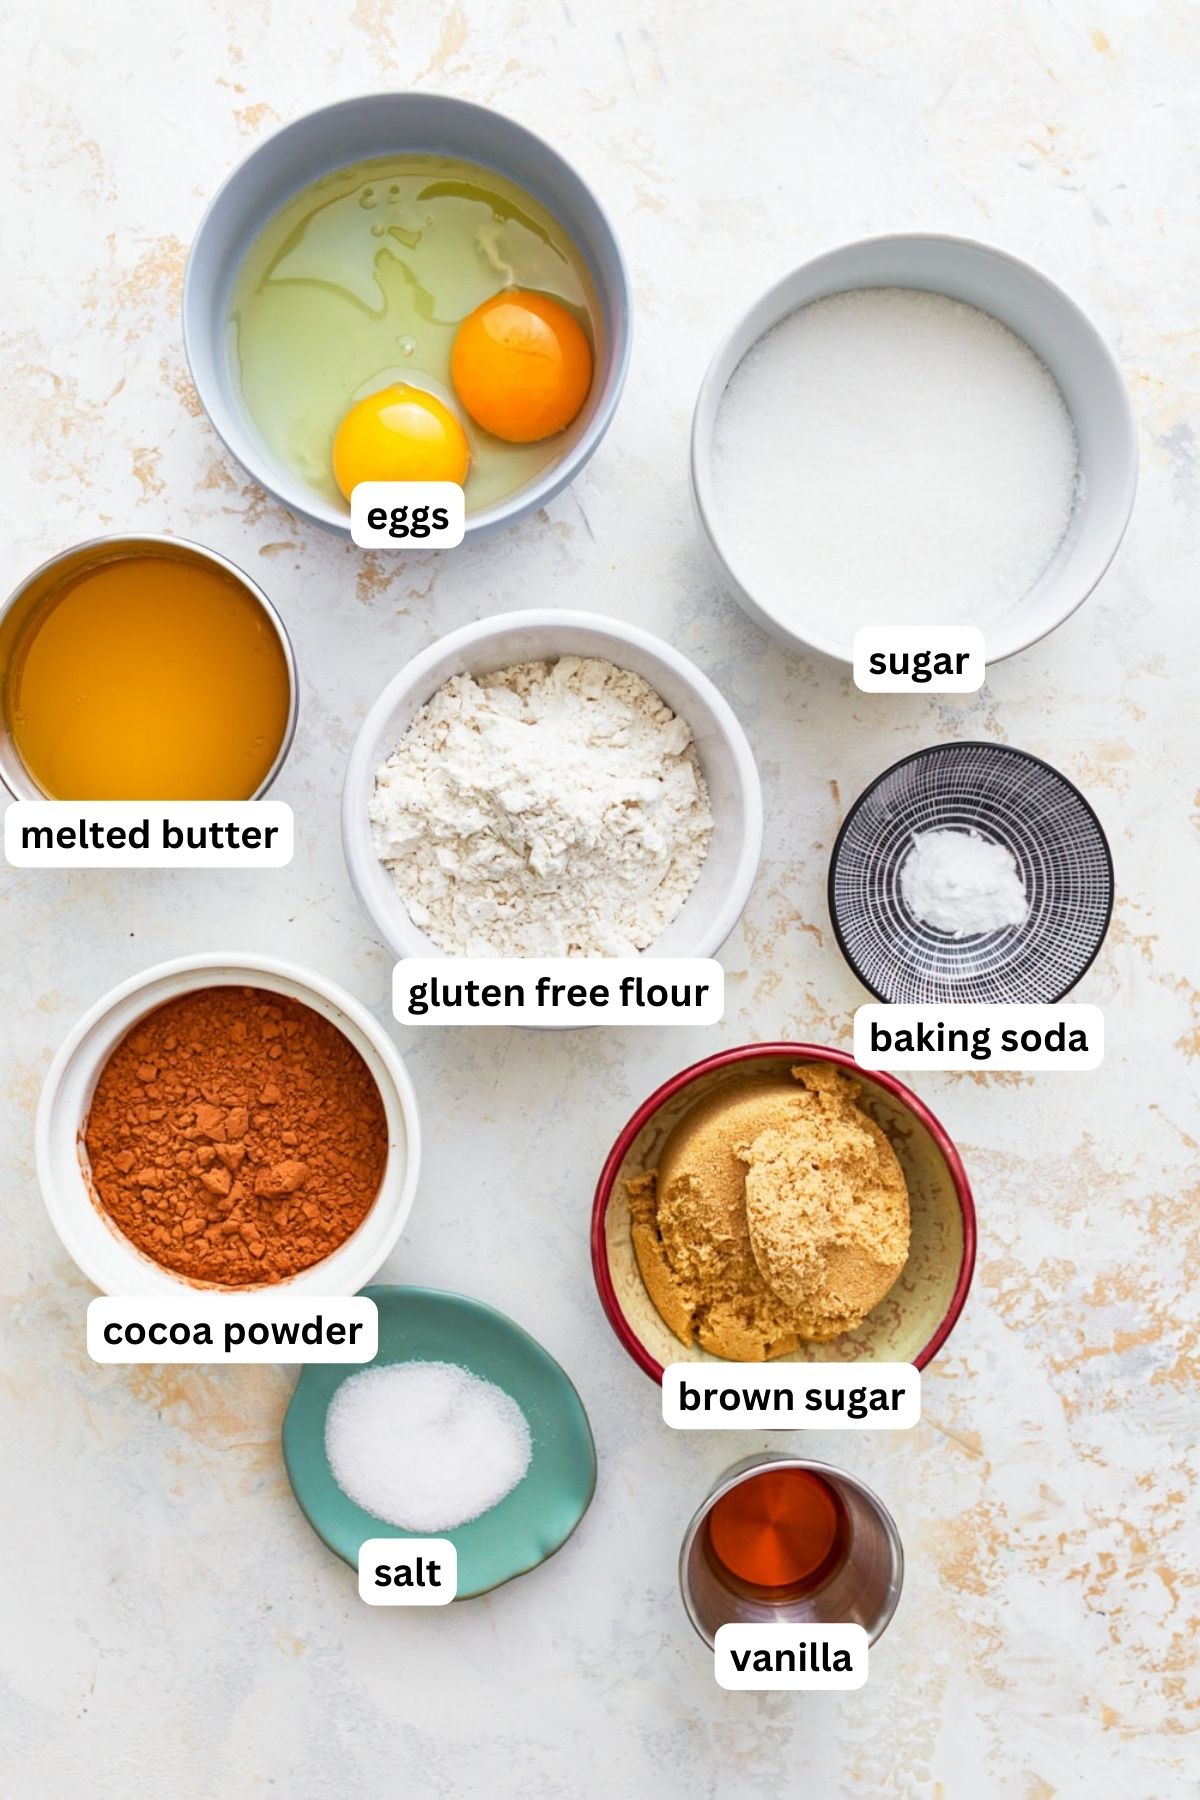
- Unsalted Butter: Makes these brownies rich and tender. For a dairy-free option, use Smart Balance butter.
- Sugar: I used a combination of granulated white sugar and brown sugar to create moist and sweet brownies.
- Eggs: Help give the brownies structure.
- Pure Vanilla Extract: Enhances the sweetness of the brownies.
- Gluten-Free All-Purpose Flour with Xanthan Gum: I like Pillsbury gluten-free. Not all gluten-free flours are created equal. You may experience different baking results depending on the gluten-free flour blend you choose.
- Cocoa Powder: Adds rich chocolate flavor to the brownies.
- Baking Soda: Helps the brownies rise so they aren’t too dense.
- Salt: Enhances the chocolate flavor of the brownies.
Tips and Suggestions
- So make sure to check the ingredients of your gluten-free flour and not to add any extra xanthan gum to your flour if it already includes it. If you do, you will get gummy brownies!
- The best way to measure gluten-free flour is the “spoon & level” method. Using a spoon, scoop the flour into the measuring cup. After you’ve spooned the flour into the measuring cup, use the back of a knife to level off the top of the measuring cup.
Should I Use A Metal Or Glass Pan?
I like to bake brownies in a glass pan. Glass pans provide better heat distribution, which leads to more evenly baked brownies. Metal pans tend to produce a firm, but chewy brownie. Metal pans also heat up quickly and you will have to watch your brownies to keep them from over-baking.
Can I Add Mix-Ins?
Yes, add your favorite mix-ins like chocolate chips, M&M’s, or peanut butter swirls.
Storage Instructions
Store leftover gluten-free brownies in an airtight container at room temperature for up to 3 days or in the refrigerator for up to 1 week. You can freeze the brownies once they are completely cooled. Wrap tightly in plastic wrap or foil and place them in a freezer bag to store for up to 3 months. When ready to serve, thaw at room temperature for a few hours or in the refrigerator overnight.
More Gluten-Free Brownies and Bars to Try!
- Almond Flour Brownies
- Flourless Brownies
- Gluten-Free Blondies
- Gluten-Free Lemon Bars
- Gluten-Free Granola Bars
Gluten-Free Brownies

Ingredients
- 1/2 cup unsalted butter, melted, Dairy-free use Smart Balance Butter.
- 3/4 cup granulated sugar
- 1/2 cup brown sugar, packed
- 2 large eggs
- 1 tablespoon pure vanilla extract
- 3/4 cup all-purpose gluten-free flour with xanthan gum, I like Pillsbury gluten-free.
- 1/2 cup cocoa powder
- 1/2 teaspoon baking soda
- 1/2 teaspoon salt
Instructions
- Preheat oven to 350ºF.
- Spray the 8×8 square baking pan with gluten-free non-stick cooking spray or line the baking pan with parchment paper and coat the bottom and sides with gluten-free nonstick cooking spray or butter.
- In a large bowl, add melted butter, pure vanilla extract, granulated sugar and brown sugar and mix until fully combined.
- Add in eggs one at a time and mix until fully combined.
- In a medium-sized bowl combine gluten-free flour, cocoa powder, baking soda and salt and whisk together.
- Slowly add the gluten-free flour mixture to the wet ingredients and mix until fully combined and smooth.
- Pour the brownie batter to 8×8 sized baking pan.
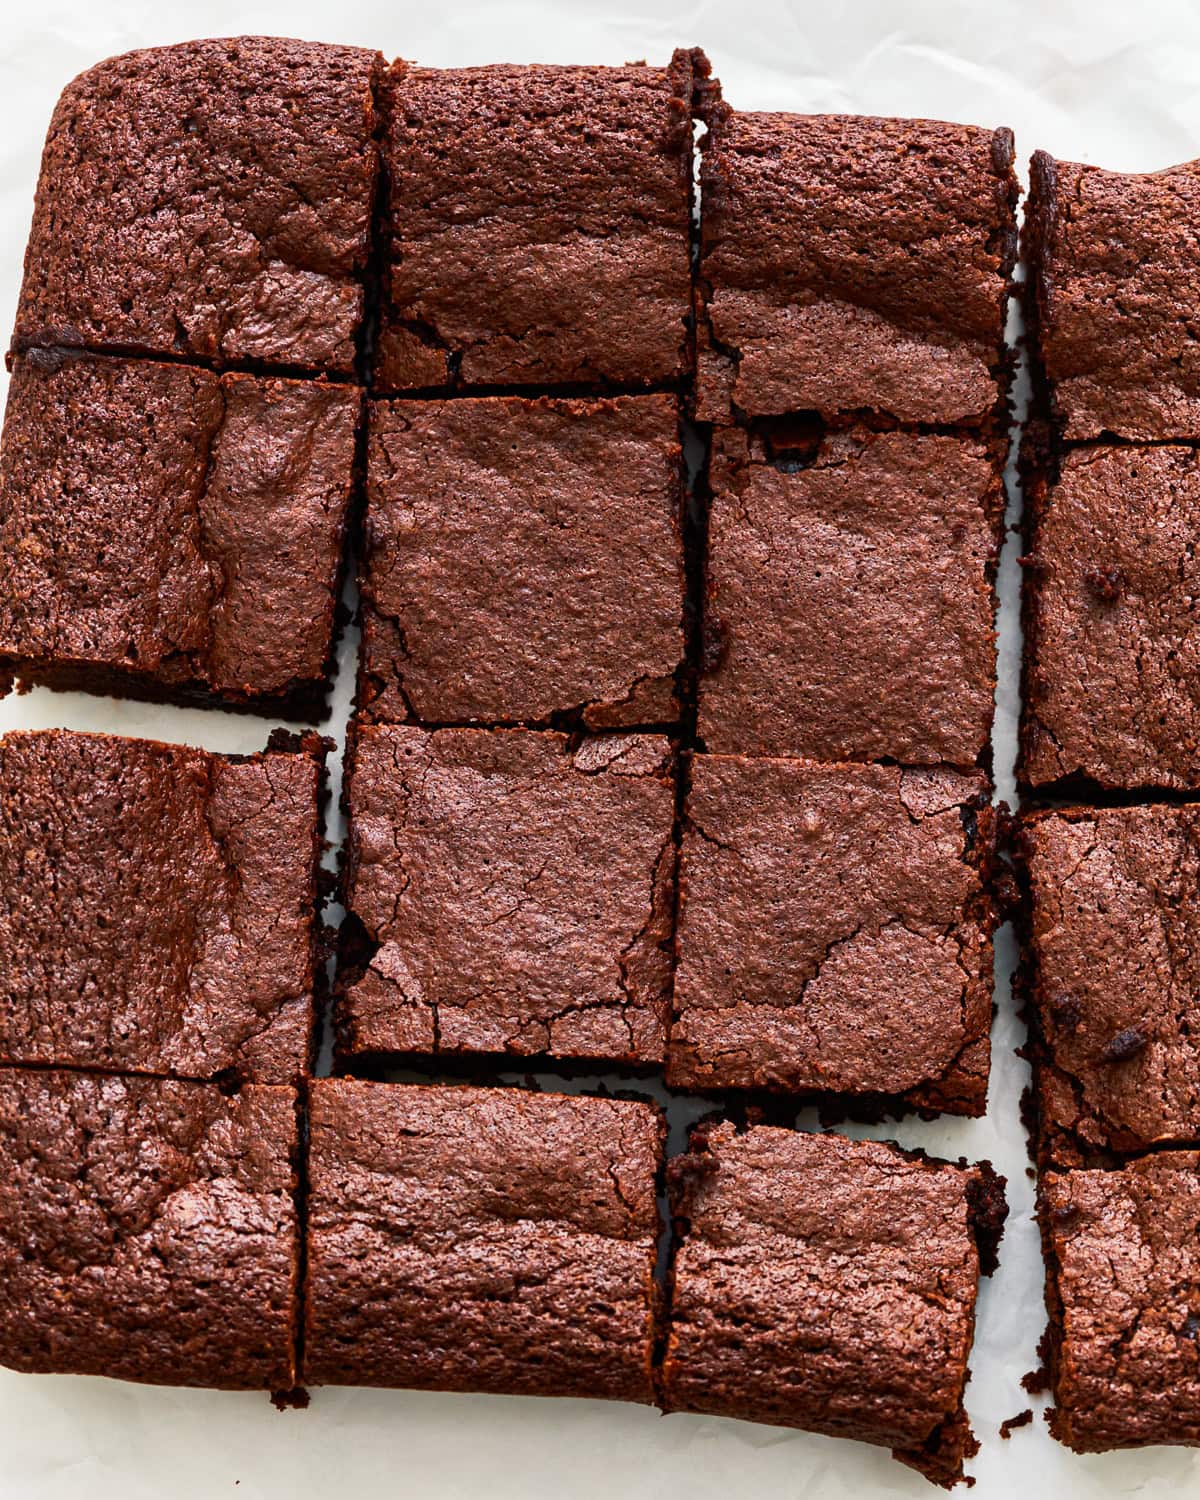
- Bake for 30-35 minutes, or until a toothpick inserted into the center comes out just barely clean. The sides of the brownies with start to pull away from the pan. Please watch your brownies because all ovens are different.
- Remove brownies and allow to cool completely. Enjoy!
- Store leftovers in an air-tight container.
Notes
- I like Pillsbury gluten-free flour. Not all gluten-free flours are created equal. You may experience different baking results depending on the gluten-free flour blend you choose.
- The best way to measure gluten-free flour is the “spoon & level” method. Using a spoon, scoop the flour into the measuring cup. After you’ve spooned the flour into the measuring cup, use the back of a knife to level off the top of the measuring cup.
- For the dairy-free option, I used Smart Balance butter.
- To store: Place gluten-free brownies in an airtight container at room temperature for up to 3 days or in the refrigerator for up to 1 week.
- To freeze: Wrap gluten-free brownies tightly in plastic wrap for up to 3 months.
- Mama says, “Please check all of your labels!”
Nutrition
Nutrition information is automatically calculated, so should only be used as an approximation.
How To Make Gluten-Free Brownies Step-by-Step
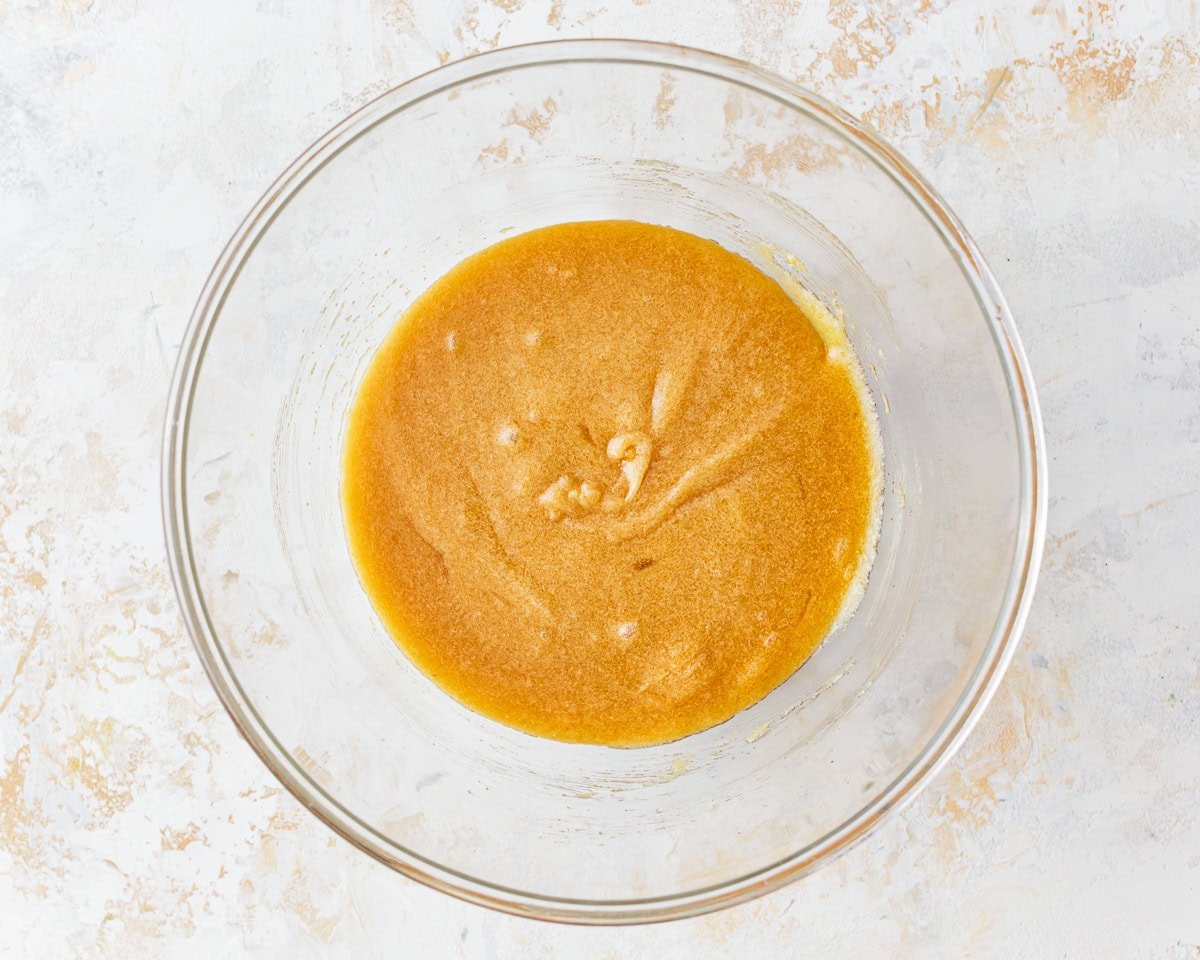
Preheat your oven to 350º F. Spray an 8×8 square baking pan with gluten-free non-stick cooking spray or line the baking pan with parchment paper and coat the bottom and sides with gluten-free nonstick cooking spray or butter. In a large bowl, add 1/2 cup of melted unsalted butter, 1 tablespoon of pure vanilla extract, 3/4 cup of granulated sugar, and 1/2 cup of brown sugar and mix until fully combined. Add in 2 large eggs one at a time and mix until fully combined.

In a medium-sized bowl combine 3/4 cup of gluten-free flour, 1/2 cup of cocoa powder, 1/2 teaspoon of baking soda, and 1/2 teaspoon of salt and whisk together.
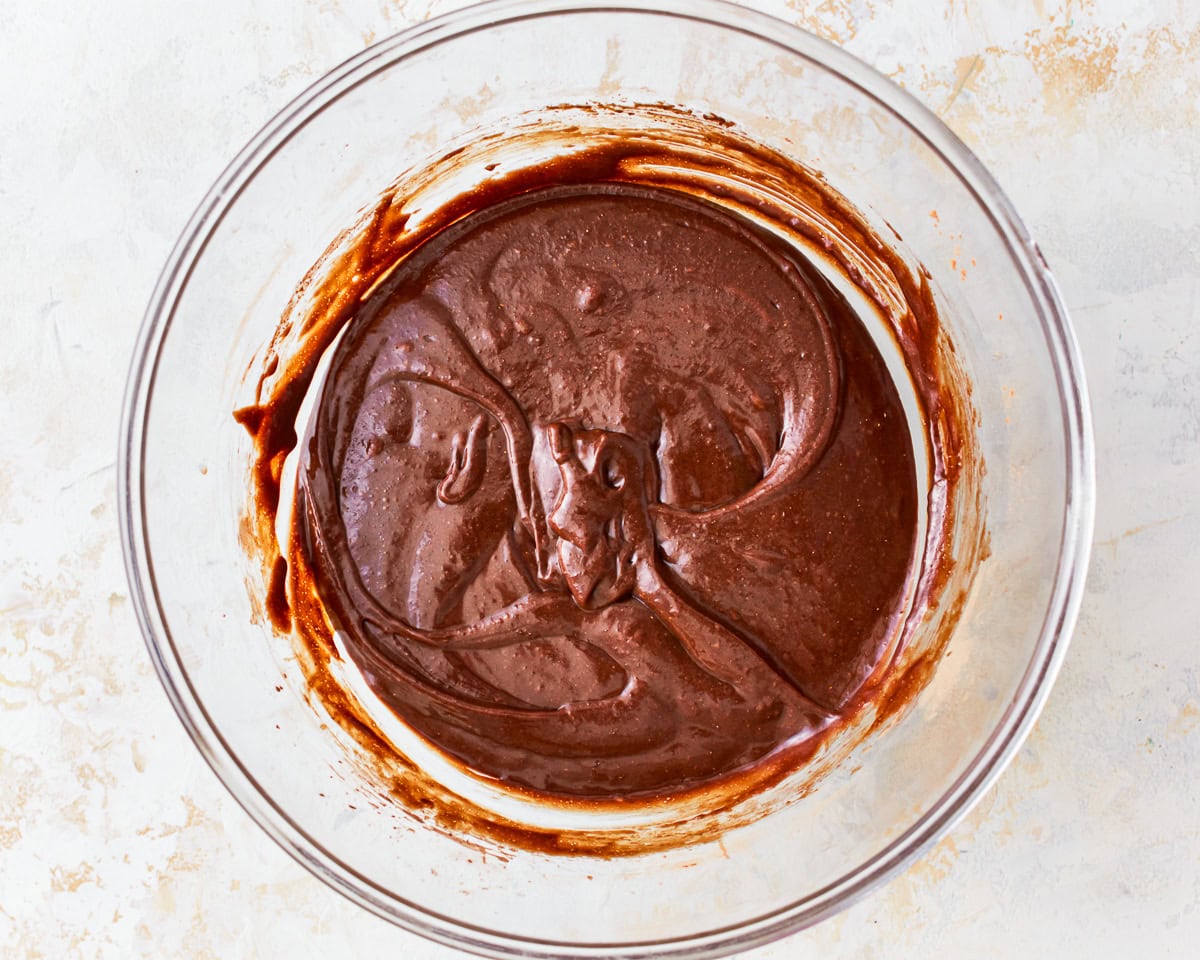
Slowly add the gluten-free flour mixture to the wet ingredients and mix until fully combined and smooth.
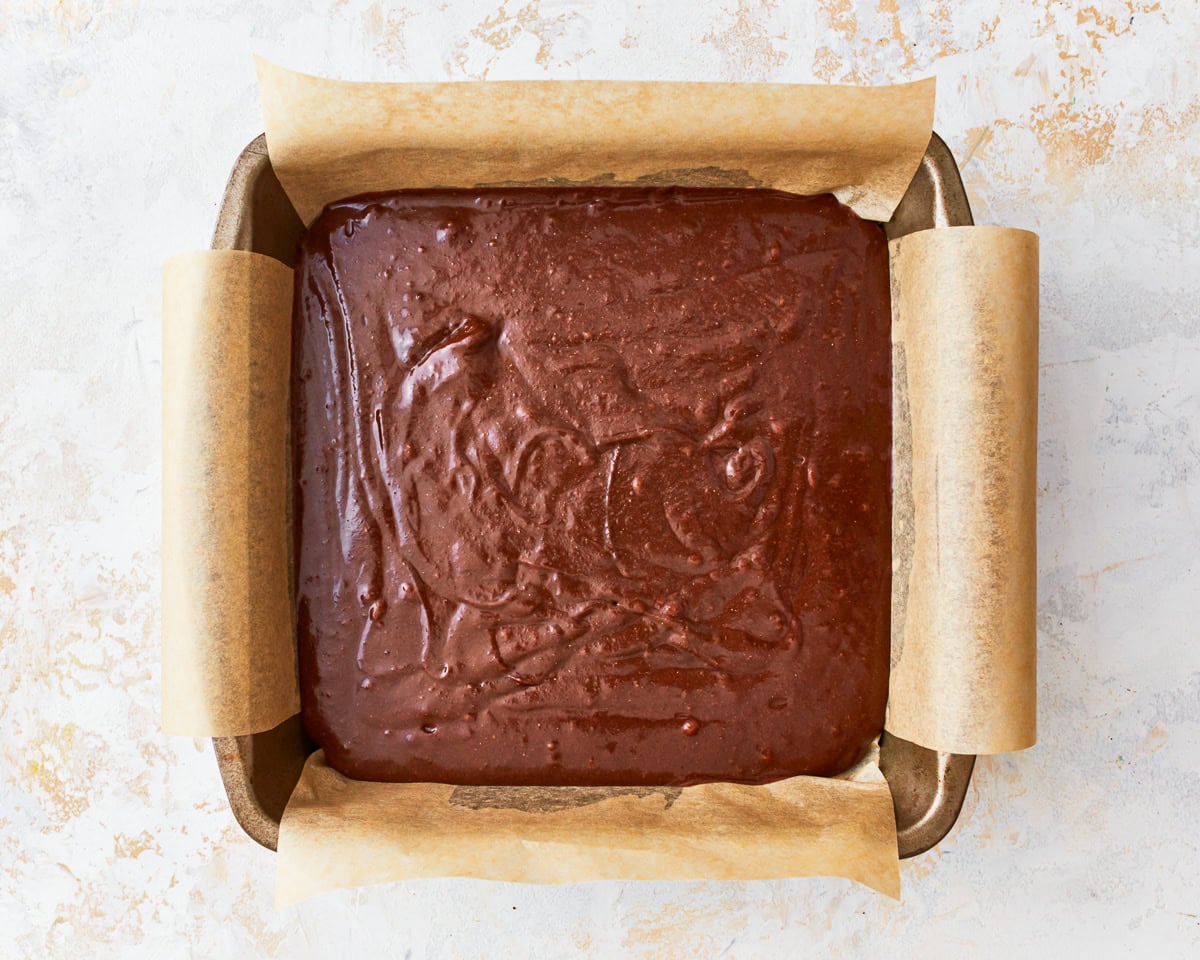
Pour the brownie batter to 8×8 sized baking pan.

Bake for 30-35 minutes, or until a toothpick inserted into the center comes out just barely clean. The sides of the brownies with start to pull away from the pan. Please watch your brownies because all ovens are different. Remove brownies and allow to cool completely. Enjoy!


Just finishing six dozen of these for the graduation party of a young friend. All the women in her family are GF and I’ve made a pan of these a time or two in the past. A couple of months ago she asked if I’d make some for her graduation party. “Sure”, I said. “How many?” “Six dozen.” I am nearly comatose but will retain consciousness long enough to deliver them. I’m so pleased to have found a recipe for GF brownies that is very straightforward, not at all complicated, and produces such yummy, chewy brownies.
If I may add a note to a poster who said hers turned out dry, the oven and the timing do make a difference and not all our ovens will produce the result intended by the recipe. In my case, I have to take them out at 25 minutes. I initially left them for 30 when I first began making them but have learned that, in my oven, 25 minutes is better.
Thank you for sharing a successful recipe.
Could not have said it better!!! I have a dual gas top / Electric oven and I’m telling you that oven just tends to be very very strong and hot compared to any other oven I have owned….
this brownies was sooooooo good i could not resist making 10 billion of them now i weigh in at only a few million pounds thanks mama knows gluten free
Just finished making these with my son and they are SO good! Wouldn’t change anything about the recipe but next time I will probably use a 9 x 9 dish as they did rise quite a bit in the oven 😉
After going gluten free 3 months ago, I was on a mission to find great recipes. I’ve made these multiple times now and they are the best brownies I’ve ever had.
I am about to make this brownie recipe, but wanted to verify some things.
Does it make a difference how long you mix the egg/sugar mixture? I have noticed how other recipes make a big deal about beating this very, very well.
Also, does it matter if the melted butter is warm/hot before adding the sugars to it? Or let it cool first? I just want the brownies to look like yours; soft, chewy and fudgy! 🙂
Hi Mary, For this recipe, you don’t need to whip the eggs and sugar aggressively like some brownie recipes call for. Those methods are usually aiming for a very shiny, crackly top by incorporating more air and dissolving the sugar. Here, you just want to mix the eggs and sugar until smooth and well combined. Overmixing can actually push the brownies more toward cakey instead of fudgy, so I keep it simple. As for the butter, it should be melted but not hot when you add the sugar. If it’s too hot, it can affect how the eggs incorporate (and in some cases even start to cook them), which can impact the final texture. Slightly warm or just melted is perfect.
This is our go to brownie recipe. I typically add in about 3/4 to 1 cup of semisweet chips. Lately I’ve been using my sour dough discard in the recipe and they come out even more delicious with a tiny bit of cake style crumb, but the chips keep it from getting out of hand.
Sounds delicious! Thank you Todd!
I made this recipe for a friend and it was amazing! I substituted the eggs for a banana, and the butter for coconut oil, and it held really well. Usually when I mess with gluten free recipes I have so many problems, but it was quick, easy, and everyone loved it!!
It’s delicious- can you double this into a 9×13?
Hi Jennifer, yes you can double it. Bake at the same temperature and start checking around the original bake time, then add ~5–10 extra minutes if needed.
These taste amazing and they are so easy to make
Excellent GF brownies. The best i’ve come across