Gluten-Free Breadsticks
Published


One of the first things I missed after going gluten-free was a warm, buttery breadstick to dip into marinara or soak up the last bit of soup. Store-bought options never quite hit the mark, so I started testing my own and found out that making a fresh batch from scratch is surprisingly fun and so satisfying. These gluten-free breadsticks are soft, flavorful, and golden on the outside with no long rise times or complicated steps. They’re a go-to in my kitchen for pasta night, cozy soups, or just slathered in butter as a snack. No proofing required, just mix, shape, and bake.
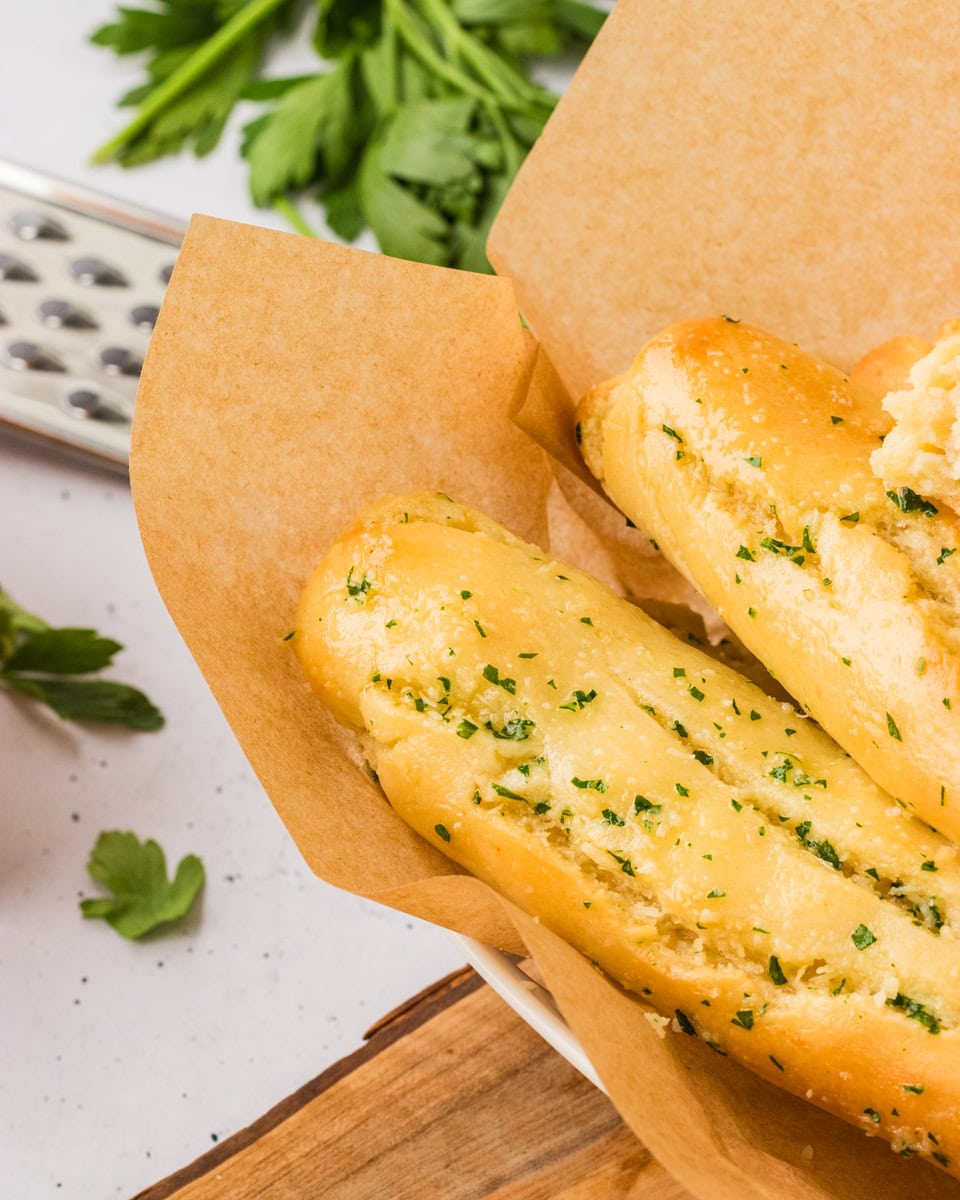
These gluten-free breadsticks are a total game-changer in my kitchen. They’re soft and buttery with crisp, golden edges—and the best part is they rise right in the oven, thanks to instant yeast. No waiting around, no kneading, no fuss. I can have a warm batch on the table in just 30 minutes, which makes them perfect for last-minute pasta dinners or dipping into soup. My kids absolutely love them, especially when I brush on garlic butter or sprinkle a little cheese and herbs over the top. I even make extras to freeze for easy weeknight sides. If you’re looking for more ideas, this gluten free garlic bread is another family favorite that’s just as quick and delicious.
Gluten-Free Breadsticks
Ingredients
Breadsticks
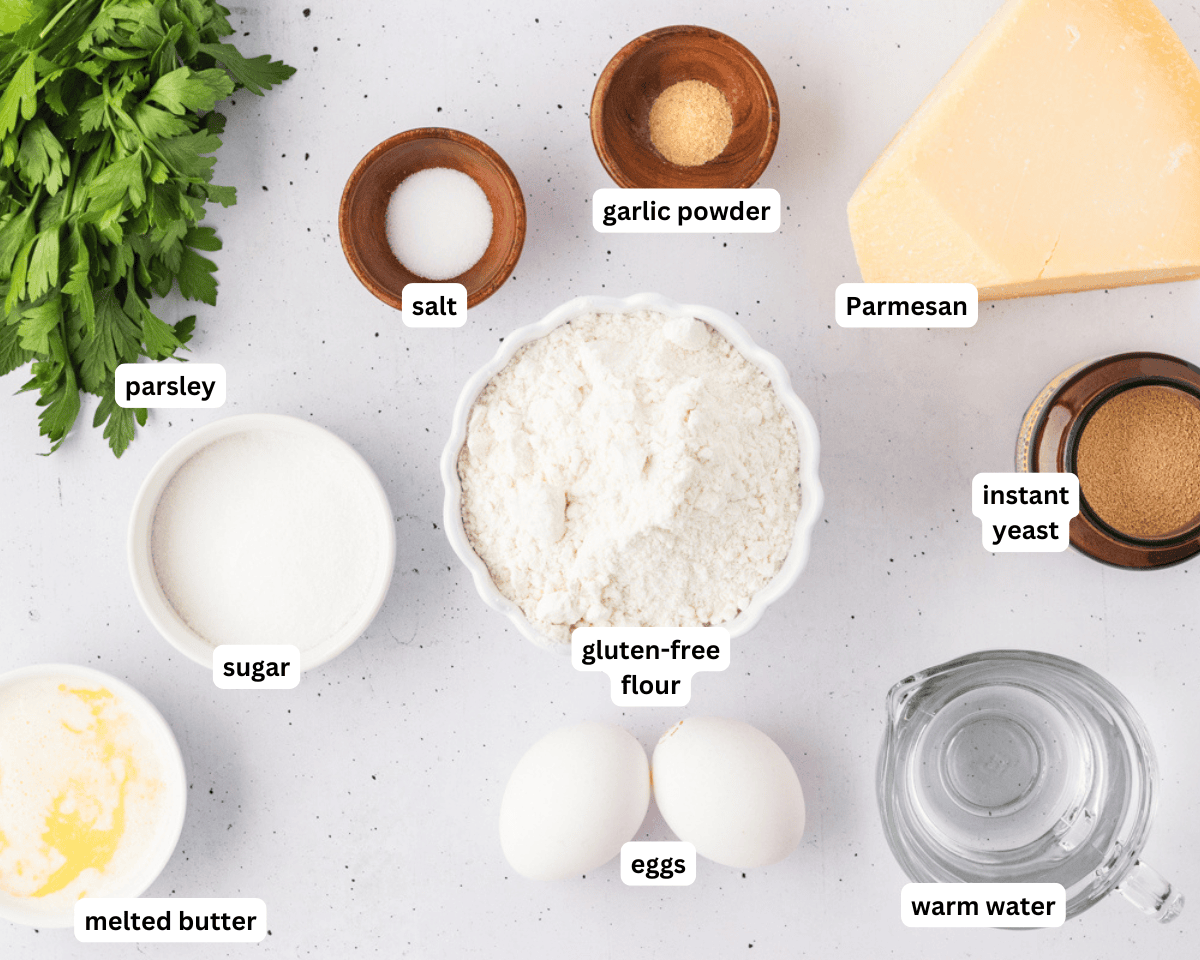
- 3½ cups gluten free flour
- 1 packet instant yeast, 2 ¼ teaspoons
- 3 tbsp sugar
- 1 tsp salt
- 2 eggs, beaten and at room temperature
- 1¼ cup warm water
- ⅓ cup butter, melted
Garlic Butter
- 3 tbsp butter, melted
- 1½ tbsp Parmesan
- ½ tsp garlic powder
- ¼ tsp salt
- 2 tsp fresh parsley, finely chopped
Instructions
- Line two baking trays with parchment paper and set aside.
- In a medium bowl or the bowl of a stand mixer, stir together your flour, salt, sugar, and instant yeast until combined.
- Add in your warm water, melted butter, and room temperature beaten eggs. Mix until everything is mostly incorporated and a dough begins to form. At this point, I start mixing with my hands so I can gauge how sticky the dough is. The dough should be a little sticky, but not so sticky that you can’t handle it. If it is, add more flour 1 tablespoon at a time until it is easily shaped. Note that the more flour you add, the more dense your breadsticks will be.
- Transfer your dough to a clean work surface. If it’s too sticky, you can lightly flour the surface. Shape your dough into a round and cut it in half. While working with one half, cover the other half so it doesn’t dry out and set it aside.
- Split your dough into 5 equal pieces and carefully shape each piece into a breadstick by gently rolling it onto the counter into a log shape. Transfer it to one of the parchment lined baking trays and repeat until you have 10 breadsticks. I put five breadsticks on a tray.
- Let the dough rest while you preheat your oven to 375°F, then bake your breadsticks for 10-15 minutes, until slightly golden.
- While the dough is baking, combine all your ingredients for the garlic butter.
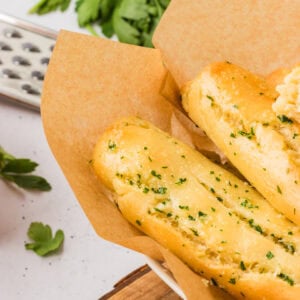
- When the bread comes out of the oven, generously brush the tops with the garlic butter and serve hot with your favorite Italian dishes or soups!
Notes
- Brush with garlic butter right out of the oven for the best flavor.
- Use fresh parsley for a pop of color and freshness.
- I use Pillsbury’s gluten-free all-purpose flour. You should be able to use most gluten-free bread or all-purpose flour blends for this, since we are measuring based on the texture of the dough more than the amount of flour, just make sure your blend contains xanthan gum.
Nutrition
Nutrition information is automatically calculated, so should only be used as an approximation.
How to Make Gluten-Free Breadsticks Step by Step
Gather the Ingredients: Gather all the ingredients together. Line two baking trays with parchment paper and set them aside for later.
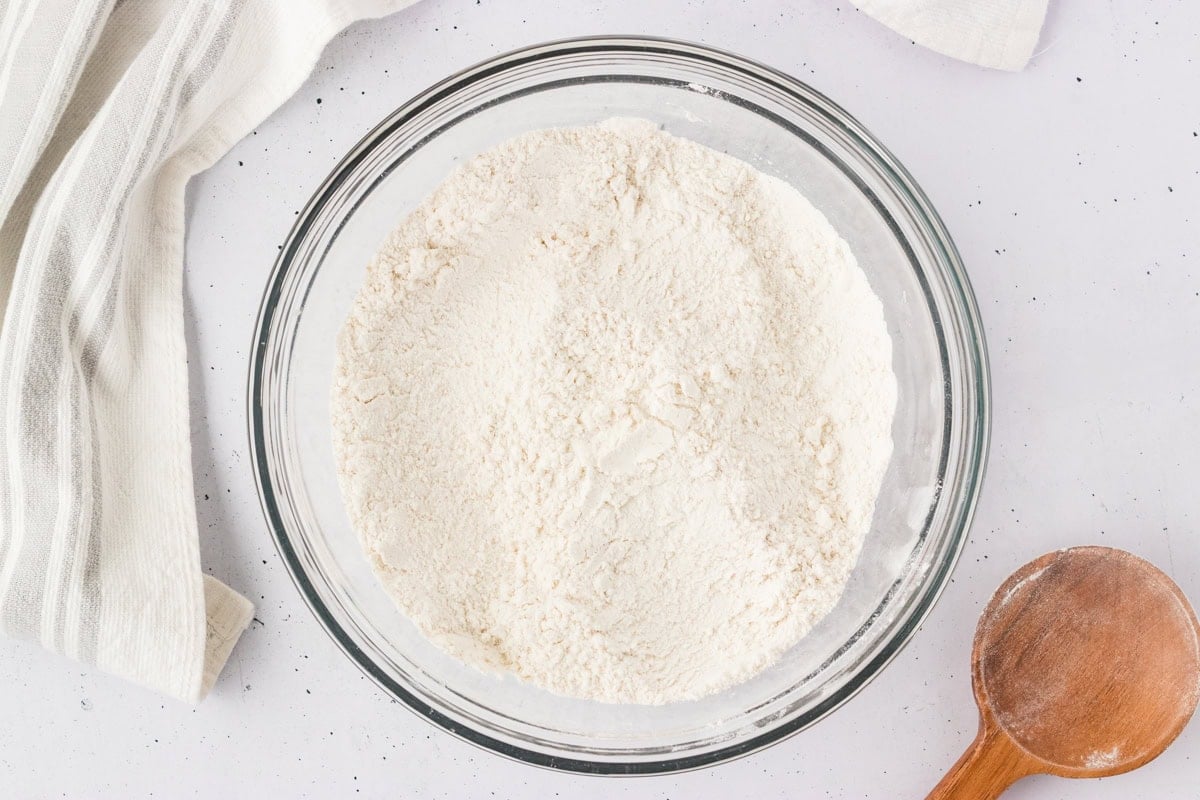
Mix the dry ingredients: Using a stand mixer bowl, stir together 3 ½ cups gluten-free flour, 1 packet (2 ¼ tsp) instant yeast, 3 tbsp sugar, and 1 tsp salt.
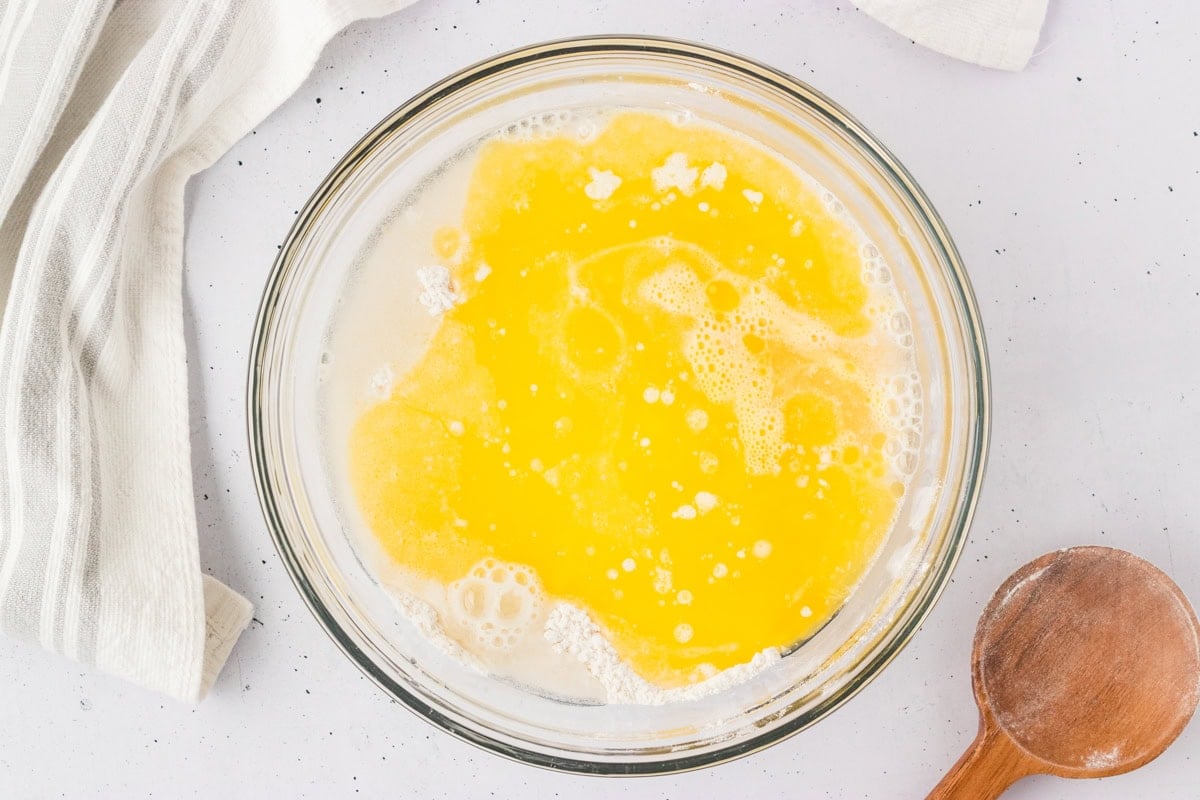
Add the wet ingredients: Add 2 beaten room temperature eggs, 1 ¼ cups warm water, ⅓ cup melted (but not hot) butter into the dry ingredients.
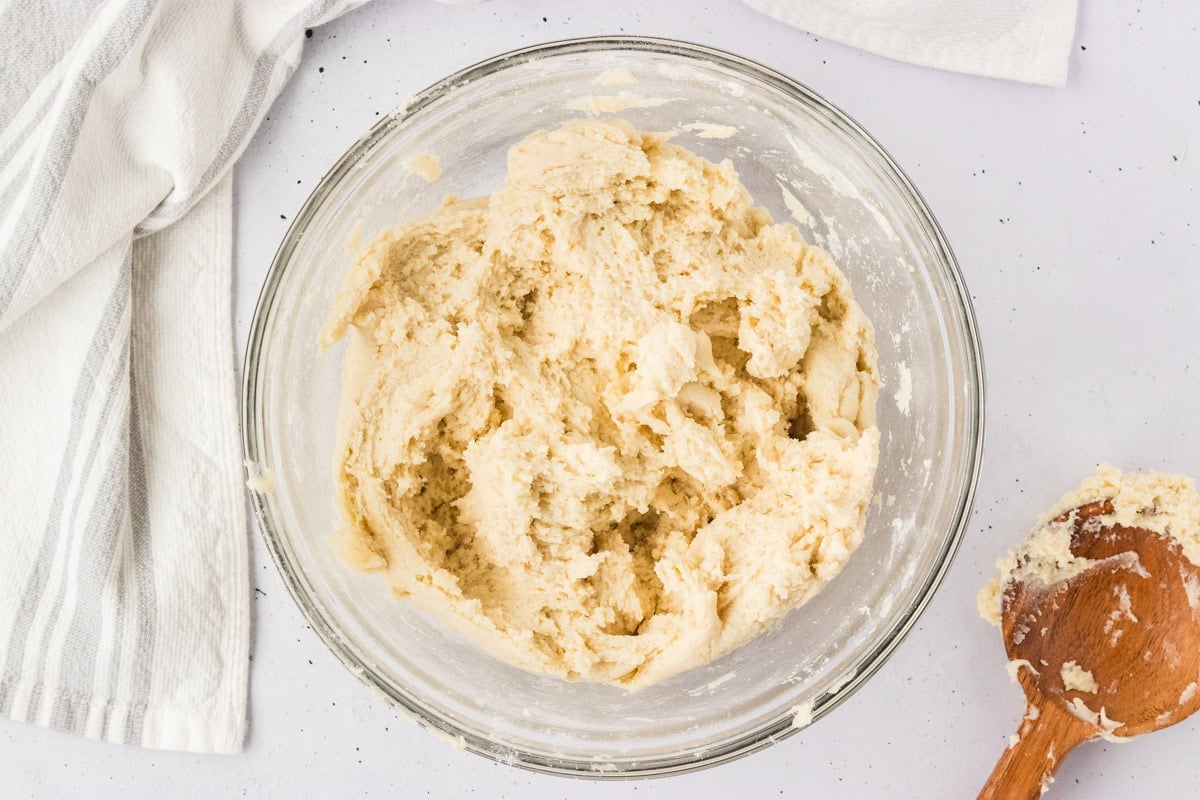
Mix the dough: Mix until the ingredients start to come together and a dough begins to form. I like to switch to using my hands at this point—it helps me feel if the dough is too sticky. It should be slightly tacky but still easy to work with. If it’s sticking too much to your hands, add more flour, just 1 tablespoon at a time. Keep in mind: the more flour you add, the denser your breadsticks will turn out, so use only what’s needed.
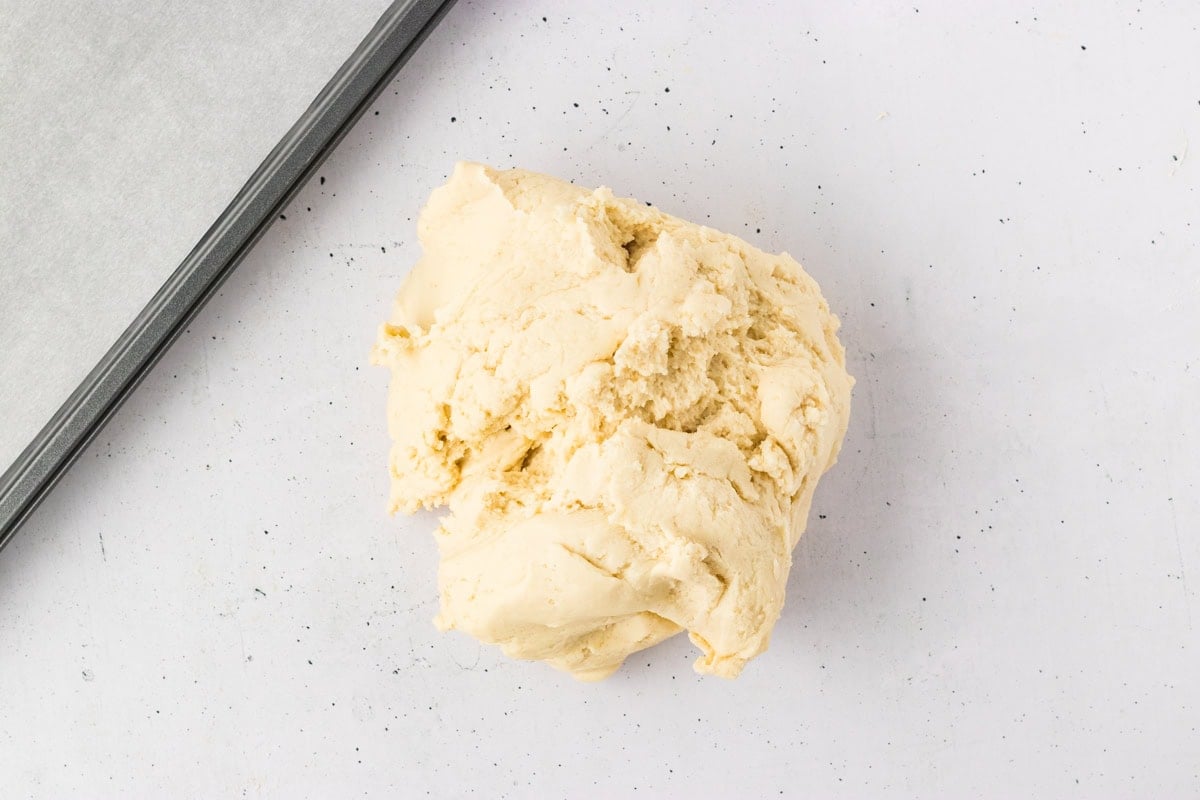
Turn the dough out: Turn the dough out onto a clean work surface. If it feels too sticky, lightly dust the surface with flour.
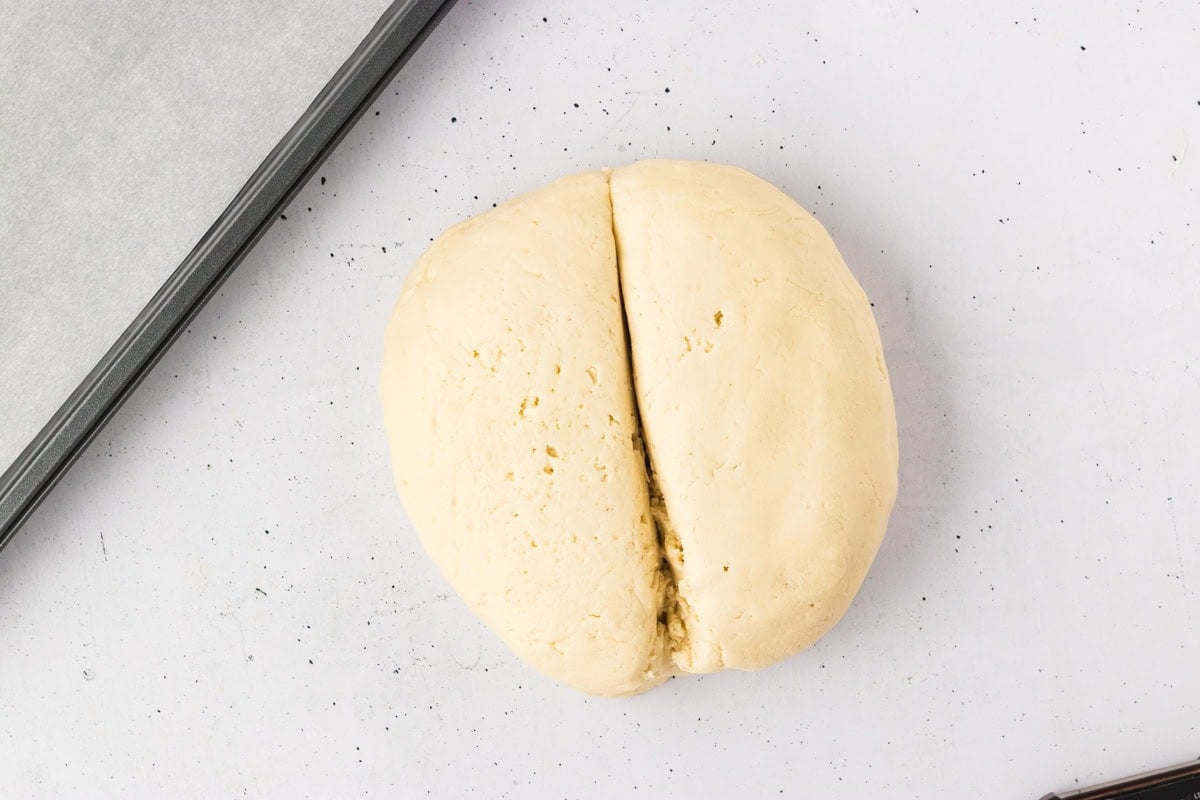
Shape the dough: Gently shape the dough into a ball and slice it in half. Cover one half with a clean towel or plastic wrap to keep it from drying out while you work with the other.
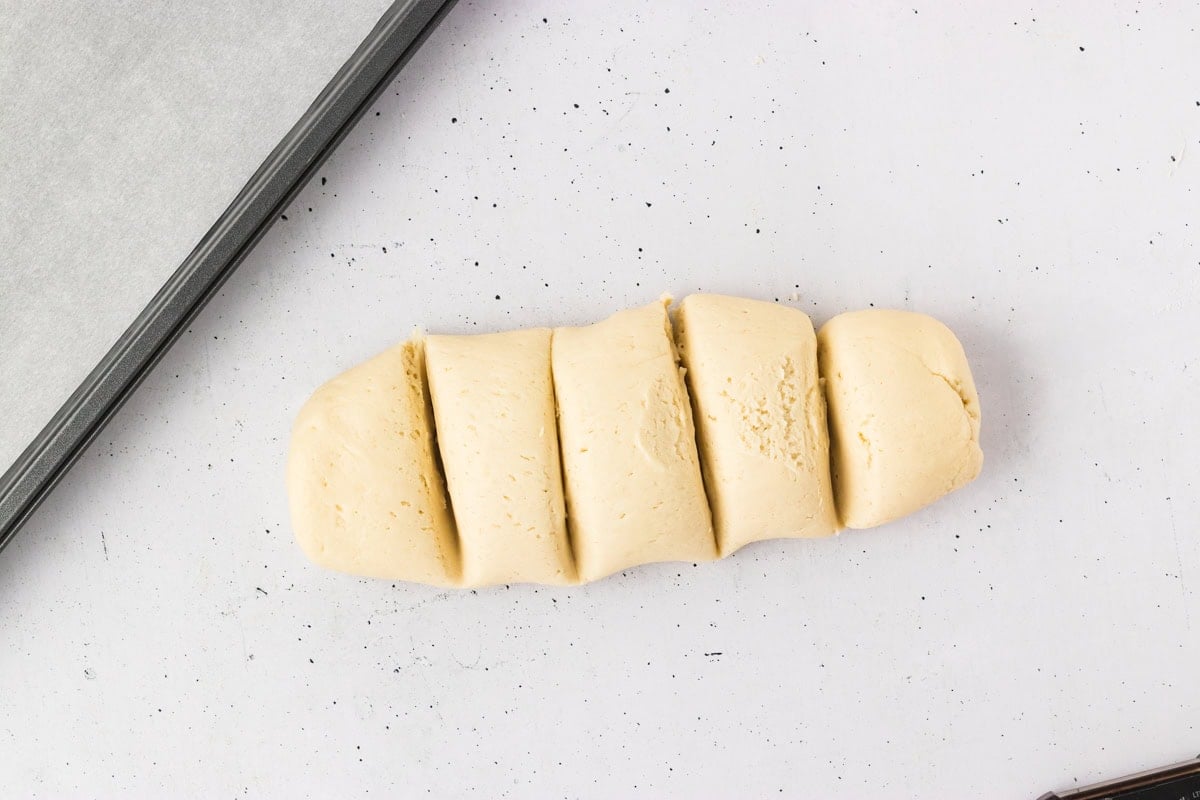
Divide the dough: Divide each dough half into 5 equal parts.
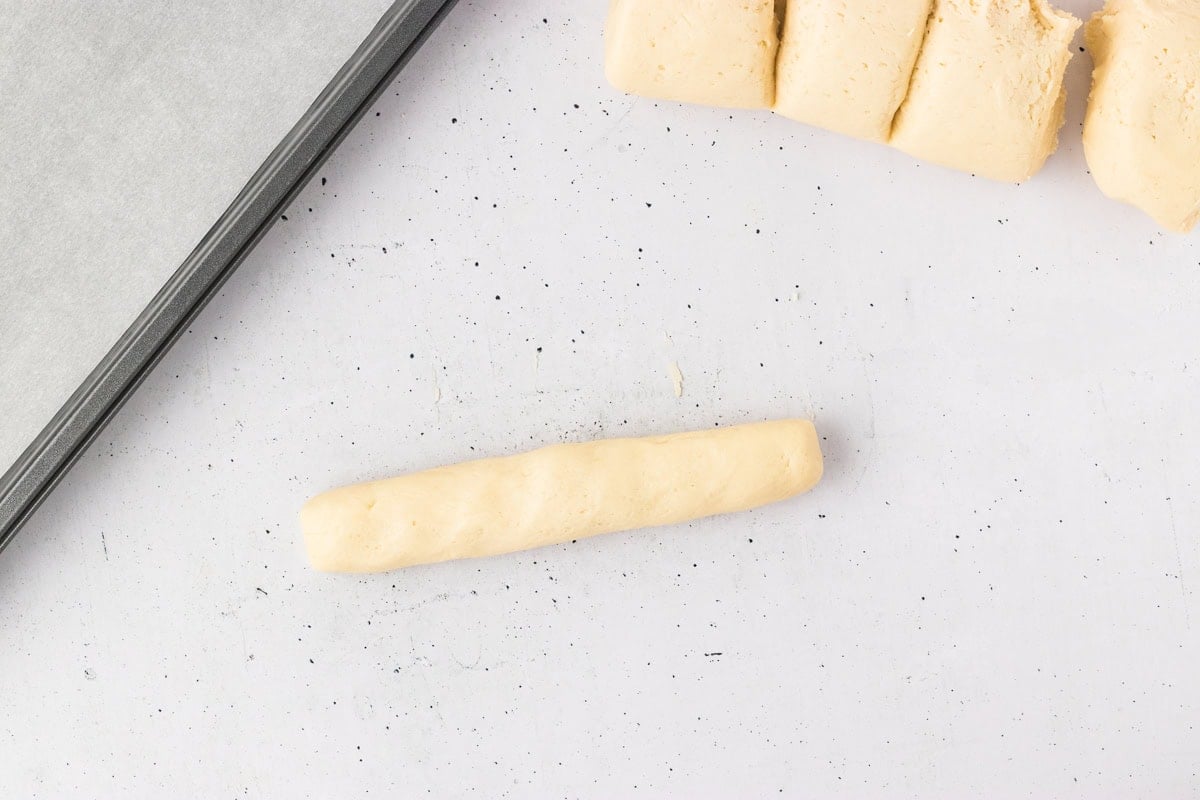
Roll into logs: Roll each piece gently on the counter with your hands to form it into a log-shaped breadstick.
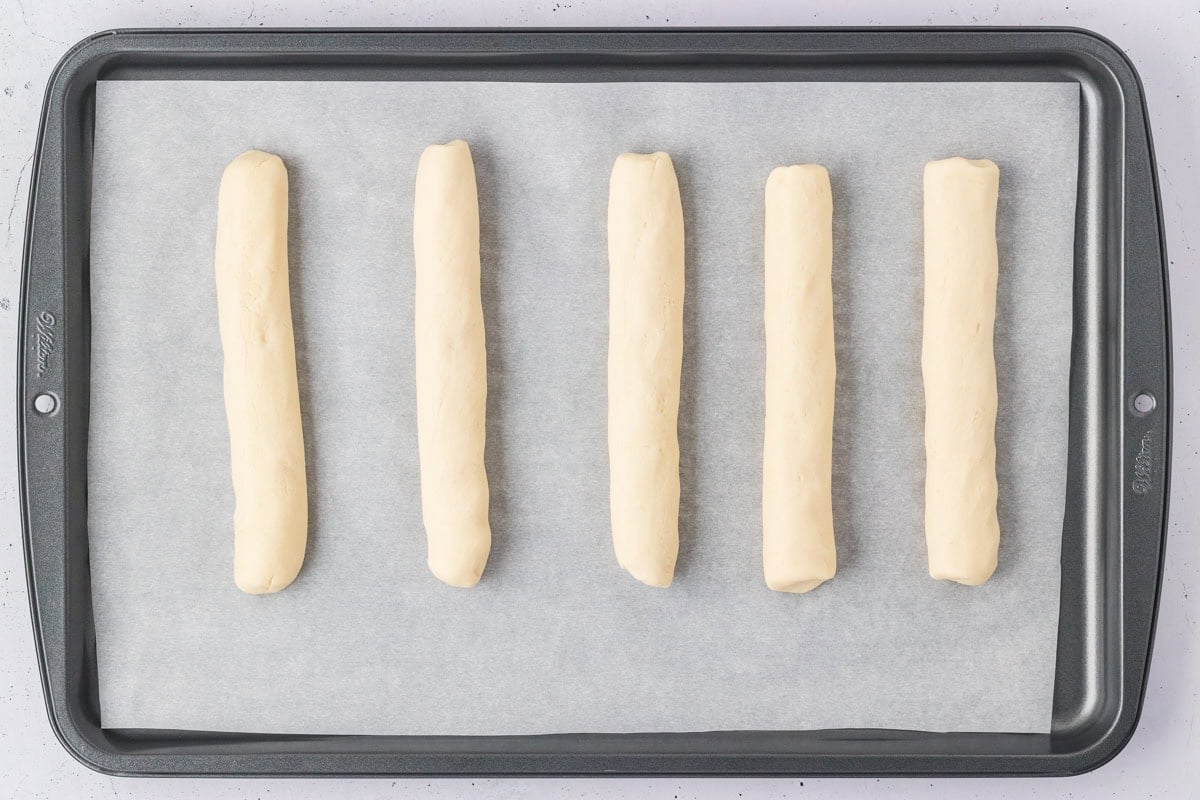
Fill the baking trays: Place each shaped breadstick onto a parchment-lined baking tray. Repeat with the remaining dough until you have 10 breadsticks total—five per tray works well for spacing.

Rest and bake: Let the dough rest while you preheat the oven to 375°F. Once heated, bake the breadsticks for 10–15 minutes, or until they’re lightly golden on top.
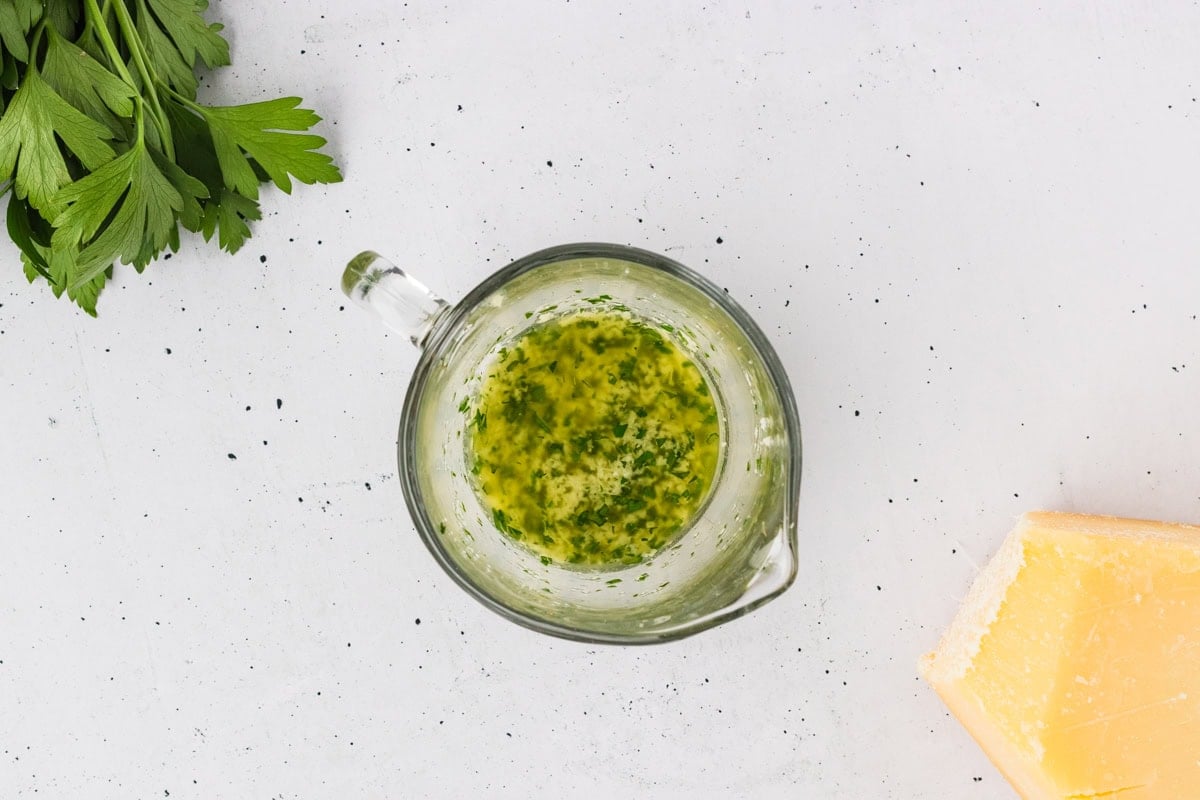
Make the garlic butter: While the breadsticks bake, mix together 3 tbsp melted butter, 1 ½ tbsp parmesan, ½ tsp garlic powder. ¼ tsp salt, and 2 tsp fresh chopped parsley.
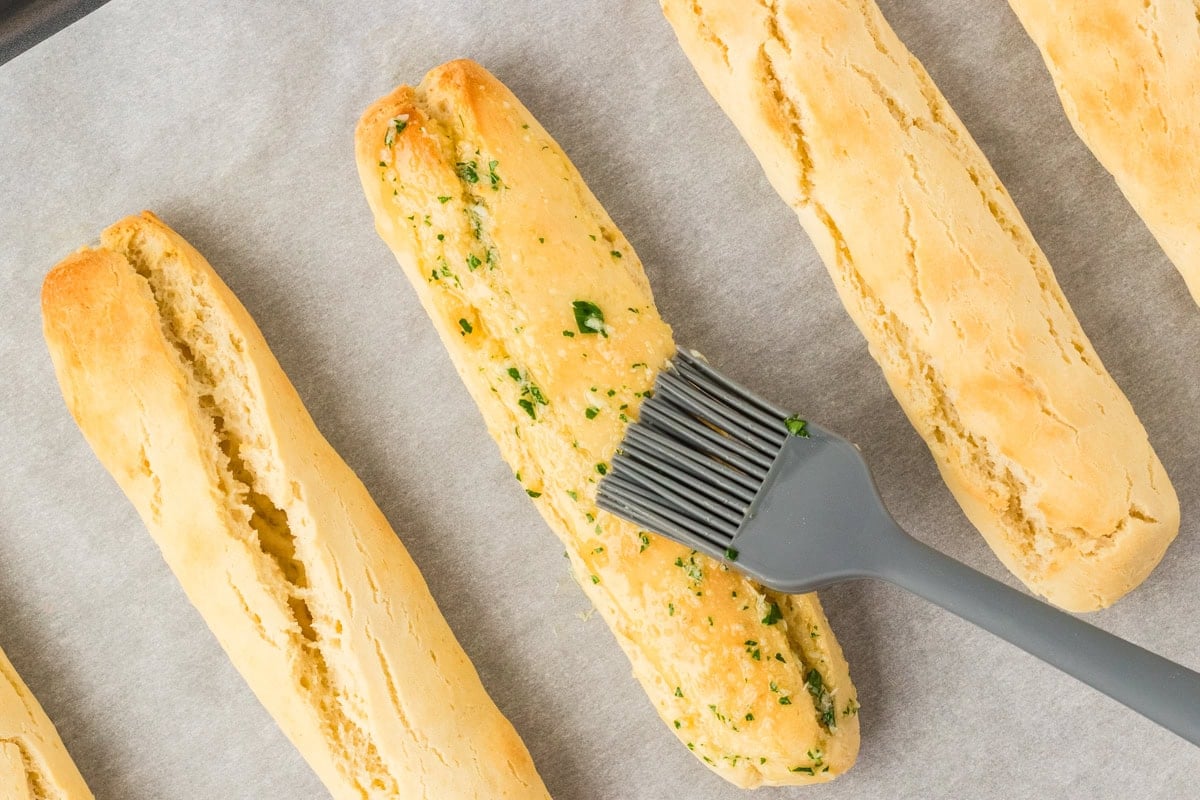
Brush with butter: As soon as the breadsticks come out of the oven, generously brush the tops with garlic butter.

Serve and enjoy: Serve warm with your favorite Italian dinner. Enjoy!

Gluten-Free Baking Tips
- Try not to add too much extra flour—your dough should feel slightly sticky but still manageable. A wetter dough means softer, fluffier breadsticks, so trust the texture over the urge to keep adding flour.
- Make sure your eggs are at room temperature so the yeast isn’t affected by the cool temperature. If you forget to set them out, just pop them in a bowl of warm water for 10 minutes—it works like a charm.
- Bake until the tops are just turning golden. Overbaking can dry them out, but that light golden color means the inside will stay soft and tender.
- Make sure your instant yeast is within its use-by date. Inactive yeast will cause the breadsticks to be too dense with no rise.
Serving Suggestions
These homemade gluten-free breadsticks are my go-to whenever I’m making homemade spaghetti sauce, gluten-free lasagna, or any saucy pasta—they’re perfect for soaking up every last bite. I also love dipping them in gluten-free tomato soup for an easy weeknight dinner. Slice them up and dip them into marinara for an extra treat, or toss a few into lunchboxes and picnic baskets. They’re a hit at holiday meals and potlucks, too.
Storage Instructions
These breadsticks are best enjoyed fresh from the oven, but leftovers can be stored in an airtight bag in the fridge for up to 5 days. Pop them in a 300°F oven until warmed through, then brush with melted butter before serving.
To freeze, allow the breadsticks to cool down before transferring them to a freezer-safe bag or container. Store them for up to 2 months. To reheat, warm them in a 325°F oven straight from frozen for 10–15 minutes, then brush with fresh melted butter before serving.