Gluten-Free Baguette
Published


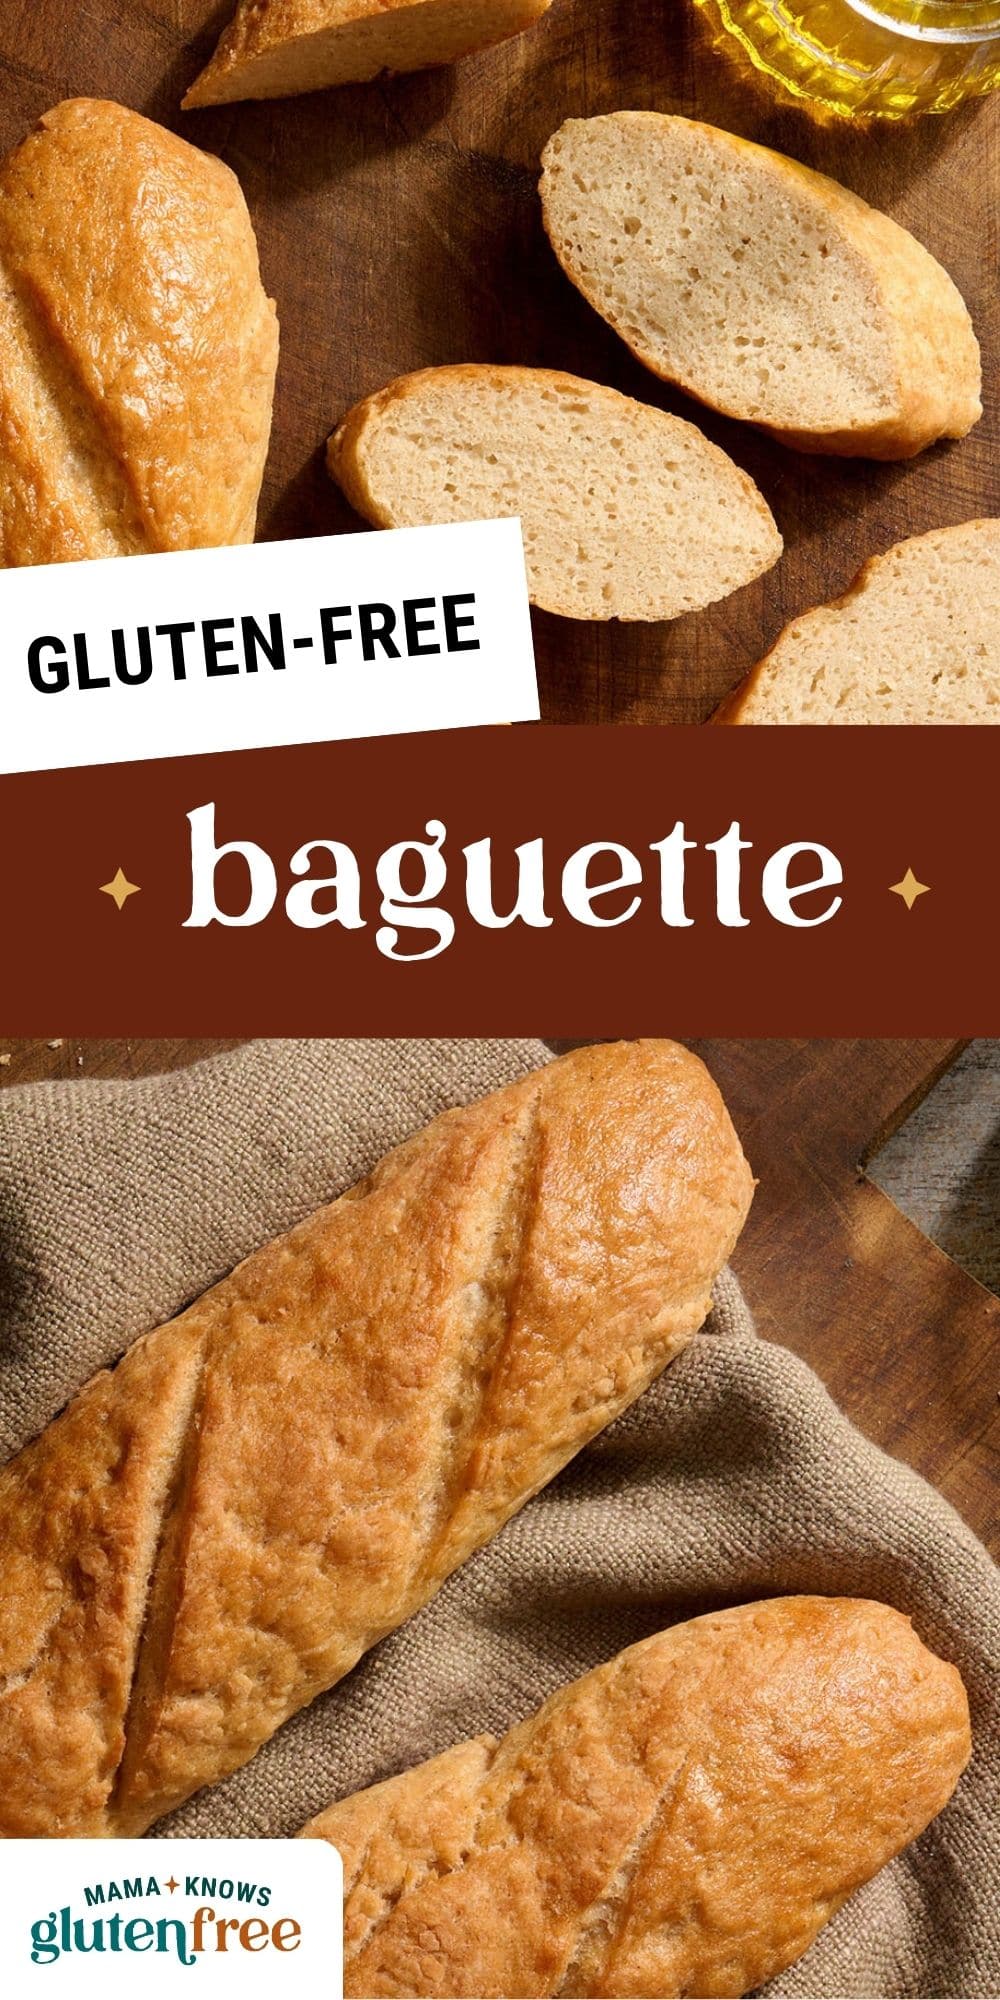
Everyone deserves a delicious, crusty baguette and that includes gluten-free. This gluten-free baguette delivers the classic crusty exterior and soft, chewy interior you expect from traditional French bread, without any gluten. With the right flour, tools, and a few simple steps these gluten-free baguettes come out beautifully every time. I especially love using King Arthur Gluten-Free Bread Flour because the built-in binders help create a sliceable crumb and that signature golden, crisp crust. It’s an easy gluten-free yeast bread that’s perfect for sandwiches, serving with dinner, or enjoying warm with butter.
The process for these gluten-free baguettes is simple and reliable. I mix a thick, sticky dough using King Arthur Gluten-Free Bread Flour, let it rise until puffed, then shape it gently to preserve the air pockets. After scoring the tops, they bake into beautifully golden loaves with a crisp crust and chewy interior. I love serving them fresh from the oven with butter or a drizzle of olive oil, which is my favorite way to enjoy them. They also make incredible garlic bread, a perfect base for bruschetta, or sturdy sandwich bread. However you serve them, these gluten-free baguettes are one of those recipes I find myself coming back to again and again.
What I Learned While Testing
- Let the baguettes cool completely before slicing. Gluten-free bread continues to set as it cools. Cutting too early traps steam inside and creates a gummy texture. I always transfer them to a wire rack and wait until they feel fully cool to the touch before slicing.
- The dough should be thick, sticky, and scoopable, not kneadable. It should resemble very thick pancake batter that holds its shape when scooped. This higher hydration is essential for creating a light, chewy interior and proper rise.
- Steam is essential for a crisp crust and proper oven spring. Steam keeps the surface flexible during the first few minutes of baking so the baguettes can expand fully. This helps create that signature golden crust and airy crumb.
- Use fresh yeast and properly warmed water for a strong rise. The water should feel warm but not hot, about 100–110°F. If the dough doesn’t puff and look aerated after rising, inactive yeast or cool temperatures are often the cause.
- Handle and shape the dough gently. Gluten-free dough is more delicate than traditional dough. I use well-oiled hands and lightly guide it into shape without pressing or compacting it, which helps preserve the air bubbles created during rising.
- Score the dough immediately before baking with quick, shallow cuts. This allows the baguettes to expand in a controlled way and prevents splitting. It also creates that classic artisan look.
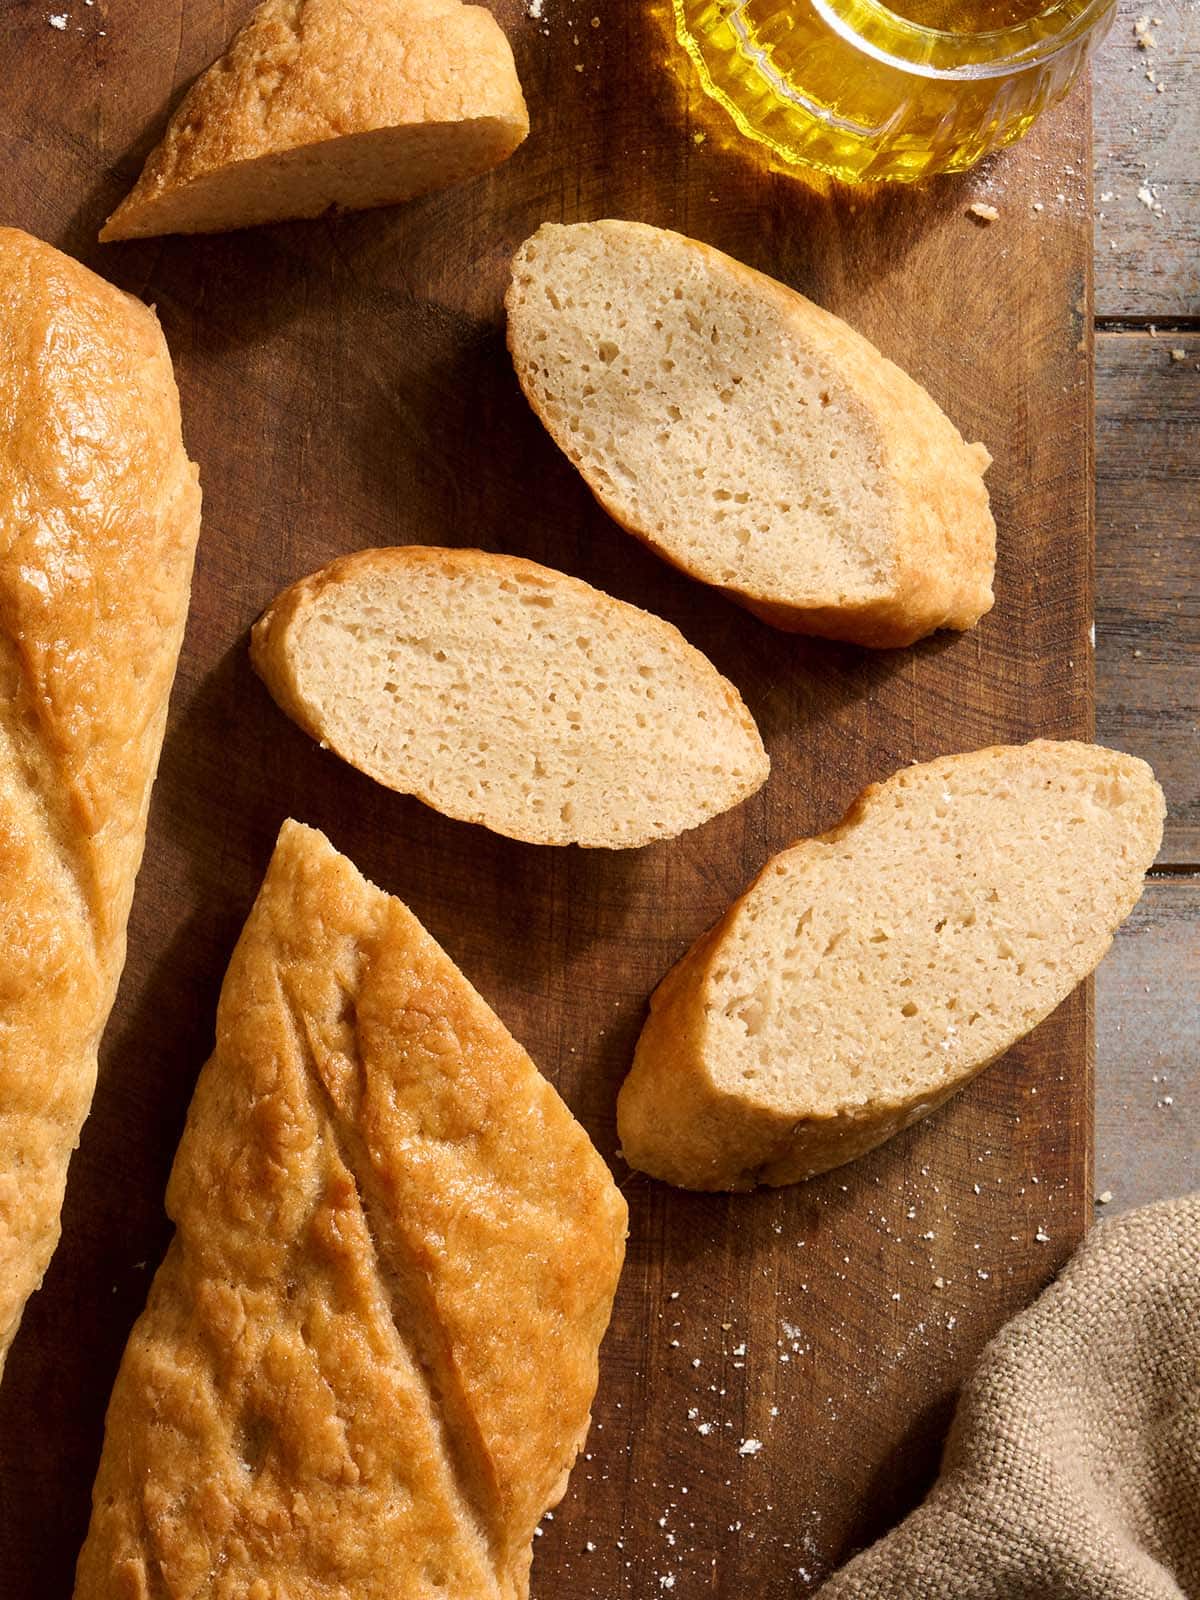
- Bake until deeply golden brown and firm. Gluten-free baguettes need enough bake time to fully set the interior. The crust should feel firm, and the loaves should sound hollow when tapped on the bottom. For extra precision, the internal temperature should reach about 205–210°F.
- Do not over-proof the dough. Gluten-free dough should rise until it looks puffed, slightly domed, and airy with small bubbles throughout, and increase by about 50% in volume, not doubled. The surface should look light and aerated but still thick and stable, not loose or fragile. Over-proofing weakens the structure and can cause the baguettes to collapse or spread too much during baking.
Gluten-Free Baguette
Equipment
- Baguette pan
- Sharp knife or lame
- wire rack
Ingredients
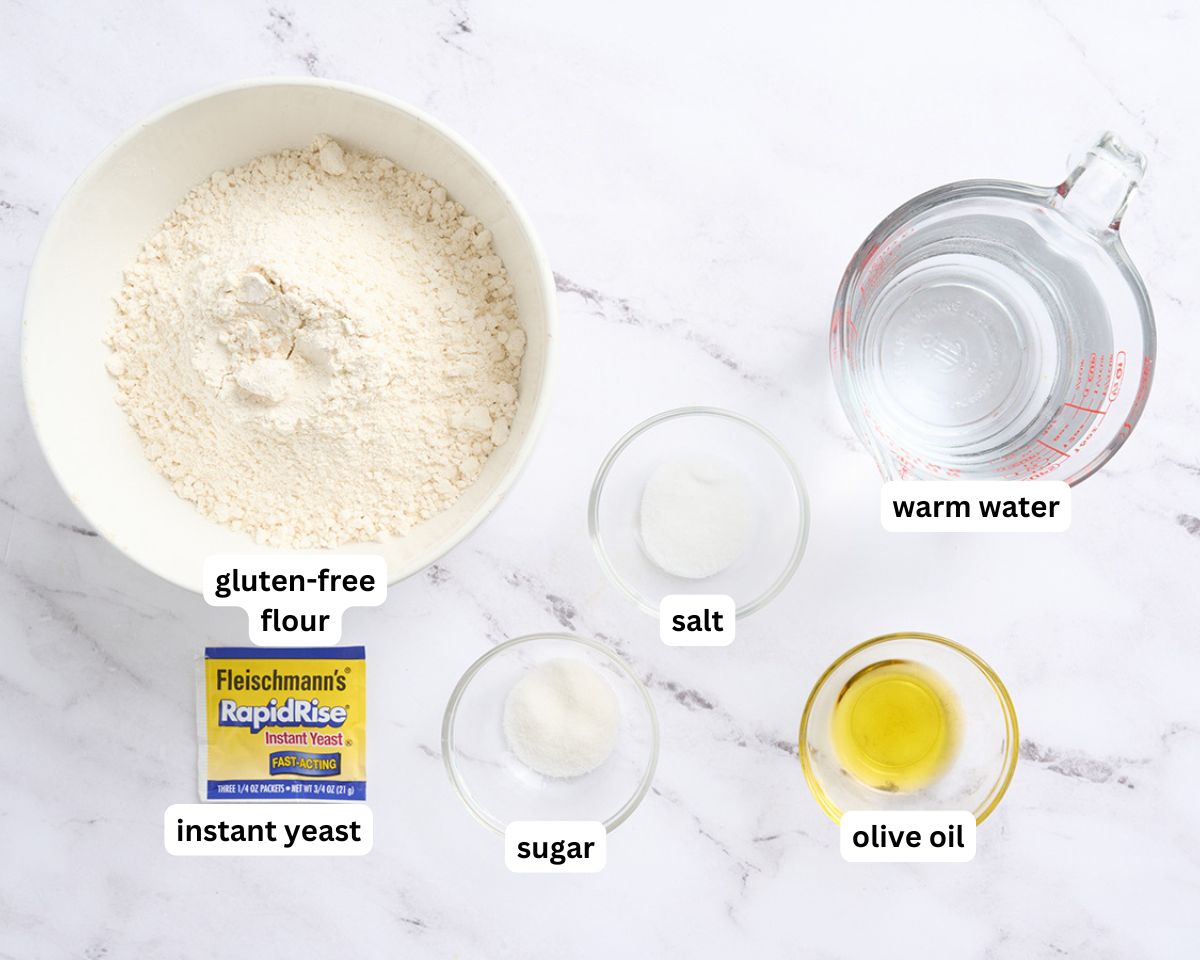
- 3¼ cups King Arthur gluten-free bread flour*
- 1½ tsp salt
- 2 tsp granulated sugar
- 2¼ tsp instant yeast, or 1 package
- 2 cups warm water, about 100-110°F/40–45°C
- olive oil, for brushing
Instructions
- Gather and measure all ingredients.
- In a large bowl whisk together the bread flour, salt, sugar, and yeast.
- Pour in the warm water and stir until a thick, sticky dough forms. The texture should resemble very thick pancake batter, not kneadable dough.
- Cover the bowl with plastic wrap or a kitchen towel and let it rise in a warm, draft-free place for 45-75 minutes. The dough should puff and look aerated, but it does not need to double. Do not overproof.
- Grease or spray a baguette tray with oil. Oil your hands thoroughly (do not flour them). Divide the dough in half and gently scoop each portion onto the prepared tray. Using oiled hands, lightly drag and pat each portion into a 12-inch log. Smooth the tops with your fingers.
- Let the shaped loaves rest for 10–15 minutes. This short rest allows the surface to relax before scoring and baking. This is not a second rise.
- Preheat the oven to 450°F. Place a heat-safe dish on the bottom rack and fill it with hot water to create steam.
- Brush the tops of the loaves lightly with olive oil. Using a sharp knife or lame, make 3–4 shallow diagonal slashes across each loaf (about ¼-inch deep). Score immediately before placing in the oven.
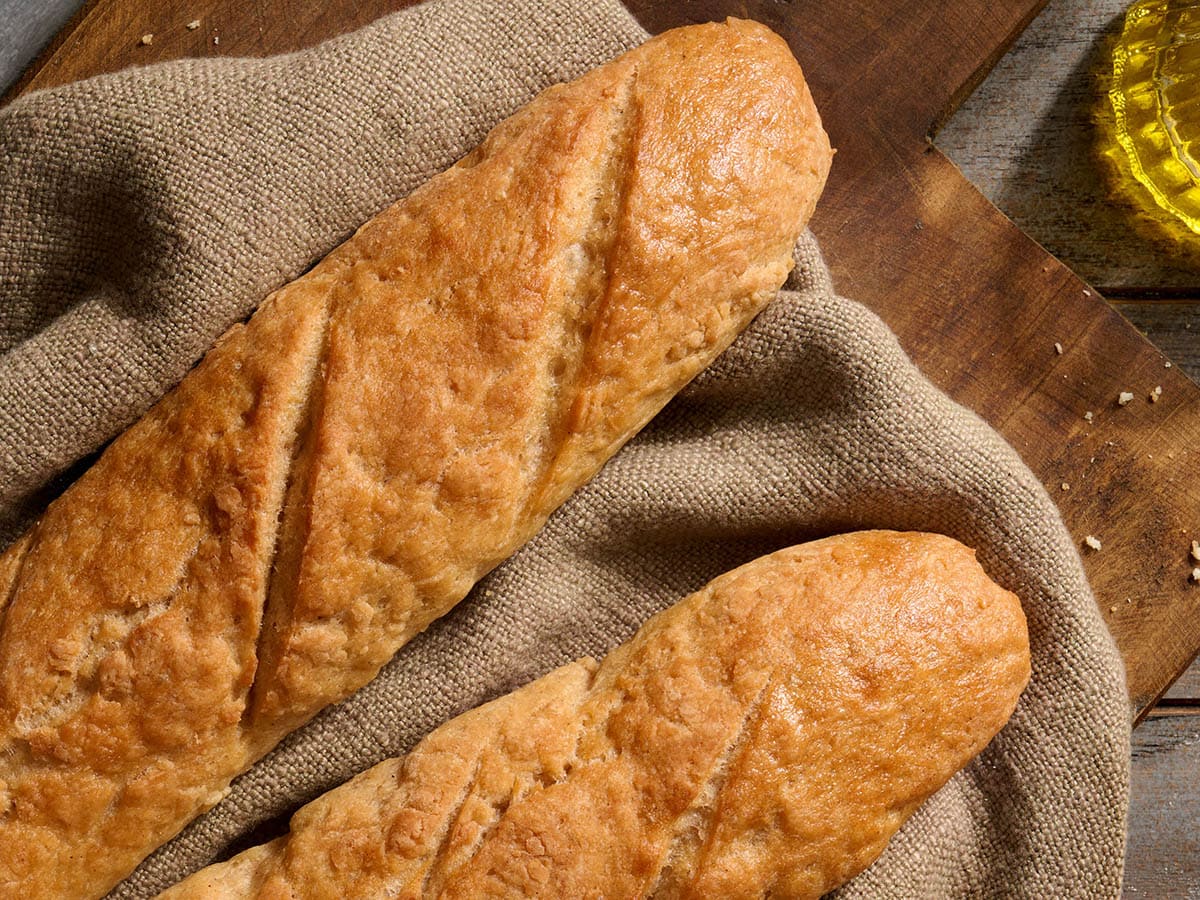
- Bake for 22-28 minutes, until the baguettes are deep golden brown and sound hollow when tapped on the bottom.
- Transfer to a wire rack and cool at least 45 minutes before slicing. This allows the crumb to set fully.
Notes
- King Arthur Measure-for-Measure: Add 2 tablespoons of psyllium husk powder. Reduce water to 380–400ml. Expect a slightly softer crumb.
- Bob’s Red Mill 1-to-1: Add 2 tablespoons of psyllium husk powder. Use 400–420ml water. Dough may spread more-use a baguette tray or parchment supports.
- Cup4Cup or similar blends: Add 2 tablespoons of psyllium husk powder and 1 teaspoon xanthan gum (if not included). Start with 400-420ml water and adjust as needed
Nutrition
Nutrition information is automatically calculated, so should only be used as an approximation.
How to Make A Gluten-Free Baguette Step by Step
Gather all the ingredients together.
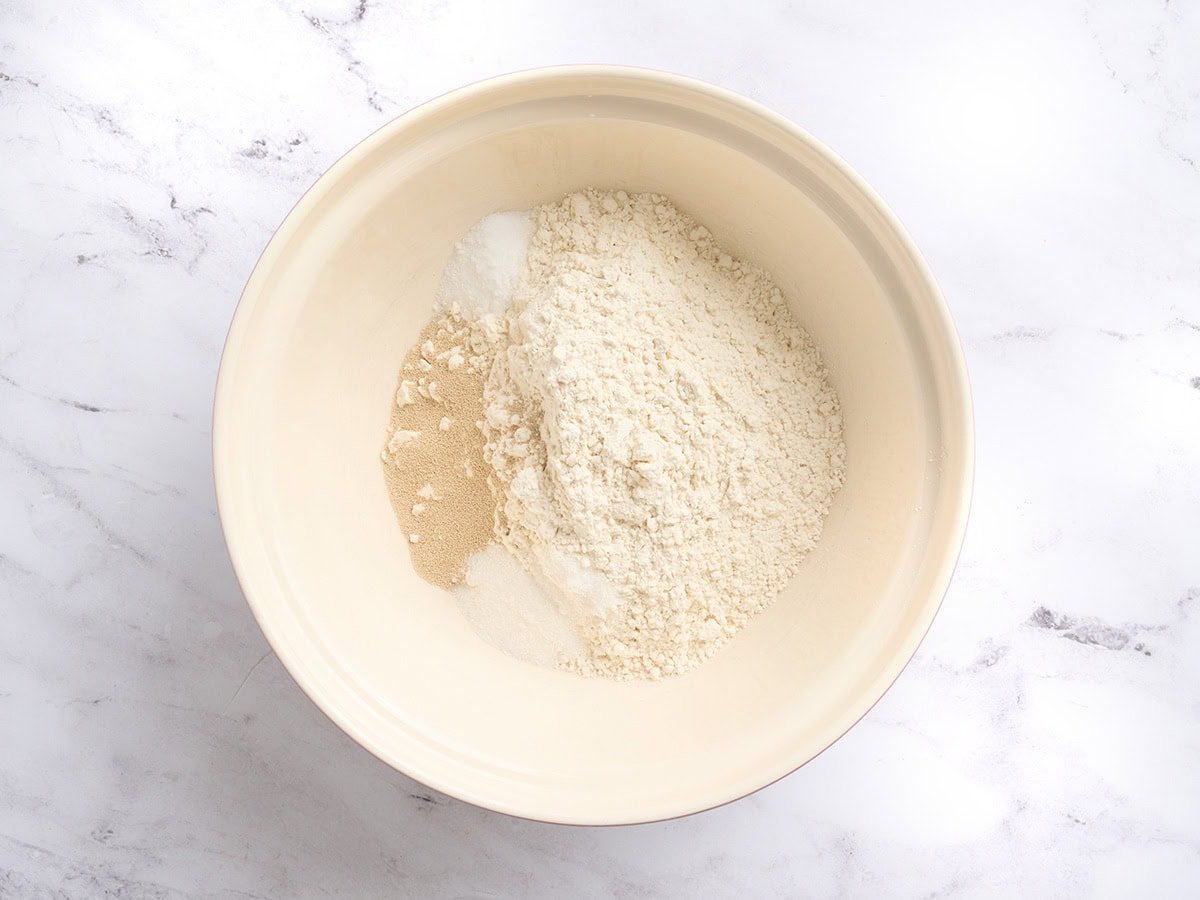
Mix the dry ingredients: In a large mixing bowl, whisk together 3¼ cups (420g) King Arthur gluten-free bread flour, 1½ tsp (10g) salt, 2 tsp (8g) granulated sugar, and 2¼ tsp (7g) instant yeast until evenly combined. Make sure there are no pockets of yeast or salt so the dough rises evenly.
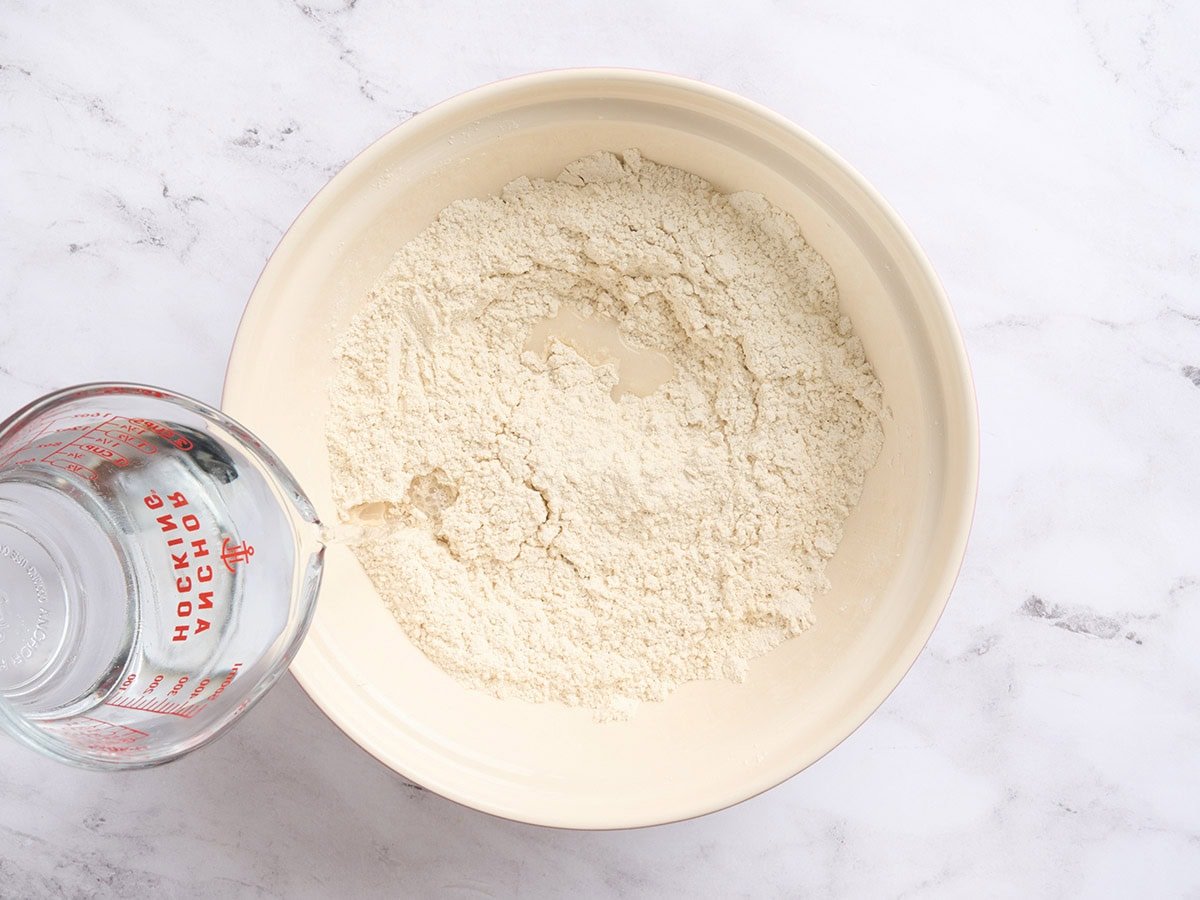
Add the warm water and mix the dough: Pour in 2 cups (450 ml) warm water (100–110°F/40–45°C) and stir with a sturdy spoon or spatula until a thick, sticky dough forms. The dough should look like very thick pancake batter and feel sticky and soft, not firm or kneadable. It should hold its shape when scooped but still spread slightly on its own. Scrape down the sides of the bowl to fully incorporate the flour.
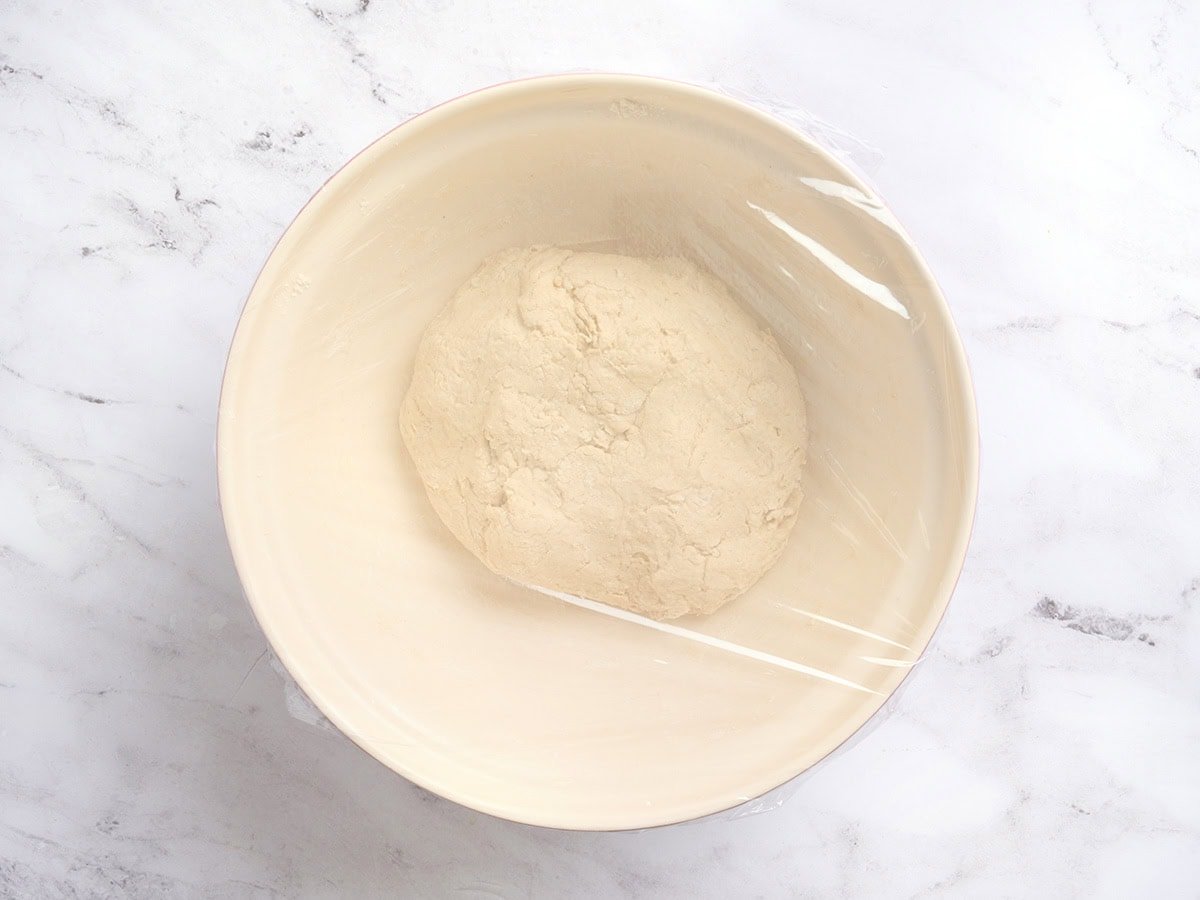
Cover and proof: Cover the bowl tightly with plastic wrap or a clean kitchen towel and place it in a warm, draft-free area for 45–75 minutes.
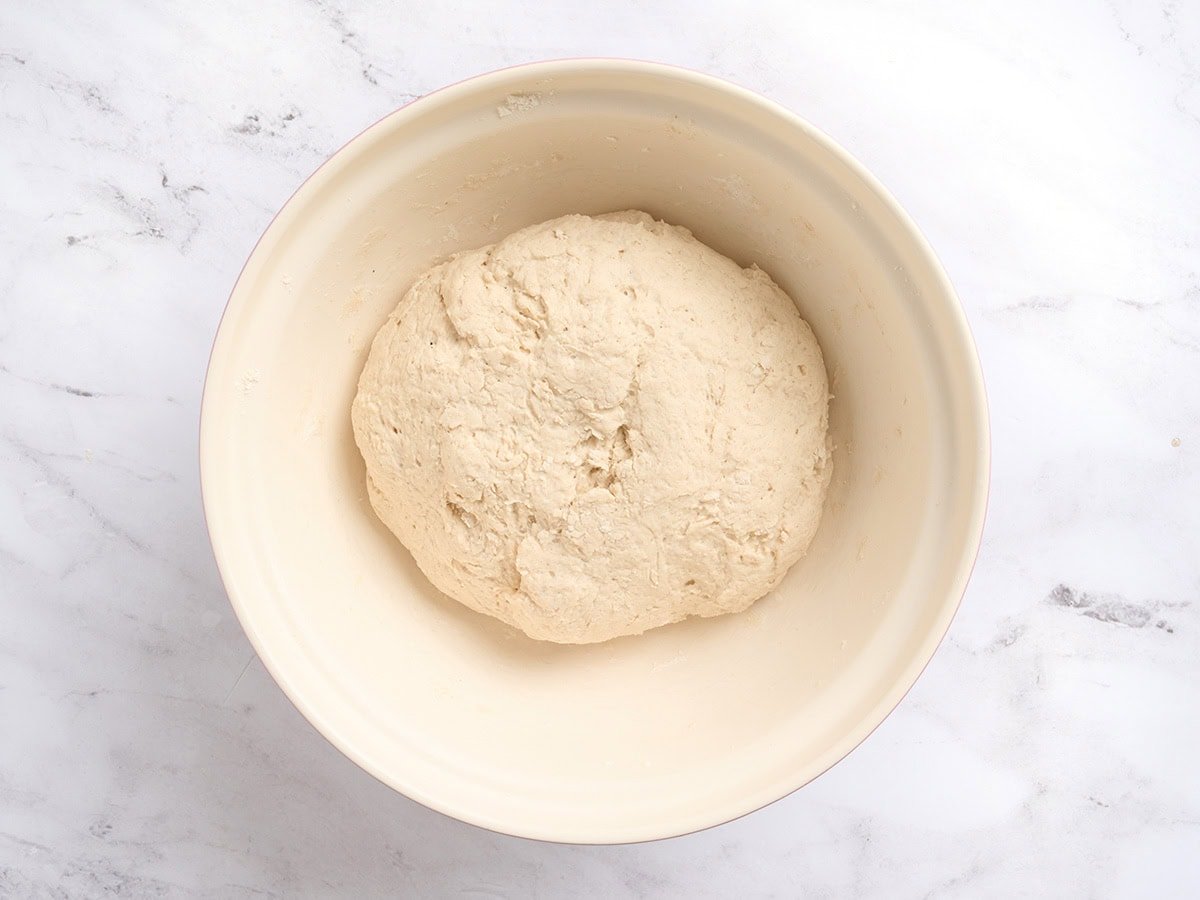
First rise: The dough is ready when it looks puffed, airy, and increased by about 50% in volume, with small bubbles visible throughout. It should look lighter and aerated but still thick and stable. Do not let it double, as over-proofing can cause the baguettes to collapse.
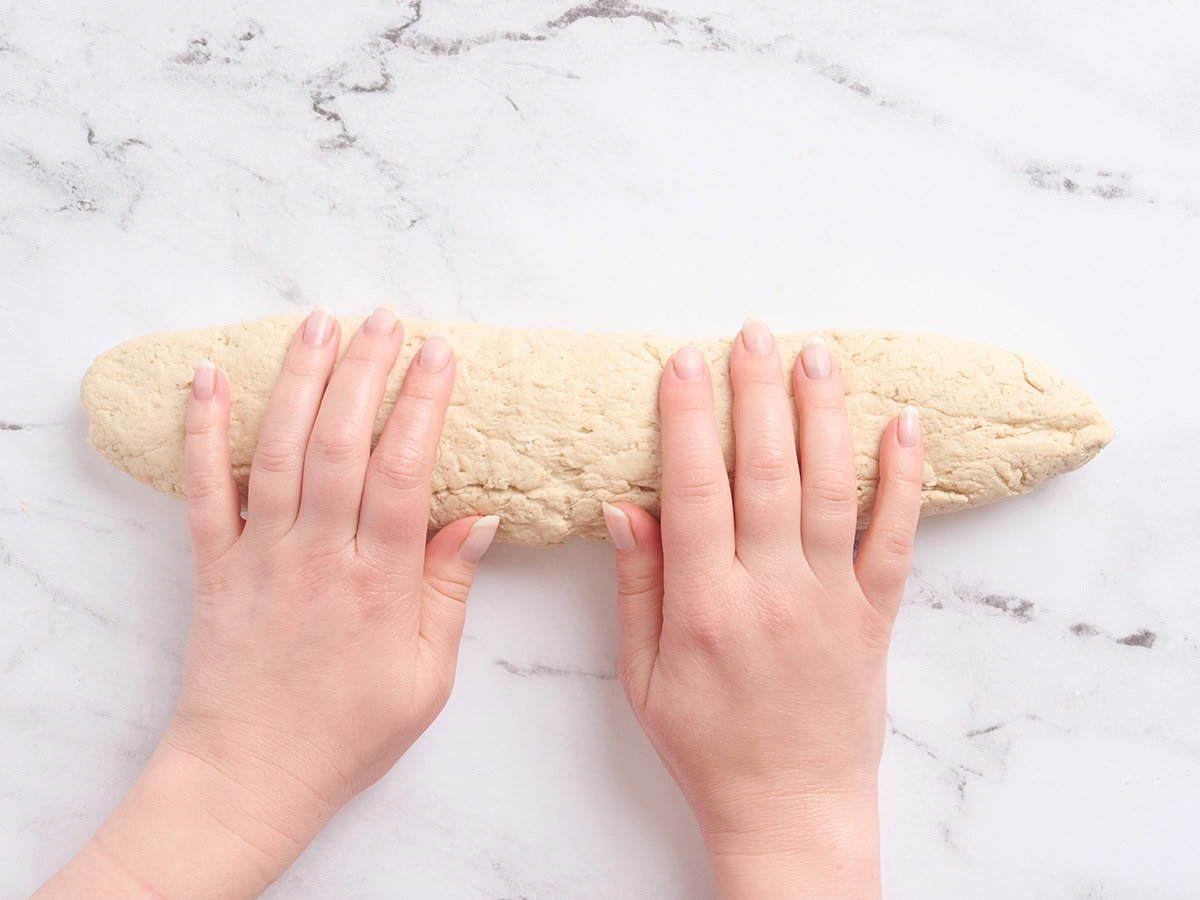
Prepare the pan and shape the baguettes: Lightly grease a baguette pan with oil. Coat your hands generously with oil to prevent sticking, then gently scoop the dough out of the bowl and divide it into two equal portions. Place each portion onto the prepared pan and use your oiled hands to gently guide and stretch the dough into 12-inch logs. Use light pressure and smooth motions to shape the dough, avoiding pressing down too firmly so you preserve the air bubbles. Smooth the tops so the surface looks even and slightly glossy.
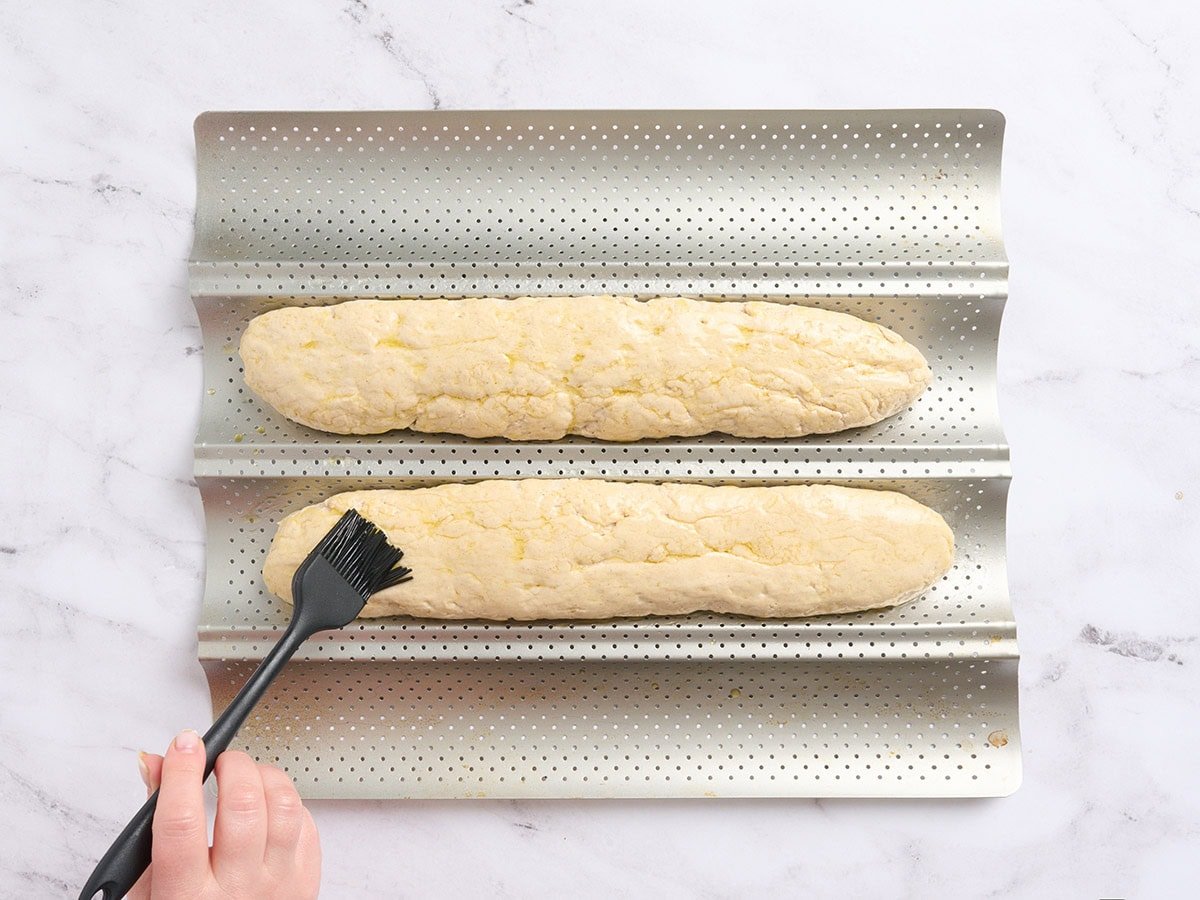
Let the shaped loaves rest: Allow the shaped baguettes to rest on the pan for 10–15 minutes. This short rest helps the surface relax, making scoring easier and helping the baguettes expand properly in the oven. The dough will not rise much during this time, but the surface will look slightly softer. Preheat your oven to 450°F (230°C). Place a heat-safe dish on the bottom oven rack and carefully fill it with hot water. This creates steam, which keeps the crust flexible during the first part of baking and helps develop a crisp, golden exterior. Lightly brush the tops of the baguettes with olive oil to promote even browning.
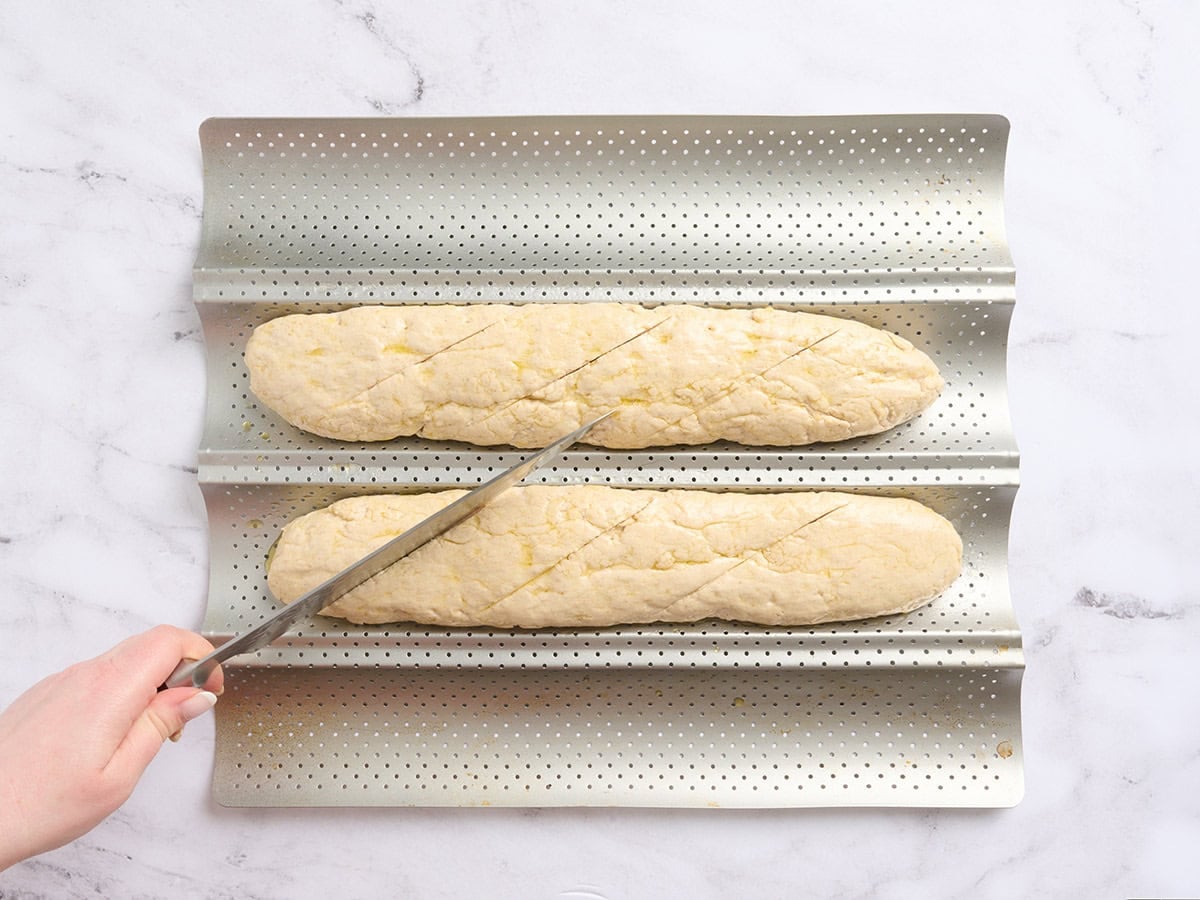
Score the dough: Using a sharp knife or lame, make 3–4 shallow diagonal slashes about ¼ inch deep across the top of each loaf. Use quick, confident cuts and score immediately before baking, so the dough doesn’t deflate.

Bake the baguettes: Place the pan in the oven and bake for 22–28 minutes, until the baguettes are deep golden brown with a firm crust. The bottoms should sound hollow when tapped, and the crust should feel crisp and set.
Cool completely before slicing: Transfer the baguettes to a wire rack and let them cool for at least 45 minutes before slicing. This step is essential, as the interior continues to set while cooling. The baguettes should feel fully cool to the touch before cutting to prevent a gummy texture.

Serving Suggestions
I reach for this gluten-free baguette anytime I want something that feels a little special but still easy. I love serving it warm alongside cozy bowls of gluten-free potato soup or rich gluten-free gumbo, where the crisp crust and soft interior are perfect for soaking up every last bit. It’s also one of my favorites for holiday dinners, cheese boards, and French-inspired meals, or simply sliced into thick pieces for sandwiches. Sometimes I toast slices with butter, turn them into garlic bread, or use them as a base for crostini. It’s just as good dipped in gluten-free beer cheese or served with olive oil and balsamic, and I always like to add it alongside pasta to round out the meal.
Storage Instructions
Once fully cooled, store the gluten-free baguettes in a paper bag or loosely wrapped in a clean kitchen towel at room temperature for up to 2 days. This helps preserve the crisp crust while keeping the interior soft and chewy. You can also wrap them loosely in foil, but avoid sealing them in an airtight container at room temperature, as this can soften the crust. I don’t recommend refrigerating gluten-free baguettes, since refrigeration causes them to dry out and become stale much faster.
For longer storage, wrap the fully cooled baguettes tightly in plastic wrap, then place them in a freezer-safe bag or airtight container and freeze for up to 2 months. I like to slice them before freezing so I can reheat individual portions as needed.
To reheat, bake from frozen in a 350°F (175°C) oven for 8–12 minutes, or until warmed through and the crust is crisp again. For best results, lightly spritz the crust with water before reheating to help restore that fresh-baked texture.
More Gluten-Free Bread Recipes
- Gluten-Free Sourdough Bread: This gluten-free sourdough bread has a tangy flavor and chewier texture thanks to natural fermentation. It’s a great option if you enjoy artisan-style breads like these baguettes and want a deeper flavor and more rustic crumb.
- Easy Gluten-Free Bread: This easy gluten-free bread is soft, sliceable, and perfect for everyday use. While baguettes offer a crisp crust and chewy interior, this loaf is ideal when you want something softer for sandwiches, toast, or quick breakfasts.
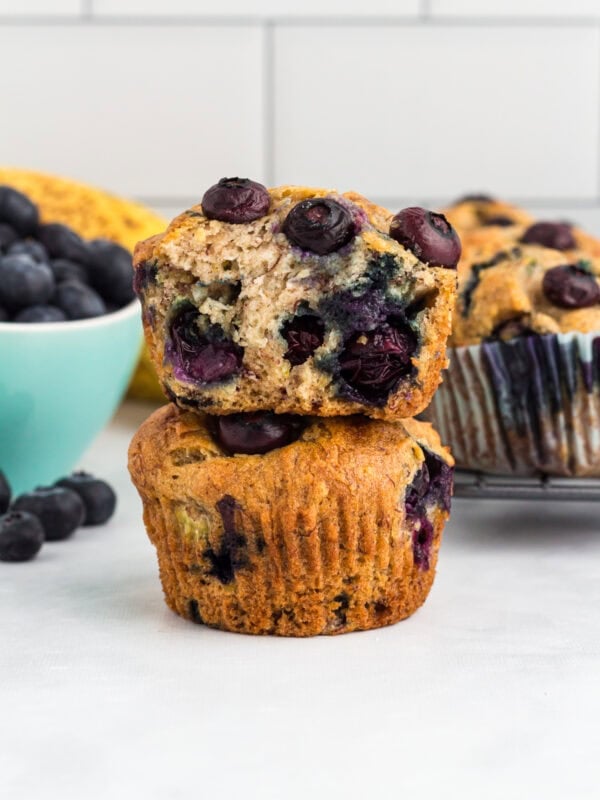
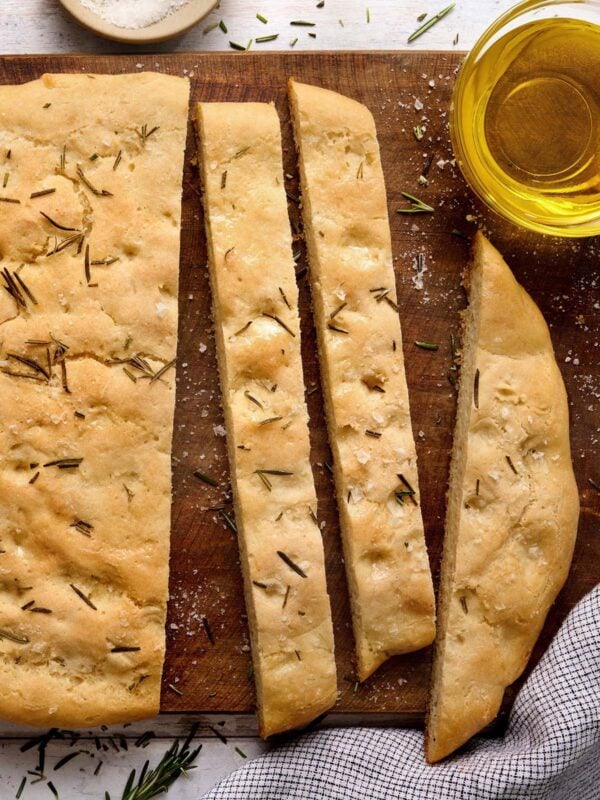
- Gluten-Free Focaccia: This gluten-free focaccia is fluffy, airy, and rich with olive oil. Like these baguettes, it develops a beautiful golden crust, but the interior stays softer, making it perfect for dipping, serving alongside meals, or using as sandwich bread.
- Gluten-Free Dinner Rolls: These gluten-free dinner rolls are light, tender, and slightly chewy. They use a similar yeast-based method as these baguettes, but bake them into individual portions that are perfect for serving with soups, holiday meals, or weeknight dinners.


Looks amazing!