Gluten-Free Dinner Rolls
Published
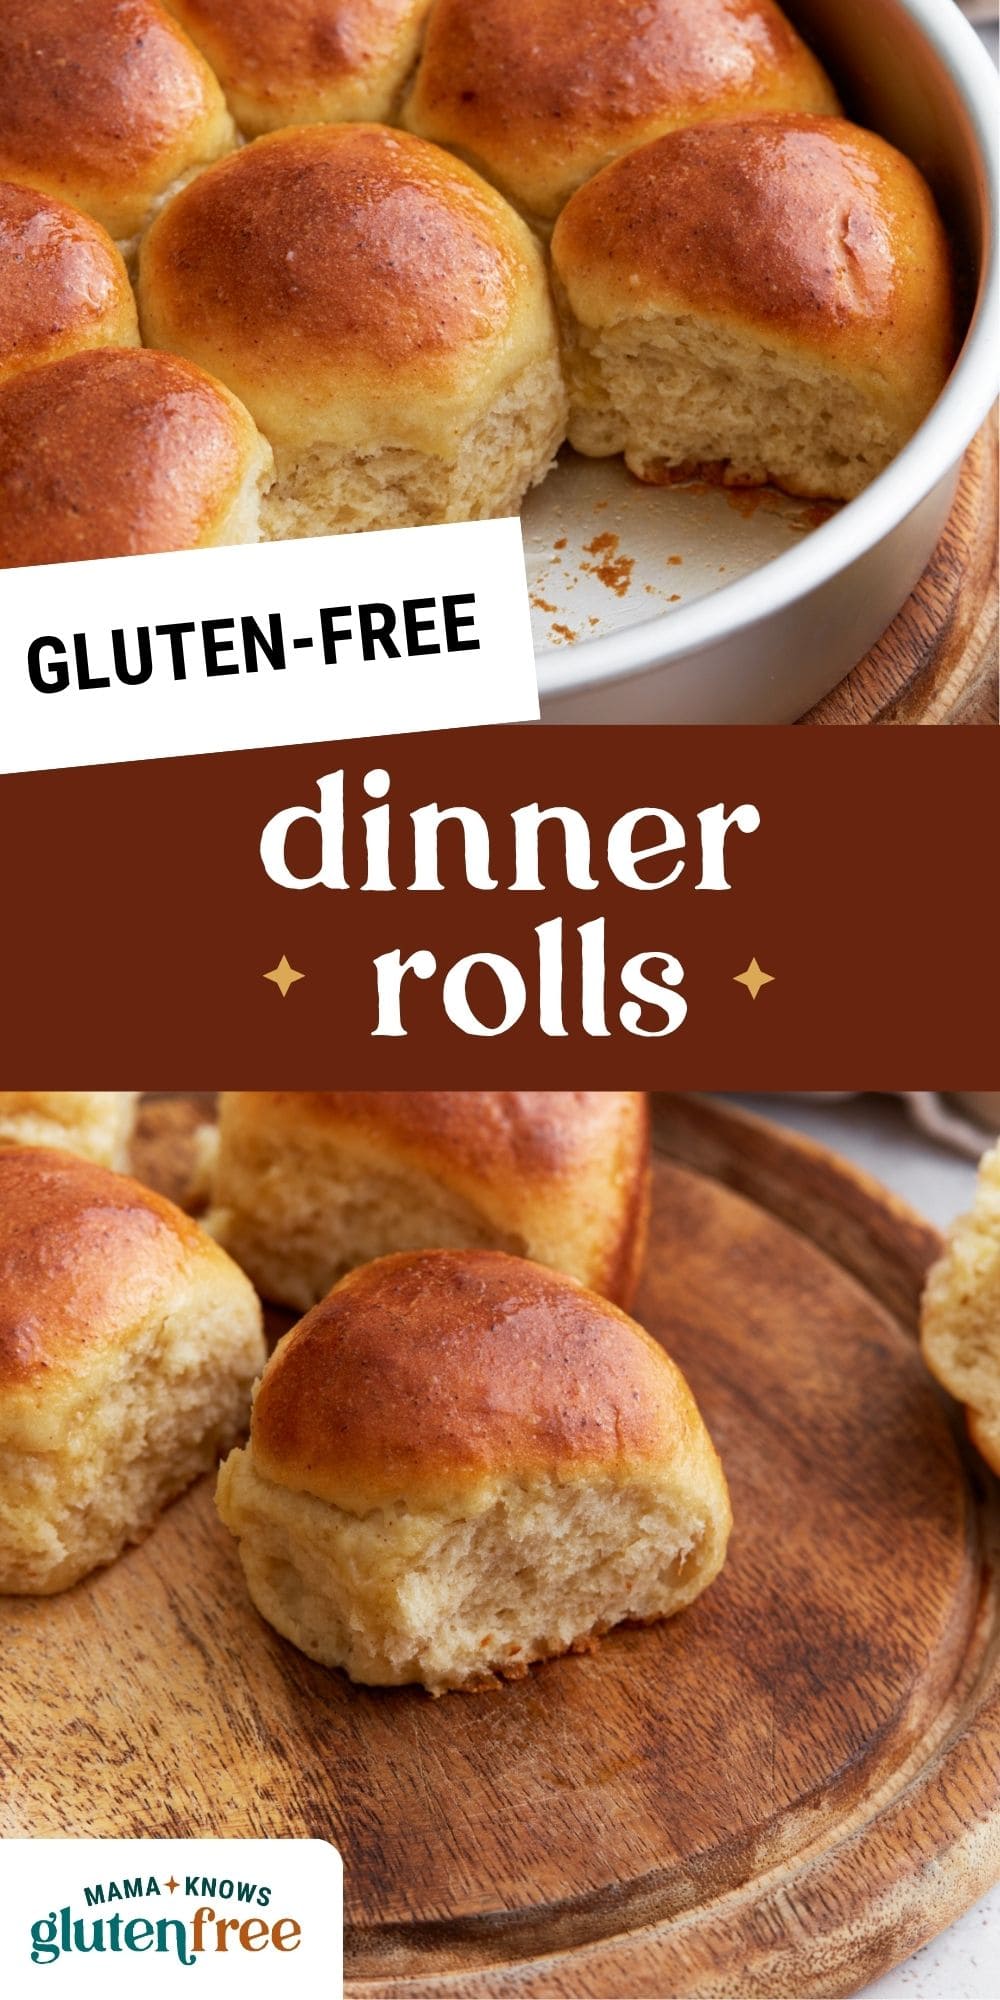
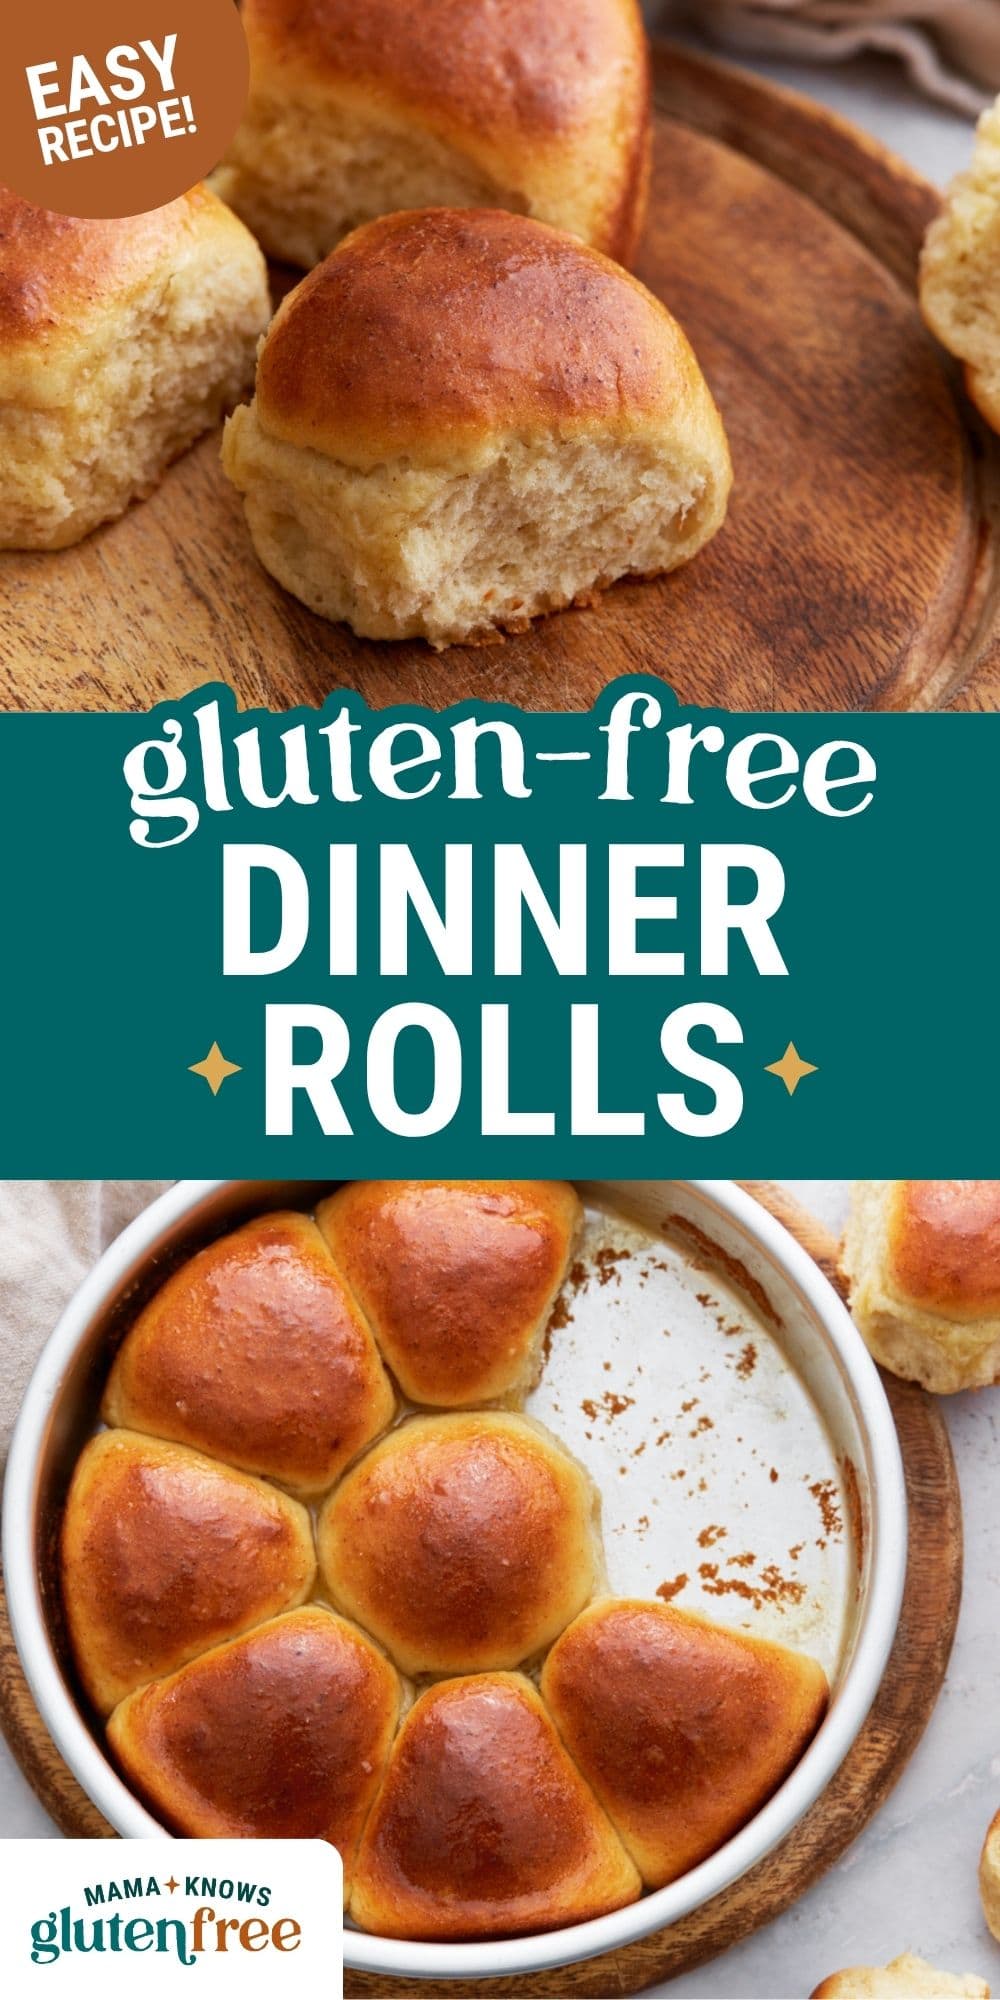
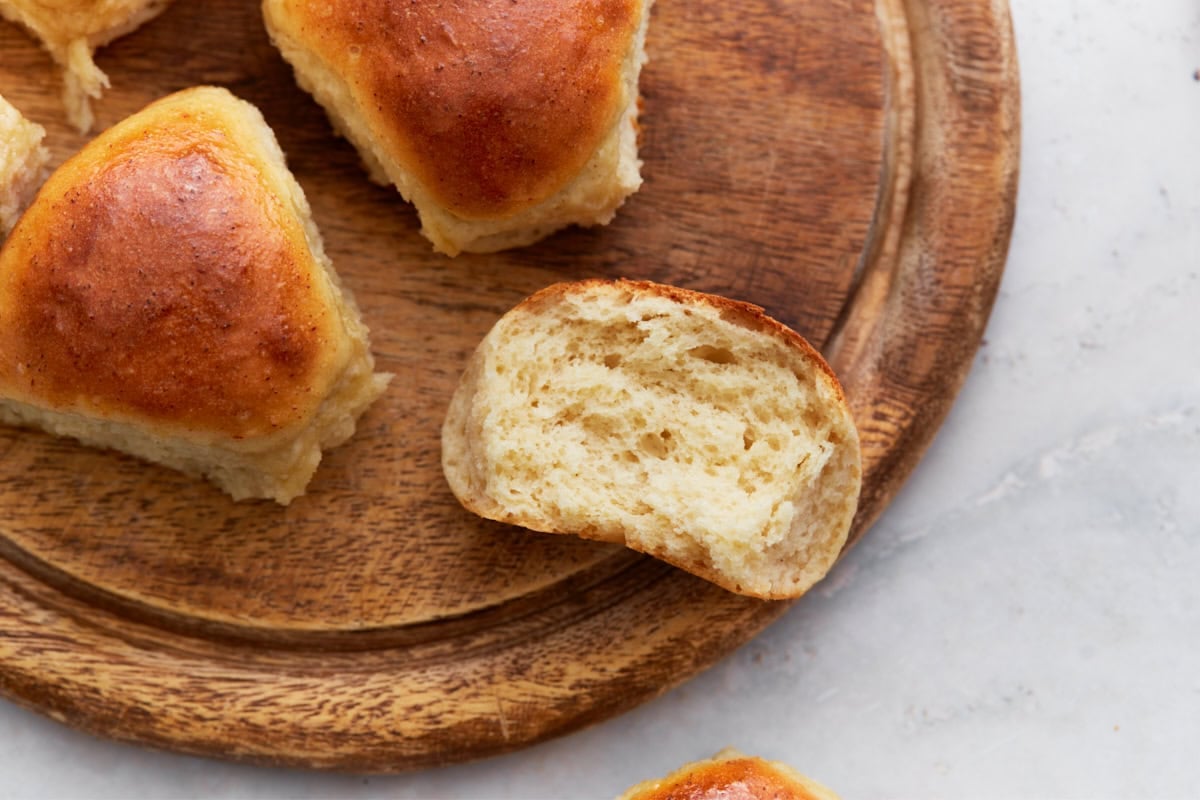
No holiday meal in my house is complete without a basket of warm, homemade gluten-free dinner rolls. These rolls are soft, fluffy, and golden on top with a brush of melted butter—just the way we like them. I created this recipe to be as simple and stress-free as possible (because let’s be real, the holidays are busy enough!). There’s even a dairy-free option, so everyone at the table can enjoy them. We love them fresh from the oven for special occasions, but I also make them year-round for weeknight dinners—they’re that good.
“Best GF rolls fluffy with a little sweetness and so easy!!!!”
– GA
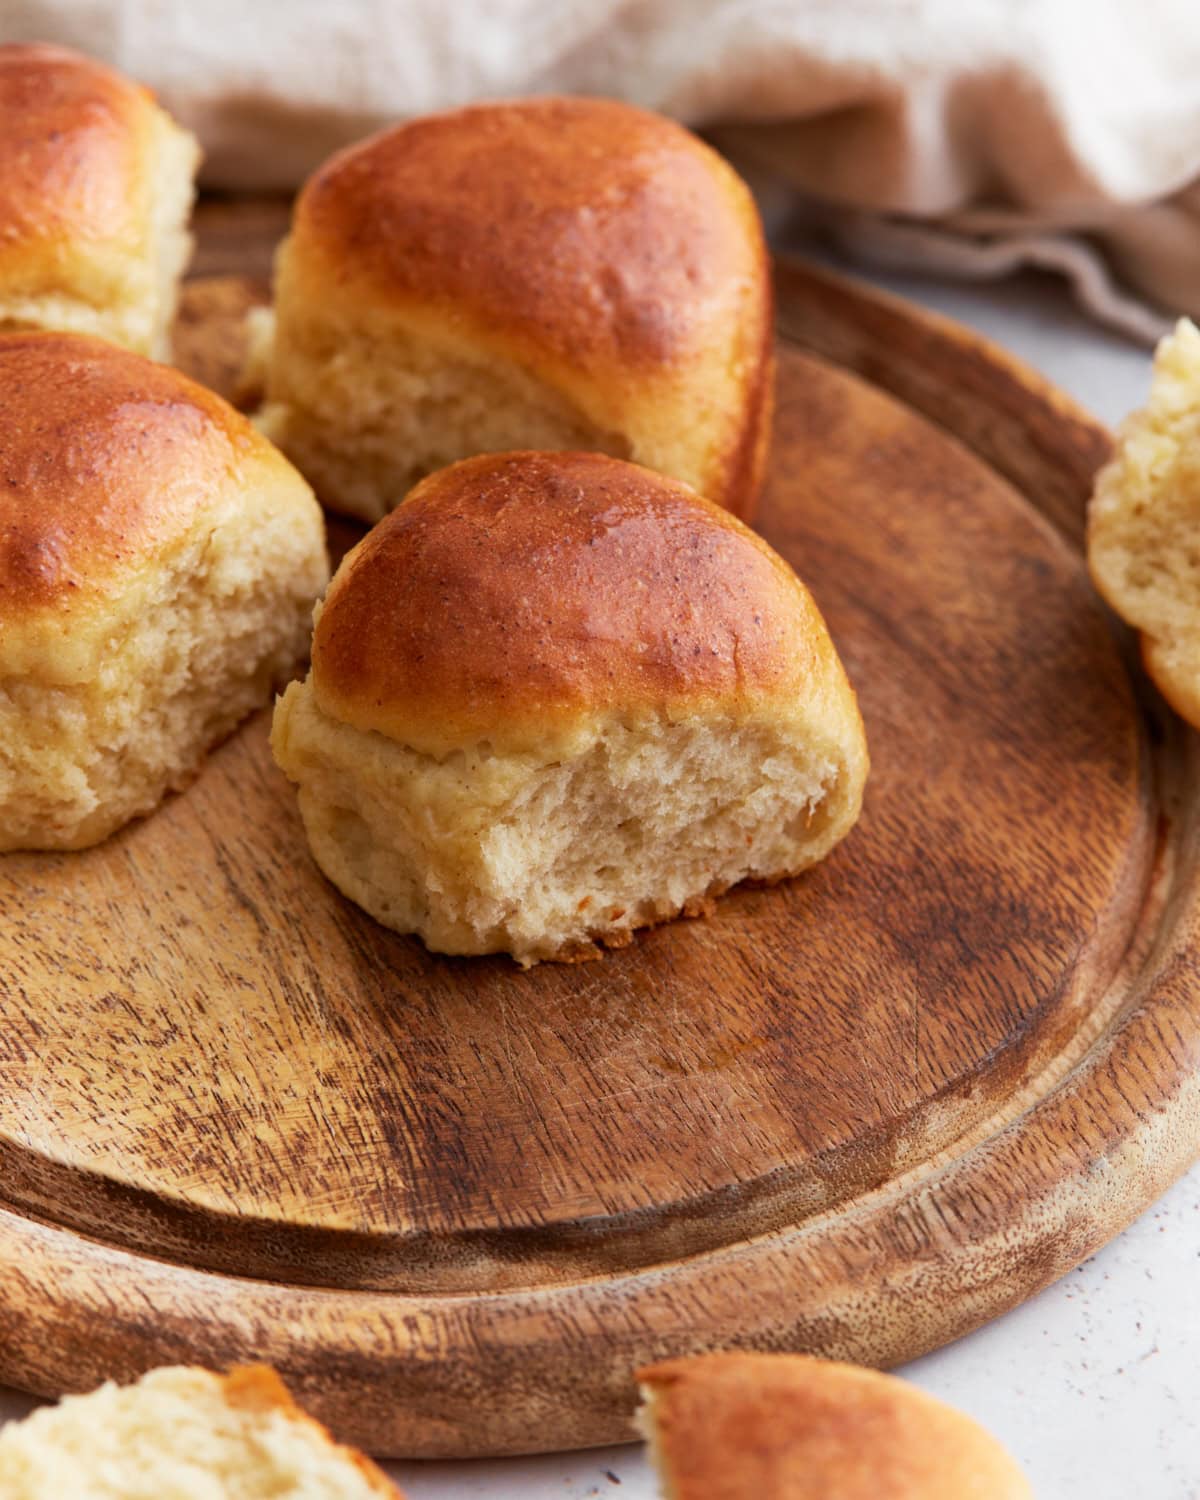
When I first went gluten-free back in 2010, one of the things I missed most was those soft, pull-apart Sister Schubert yeast rolls. After perfecting my homemade gluten-free bread, I knew dinner rolls were next on my list. It took a few tries to get the texture just right, but once I cracked the code, I couldn’t wait to share it. These gluten-free dinner rolls are made with a simple mix of gluten-free flour, instant yeast (no proofing needed!), eggs, milk, butter, and a touch of honey. You can easily swap in dairy-free alternatives, and the result is always the same: soft, fluffy rolls with a hint of sweetness, just like the ones I used to love.
Gluten-Free Dinner Rolls
Ingredients
- 3-3½ cups all-purpose gluten-free flour with xanthan gum, The amount of gluten-free flour needed can vary A LOT depending on the brand, age of the flour, altitude, climate, how accurately someone measures, and other factors
- 1 tsp salt
- 1¾ tsp rapid yeast/instant yeast, I use Fleischmann's Bread Machine Instant Yeast
- 1¼ cups warm milk (110°F-115°F), dairy-free use almond, cashew or coconut milk
- ¼ cup unsalted butter, softened, dairy-free use Earth Balance or Smart Balance
- 2 eggs, room temperature
- 1 tsp apple cider vinegar
- ½ cup honey
- 2 tbsp unsalted butter, melted, for dairy-free, I use Smart Balance buttery spread
Instructions
- In a large bowl add the gluten-free all-purpose flour and salt.
- Add the yeast to the gluten-free flour mix by making a little hole with your finger in the flour and pour the yeast into the hole.
- Warm the milk to 110°F-115°F (43-46°C). I microwave the milk in a large glass measuring cup for 1:30. I also use a thermometer to check the temperature. If your milk is too hot it'll kill the yeast. Pour warm milk over the yeast.
- Add the softened butter, eggs, apple cider vinegar, and honey to the bowl.
- Mix until fully combined. (2-3 minutes). You may need to scrape the sides down to make sure all of the flour is mixed well with the ingredients. I like to use my dough attachment to my KitchenAid mixer, but you can use the paddle attachment. The dough will be sticky.
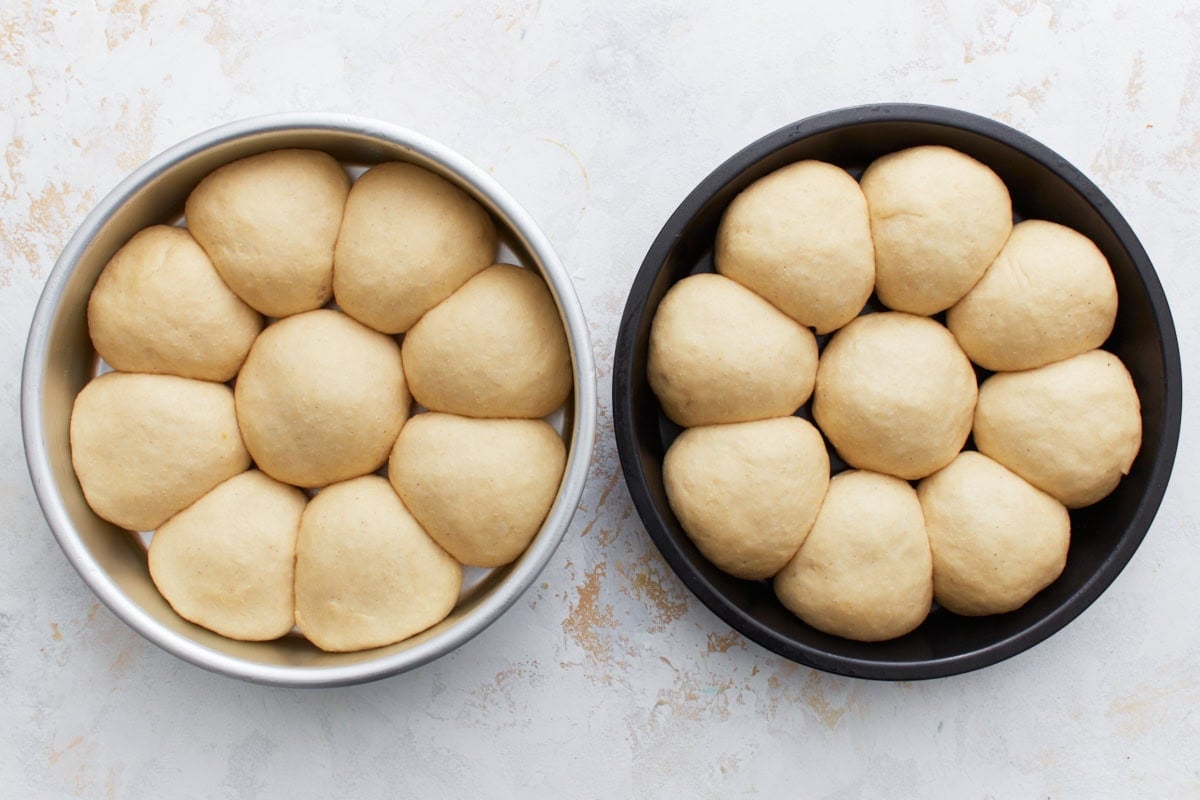
- Spray two 9 inch cake/pie pans with gluten-free cooking spray. I like to use metal pans, but you can use a glass pan.
- Using an ice cream scoop place the dough balls into the pans. Spray your ice cream scoop with gluten-free cooking spray to help the dough not stick. You should have 8 dough balls around each pan and 1 dough ball in the center. This recipe makes 18 rolls.
- Take a small spatula and smooth out the tops of the dough.
- Cover the pans with a kitchen towel and allow to rise in a warm place for 1 hour.
- Pre-heat your oven to 400°F (204°C).
- Bake the rolls on the middle rack for 14-16 minutes. They will turn a nice golden light brown. Please watch your oven because all ovens are different. The temperature of the rolls should measure 200°F (93°C) internally.
- Brush the tops of the rolls with melted butter before serving. Enjoy!
Notes
- If your flour blend doesn’t include xanthan gum, you must add 1½ tsp of xanthan gum to step one in this recipe.
- Double-check that your instant yeast is still in date (besides rising in a too-cold environment, expired yeast is a common culprit for dough that won’t rise!).
- Use the spoon & level method to measure my gluten-free flour. This means using a spoon to fill your measuring cup with flour and then leveling it off with the back of a knife.
- I’ve only made these with Pillsbury gluten-free flour. Other gluten-free flours, like almond, coconut, or oat flour, won’t work in this recipe. You could try our coconut flour bread or almond flour biscuits for a side dish made with these flours.
- Make sure your chosen flour is suitable for yeast baking. Bob’s Red Mill 1 for 1 and King Arthur Measure for Measure state on their website and/or package that their blends aren’t recommended for yeast baking.
Nutrition
Nutrition information is automatically calculated, so should only be used as an approximation.
How to Make Gluten-Free Dinner Rolls Step by Step
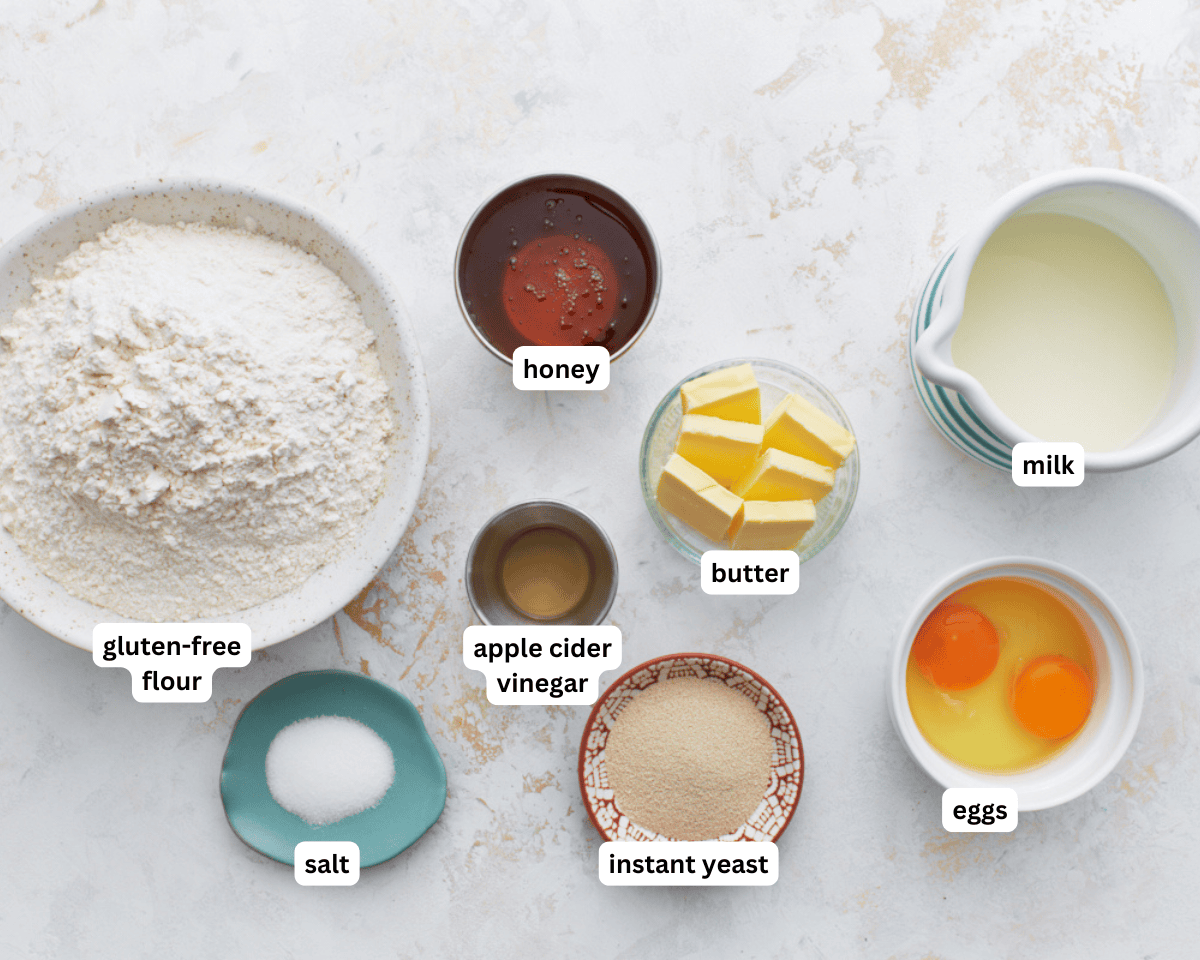
Gather the Ingredients: Gather all the ingredients together. Lightly grease two 9-inch metal cake or pie pans with gluten-free cooking spray. Set aside.
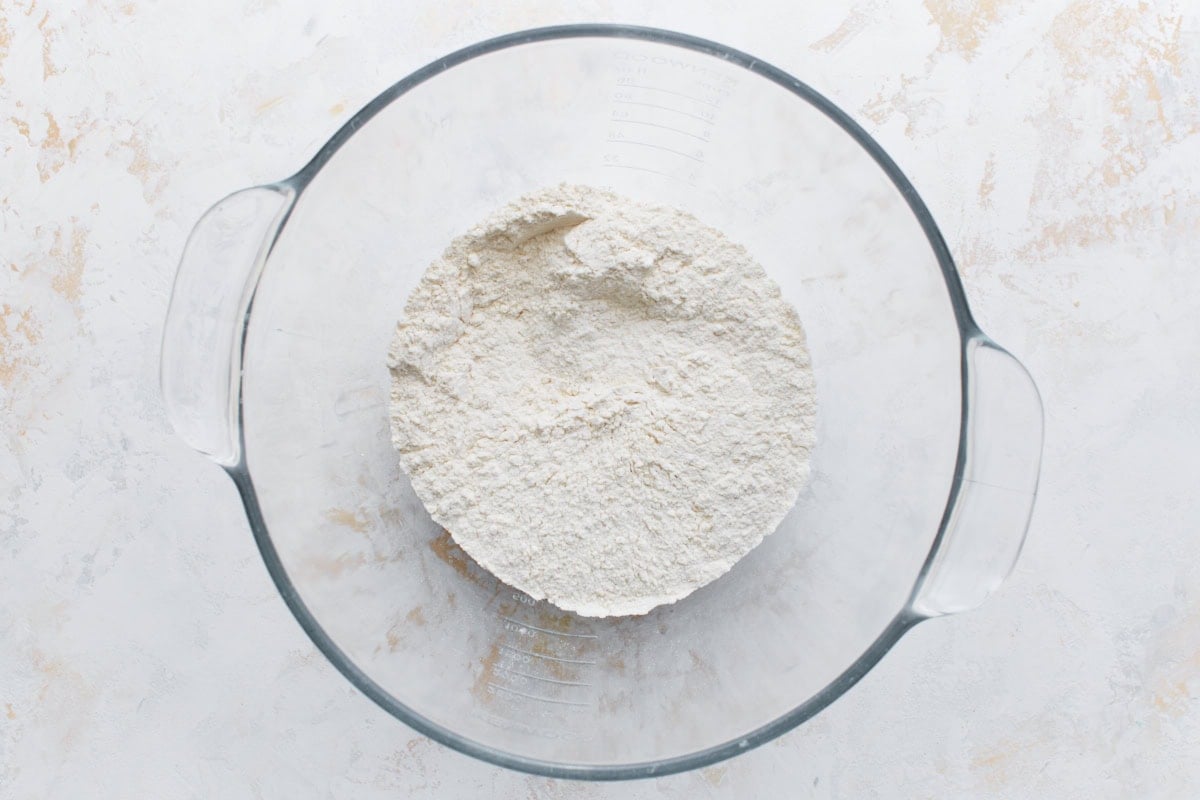
Mix the dry ingredients: In a large mixing bowl, whisk together 3-3 1/2 cups gluten-free all-purpose flour (the amount needed can vary A LOT depending on the brand, age of the flour, altitude, climate, how accurately someone measures, and other factors) and 1 tsp salt. Make a small well in the center of the flour and add 1 ¾ tsp rapid rise yeast.

Add the wet ingredients: Warm 1 ¼ cups milk to 110°F–115°F (I microwave it in a glass measuring cup for about 1 minute 30 seconds). Use a thermometer to check the temperature—if it’s too hot, it can kill the yeast. Pour the warm milk into the bowl over the yeast. Add ¼ cup softened butter, 2 eggs, 1 tsp apple cider vinegar, and ½ cup honey to the bowl.
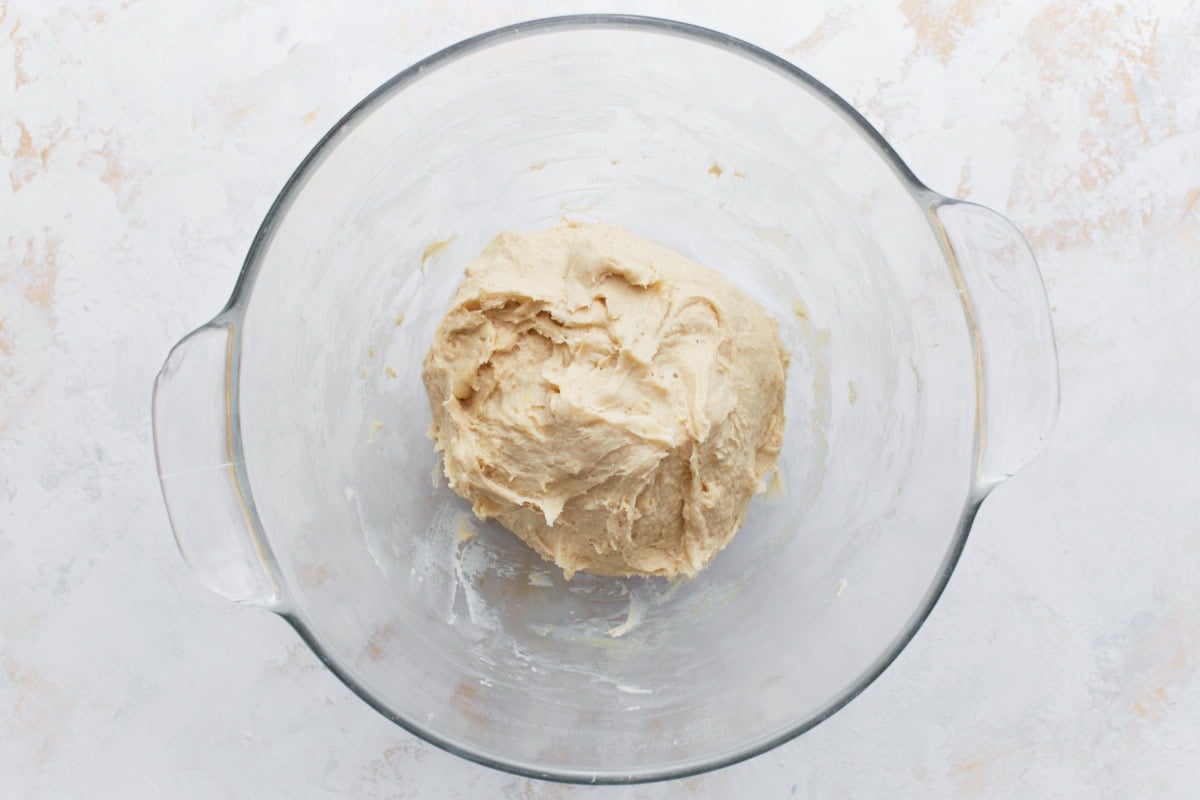
Mix the dough: Using a stand mixer fitted with a dough hook (or paddle attachment), mix the dough on medium speed for 2–3 minutes, scraping down the sides as needed. The dough will be sticky and thick.
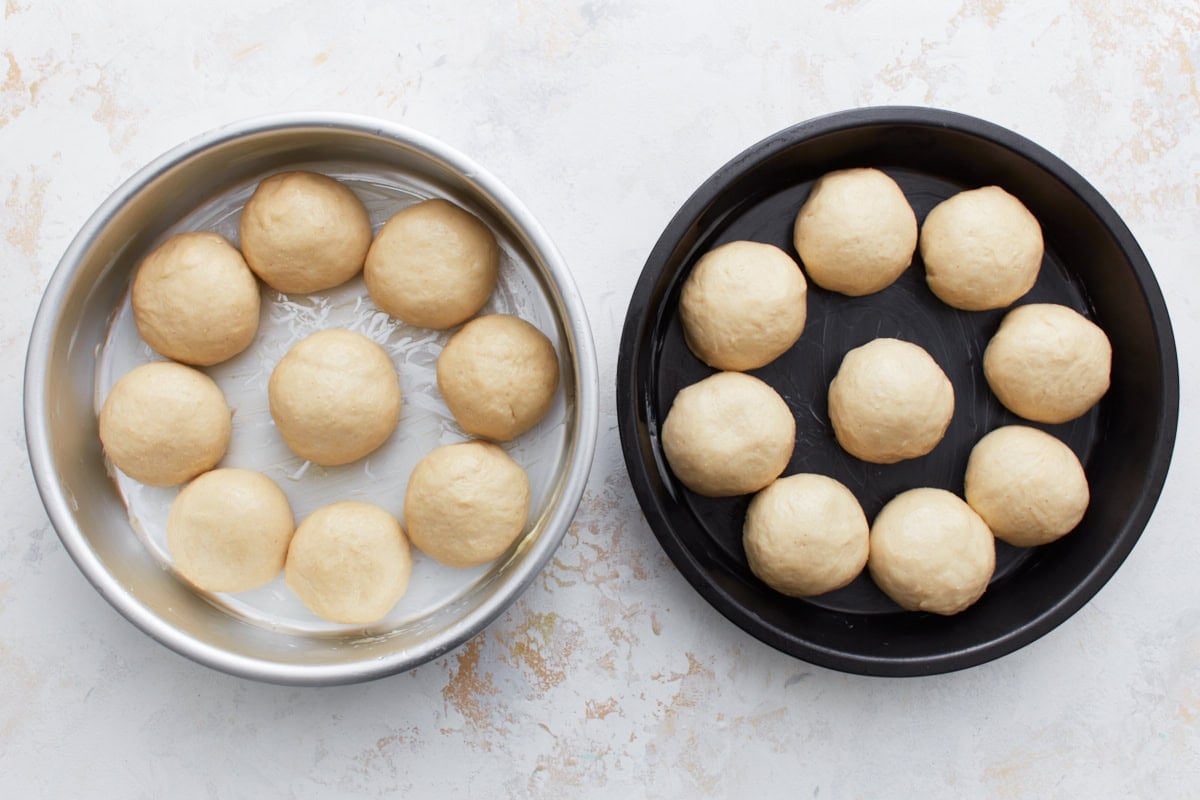
Portion the rolls: Spray your hands or a cookie/ice cream scoop with gluten-free cooking spray. Divide the dough into 18 equal portions, rolling each into a ball. Place 8 dough balls around the edge of each greased pan and 1 in the center of each. Use a small spatula to gently smooth the tops.
Let the dough rise: Cover the pans loosely with a clean kitchen towel. Let the dough rise in a warm spot for 1 hour, or until noticeably puffy. (Tip: You can preheat your oven to 100°F, turn it off, and let the rolls rise inside.)
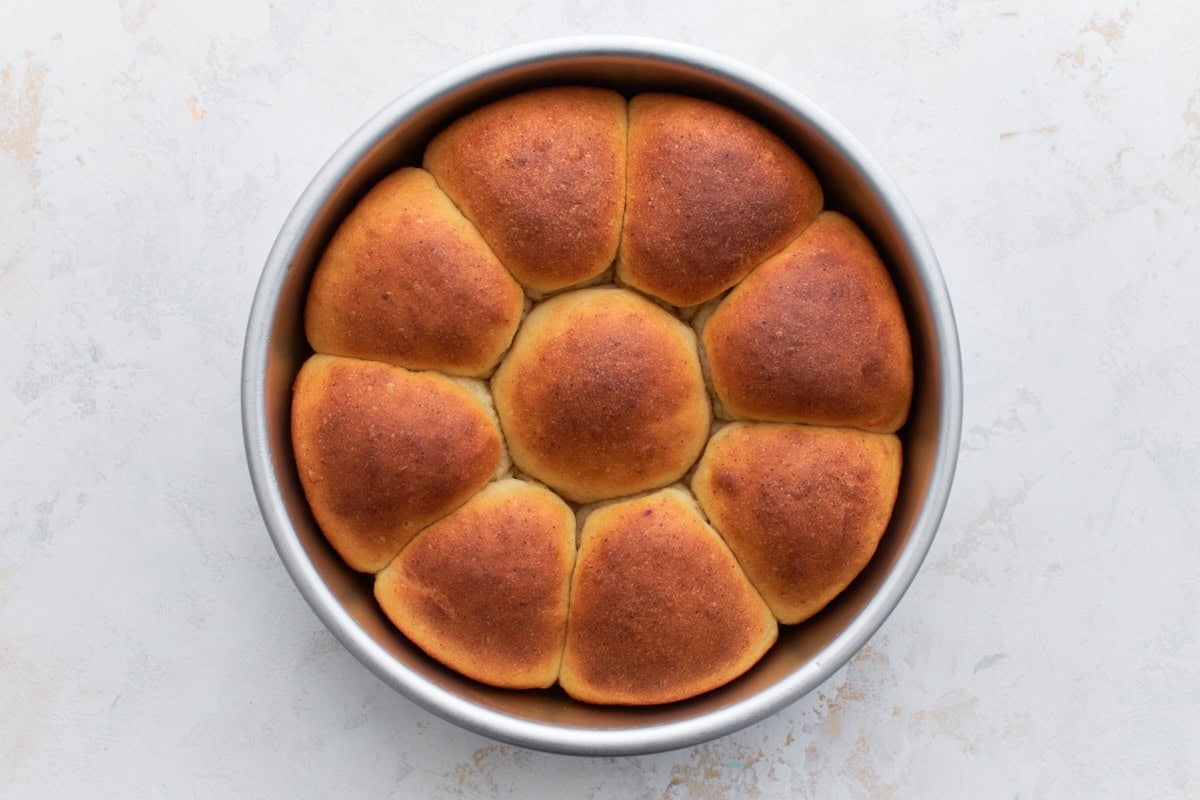
Bake the rolls: While the rolls finish rising, preheat your oven to 400°F. Bake the rolls on the middle rack for 14–16 minutes, or until golden brown and the internal temperature reaches 200°F. Keep an eye on them—bake times can vary by oven.
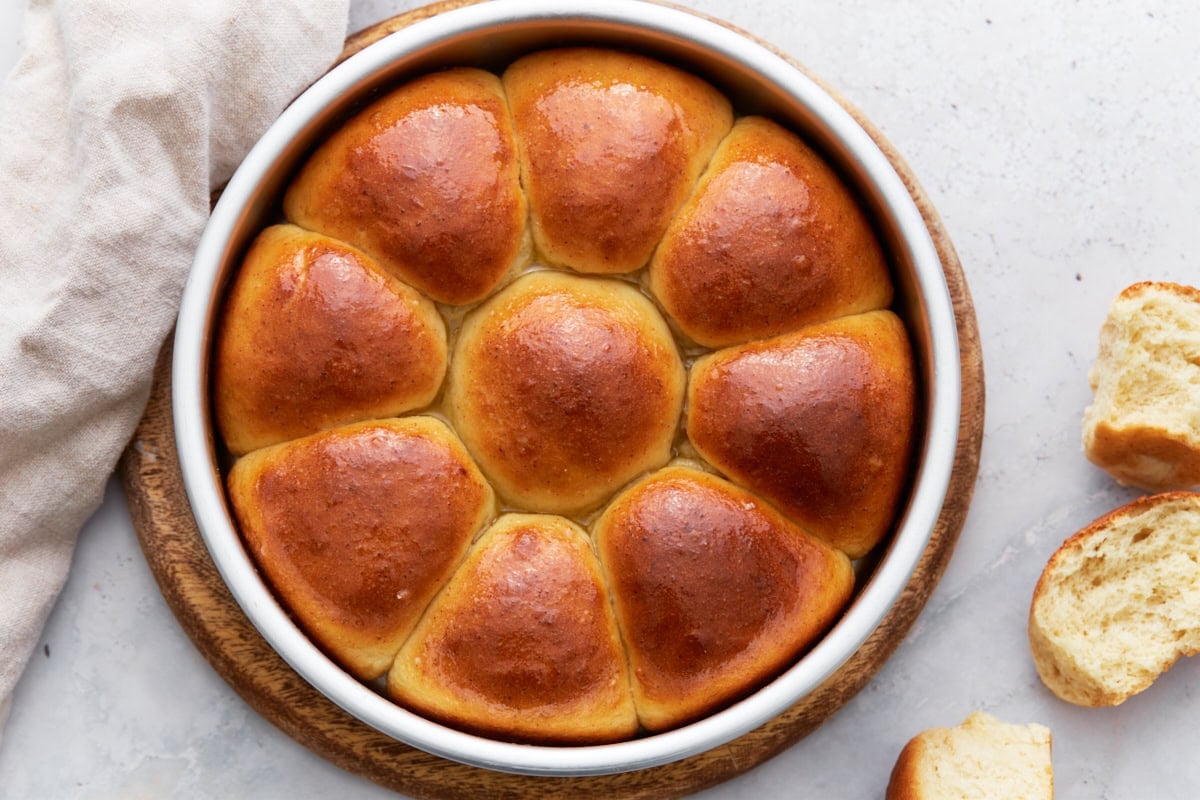
Finish and serve: Brush the tops with 2 tbsp melted butter (or dairy-free option). Serve warm and enjoy!
Gluten-Free Baking Tips
Use a flour range for best results: Gluten-free dough can vary a lot depending on the flour blend, how it’s measured, the age of the flour, and even your climate or altitude. For that reason, think of the flour amount as a range rather than a fixed number. I typically land between 3 and 3½ cups of gluten-free flour. On my last test, I added an extra ⅓ cup, which gave the dough more structure and made it firm enough to roll by hand instead of scooping. You’re looking for a dough that feels soft but not wet, holds its shape when rolled, and doesn’t slump or spread when set on the pan. If the dough still feels sticky after chilling, don’t worry. Mix in 1 to 2 tablespoons of flour at a time until it’s smooth, slightly tacky, and easy to shape into round rolls.- Weigh the dough for even rolls. Using a kitchen scale to portion the dough helps the rolls bake evenly and look uniform. It’s a small extra step, but it makes a noticeable difference, especially if you’re serving these for holidays or guests.
- Oil your hands generously. Gluten-free dough is naturally stickier than wheat-based dough, so don’t hold back on the oil or nonstick spray. Well-oiled hands make shaping faster, cleaner, and far less frustrating.
- Chill the dough to make shaping easier (and for make-ahead prep): If the dough feels too sticky or soft to handle, refrigerate it for about 30 minutes before shaping. Chilling helps the dough firm up so it’s easier to roll and holds its shape better. If you’re making the rolls ahead of time, go ahead and shape them first, then cover and refrigerate for a few hours or overnight, depending on your schedule. When you’re ready to bake, let the rolls sit at room temperature until they no longer feel cold before proceeding with the recipe.
- Create a warm, reliable rise. Make sure your yeast is fresh, and your proofing spot is warm. I like to preheat my oven to 100°F, then turn it off and let the dough rise inside. It creates a steady, draft-free environment that helps gluten-free dough rise consistently.
Serving Suggestions
I can’t think of any occasion where these gluten-free bread rolls wouldn’t be a hit! Serve them as a side dish for tomato soup, bring them to a potluck or holiday gathering, or enjoy them as an afternoon snack. They’re also a staple on my holiday table for Thanksgiving, with gluten-free green bean casserole and roasted turkey. My kids even love them for breakfast with some jam or honey spread on top.
Storage Instructions
These rolls are best served warm and fresh from the oven. They can harden slightly the longer they’re stored. If I have any leftovers, I keep them in an airtight container at room temperature for up to 3 days. You can also freeze them in a freezer-safe container for up to 3 months and thaw as needed.
I always recommend reheating them before serving. Pop them in the microwave for 15-20 seconds or place them in a 350°F oven for a few minutes until warmed through.
More Gluten-Free Bread Recipes to Try!
- Homemade Gluten-Free Machine Bread
- Gluten-Free Sweet Cornbread
- Gluten-Free Burger Buns
- Gluten-Free Challah Bread
- Gluten-Free Hot Cross Buns
Our Gluten-Free Dinner Rolls recipe was originally published 11/07/24. It was retested, reworked, and republished to be better than ever 7/4/25.


These were amazing! I used King Arthur gluten free bread flour and they came out beautiful! Some of my family had no idea they were gluten free and love them 🙂
I just made these. Not alot of flavor and didn’t rise well bummed but ill try again. Gave 5 stars im sure its baker error.
These are so wonderful!!! Used 3 1/2 cups of Meijer gf flour and a packet of regular yeast (as that’s all I had on hand). Also used muffin tins instead of pie plates. So good! I’ve had lots of GF store or bakery bought breads and they don’t even compare to these rolls. Also liked how you used the whole egg. Thank you for this recipe-it’s a keeper. Even my husband, who is not gluten sensitive, loved these. P.S. I’ve never commented on a recipe before, but just had to tell you how much I appreciated eating something this good AND GF!
Thank you Cheryl!
Can I make up the rolls and freeze them? Then bake them when I need them?
Hi Nancy, that should work!
hi! thank you so much for the recipe. I would love to make this but I cannot get Pillsbury gf flour In my area. do you know if Bob’s Red Mill would work as well? should I use a gr bread flour? or are there other homemade blends that would work better? thank you so much!
Hi Mercedes, we have only tested these with Pillsbury, but some other reviewers have had success with other flours.
Hi Audrey,
I’m very excited to make these! Will reducing the honey by 1/2 have any negative affects? Thanks!
Hi Martha, yes it will likely change the flavor and consistency a bit.
Can I make half of the recipe (X1) to test them?
Sure!
They were a hit on Thanksgiving
They turned out perfect!!
I wouldn’t normally share if I changed a lot about the recipe, but I thought others would like to know: first, I used King Arthur measure for measure, even though it’s not recommended. next, we have a kiddo who can’t have honey or eggs, so I subbed simple syrup for the honey and a gelatin egg for the eggs. They turned out perfectly moist and delicious. The best GF rolls I’ve ever had!
I made these for Thanksgiving and they turned out soooo good! I was very surprised because I haven’t had much success with gluten free rolls in the past. I did add a couple tablespoons spoons of flour after I began forming the balls because it was too sticky.
I got a little creative. I did not have xanthan gum.. soo I subbed 1/4c milk for 1/4c sour cream, and added about 1/2 tsp cornstarch… I had to work with what I had baking last minute like I am, lol. The rise is a little smaller but they look pretty good. I added a lil italian seasoning as well. Oof, also, accidently melted my butter instead of softening(tossed it in the freezer to chill alil, I was cautious enough to make sure it wasn’t too hot for the yeast but not enough to keep from melting it.. lol..), but my honey was kind of thick and granulated, so I mixed it with the butter prior to adding to the main mixing bowl. This seemed to help both smooth out the honey and chill out the butter a bit more. That was my crazy troubleshoot for my mini issues. and yeah I could have heated up the honey to fix it’s issues but I like what I tried this time 🙂 also, totally had more butter I could have softened and saved the melted butter for the final step 😛 but, I didn’t. We eat them tomorrow, they really do look and smell good.
Since mine has a cake batter consistency, and I added 3 1/2 cups of flour, could I cut back on the amount of milk?
Hi Deandra, When it comes to gluten-free dinner rolls, a cake-batter-like consistency is actually normal, even when using 3½ cups of flour. Gluten-free yeast doughs don’t behave like traditional bread dough and are meant to be thick, sticky, and soft rather than firm and kneadable. If your batter feels very loose or pourable, you can either add a tablespoon or two of flour at a time or slightly reduce the milk, but I wouldn’t cut back too much. The extra moisture is what helps the yeast activate and keeps the rolls light and fluffy. I’ve found that it’s usually better to make small adjustments and trust a sticky dough—adding too much flour too quickly can easily lead to dense, dry rolls.
I’m really confused on when the chilling comes in the process. it’s not anywhere in the first set of steps, but then you mentioned chilling down toward the bottom in the tips section. help! TIA
Thanks for pointing that out! We’re going to edit the recipe now. It should say, if you feel the dough is too sticky to handle pop it I the fridge to chill for 30 minutes before shaping. Not a necessary step if your dough is easy to handle.
I’m wanting to bake fresh, can I put the rolls in fridge before they rise? Or should I put them in freezer. I made them two days in advance.
Hi Linda, you can prep these gluten-free dinner rolls the day before. Just make the dough as directed, shape the rolls, and place them in the baking dish. It’s important to shape before chilling. Cover tightly and refrigerate overnight. The next day, take them out and let them sit at room temperature for about 60–90 minutes so they can warm up and finish rising, then bake as usual.
Would I be able to make the dough ahead of time and put it in the fridge overnight to proof?
Yes, you can prep these gluten-free dinner rolls the day before. Just make the dough as directed, shape the rolls, and place them in the baking dish. It’s important to shape before chilling. Cover tightly and refrigerate overnight. The next day, take them out and let them sit at room temperature for about 60–90 minutes so they can warm up and finish rising, then bake as usual.
Would gluten free bread flour work for these? I have King Arthur brand.
Hi Brittany, we’ve only made these with Pillsbury gluten-free flour. King Arthur Measure for Measure states on their website and/or package that their blends aren’t recommended for yeast baking.
What about the BREAD flour – not measure for measure?
Hi Sally, others have used that brand and had success!
Hi! I just made these and they are sitting to rise currently. I just realized I left out the apple cider vinegar. How big of a deal is that? Should I throw them out and start over ?
Hi Eve, The apple cider vinegar helps with the moisture and lift.How did they turn out?
I can’t wait to try these! Do you think it would be okay to prep then cover and refrigerate until the next day to let them rise and bake?
Yes, you can prep these gluten-free dinner rolls the day before. Just make the dough as directed, shape the rolls, and place them in the baking dish. It’s important to shape before chilling. Cover tightly and refrigerate overnight. The next day, take them out and let them sit at room temperature for about 60–90 minutes so they can warm up and finish rising, then bake as usual.
Thank you for this recipe. Mine are rising now, but I may have messed them up. Your notes suggest placing the dough in the fridge for 30 minutes after mixing to help with the firmness. I did this, but still had a lot of trouble with firmness. I used the same brands you used in your recipe. That said, when I went to review the comments just now, I saw that you in your reply to some of the comments, you suggest shaping the rolls before putting them in the fridge. I have a feeling my rolls are probably not going to be beautifully shaped but I hope they still taste good.
Do you mind clarifying whether regardless of whether it is 30 minutes or overnight, whether we should shape the rolls before putting them in the fridge?
Thanks for your question! Even if they don’t turn out perfectly shaped, I’m sure they’ll still be delicious. We’re going to clarify the tips section now. In the mean time, that answer was specifically for making the rolls ahead of time. Another tip I have is if you feel the dough is too sticky or thin to handle, try sticking it in the fridge before shaping. If you feel the sough was still to tricky to handle, you can try adding a bit more flour, 1 tbsp at a time until you feel like it can be handled and shaped.
I’ve been tasked with making gluten free rolls for thanksgiving because I’m the “baker” in the family. Lol. This is the second recipe I’ve tried this week and these taste amazing! Mine definitely have more of a biscuit consistency but they taste so good! So I’m bringing biscuits! I’m freezing them bc I’m not sure I could do any better.
Mine also has a biscuit consistency.
Could I make these with molasses? Maybe substituting the honey? My grandmother had a molasses dinner roll recipe, and I’m trying to find a good alternative that is GF.
Hi Kara, yes you can sub the honey for molasses 1:1
Can these be made a day in advance and then warmed up? I want to try them for Thanksgiving and am trying to save time. Thanks.
These rolls are best when baked fresh and served warm. They are amazing fresh baked out of the oven. Thank you for asking!
Can use something beside eggs in this roll recipes
Hi Mary, we have not tried substituting the eggs but would recommend an egg replacer, such as Bob’s Red Mill.
Which gluten free flour do you use in these?
Pillsbury gluten-free all-purpose flour 🙂
I used KRUSTEAZ Gluten Free Flour that has Xanthan Gum in it. The dinner rolls turned out great.
To the person that said they used Krustez brand gf flour and they turned out great, thank you! I’m making these for Thanksgiving today and I’m out of my usual stash of gf flour. That was the only brand available at my local store this week. Happy Thanksgiving everyone!
Hi! in the US Customary measurements it says 1 3/4 teaspoons and in the metric version it says 1.75 tablespoons. I’m Just wondering which measurement is correct? Thanks!
Thanks Felicia, we fixed it!
My cousin can’t do eggs is there something else can be used instead of eggs for this recipe!
Hi Mary, we have not tried substituting the eggs but would recommend an egg replacer, such as Bob’s Red Mill.
I gave it 4 stars even though it came out really really dense. it was my fault. I used Bob’s Mill flour because that’s what I had. Also, I did not use Rapid rise yeast. It’s SAF active dry perfect rise yeast. The rolls did rise slightly but obviously not enough. They looked beautiful and if I use the right products I’m sure they will not be as dense. The flavor was to die for.
If I do not have honey can I replace with sugar?
Hi Jamie, yes you can use a mixture of granulated sugar and a small amount of liquid (like water) in a 1:1 ratio as a replacement for the honey.
I have not tried this yet but I’m going to today. Everything I’ve tried on this site has been wonderful. I love getting your emails!
I tried making these and it was a fail for me. I followed the recipe exactly, but the mixture came out like pancake batter. I used King Arthur flour measure for measure gluten free flour, as other commenters mentioned that they used it with some success, even though it does say on the back of the bag that it should not be used as a 1:1 swap for yeast recipes. After, I found another gluten free dinner roll recipe that called for less liquid, and half the amount of eggs, butter and honey. I used the same flour and it turned out great.
Just made these for dinners I used Pillsbury GF flour. I measured using the spoon method. The dough was more like batter. They had a really good flavor though. Texture was more like a biscuit. I definitely will make them again to see if i can get the right consistency for the dough because we really liked the taste. Any tips?
Hi Sue, depending on the ambient humidity in your kitchen environment, you may need to add a little extra flour to get the dough to firm up.
Just made these, planning to have them with soup tonight. I used cup4cup, my dough was alittle soft so I used a muffin (also I am still unpacking, so that was easiest lol) I noted the dough set up alittle after scooping. I am thinking next time letting it rest a few minutes before scooping. Overall very good, love that it has honey as the sweetener 🙂
Hi Audrey,
I just finished baking these dinner rolls and I want to thank you so much! I have tried many gluten free recipes and yours is top notch!!! They are fluffy and amazing. I have 1 question: For me, they are sweet and I must not have so much honey. Would you be so kind as to advise what else (not sweet) I could replace most or all of this with?
With much gratitude,
Melly
Hi Melly, you can try maple syrup, light corn syrup, agave nectar, molasses, or a mixture of granulated sugar and a small amount of liquid (like water) in a 1:1 ratio as a replacement for the honey.
Thank you for replying. I will try altering the amount of sugar/honey in the recipe and hopefully it will turn out ツ. I used Ardent Mills GF flour for others interest.
These rolls are outstanding! I used King Arthur BREAD flour. Easy recipe that everyone loved. You really can’t tell that they are gluten free! Also, the ice cream scoop idea worked great! 🙂
Vegan as well as GF can we substitute the eggs?
Hi Leann, we have not tried substituting the eggs but would recommend an egg replacer, such as Bob’s Red Mill.
Is it possible to make these without a stand mixer?
Hi Glenda, yes, but you will need to knead the dough by hand.
I made these and am a Believer! Gluten Free can be Tasty and Fluffy. I didn’t want to stop at one. Only been Gluten Free for a year now and these are the Best Tasting, Best Texture Gluten Free breads I have found. They are easy to make. I used Premium Gold GF Flax and Ancient Grain All-Purpose Flour. I am impressed enough that I would give higher stars if I could. I will also be checking out your other GF recipes. They are too good to just be a one shot success. Thank you!
I totally agree. In fact I was amazed when I made them last night (12/8/24). It was the first time I have created something light and fluffy with gluten free flour! Definitely in my stack of recipes to keep. Thank you, Audrey!
The best gluten free dinner rolls! I thought they’d have more of a texture like a biscuit but I was wrong. They are so soft and fluffy and delicious! Honestly, better than store bought dinner rolls. Only adaption I made was using King Arthur GF Bread Flour.
Similar to other comments, mine turned out more like a soupy cake batter than a dough… no idea what went wrong.
Hi Shannon, what brand of GF flour did you use? Only certain brands are recommended for yeast baking. We recommend Pillsbury or Better Batter brands. We also highly recommend measuring by weight whenever possible for the most accurate results.
I bought the pillsbury GF flour made 1/2 of the 3Cup flour recipe to sample it. The rolls seem dry and need better flavor. I have to try it with some tasty nut flour walnut,peacon, almond coconut flax seed. I’m very new to GF baking so I would love your suggestions?
Hi Sandy, we have not tested this recipe with other flour types, so we cannot advise. However, we highly recommend using a kitchen scale to measure the correct amount of flour for the recipe. It sounds like you may have packed the flour into the measuring cup, which can cause these rolls to turn out dry.
These were fantastic! I used King Arthur Bread flour and I did have to add a little extra flour so they held together enough to look like the picture. My celiac husband loved the sweetness of them. He has pretty much given up on GF bread, but he said these are “very, very good”!
Love the taste of these rolls! I used agave syrup and they came out great. One request… do you know how I might adapt for high altitude? (7,000′) They didn’t rise very high, but maybe it was the yeast. I’ll try again. ;0) LOVE your site!
Hi Jeannie, we recommend following these tips! https://gfjules.com/high-altitude-gluten-free-baking-tips/
These were my first attempt at GF rolls and they turned out perfect! I used KA Bread flour and they turned out better than I imagined!
Amazing!!! I can’t believe how light and fluffy these turned out. I needed to add a bit of extra flour so the scoops would hold their shape, and I’m going to try reducing the honey as they are very sweet, but absolutely the best yeasted gf buns/bread I’ve ever made. I froze my leftovers and they toast up just as good as new. THANK YOU!!!
unfortunately these did not turn out well at all. I followed the directions very carefully down to making sure eggs were room temperature, and spooning flour etc. after mixing in the stand mixer it was already not looking good. I know the recipe says it will be a “sticky” dough but this was so sticky it couldn’t be formed into much of a resemblance of a ball. I did not add any flour (I should have) as I wanted to be precise to the recipe. I put them in the tins and left them to rise…they didn’t rise from what I can tell. when I baked them they went a good colour but still didn’t get much bigger, If at all. they came out like little odd scones. luckily, we had these with soup, so I called them “soup biscuits” and we still enjoyed them…but I won’t be making these again they were very dense and tasted too much like honey. quite disappointed as I made these especially for a gluten free guest. luckily he quite enjoyed them since he never gets to eat bread of any kind it was still a treat, but absolutely not what they were supposed to be.
Hi Tayah, what brand of flour did you use to make these? Different brands of flour will yield quite different results.
hi. can I make this recipe in my bread maker on the “dough” only setting., then let them rise and then baked these in my oven!?
It should work just fine!
Made this for Easter dinner with the family and it turned out great. They were gone very quickly. I used grandpa’s kitchen flour and canned coconut milk. This recipe is a keeper.
Best GF rolls fluffy with a little sweetness and so easy !!!!
Someone tell me what I’m doing wrong. I’m following the recipe to a t. The rolls taste so good but the last 2 batches I made were very dense and didn’t rise. They almost seemed like biscuits. I’ll keep trying because they still taste delicious. I just want to know what I could possibly doing wrong.
Hi Theresa, it sounds like either the dough is overworked or your oven temp may be off. If you have access to an oven thermometer, we recommend checking, as the temperature can vary quite a bit. Gluten-free breads get most of their rise from the heat of the oven, so temperature is super important!
Is it possible to replace the eggs with something else? My granddaughter is allergic to eggs.
Thank you!
Jeanine
While we haven’t personally tried an egg replacement, we think that flax eggs or aquafaba (1/4 cup per egg) would work best.
These were soooo delicious! I couldn’t stop eating them. I couldn’t find the Pillsbury gluten free flour. I used Better Batter gluten free flour. The Better Batter gluten free flour worked well but it is pricey. Thank you for this recipe!
This is not turning out AT ALL as indicated in the recipe. I followed it exactly, checked ingredients carefully, used a gfap blend recommended for yeasted bread, and double checked measurements, and did not end up with any kind of dough able to form into balls at all, but a soupy. gloppy batter that looks like it *might* maybe bake bread but will in no way form any kind of shaped bread. I have been baking gf for over a decade and I have NEVER had a recipe turn out so unlike the description. I am profoundly disappointed. I’m pouring this into a pan to hope I can at least get bread but I’m beginning to fear like trusting this recipe is a waste of expensive ingredients. So dissapointed!
I followed the recipe to a T and I didn’t end up with dough, I had a batter. I flopped it into the pans and I’m waiting to see if it will raise. I’ve been baking bread from scratch since I was 12 years old and I’m now 68. This is the second time I’ve tried gluten free flour. It’s my last.
can the unbaked dough be frozen so I can bake half at a time?
Hi Pat! Yes you can definitely freeze this dough. Bake immediately no need to thaw it before baking.
These tasted absolutely delish! My only issue, which is definitely my fault, is they fell apart. I did recipe exactly as instructions, but when lifting out of pan and buttering, they crumbled. They do not look as pillowy as the photos.
Definitely going to try again, but wish I knew where I went wrong!
Can I make these rolls using Cup4Cup multipurpose flour? Has anyone tried it with the
Is recipe??
Hi Nathaly –
Cup4Cup is the only flour I ever use. And I use almond milk. All the other ingredients are the same. They turn out fantastic! I’ve been making her rolls for several years now. Good luck!
I make this bread in my bread machine weekly. I often add fresh garlic. Even my whole wheat bread lovers enjoy this one.
Delicious! thanks so much for this recipe!! My husband loved them ❤️
These are the best GF rolls! I’ve tried different GF flours, but Pillsbury produces the best rolls (unfortunately, it is hard to find this brand in my area). These rolls have a nice light flavor of honey. Definitely a family favorite! I follow the recipe exactly with the rolls baking in the middle of the oven.
I used Pamela’s gluten-free all purpose flour mix with xanthum gum already in it and the rolls were heavenly! My daughter-in-law found them a bit sweet for her taste so next time I will cut the amount of honey in half.
These were delicious, especially with butter on them (cut in half, like a biscuit)! I only wish they stayed fresh longer, but maybe if I froze them, they would. (FYI, I used agave, instead of honey. And they tasted scrumptious, like sweet Hawaiian rolls!) 😋🤤
I’ve been making this dinner roll recipe for a few years now. It is easy to make and absolutely delicious!!! You will love this recipe!
Best gf dairy free rolls I’ve not only made, but had or bought. I used Divided Sunset all purpose gluten free flour which has xantham gum in it. You can get this flour at walmart. Also I followed the heating instructions (milk at 110-115, softened butter, room temp eggs) and my rolls have turned out amazing twice now. My family liked them better than regular rolls at Thanksgiving dinner!
Thank you so much for this recipe!
I used King Arthur 1:1 GF sub for wheat flour even though it said it is not recommended for yeast recipes and it worked well. I also used 1/2 cup apple sauce instead of 2 eggs, and in place of honey, used just over 1/2 cup of sugar and added about 1/4 cup more warm milk to the recipe while mixing. It turned out well and the Sister for whom I made this said the rolls are just like regular ones. She was so surprised and grateful!
I also made GF pizza, soda bread and regular GF bread from your website and they all are delicious according to our sister.
Thanks again and God bless!
made these for Thanksgiving today and they turned out quite well. not gummy inside which frankly it’s the first gluten-free recipe I’ve made that wasn’t. the hubby really likes them. do you happen to know if there’s a way to store the dough so I can make them fresh in smaller batches?
I know this is an older post but my household just became gluten free a couple months ago and my son also has to be xanthan gum free. so, I looked at the floors used in the Pillsbury flour, purchased them individually and mixed them myself. I didn’t add anything to replace the gum.
I have successfully made these rolls and they are FABULOUS!! this has restored my faith in being able to enjoy baked goods again.
thank you so much for this recipe!!! ps. I ended up having to add a TON more flour because mine was literally liquid. I just added until it became the right consistency and it ended up being 7cups!!! no idea why lol but they are fabulous!
The best I’ve ever found!
Oh my word! I made these and we LOVED them! They taste so good and the texture is great! I love that the recipe is easy to follow! I made them with Walmart Gluten Free flour. I’m going to try them as burger buns sometime soon. Thank you so very much!
Doesn’t the Pilsbury gf flour have xanthan gum in it? Do you add more to yours or leave it out? Thanks.
Hi Kathy! The Pillsbury gluten-free all-purpose flour already has the xanthan gum in it. You do not need to add it to the recipe. Thanks for asking. I hope you enjoy the gluten-free rolls!
I used the King Arthur measure-for-measure flour and they came out well I think. I was hoping they’d be more like traditional yeast rolls, but they are still good. They must be, I just ate like four of them.
These are delicious! Made just as it is written but I used a large ice cream scoop which only made 13. Placed them on a baking sheet and use for sandwiches. Thank you so much for sharing your recipes.
There is so much to love about this recipe: readily-available ingredients, a dairy-free option, easy instructions, and amazing taste + texture! I have been missing my grandmother’s yeast rolls, which were a staple at every Christmas dinner during my childhood, and these are close enough to fulfill my desire to eat Grandma’s rolls again! I made half a batch, in case they didn’t turn out as anticipated, but I was not disappointed in the least. I also stirred them by hand, since I don’t have a stand mixer. The only thing I think would be a helpful change is a weight measurement amount for the flour. I measured my flour exactly as described in the recipe, but I could tell the finished dough was still too soft when compared to the photos. I added a couple more spoonfuls of flour, stirring between each addition, until it looked right. If the flour was listed in weight as well as cups, those of us with scales could get the measurement just right. Thank you so much for this recipe! I will probably be baking these more than I should. 😉
my first try making gf bread dough. Easy, versatile, delicious dough. I used this dough for Runzas ( bierocks) and it came out perfect. I am going to make bread and dinner rolls next. Thank you for the easy step by step instructions on making a great dough.
I love runzas. I’ll have to try that.
These rolls taste amazing!
Can I use regular yeast instead of fast rising yeast? I live in high altitude and I only use regular yeast. I love all of your recipes, so happy you have a dinner roll recipe. Your biscuits are awesome!
Hi Jackie! If you use regular yeast you will need to activate the yeast and you will need to double the rising time. Thank you so much for your kind words. I am so happy to hear that you love my recipes!
they were a little sweet for my tastes, but the kids loved that part. i loved having rolls (could be because i had to use syrup since i was out of honey haha). it’s been so long since i had a good roll. thank you so much! i used cup for cup flour and it had a…eh a bit of a gf flour taste but im getting used to that. next time I’ll try a different kind of flour but i will 100% be making these again.
my sister in law made these for me because I have celiac disease and brought them to Thanksgiving. immediately asked for the recipie and had to keep myself from eating the whole pan. literally the best recipie in the world for GF Rolls. I used them as a sub for my familys cinnamon pull apart bread recipe too and they’re just as good as I remember the glutinous version being. such a versatile recipe. a million thank yous for sharing this!!!!
These turned out great! I don’t have a kitchen mixer, so stirred by hand by it seemed they still came out fine. Mine were just the slightest but gummy still, but I used Namaste GF flour blend so may try another one next time. But even so…. these were so good and super easy! will definitely make them again.
My uncle, who has been gf far longer than me, gave me a big grin and said “these are great!” I used Divided Sunset gf flour blend with great success. Thanks!!
I have wasted so much gluten free flour trying to make dinner rolls. I made these for Christmas and they were fantastic! Thank you so much! They are better than most non gluten free rolls!
Amazing! First time making rolls and it was easy! It also freezes really well. The next day I had some toasted slices with butter for breakfast, yummy! Thanks for the recipes and detailed instructions.
I am DYING! These were the simplest, most fantastic-tasting GF rolls I’ve EVER had! Even my gluten-eating family members said they wouldn’t have known they were GF if I hadn’t told them. I am absolutely ecstatic over here. Thank you!!!
I love these as rolls. I always used Cup4Cup flour. I fill muffin tins and have nice rolls. I also bought bun pans an made hamburger buns and these are fantastic. The bun holds together for the entire burger! Then, I bought a square bread loaf pan and made bread. Perfect for sandwiches or toast. Tonight, I used this recipe to make cinnamon bread. It’s so easy and quick. It freezes very well. Thanks!
Best GF bread I’ve ever tasted. I used Bob’s Red Mill All Purpose GF. I added some extra flour after mixing, maybe 1/2 cup. Since I didn’t have GF dedicated pans, I lined mine with foil & then sprayed. Also covered with paper towels because I don’t trust my towels to be GF. The only change I’ll make next time is adding a little more salt. (probably an extra 1/2 t)
Made these tonight with Cup4Cup gf flour and omg thank you so much for this recipe! I had almost given up hope on being able to make the rolls for Thanksgiving this year and these rolls really raised my spirits!!
Did the Cup4Cup multipurpose flour work well? I want to make these but I’m not sure how it will turn out.
For my fellow Low-FODMAPers, I replaced the honey with maple syrup and they turned out amazing!
I’ve run out of honey and was wondering if maple syrup would work well for these dinner rolls. So, thanks for your comment which confirms that maple syrup works well.
These are the best gluten free rolls. And they are easy to make. My family loves them an I even serve them to guests. They freeze well too.
I made these last week for a family dinner and I made them dairy free as well and my family loved it!!! I have been wanting to try these and so excited to make them during the holidays 🙂
Good and easy recipe, tastes great for GF!!! I have been searching for a good yeast roll for 2 years and finally FOUND ONE!! Thank you. I only cooked 9 rolls just to “test” this recipe. I do this as I have wasted so much of the expensive GF products after reading “how great!” this tastes and how “soft and moist” this bread is to find out those are not correct comments/reviews. Every one of them either failed after several attempts or tasted like cardboard with a sand topping. I have found authentic foods super fine ground flours to be the best to use (but not their bread flour mix or other mixes, just the individual flours) and made my own mock Better flour blend. Easier and cheaper for me since I live way out in the boonies with no stores within an hour drive that stocks. Anyway, good moist not gummy, flavorful and this DOES freeze nicely to thaw as needed. So am making the full recipe and storing them. So nice to have a good roll (also larger size makes a great bun) to eat now after so long. Thank you Audrey!! The meat loaf is great too – family loved it – no left overs.
My sister, who lives with me is dairy free and gf. She has been complaining that she really doesn’t like any of the bread products that are available in the supermarket. I made these for her and she is absolutely over the moon. She uses them not only for dinner rolls, but also as a bun for a burger and other sandwiches. We both love them, actually, I’m just saving them for her. Thank you Audrey. God bless you.
My favorite gf dinner rolls! Easy and delicious!
These turned out absolutely perfect! I was a little worried because the dough seemed looser. Not thick and stretchy like traditional dinner rolls. I followed the recipe to a T and they turned out great! I didn’t have an ice cream scoop so I used a 1/4 cup measuring cup sprayed with non-stick spray so the dough was easier to transfer. I also halved the recipe. My husband turned his nose up when I said gluten free, until he took a bite warm out of the oven and he was sold! Thank you so much for the recipe and all the suggestions!
These are the best gluten free rolls I’ve ever made!! Thanks for sharing your recipe!!Dawn
My mother is coeliac and hasn’t had anything like this in a long time. She loved them and we are freezing some to see how they go being defrosted/heated in the microwave wrapped in a tea towel. Just wondering if the honey can be reduced to make them less sweet or does it play a structural role in the rolls? Thanks so much for the amazing recipe – will definitely be making again!!!
Excellent! As described, these rolls are super soft. I tried half batch (9) dinner rolls, and they came out great (maybe needed a little more salt). By using half batch each dinner roll was approx 50 grams of dough. I think I will up the recipe so each dinner roll is about 65 grams (just a little bigger). I will also add a little more salt to the dough and use salted butter instead of unsalted. I used Better Batter Original Blend gluten free flour. I will experiment with a different GF flour as Better Batter is expensive. I am also testing a few of the rolls by putting them into the freezer to see how they are after a few days frozen. Thank you for the absolute BEST GF dinner roll recipe.
These are wonderful! My son has many food allergies and recently we have been testing egg to see how he tolerates it. Made these tonight and he loves them! Thanks for the awesome recipes!
Oh, my. Had not heard of this website so I took a chance. Wow! Some of the best rolls…ever! Pillowy soft, flavorful. Had to stop myself from eating the whole pan. By the way, thanks for the tip on 200° F. Helpful. Love the use of honey. I used GF Jules flour. These are going on Facebook. Yum!!!!
Best and easiest gf rolls.
Best and easiest gf rolls I’ve ever made!
This is, by far, our favorite dinner roll recipe ever! We have grandkids with allergies to soy, peanuts, eggs, dairy, and wheat. So, as their Nana, my quest is to make them treats they can’t normally have. For this recipe, I used flax milk, Melt (plant based “butter” spread), and Authentic Foods Multi Blend Flour. For the eggs, I used a blend of 3 tablespoons oil, 3 tablespoons water, and 2 teaspoons baking powder. All I can say is “wow”! We call them “Christmas rolls” which is the first time I made them. Thank you so much for this recipe. My grandkids think I am pretty cool!!
Thank you for the tip on eggs. For my Vegan person!
My family cannot get enough of these! I use Bob’s Red Mill 1 for 1 Gluten Free Flour. These are a staple in our homes!!
Hello! These were fabulous!
I made a 1/2 recipe for Thanksgiving, and they were a total hit. I made a full recipe tonight. One half went into my pie plate. The other one I did like this: 1/2 half scoop into a muffin paper that had been sprayed with avocado oil. Then cinnamon-sugar. Then the other 1/2 batter. Then cinnamon-sugar. I then took a toothpick to swirl a bit. A quick final sugar dust. Rise and bake. I made about a 1/2 cup of a quick vanilla paste icing that I served optionally. There’s only one cinnamon one left. It turned out like a cross between the best cinnamon roll and monkey bread. I have not had an edible cinnamon roll in FOREVER! Thank you.
Fantastic!! I use Better Batter flour and instant rise yeast (Saf) and let the rolls rise in a proofing oven for 2-3 hours. Very fluffy rolls.
Love these rolls. Made with gluten free rice flour mix and turned out great. The only problem is they made my sugar go up. Now I make them with almond, coconut and tapioca blend. Mine aren’t fluffy. They are a little doughy but even my picky gluten eaters enjoy these rolls. Any suggestions on how to make them fluffier using my flour blend.
I am so happy that you enjoyed the rolls Ora! Using almond and coconut flour will not be as fluffy as using a rice flour blend. Baking with almond and coconut flour makes for a more dense crumb.
Although they didn’t rise very well, they still tasted terrific! My family devoured them at Thanksgiving dinner not realizing they were gluten and dairy free. I had to laugh because I also made traditional buttermilk biscuits for those in my family that usually roll their eyes at my gluten free cooking and baking. Some even asked if there were extras to take home. Thank you for sharing this recipe!!! They were wonderful! I will be making these more often for sure!!
I am so happy that everyone enjoyed the rolls! Can you please tell me which brand of gluten-free flour you used? Not all brands are recommended for yeast baking. That may be why your rolls did not rise like mine. I am so happy that you will be making them again. Thank you so much for the wonderful 5-star recipe review!
Hello, I love this recipe and it worked out great! My wife and sister-in-law have celiac disease and they loved these rolls. Some of my family members who do not need to be GF loved them too which is usually a good test of a gf roll recipe.
I just made these for tomorrow. Thanksgiving with my Kid and his family. These are AMAZING!!!!!!!!!!!! Soft fluffy and so delicious. Thank you so much for sharing. I will be saving this link for a later date to make again. <3
I wanted to make this Thanksgiving extra special for family members who are celiac, and got in the mission of finding THE BEST gf dinner rolls. I tried six different recipes from different blogs, before I came to yours, and yours was the winner BY FAR!!! 😍😍😍 My family loved them so much!! Thank you so much for sharing your talents!
Made this gf sf roll for Thanksgiving and they were such a huge hit!! Not one left and everyone wanted the recipe!!!!thank you for the recipe and these are the best gf at rolls I have made!!! The flavor is amazing !!
OMG!! So, delicious. Thank you!!!!!
Mine turned out ugly not like the picture 🤣because i didnt have an icecream scoop and didnt bast the tops but they are delish perfect texture. Turned out like real rolls. I used ‘not milk’ brand dairy alternative and soy free earth balance. The recipe was simple and easy to follow which is hard to find of gf breads. I am really happy with how these turned out. Thank you.
These turned out excellent – The recipe was easy and it’s not obvious that they are gluten free. I brought them to our Thanksgiving family dinner and everyone liked them. Ty!
These dinner rolls are delicious! And easy to make! Thank you for all your yummy recipes!
I was wondering what size scoop you used, mine was to small because I had to add more to each roll after scooping the rolls out. Also mine spread after they were in the pan, maybe a little less milk next time? And mine didn’t brown very well. My husband is the one that has to eat gf. I know he will enjoy these rolls immensely. Just wondering how I can improve so I can do better next time. I have been cooking and baking for my husband about 20 years now and the bread baking is the hardest, even after all this time. But your biscuit and dinner rolls recipes are real winners. Thank you so much for sharing them.
Hi Kathy! I use a standard-size ice cream scoop to make the bread rolls. Can you please tell me which brand of gluten-free flour you are using? You may be getting different results (spreading, not browning enough) if you are using a different brand. I am going to send you an email too. You are so right, that yeast baking gluten-free is the hardest. I am so happy to hear that you and your husband enjoy the rolls and the biscuits.
This recipe is easy to follow! I’m practicing recipes to make sure I can do it for our Thanksgiving meal. I used Vitacost Gluten Free flour and used avocado oil instead of the spread and they came out great. I’m also bringing the Southern Corn Bread too. Also delicious!
I’ve made this every week since discovering the recipe! Particularly delicious when you spread on high quality salted butter. 🧈🍞😋
Hi can’t get pillsburry flour over here so I have to use bob’s red mill 1to1 flour I hope It’s OK please let me knaw soon
Hi Rose! Bob’s Red Mill is not recommended for yeast baking according to their website. I order the Pillsbury gluten-free flour from Walmart. I also like Better Batter gluten-free flour for yeast baking.
I just made these and I used bobs red mill gluten free 1-1 baking flour because that’s what I had right now along with almond milk and they are amazing! My kids liked them better than my paleo dinner rolls.
I used King Arthur baking because I couldn’t get Pillsbury either. King Arthur’s turned out great. It had a wonderfully wheaty flavor.
Excellent! However, I added an extra 3/4 cup of gluten free flour. The consistency was too wet with only 3 cups. Everyone loved them! Even those who can eat gluten! This is a keeper!
I am so happy that you enjoyed the rolls! I would love to know which brand of gluten-free flour you used. Not all gluten-free flour blends absorb liquid the same. I am glad that everyone loved the rolls. Thank you for the wonderful 5-star recipe review!
My family loves these rolls! I use Cup4Cup brand and usually have to add 1/2-3/4 C extra flour.
Recipe is so good for these buttermilk biscuits. Family really enjoyed them.
Since I found this recipe I now use it to make for all holidays and special occasions. Even people who are not GF love this recipe. Thank you so very much. I love when i can make food for me that my families love as well. It’s awesome to be able to share this recipe with others when they ask “Can I have this recipe.”
Delicious
The best soft GF dinner rolls I’ve ever made thanks to your recipe from one Mama to another.
Just tried and the rolls were fantastic and moist. I used almond milk. Next time I will use just water or low fat milk. I do very well with baking glutten free desserts. The breads are my problem. But this recipe is a keeper and I am going to try it again.
These were amazing I’ve just started cutting out gluten and wanted to try a dinner roll to make to have with soup. These didn’t disappoint. I made them with just regular gluten free powder I had on hand and I made a chia seed gel to use instead of the xantham gum. They worked out amazing and extra nutritious 🙂 Super easy to make too!
So good, even my non-gluten free family members love them and they don’t last long.
Absolutely Fabulous recipe! The subtle taste of honey is divine. Since going gluten free 12 year’s ago, I’ve not had anything like this!! My husband and boys are also huge fans, and can’t wait until I make another batch. I used the Organic Namaste flour I had on hand and it worked wonderfully.
Audrey, THANK YOU! I have made gluten free bread using so many different recipes before and this is by far THE BEST recipe. The dinner rolls come out soft and fluffy and without any weird gluten free taste. I will try using this recipe to make bread loaf and hope it will yield the same result. Note: I used Bob’s Red Mill Gluten Free All-Purpose Baking Flour for this recipe.
These were great. My daughter has a honey allergy so I used agave nectar and it worked great.
The Best! Thank you for this amazing recipe! It will now be written into our family cookbook and used by generations to come.
Made these for Thanksgiving and my picky daughter loved them. Of course I didn’t tell her they were gluten free until she was enjoying her second one. Husband loved them too and I was so happy to have a roll to enjoy with my meal since I am trying to get used to eating gluten-free.
This is the second Thanksgiving I have made these rolls plus several times in between. My family (my daughter and I both have Celiacs and her husband is gluten free by choice) loves them. Last Thanksgiving my neighbor who is gluten sensitive couldn’t believe they were gluten free.
I am a huge fan of all of your recipes, so I expected this one to be good as well. But… it was even better even than my already high expectations! I haven’t had delicious rolls like this in years! My niece and I made them for Thanksgiving, and the recipe was so easy to follow. I made your Dutch apple pie as well, and I can’t wait to dig in to that later.
If I could rate 10 stars I would! Easy, excellent prep and mixing. Produces the most delicious tasting rolls ever!
Excited to try for my mother who is gluten free! Do you add the xanthan gum with the pilsbury gf flour? Thanks!
Hi Beth! Pillsbury gluten-free flour already has the xanthan gum you do not need to add any more xanthan gum to the recipe. I hope you enjoy the rolls.
DELICIOUS!! Thank you so much 🙂 I was afraid I did something wrong since the dough wasn’t really rising well, but they are perfect… they’ve risen further while baking…I used Schär Mix B, a German glutenfree flour blend (I live in Belgium).
Thank you so much for sharing your recipe! This has been the best GF dinner rolls/bread that I’ve eaten since being GF. My non GF husband and children loved them too. They asked me to make them for Thanksgiving. I was wondering if I used less honey do i need to increase the milk?
Super good! AND Super easy! *my daughters favorite item at Thanksgiving was always the self rise rolls that I used to make. She was diagnosed Celiac this past year, so I wanted to find a GF version to surprise her. I was so impressed with these. They are really, really good!!Thank you in advance from my daughter : )
OMG theses are absolutely fabulous! Thank you. One question, do the freeze well?
I made these today. I used King Arthur one to one baking flour. They were amazing!!! Next time I’ll use less honey if I want them to be less sweet. The texture was spot on. I didn’t have an ice cream scoop so I oiled my hands and rolled them into a ball.
Thank you!!! Just made these and they are amazing. So excited to have GF bread recipe that works!
These rolls are easy to make and are absolutely delicious! They are soft on the inside and nicely browned on the outside, and they taste like regular bread, just a tad sweeter. The only thing I did differently was to add 2/3 C. almond flour in adddition to (not as a subsitute for) the all-purpose gluten-free flour. I shared them with a neighbor who also is GF, and her family devoured them in about 60 seconds. I will be making them for Thanksgiving and cannot wait to try the cinnamon rolls!
Once again a most wonderful recipe from our “mama”! The rolls were absolutely delicious – my family was so excited!!!
These are fabulous rolls. Such a lovely recipe. Will be a stable in my household from now on. Glad I found your recipe. Many thanks on****** ❤️
These tasted really good! I was a little nervous because the dough was so thin, but they turned out to be tasty! Do you know if this recipe would work as a loaf of bread in a bread machine! Thanks!
I used cup4cup flour. Turned out delicious
Finally!!!! Thank you soooo much, Audrey!! I am absolutely in love with this recipe, even posted it on my Facebook page (@theunscrambledhome) and shared with a few GF Facebook groups! Question, have you made these into hot dog buns? If so, do you have a particular method or pan you would recommend?
I am so happy that you enjoyed the rolls Marnie and thank you so much for sharing! I have not tried making hot dog buns with the dough. If you do can you please let me know how they turn out? Thanks again!
Finally!!!! Thank you soooo much, Audrey!! I am absolutely in love with this recipe, even posted it on my Facebook page (@theunscrambledhome) and shared with a few GF Facebook groups! Question, have you made these into hot dog buns? If so, do you have a particular method or pan you would recommend?
Love these rolls! Can you freeze these after baking?
EXCELLENT recipe! The cake like consistency surprised me but they are amazing! Better than ANY store bought brand I’ve tried! Will be making these forever! Thank you so much for sharing with the gluten free community!
Delicious, fluffy GF rolls. I added a teaspoon of xantham gum despite my flour mix containing it, and it turned out great.
Finally, I can make my own gluten free dinner rolls! This recipe works very well. As I don’t have a dough hook, I decided to work the dough by hand. It worked well, as long as you don’t over do it. Thanks for the dairy free option which I will try next time I bake them.
I am always looking for recipes to help my friends that are gliutten free that is good and that even I would enjoy. I love to bake , my friends love my breads. Thank you, I need more recipes.
I’ve come back to this recipe over and over and it comes out always better than I can imagine! I’m living in Europe where the gluten free brands are slightly different but this recipe still works. I actually ran out of honey this time and just substituted agave syrup. Also ran out of GF flour and put together a mix of GF flour, rice flour and oat flour. Still tastes delicious. Also love your GF pancake recipe. Thank you Audrey!
Just made these dinner rolls along with a London broil and baked vegetables for dinner, but these stole the show! They were so sweet and fluffy, almost more like a biscuit but not dense at all. I halved the recipe because I did not need 18 rolls and thank God I didn’t because we ate these in 20 minutes, so I’m sure it wouldn’t have taken long for us to down 18. So good,keep up the good recipes.
The search is over! I have found the best recipe for gf, df, and refined-sf dinner rolls!
I am cooling the batch I just made for my son who has PsA. I couldn’t help but eat two rolls!
Thank you very much for this recipe. You don’t know how happy my son will be to have dinner rolls again. This Mama (all the way in HongKong) is very grateful.
These are the BEST gluten free rolls we’ve had in 20 years of celiac disease! Thank you so much!!
Thank you so much Laura for the awesome 5-star recipe review, it really made my day! I am so happy that these are are the best gluten-free rolls you have had in 20 years. This really made my heart happy. You are so welcome, I love sharing the recipes I make for my family. Thanks again!
Great rolls! Mine batter was a bit runny. I followed spoon and level gf flour and other measurements as directed but used a different brand – Krusteaz. So that may have been the reason. So I proofed and baked in a greased muffin pan. Still turned out great. Thanks for the recipe.
Thank you so much Annalisa for the wonderful 5-star recipe review! I am so happy that everyone enjoyed the rolls. Namaste gluten-free flour has arrowroot starch and sorghum flour in it. Sorghum does not absorb liquid the same as rice flour, so that is why the batter was a bit runny. I am glad that they turned out great. You are so welcome, I love sharing the recipes I make for my family. Thanks again!
I have had celiac spru my whole life. I have never had a roll until maybe 3 years ago… I’m 31. Haha well I got ambitious a few weeks ago and made your recipe and can I just say on my gooooooooodness. I can’t stop making them. EVERYONE loves them. Thank you from the bottom of my heart. ??❤️
Thank you so much Mallory for the awesome 5-star recipe review, it really made my heart happy and blessed me! I am so happy that you are enjoying the rolls and everyone loves them. You are so welcome, I love sharing the recipe I make for my family and helping others. Thanks again!
These rolls were AMAZING! I followed the recipe to a T, except I used Chobani oat milk and Country Crock olive oil butter because I can’t have dairy either. Also, I used King Arthur measure for measure flour. The dough is quite runny and I was worried I had messed it up, but after proofing for an hour in a warm area, the rolls had risen pretty well so I popped them in the oven. These rolls are SO soft and fluffy. My husband compared their taste to the Sister Shubert rolls which is a high compliment!!
Thank you so much Lakin for the wonderful 5-star recipe review, it really made my night! I am so happy that you and your husband enjoyed the rolls and they were soft, fluffy and amazing. Thank you for sharing the brand of gluten-free flour and the dairy-free options you used. I love that your husband compared the taste to Sister Shubert, that is a high compliment in my book too! Thank you again!
You made ALL seven of my tribe HAPPY, HAPPY, HAPPY! My supertasters, my GF/DF/SF people *all* ate the *same* pan of bread. My like has been made simpler – and I know you are ALL about that. Thank you SO much!
Thank you so much Joy for the wonderful 5-star recipe review, it really made my day! It makes my heart so happy to hear that everyone in your family enjoyed the dinner rolls. You are so welcome, I love sharing what I make for my family and helping others. Thank you again!
These are easy and delicious, They were a hit at dinner! Thanks for sharing
Thank you so much Jo for the wonderful 5-star recipe review! I am so happy that you enjoyed the rolls and they were easy to make and delicious. You are so welcome I love sharing the recipes I make for my family. Thanks again!
These are the best gluten free rolls I have ever come across! Every holiday season for several years, I have tried out a new recipe for dinner rolls–I am now saving this as my go-to dinner roll recipe. Even better, I made these vegan by using flax seed eggs instead of regular eggs–which worked perfectly! Since the holidays, I have made this recipe several times. I make a batch, keep them in the freezer, and then when I am craving a soft roll, I take one out and microwave it. Thank you–I am so happy to have found this recipe!
Thank you so much Tracy for the awesome 5-star recipe review, it really made my night! I am so happy that you enjoyed the rolls and they are the best you have had. Thank you for sharing that you were able to make these Vegan by using flaxseed eggs, as I know it will help others. You are so welcome I love sharing the recipes I make for my family. Thanks again!
Amazing!! Just like every single one of your other recipes i have tried!! Thank you!!
Thank you so much Mary for the awesome 5-star review, it really made my day! I am so happy that you enjoyed the rolls and you have enjoyed the other recipes of mine that you have tired. You are so welcome, I love sharing the recipes I make for my family. Thank you again!
These were amazing!
Thank you so much Ruth for the awesome 5-star recipe review! I am so happy that you enjoyed the rolls and that they were amazing. Thanks again!
Delicious!! My son is a very picky eater when it comes to breads since his celiac diagnosis and thankfully he loves these rolls!! Thank you for sharing this recipe.
Thank you so much David for the awesome 5-star recipe review, this made my night! I am so happy that your son loves the rolls. You are so welcome, I love sharing the recipes I make for my family. Thanks again!
My family has struggled finding a bread they like since finding out about wheat and dairy allergies. My family LOVES these dinner rolls. They said it’s the best bread they’ve has in years! I’m so thankful for finding this site and benefiting from Audrey’s quest to find good gluten and dairy free recipes!
Thank you Jennifer for the awesome 5-star recipe review, it really made my night! I am so happy that your family loves the dinner rolls and it’s the best bread they have had in years. Your kind words really blessed me. Thank you again!
These are amazing thank you ! They turned out beautifully. However they are far too sweet, can i make with less honey (maybe half?) or use date syrup instead? We want to bake them for burgers
Thank you so much Zuzia for the awesome 5-star recipe review! I am so happy that the rolls were amazing and turned out beautifully. If the rolls are too sweet for your liking, you can cut back on the honey. I have never tried date syrup, so I am not sure how it would work in the recipe. Thank you again!
These turned out beautifully thank you ! A great find. However they are too sweet with the honey, as we want to make them for burgers at the weekend. Could i try with less honey ? maybe half the amount ? Or date syrup ? 🙂
Thank you so much Zuzia for the wonderful recipe review! I am so happy that the rolls turn out beautifully. You can cut back on the honey for making burger buns. I have not tried date syrup, but if you try it will you please let me know how they turn out? Thanks again!
Oh my gosh!! My husband has been eating GF and has had to cut out most bread items. I made these tonight and I was SHOCKED how good they are!!! Thank you!! They are amazing!!!
Thank you so much Jenn for the awesome 5-star recipe review, it really made my day! I am so happy that you and your husband enjoyed the rolls and that they were amazing. You are so welcome, I love sharing what I make for my family. Thank you again!
Thank you for this recipe, along with so many others, from your blog! I made these rolls for Thanksgiving for a church dinner, and they were a hit! We’re making these again today for Christmas dinner! I have gluten sensitivity and understand what it feels like not to have bread options! I love being able to make rolls/bread at home for my family and myself!
Thank you so much LaKeshia for the awesome 5-star recipe review, it really made my day! I am so happy that you enjoyed the dinner rolls. You are so welcome, I love sharing what I make for my family and helping others. Thank you again!
I have tried a few different recipes and they are amazing! They have almost the same consistency that regular rolls have. I used King Arthur GF flour and added 1.5 teaspoons of gum even though it had some in it. The dough was REALLY thin at first so I let it sit for about 30 minutes and mixed it again. Left it again for another hour and mixed it. It was still really thin compared to gluten dough but I read a lot about how that is normal. I had to used my hands to drop them in the pan since they were so soft. Smoothed the top with hot water and let them bake. They were light and fluffy. Thank you for this recipe. These are now a staple in our house. Attempting the cinnamon roll recipe next. Christmas will be amazing!
Thank you so much Torie for the wonderful recipe review! I am so happy that you enjoyed the rolls and they were light and fluffy. I am so glad that they will be a staple in your house. I hope you also enjoy the cinnamon rolls. Thank you again and Merry Christmas!
Made this recipe with paleo flour for my husband and son who are grain-free – delicious! I shared a pan with a friend who is gluten-free and her whole family loved them, too. Will be making again for Christmas. Thank you!!!
Thank you so much Heather for the awesome 5-star recipe review! I am so happy that your family and friend enjoyed the rolls. Thank you for sharing that the recipe worked with Paleo flour, as I know it will help others. I have not tried the recipe grain-free. I am so glad that you will be making them again for Christmas. You are so welcome, I love sharing what I make for my family. Thank you again!
Very yummy!
Thank you so much Eliesha for the wonderful 5-star recipe review! I am so happy that you enjoyed the rolls. Thanks again!
Love these rolls so much! I ran out of honey the first time i made them so i did half honey and half molasses. They were fantastic!!!
Do you think it would work/have you tried to use a flax egg substitute for these?
Thank you so much Jen for the awesome 5-star recipe review! I am so happy that you love the rolls. I have not tried the recipe with an egg replacer. If you try it will you please let me know how it turns out? Thanks again!
Just tried these with two different egg subs. Flax works pretty well! I also tried ACV and baking soda and that batch ended up with more of a cake textured crumb. Still tasty though 🙂
I ran out of honey the first time i made these and used half honey and half molasses and I actually like it better that way 🙂
Thank you so much Jen for sharing which egg replacers worked well with the roll recipe and the tip about the molasses. I know it will help others. I am so happy that you enjoyed the rolls. Thank you again!
I followed the recipe pretty much to a T. Made it dairy free as well. Girl, you sure do know gluten free. These rolls were HANDS DOWN amazing. My husband who has been recently diagnosed with celiac absolutely loved them. I will be making these from now on and will definitely not shy away from making them at our next family gathering! I made them for thanksgiving tonight and they were a hit 🙂
Thank you so much Deborah for the amazing 5-star recipe review, you totally made my night! I am so happy that you and your husband enjoyed the rolls and that you will be making them again at your next family gathering. Thank you again you really blessed me!
Made them for Thanksgiving. I like having non-sugar gluten free options and my nephew absolutely requires it. He was pleased to not be left out of the bread category. I really liked the homespun honey taste, but I need to work on the dough so they look more like rolls and not biscuits. I will definitely make these again!
Thank you so much Beth for the wonderful recipe review! I am so happy that your nephew enjoyed the rolls. You may have had to work on the dough more, depending on what brand of flour you were using. Not all gluten-free flour blends are the same. I am so happy that you will be making the rolls again. Thank you again!
Something I did was i put a light bit of oil on my hands and rubbed my hands similar to if I put lotion on and I got beautiful shaped rolls.
That’s a great tip Mallory! Thank you so much for sharing. I know it will help others.
THESE WERE SO GOOD.
I’m so surprised & happy.
I will definitely make them regularly.
For me they turned out more like biscuits-but I’m not complaining.
Thank you so much Lucie for the awesome recipe review! I am so happy that you enjoyed the rolls, they were so good, and you will be making them regularly. The texture may have been more biscuit-like depending on what brand of flour you were using. Not all gluten-free flour blends are the same. I am so happy that you will be making the rolls again. Thank you again!
I am so excited to try this recipe. My mother-in-law made yeast rolls for Thanksgiving and I was left out. I am gluten-free. I was not diagnosed either, I figured this out on my own. I never saw myself making bread but I would love to try this recipe. Can you use maple syrup instead of honey and do you have a substitute for the eggs?
Hi Janie! I have not tired an egg substitute or maple syrup in this recipe. I have only baked with Bob’s Red Mill egg replacer. If you try the recipe with these modifications will you please let me know how they turn out? Happy Thanksgiving!
Made these tonight for my 13 year old celiac son. He loved them! Thank you!!!
Thank you so much Jill for the awesome 5-star recipe review! I am so happy that your son loved the rolls, this really made my night. You are so welcome, I love sharing what I make fo my family and helping others. Than you again!
These rolls were a fantastic hit at our Thanksgiving table. The directions are very easy to follow. I will definitely be making again. Thanks, Kim
Thank you so much Ki for the awesome 5-star recipe review! I am so happy that the rolls were a Thanksgiving hit, the directions were easy to follow, and you will be making them again. You are so welcome, I love sharing what I make for my family and helping others. Thanks again!
I made these for Thanksgiving. I had to substitute Bob’s Red Milll 1 to 1 flour. They turned out soooo good. Best GF dinner rolls I’ve had in 10 years. They were light and fluffy. Couldn’t believe it!!!
Thank you so much Sarah for the wonderful 5-star recipe review, it really made my day! I am so happy that you enjoyed the rolls and that they were the best gluten-free dinner rolls that you have had in 10 years. Thank you that really blessed me!
Made these in muffin tins. It yielded 18 rolls. Taste great and will be wonderful for Thanksgiving dinner.
Thank you so much Sandra for the wonderful 5-star recipe review! I am so happy that you enjoyed the dinner rolls. Thank you for sharing that you baked them in muffin tins, as I know it will help others. Thank you again!
I just took these rolls out of the oven… oh my….so good!! I was very apprehensive after I mixed the initial dough because I used another blend and, of course, it did not seem as if I would succeed. But I added about another half cup of my blend and they are awesome!!! Thanks for this ‘forgiving’ recipe, Audrey.
Thank you so much Joanetta for the wonderful recipe review! I am so happy that you enjoyed the dinner rolls. You are so welcome, I love sharing what I make for my family. Thanks again!
Hi! I have been watching this recipe for about a week now to see how others liked it. My son is totally dairy and gluten free. He also has an allergy to apple. Any suggestions as to what I can use instead of the apple cider vinegar?? Would love to make these for him for thanksgiving and every day meals!
Hi Jennifer! You could substitute white vinegar or lemon juice in place of the apple cider vinegar. I hope that you all enjoy the rolls and have a Happy Thanksgiving!
Hi! I’m excited to try these at Thanksgiving this year! We have 3 people (including myself and my son) who are GF. Just a question, have you ever frozen these? If so, freeze before baking or after or pre-bake a little?? Thanks!
Hi Marcia! I have never frozen or pre-baked the rolls before. If you try it, will you please let me know how they turn out? I hope you enjoy the rolls and Happy Thanksgiving!
Just made these, as a trial run for Thanksgiving, using King Arthur Measure for Measure flour and Ref Star rapid rise yeast. *They were fantastic!*
I usually host holiday dinners and because I’m GF, there is much gnashing of teeth due to the terrible premade roll options. This year will be different!
Would love to make the dough the night before and bake after the turkey comes out of the oven. If I were to do that, at which point would I refrigerate; after the rise?
Thank you so much for the awesome 5-star recipe review Melissa! I am so happy that you enjoyed the rolls and you will be making them for Thanksgiving. I have not tested making the dough the night before, so if you try it will you please let me know how it turns out? Just make sure that the dough does not overrise, it just needs to rise in a warm place for 1 hour. Thanks again!
We just made the dinner rolls and they are FANTASTIC!! So easy to make and much better than any other Gluten Free rolls or bread recipes I have tried. The texture and flavor are just perfect. They’re delicious right out of the oven, but even warmed up in the microwave (and spread with a little strawberry jam!!) they are delicious. I can’t wait to try more recipes!!
Thank you so much Carolyn for the wonderful 5-star recipe review, this really made my night! I am so happy that you enjoyed the rolls and that they were fantastic and the taste and texture were perfect. I hope you enjoy the other recipe you try. Thank you again!
We have been gluten and dairy free for over a year. This recipe allowed our family to be excited about bread again! Bread doesn’t have to be hard and crumbly just because it is dairy and gluten free!! This recipe will be our go to for spaghetti dinners, dipping in soups and definitely for Thanksgiving! I used coconut milk for milk and coconut oil in place of the butter. Thank you for this delicious recipe.
Thank you so much Ronnie for the awesome 5-star recipe review, you really made my night! I am so happy that your family enjoyed the dinner rolls. Thank you for sharing which dairy-free alternatives you used, as I know it will help others. You are so welcome, I love sharing what I make for my family. Thank you again!
The flavor and texture were wonderful. Even my 4 year-old grandson loved them!
Thank you so much Susan for the awesome 5-star recipe review! I am so happy that you and your grandson loved the rolls and that the flavor and texture was wonderful. Thanks again!
I love these rolls so much! And I am a huge fan of your other bready gf delights as well. Thank you for sharing your recipe!
Thank you so much Lorraine for the wonderful 5-star recipe review! I am so happy that you love the rolls and other gluten-free recipes. You are so welcome, I love sharing what I make for my family. Thanks again!
Absolutely LOVED these dinner rolls!!! After going 2 years without a dinner roll after going gluten free; to find your recipe was a God send! Every bit as good as a regular dinner roll and they warm up beautifully the next day too. Holidays will be great again for me! Yay! Thanks Audrey so much! I’m interested in trying this recipe and make the rolls bigger and longer to imitate hamburger and hot dog buns, will have to bake a little longer but they would be delicious I think!
Thank you so much Susan for the awesome 5-star recipe review! I am so happy that you LOVED the dinner rolls. You really made my day! You are so welcome, I love sharing what I make for my family. Please let me know if you try making bungs with the recipe, I would love to know how they turn out. Thank you again!
Hi I’m brand new to DF & GF, do you have a recommendation (brand as well) on what to sub the butter with? Thank you!
Hi Anna! I like baking dairy-free with Smart Balance buttery spread. Please let me know if you have any other questions or if I can help you in any way.
I made these for Thanksgiving, with both gluten free and mainstream eaters. Everyone loved them and went back for more. These have been added to my holiday repertoire for sure!
Thank you so much Miri for the wonderful 5-star recipe review, it really made my night! I am so happy that everyone enjoyed the rolls. Thank you again!
I just made these today. They’re great! I used the Bob’s Red Mill Gluten Free 1:1 Baking Flour, and they turned out just fine. Mine didn’t make 18 though, only 11. I guess I made mine a little bigger than the recipe calls for. They taste great, though.
Thank you so much Jen for the wonderful 5-star recipe review. I am so happy that you enjoyed the dinner rolls. Thank you again!
By far best homemade GF bread recipe yet. I’m not a huge fan of honey, so next time i will halve it and use sugar water (simple syrup) in its place. So glad i found this so i can eat tomato sandwiches this summer! Thanks Mama!
Thank you so much Stacy for the awesome 5-star recipe review! I am so happy that you enjoyed the rolls and that you will be able to eat tomato sandwiches this summer. I’ve never tried it with simple syrup, so please let me know how it turns out. You are so welcome, I love sharing what I make for my family. Thanks again!
Made with simple syrup today. Simple syrup is 1:1 water and sugar. I microwaved the water, added the sugar and stirred to dissolve. Put it aside to cool a bit then added in the recipe when it called for honey. These came out just as good! Slightly different flavor, but same rise and texture as with the honey. These will be perfect for sliders and small sandwiches ????
Thank you so much Stacy for letting me know how the simple syrup worked in the recipe. I am so glad that it came out just as good! This will help others. Thank you again!
can Lactosefree milk be used?????
Hi Sharon! Yes you can use lactose-free milk in the recipe. Thank you for asking. I hope you enjoy the rolls!
Thank you for mentioning that you made these larger for burger buns. I was wondering if they would turn out. I haven’t tried the recipe yet but click 5 stars anyway becasue if they are as good as the biscuits in her biscuit recipe they will be five stars for sure
Thank you so much Ruth for the 5-star recipe review! I hope you enjoy the rolls. Please let me know how the larger buns work out. I am really happy to hear that you enjoy my biscuit recipe. Thanks again!
The best roll recipe we have found yet!! Works well with our flour blend!
Thank you for sharing!
Thank you so much Cindy for the wonderful 5-star recipe review! It makes me so happy to hear that it’s the best roll recipe you have found. I am glad that it works with your flour blend. I have not tired to make my own blend, yet. You are so welcome, I love sharing what I make for my family. Thanks again!
Made these for a family Easter dinner where I was the only one with food allergies. They were devoured by everyone!
The only way that I strayed from the recipe was that I didn’t have instant yeast, so I used Dry Active Yeast and left it to rise a little longer.
They came out excellent, and I will definitely be making these again.
Thank you so much Miriam for the wonderful 5-star recipe review! It makes my heart so happy to hear that everyone loved the rolls. I am glad that the active yeast worked with the recipe. I have never tried it with the recipe because I am not a patient baker. Thank you again, the recipe reviews really mean a lot me!
Thank you for this great gluten free, dairy free rolls recipe. I’d like to try the rolls for Easter. Could I substitute unsweetened soy milk in place of almond milk? We are also avoiding nuts.
Hi Carol! Soy milk sound work in this recipe. I have not tried the recipe with soy milk, because I am sensitive to soy. I hope you enjoy the rolls! You are so welcome, I love sharing what I make for my family.
Thank you Audrey! Tried 1/2 the recipe using my homemade gluten free flour mix. Made 6 burger sized buns. They were sooo good. Almost like regular brioche buns. I’m going to try the next batch as hot cross buns for Good Friday. Thanks again Audrey, Happy Easter!
Thank you so much Hazel for the wonderful 5-star recipe review! I am so happy that you enjoyed the rolls. I am glad to hear that the recipe worked with your homemade gluten-free flour mix. I’ve made buns with this recipe too and they always turn out yummy. I need to make hot cross buns too, such a great idea. Wishing you a blessed Easter. Thanks again!
Thank you for mentioning that you made these larger for burger buns. I was wondering if they would turn out. I haven’t tried the recipe yet but click 5 stars anyway becasue if they are as good as the biscuits in her biscuit recipe they will be five stars for sure
Thank you so much Ruth for the 5-star recipe review! I hope you enjoy the rolls. Please let me know how the larger buns work out. I am really happy to hear that you enjoy my biscuit recipe. Thanks again!
This looks amazing! Trying these for my sister in law that needs GF and dairy free. Quick question, the almond milk, etc. That is unsweetened? Thank you!
Hi Jamie, thank you so much! Yes, I use unsweetened almond or cashew milk when I make these rolls dairy-free. I hope that your sister in law enjoys them!
Just made these two days ago and they were THE best rolls I have made that are gluten free. I would really recommend using the 200 degree internal temp for “doneness.” It was perfect. I made a batch into bread and that worked out as well (I haven’t had a gf bread worth eating – so I could have cried when this one fit the bill).
My husband (who isn’t gf) asked me to make the dough and turn it into cinnamon buns – so I am in the process of raising the buns right now. They look delicious.
I will note that I make my own GF flour and have been fiddling with it for the past year – I think I finally have the perfect combination! Couple my flour with your recipe and fireworks!
Thank you so much Colleen for the amazing 5-star recipe review! It makes my heart so that you and your husband enjoyed the rolls. I am happy to hear that you were also able to use the recipe to bake bread. I love cinnamon buns! Please let me know how they turn out. That’s awesome that you have created your own flour mix. I have not tried that yet. I would love to know what you are using in your flour blend. Thank you again!
The cinnamon buns were wonderful. I rolled the wet dough out on a oiled parchment paper and oiled the top and then rolled the dough. Then I made them just like regular cinnamon buns. I will say that if you are looking for a syrupy bun – you should add more brown sugar/honey than normal (or whatever you normally use – use more of it). The gf grains soak up the moisture more than wheat. I find that I have to let the dough raise 3-5 hours before it gets to the height I want and that is fine. Could be this cold weather we are having slowing down the yeast development. I put a cream cheese frosting on top and everyone loved them.
I would love to share my flour recipe since you were so wonderful sharing your recipe:
All Purpose (but especially good in cookies, pies, bread)
3 cups sweet white sorghum
2 cups tapioca flour/starch
1 cup white rice
1 cup brown rice
1 cup millett
1 cup potato starch
This flour does not have the gritty texture of others. I notice if I use Bob’s Mill stone ground flours it always comes out grittier than I like. I have been buying all of the flours in my recipe at Vitacost – their own brand grains – great price, most are organic, non-gmo, and I don’t have the gritty factor at all. I mix it myself.
This recipe is the closest I have come to the wheat flavor I craved and the texture is the closest as well. I add quinoa and amaranth occasionally – when I want a stronger flavored/denser flour (only a 1/4 cup each).
If you (or one of your readers) uses my flour recipe – let me know what you think. I would love to hear your thoughts.
Thank you so much Colleen for sharing your flour blend! I really need to try it. I also need to check out Vitacost. I am so happy to hear that the rolls made great cinnamon buns too. Thank you again!
I adjusted this Recipe by one-half, as I wanted a small quantity. Also, I used a bread roux. Rolls were fluffy and moist. I made recipe several times. I wasn’t satisfied with results until I adjusted recipe to include bread roux, substituted buttermilk for milk, and 1/3 cup of sugar. With my adjustments, these rolls taste better than my gluten dinner rolls and were more moist.
Thank you so much Cheyenne for the wonderful 5-star recipe review. I am so happy that you enjoyed the dinner rolls and were able to modify the recipe to your liking. I have never tried a bread roux before, I need to look into that. Thanks for the tip. I do like baking with buttermilk. Thank you again!
I have a been admiring the photos of these rolls since Thanksgiving time and have not had a chance to try them out. We bake cookies, muffin and cake every day but gf bread and rolls seem to be my nemasis lol, they never come out good!!! I finally made them yesterday and my family was thrilled. They were the best tasting rolls since going gluten free almost a year ago!! Great texture and flavor!! These gf rolls will be made weekly in our house! Thank you for sharing!!
Thank you so much for the wonderful recipe review! I am so happy that you and your family enjoyed the dinner rolls and that you found them to have great flavor and texture. I totally understand about gluten-free bread being tricky. It took me a while to get these rolls just right. It really makes my heart happy to hear that you will be making these weekly in your house! You are so welcome, I love sharing what I make for my family. Thank you again!
These are out of this world good! I made them with coconut milk and they were divine! By far THE BEST gluten free roll I’ve ever tasted. My cousin shared these with me and I’m so glad she did!! Well worth the time to make them. ????????
Thank you so much for the amazing 5-star recipe review Brianna! I am so happy that you enjoyed the dinner rolls. You just made my night! Thank you so much.
Hi! I have the Oster bread machine that you’ve recommended. I’m wondering if I can
do everything in the machine up to the dough rising, then pull it out, shape into rolls
and then bake. I’m trying to avoid some clean up (who isn’t) with my stand mixer and
just contain as much I can with the bread machine. The dinner roll recipe is pretty
much the same as your sliced loaf bread recipe…which by the way, is a great recipe.
Thanks Audrey…keep doing what you’re doing! ❤️
Hi Samantha! I have not tired make the rolls in my bread machine. I totally understand about avoid some of the clean-up. The dinner roll dough is just a little thicker than the bread dough. If you try it in your bread maker can you please let me know how it turns out? I am happy to hear that you enjoyed the bread recipe. I hope you enjoy the dinner rolls too. You are so welcome Samantha, I love sharing what I make for my family. Thank you so much for your encouraging words!
Best Yeasts Rolls Ever????My family has miss yeast rolls since going gluten free. All the other recipe we have try never taste like the real one until I find yours. Thank you so much for make Gluten free recipes that tastes so delicious????
Thank you so much Ellen for the amazing 5-star recipe review! My heart is so happy to hear that you and your family enjoyed the dinner rolls. This totally made my day! You are so welcome, I love sharing what I make for my family. Thank you again!
Hi! I have not made these yet, but making 18 rolls for just my husband and I is way too much.
Can you give me a tip for freezing? Should I bake the rolls first then flash freeze the balance? And how would I warm up the frozen already baked ones?
Or should I bake half and flash freeze the other half that are not baked yet? And how would I bake off
the uncooked frozen rolls? Just curious if it would affect the texture of the rolls.
I’m new to your site and I’m loving your recipes. Can’t wait to try them.
Thank you!
Hi Cynthia! I have never tried freezing them before. The dinner rolls are best when baked fresh. You could cut the recipe ingredients in half. I have frozen my gluten-free biscuit dough, but I have not tired to freeze the dinner rolls. I hope you enjoy the dinner rolls!
Loved your recipe! Made it for our Christmas meal and even the non-GF people thought they tasted awesome. I made it with the ingredients I have available in Spain and although I don’t think they rose as high as yours, they were yummy! I froze the rest of the recipe to pop in the toaster for breakfast or for a sandwich.
Thank you Joy for the wonderful 5-star recipe review! I am so happy that you all enjoyed the dinner rolls. It makes me really excited to hear that you were able to make them with the ingredients that you have available in Spain. That’s a great idea about freezing them. I have not tried that yet, because my family eats them all. I do make a double batch of my biscuits and freeze them for baking later. Thank you again!
These dinner rolls were a big hit at our Christmas dinner! Very easy recipe and great results. My husband commented that he thinks these rolls could be used to recreate Chick Fila chicken minis, which he desperately misses. Thanks for another great recipe!
Thank you so much Val for the wonderful 5-star recipe review! I am so happy that you all enjoyed the dinner rolls and you found it to be an easy recipe. That’s a great idea to try to make gluten-free chicken minis. I’ll have to try that! My kids would love that. You are so welcome I love sharing what I make for my family. Thank you again.
I made these dinner rolls for our Christmas dinner. They turned out amazing! This was my first time ever baking homemade rolls of any kind. I used Better Batter flour for this recipe. Thanks for such a simple and delicious recipe to follow. You have helped me to build confidence in the kitchen.
Thank you so much Kristen for the amazing 5-star recipe review! I am so happy that you enjoyed the dinner rolls and that you found the recipe easy to follow. I can’t wait to try Better Batter flour with this recipe when they start re-shipping their gluten-free flour in January. It makes my heart that I have helped you build your confidence in the kitchen! Your kind words really made my night. You are so welcome, I love sharing what I make for my family. Thank you again!
Have you tried making these ahead of time? How do they hold up?
Hi Carrie! These rolls are best when baked fresh and served warm. They are amazing fresh baked out of the oven. Thank you for asking!
What is the apple cider vinegar for. No where in the instructions does it say to use it, yet it is in the I gredient list.
Hi Penny! The apple cider vinegar helps with the moisture and lift. You add it the same time that you add the eggs, honey, and butter. I apologize for the oversight and thank you for bringing it to my attention that it was missing from the instructions. I have updated the recipe. I hope you enjoy the dinner rolls.
Amazing recipe! Easy to follow recipe and tastes like traditional yummy holiday rolls!
Thank you so much Helena for the wonderful 5-star recipe review! It makes my heart so happy to hear you enjoyed the rolls. My family loves them and I will be making them for the holidays also. Thanks again!
Do you think this would work ok with an egg substitute (like a flax seed egg)? Thanks!
Hi Carrie! I have not tested this recipe with an egg substitute. If you try it could you please let me know how it turned out? If you try it, I hope you enjoy the rolls. Thanks!
If I were to divide this recipe since it is just me, how. Dn I get half an egg
Hi Dru! I am sorry but I do not know how to properly divide an egg. Maybe you could whisk it and pour half in? I don’t know if that would work. You could always freeze a batch and reheat them later if you wanted to make the full recipe. I hope you enjoy the rolls!