Gluten-Free Sourdough Starter
Published
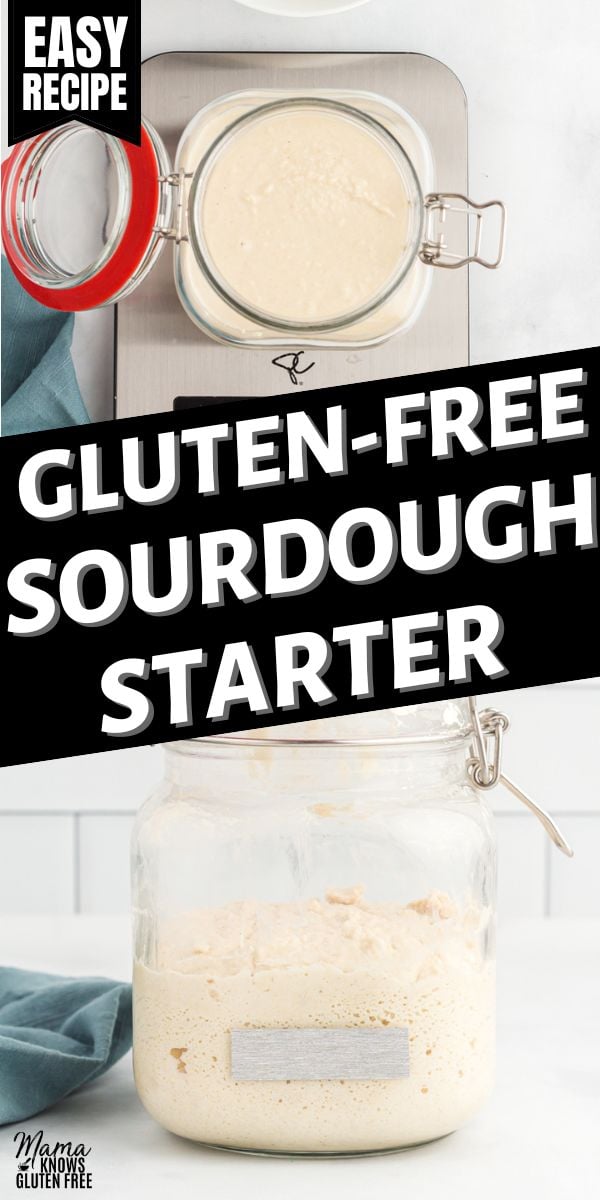
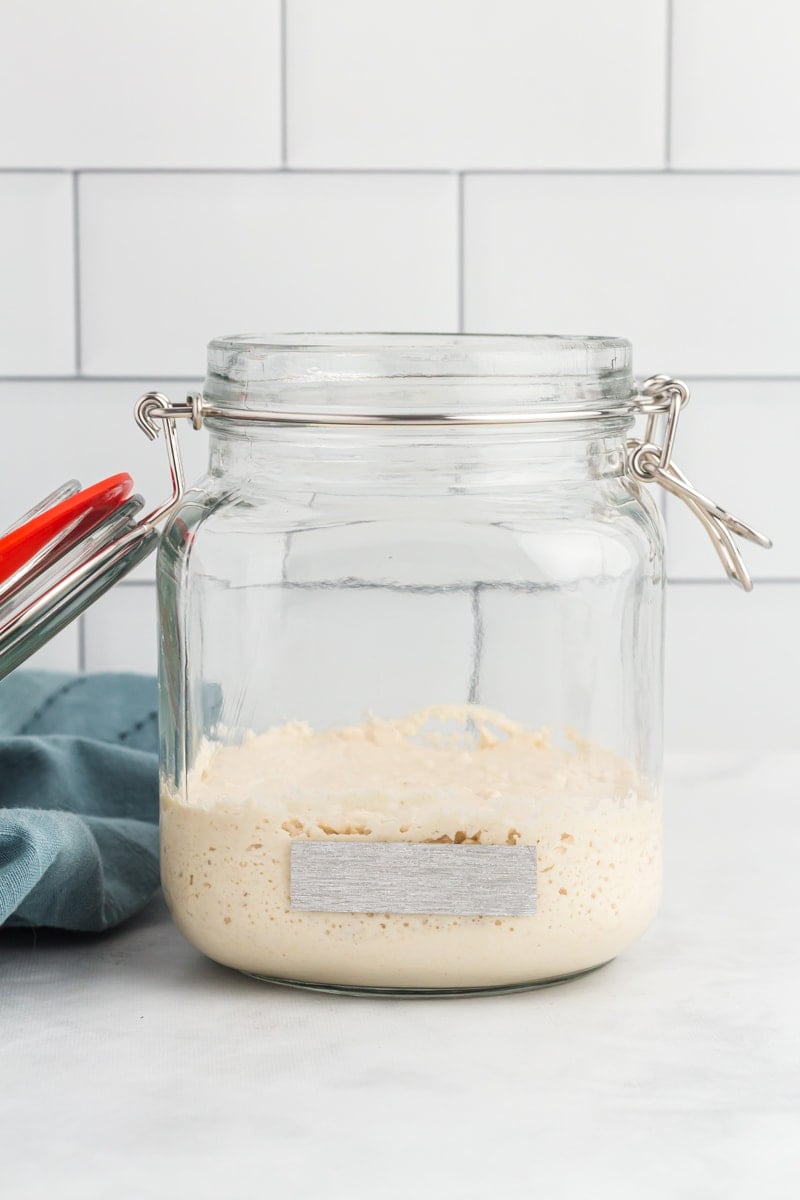
Sourdough bread has been rising in popularity in the last few years, but did you know that it can be made gluten-free? I’ve been perfecting this recipe for a bubbly, active gluten-free sourdough starter for a few months, and it works so well for making gluten-free sourdough bread. This is a simple combination of flour, water, and wild yeast from the environment that creates a live fermented culture. This preferment is what gives bread a nice, fluffy rise without the use of commercially prepared yeast.
Gluten-Free Sourdough Starter Recipe
The idea of creating a gluten-free sourdough starter may seem a bit overwhelming, but it’s a lot easier than you think. You need just two ingredients to get started and a few minutes each day to feed it. Within about two weeks, you’ll have an active sourdough preferment that you can continue to feed and use in all your favorite gluten-free sourdough recipes.
Although the process is quite easy, there are a lot of things to note when you’re getting started, such as proper temperatures, the right tools to use, how to know if it’s working or if you need to start over, and so on. Through extensive testing, I’ve come up with a guide that takes all of the guesswork out of it.
Read this post in its entirety before getting started and keep it handy to reference!
Ingredients
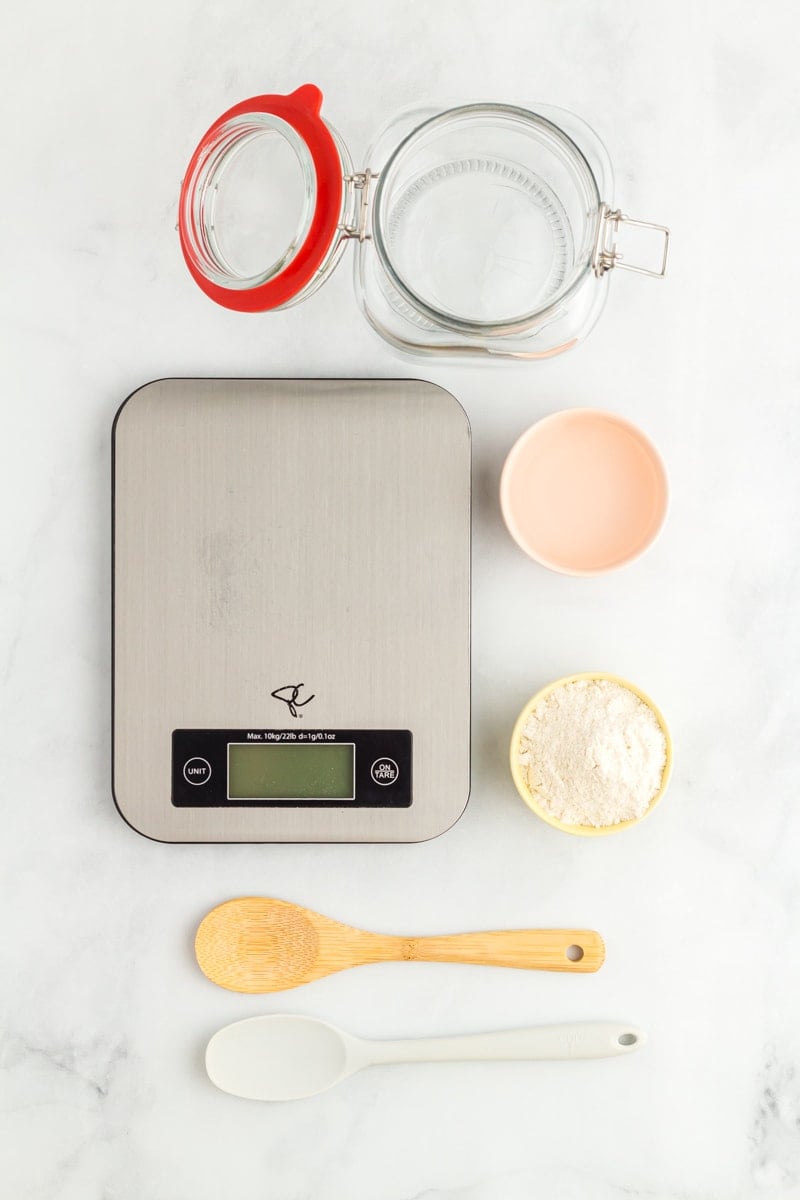
- Whole Grain Gluten-Free Flour: There are a few different types of gluten-free flour that can be used (for example: brown rice flour, buckwheat flour, sorghum flour, millet flour, etc.), but the most important thing is to avoid options with added starches, gums, and other additives. For this recipe, I used brown rice flour.
- Filtered Water: Regular tap water can have chlorine in it, which inhibits the growth of good bacteria, so it’s best to use filtered water. Do not use distilled water since that won’t have the minerals needed.
Supplies
- Food Scale: A lot of measuring is required. Be sure to use a food scale rather than guessing or estimating quantities.
- Glass Jar: A 1-quart glass jar should be large enough. A clear, straight-sided jar is best so that it’s easier to scrape down between feedings. Extra ridges in the jar can be a breeding ground for mold.
- Wooden Spoon: Some experts say a wooden spoon is needed and others say stainless steel is fine. Some warn to stay away from metal or stainless steel utensils because sourdough is made with acid that will react to the metal. Experts are split on if this matter, but we recommend sticking to a wooden spoon to be safe.
- Silicone Spatula: Use a flexible one to scrape down the inside of the jar at each feed.
- Colored Tape or an Elastic Band: This will be placed on the outside of the jar to measure growth between each feed. Choose something that’s easy to move along the jar and won’t fall off easily.
- Clean Towel or Food-Safe Plastic Wrap: The sourdough starter will need to be covered in between feedings. Do not seal the jar completely. You need air to grow the yeast, so a light cover will maintain airflow.
Tips and Notes
- The amount of flour and filtered water needed for this recipe varies depending on how long it takes to build a strong active sourdough starter. Depending on the time of year, the temperature in your house, and other factors, it could take 2 full weeks to see a good rise. This recipe calls for 3 pounds of gluten-free brown rice flour to start, but you may not need all of it.
- Store the jar in a warm, draft-free area. Do not place this by a window, a door, a cold exterior wall, or in direct sunlight (too much heat will kill the yeast).
- For the first week, the sourdough starter is going to smell bad. This is normal! As long as there isn’t mold growing in it, it’s still good. It takes at least a week (usually two weeks) before it starts emitting a pleasant, yeasty bread scent.
- When you switch from twice-a-day feedings to once-a-day feedings, it’s normal for the activity level to decrease. You may see less rise and not as many bubbles. This is normal and usually lasts 2 to 3 days after switching to once-a-day feedings. Just keep going with the 24-hour feeds and your starter will start to become more active again.
- Keep the mouth of your jar, the lid area, and any ridges inside the jar clean. Use a slightly damp clean cloth to wipe the inside of the jar down after every couple of feeds. If you leave old starter to dry out and stick to the inside of the jar, it could be a breeding ground for mold.
What Happens If I Miss A Feed?
A sourdough starter can be quite forgiving. If you miss a feed by a few hours or even a day, just pick up where you left off. You may see a decrease in activity at first, but it’ll pick up within a couple of days after regular feedings are resumed.
Do I Have To Throw Away The Discard?
No, there are still lots of uses for discard! Although the discard won’t be good for bread, you can use the discard to add a distinct tangy flavor to biscuits, muffins, cookies, and pancakes. Store the discard in the fridge if you plan to use it later for another recipe.
What Is The Liquid On Top?
If your starter starts to get a liquid forming on the top of it, it’s likely hooch (a naturally occurring alcohol). This sometimes starts to form if it’s been too long between feedings. Pour it off and continue feeding as normal.
What Are Signs That It Has Gone Bad?
Once mold develops in your starter, it’s best to discard it and start over. Fuzzy growth, pink or orange streaks, or any signs of mold throughout the starter are indicators that it is no longer safe to use.
Keep in mind that not every discoloration is mold. A dark liquid layer on top, often called hooch, can develop when the starter is hungry and simply needs to be fed. A thin white film may also be kahm yeast rather than mold, though it can affect flavor.
If you notice mold growing only on the inside of the jar above the starter itself, carefully transfer the unaffected starter to a clean jar and continue feeding it. If mold is touching the starter or you are unsure whether the growth is mold, it’s safest to discard the entire starter and begin again.
Storage Instructions
Store gluten-free sourdough starter in a clean, covered jar at room temperature indefinitely. If you plan to feed it less often, store it in the refrigerator.
While some patience and measuring are required, once you get the hang of this gluten-free sourdough starter recipe, it’s easy to keep it going. You’re just two weeks from a lifetime of delicious gluten-free sourdough bread!
More Gluten-Free Bread Recipes to Try!
- Easy Gluten-Free Bread
- Gluten-Free Bread Machine Bread
- Gluten-Free Sweet Cornbread
- Gluten-Free Irish Soda Bread
Gluten Free Sourdough Starter Recipe
Ingredients
- 1400 grams whole grain gluten-free flour, I used brown rice flour
- 1400 grams filtered water
Instructions
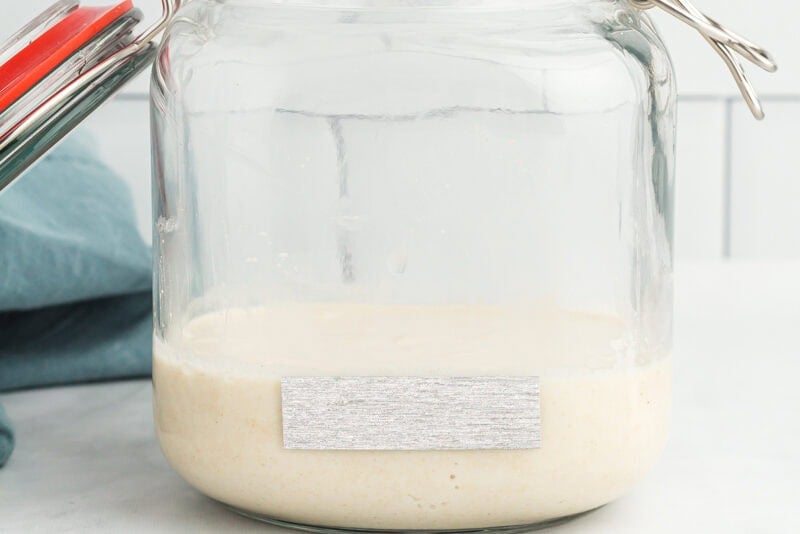
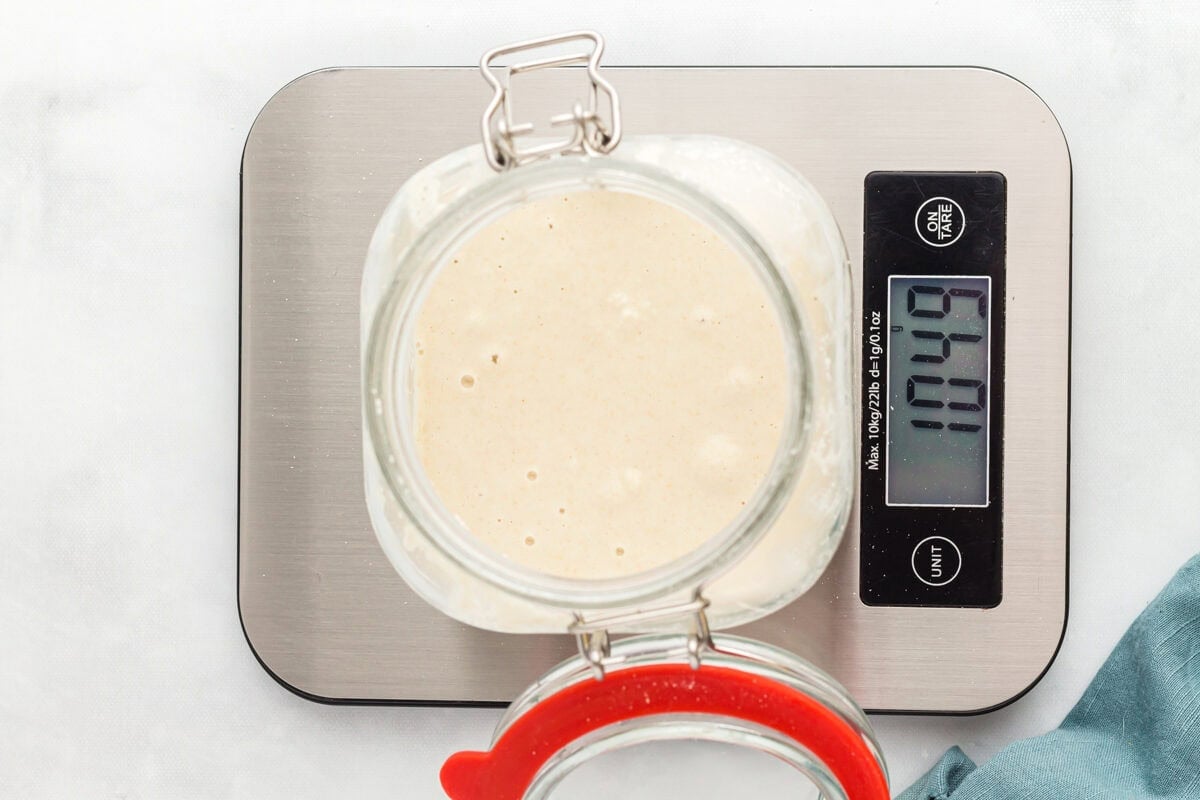
- Weigh the empty glass jar. You’ll refer back to this weight daily so make sure you write the number down and have it near your prep area.
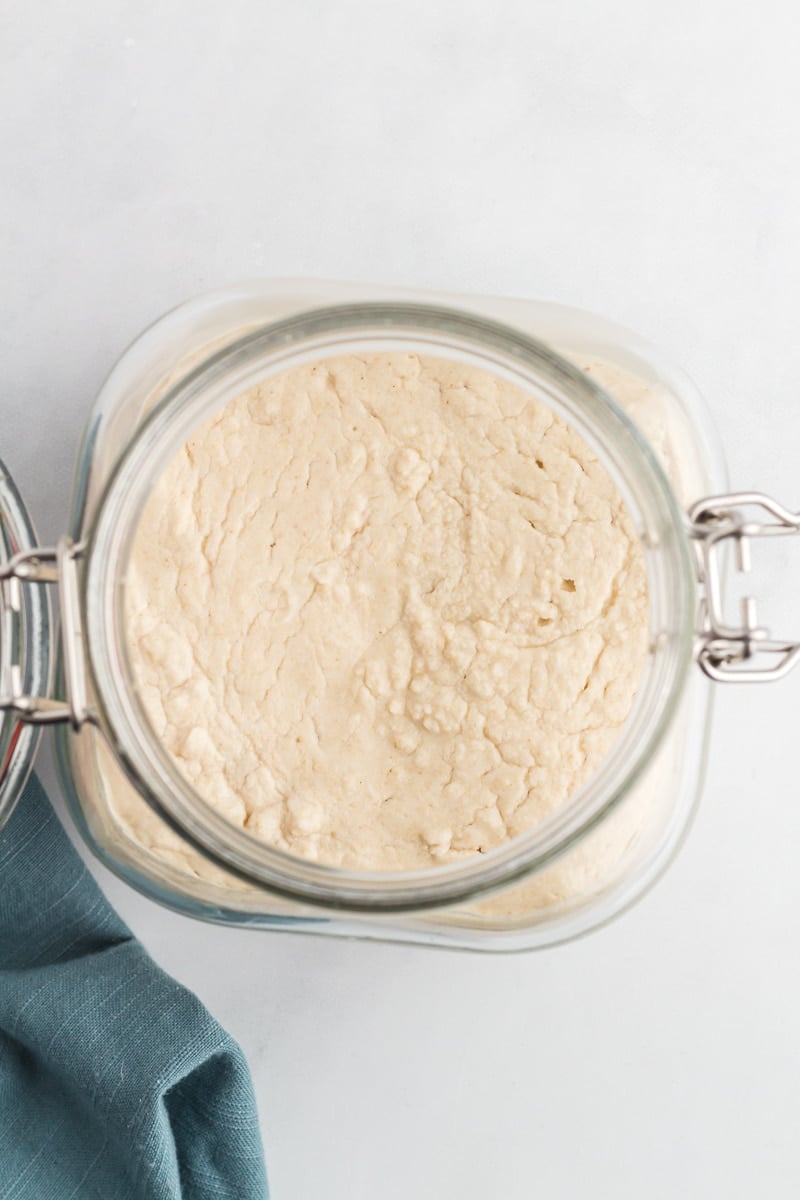
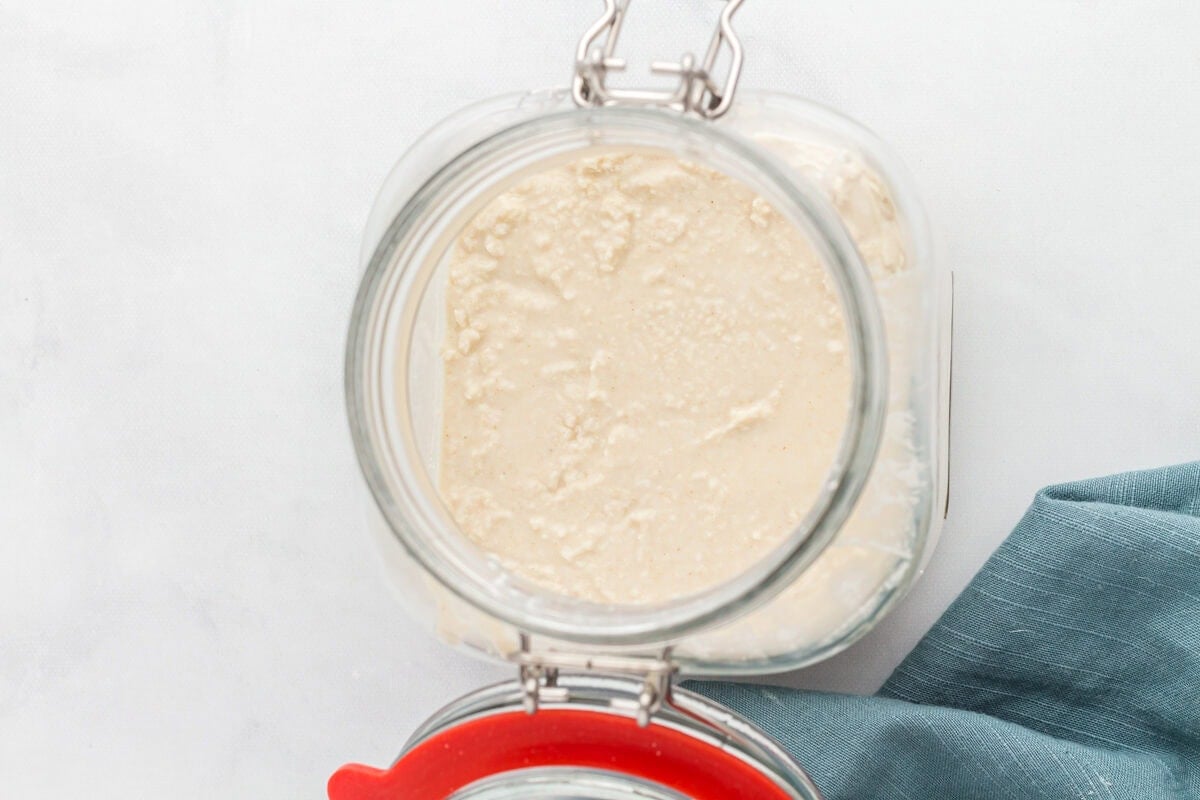
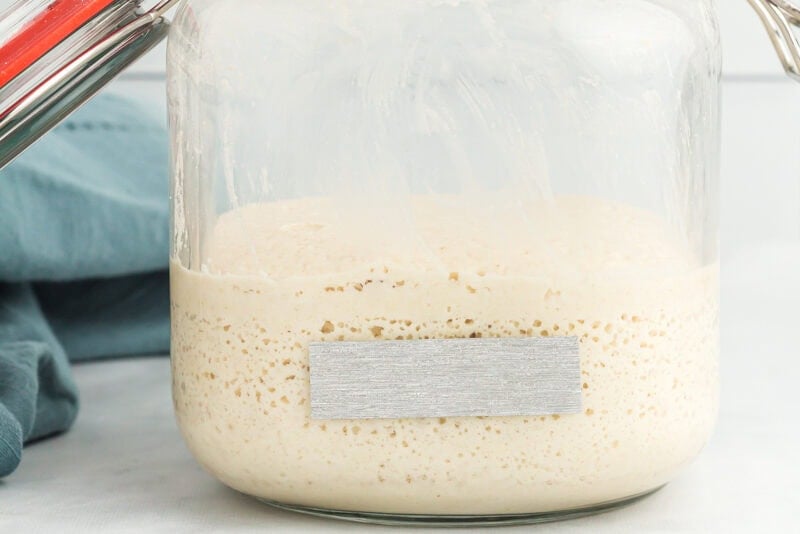
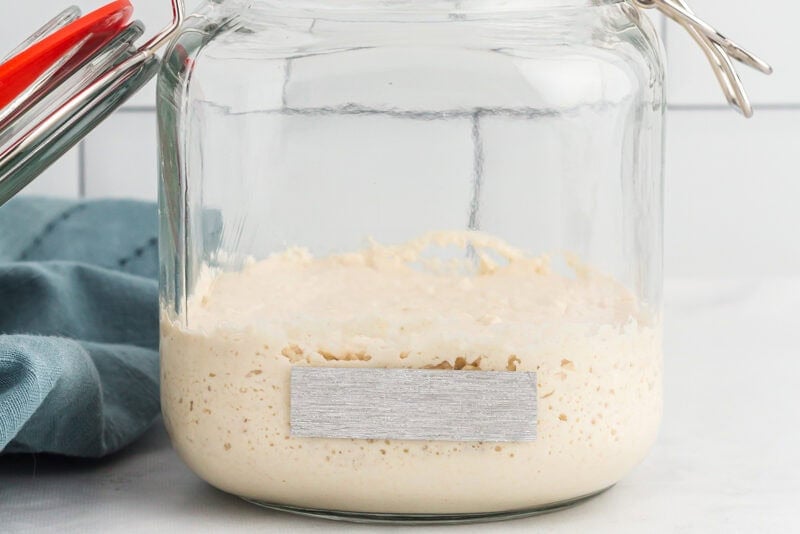
- Day 1 First Feed: In the clean and dry glass jar, add 50 grams of brown rice flour and 50 grams of room temperature filtered water. It’s okay if you’re a few grams above or below 50 grams each when doing the daily feedings. The consistency should look like a thin paste that’s a bit thicker than pancake batter. Add a little extra water or flour if needed. Stir well with a wooden spoon, then use the spatula to scrape down the inside of the jar. Place the colored tape or elastic band at the height of the starter. Cover the jar loosely with a clean towel or plastic wrap and set it in a warm location in your home away from direct sunlight.
- Day 1 Second Feed (12 hours after Day 1 First Feed): Stir the starter with a wooden spoon. Add an additional 50 grams of brown rice flour and 50 grams of room temperature filtered water. Stir well with a wooden spoon. Use the spatula to scrape down the inside of the jar. Move the colored tape or elastic band to the height of your starter. Cover the jar loosely with a clean towel or plastic wrap and set the jar back in a warm location.
- Day 2 First Feed (12 hours after Day 1 Second Feed): Repeat steps of Day 1 Second Feed.
- Day 2 Second Feed (12 hours after Day 2 First Feed): Repeat steps of Day 1 Second Feed.
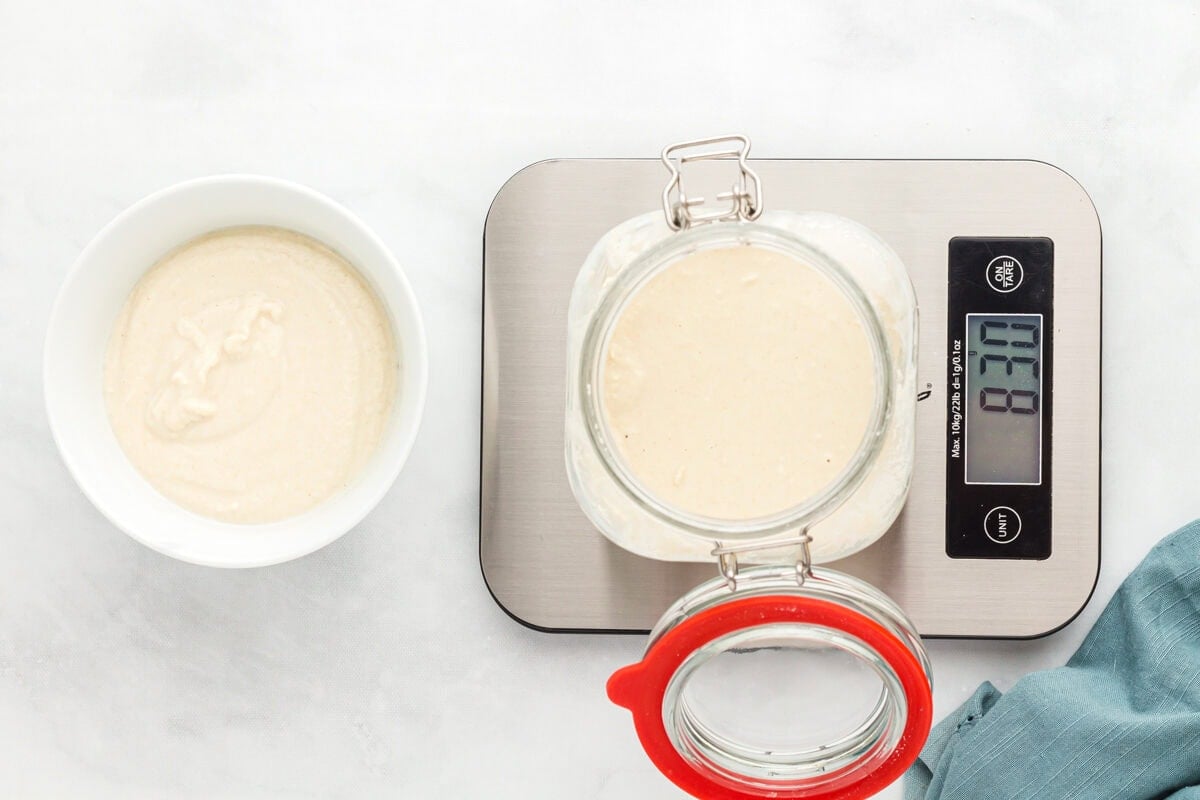
- Day 3 First Feed (12 hours after Day 2 Second Feed): Stir the starter with a wooden spoon. Discard all but 100 grams of the starter. This is where your math comes in handy. Let’s say your jar was 730 grams. When you stir and discard all but 100 grams of starter, your food scale should now read approximately 830 grams (730 grams for the jar, plus 100 grams for the starter in it). Now add an additional 50 grams of brown rice flour and 50 grams of room temperature filtered water. Using the math, the 730 jar plus the 100 grams of starter in it plus the 50 grams of additional brown rice flour plus the 50 grams of additional filtered water, the weight of all would now be around 930 grams. Stir well with a wooden spoon. Use the spatula to scrape down the inside of the jar. Move the colored tape or elastic band to the height of your starter. Cover the jar loosely with a clean towel or plastic wrap and set the jar in a warm location in your home.
- Day 3 Second Feed (12 hours after Day 3 First Feed): Repeat the steps of Day 3 First Feed.
- Day 4 First Feed (12 hours after Day 3 Second Feed): Repeat the steps of Day 3 First Feed.
- Day 4 Second Feed (12 hours after Day 4 First Feed): Repeat the steps of Day 3 First Feed.
- Day 5 First Feed (12 hours after Day 4 Second Feed): Repeat the steps of Day 3 First Feed.
- Day 5 Second Feed (12 hours after Day 5 First Feed): Repeat the steps of Day 3 First Feed.
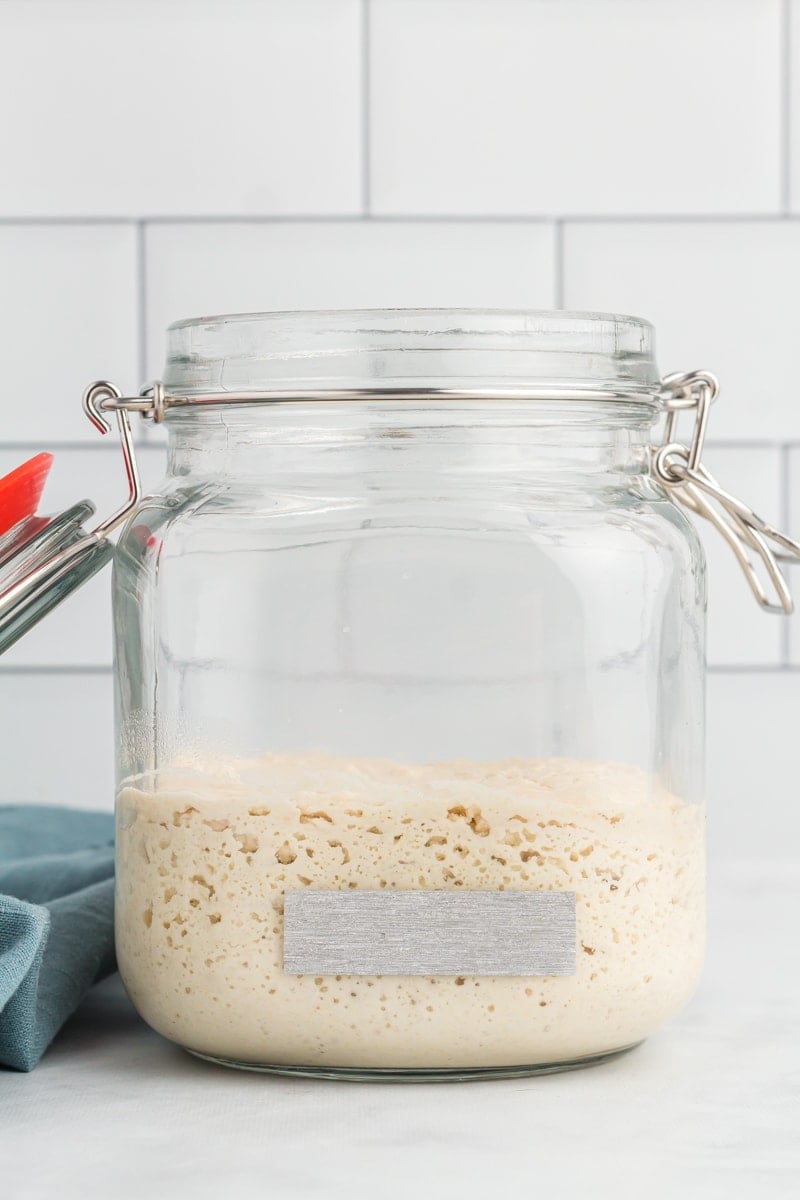
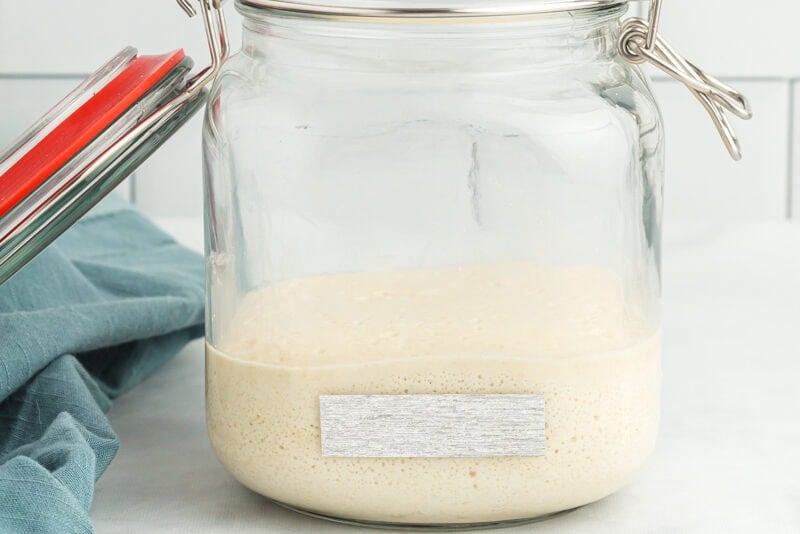
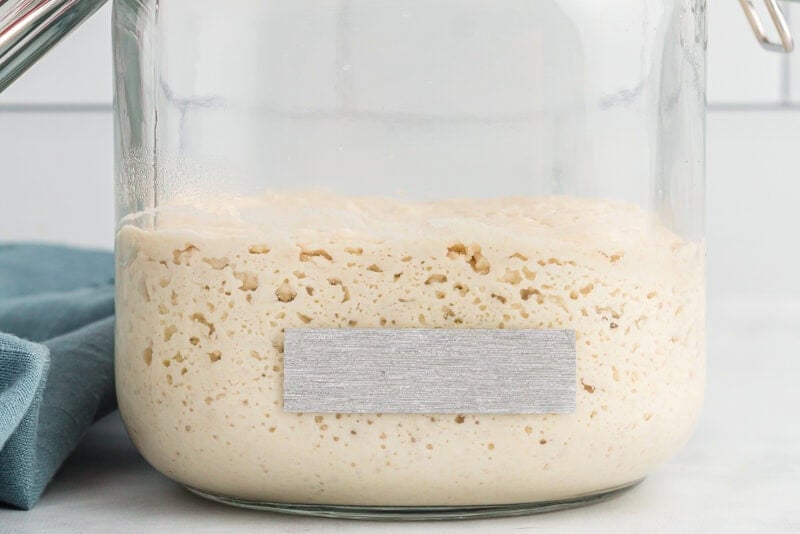
- If you’re seeing good bubbles and a rise in your starter (almost doubling in height between feeds), then move onto Day 6 Feed instructions. If you aren’t seeing a good rise yet, don’t panic! Continue with Day 3 First Feed instructions until you’re seeing bubbling and height in your starter. The amount of time it can take to see a good rise is dependent on a lot of factors, including time of year, temperature inside the home, type of flour used, temperature of water used, etc. Be patient and keep going even if you aren’t seeing a lot of activity yet. If you’re seeing absolutely no activity (no bubbles, still a very loose consistency before feeds) after 5 days, it’s probably time to start over.
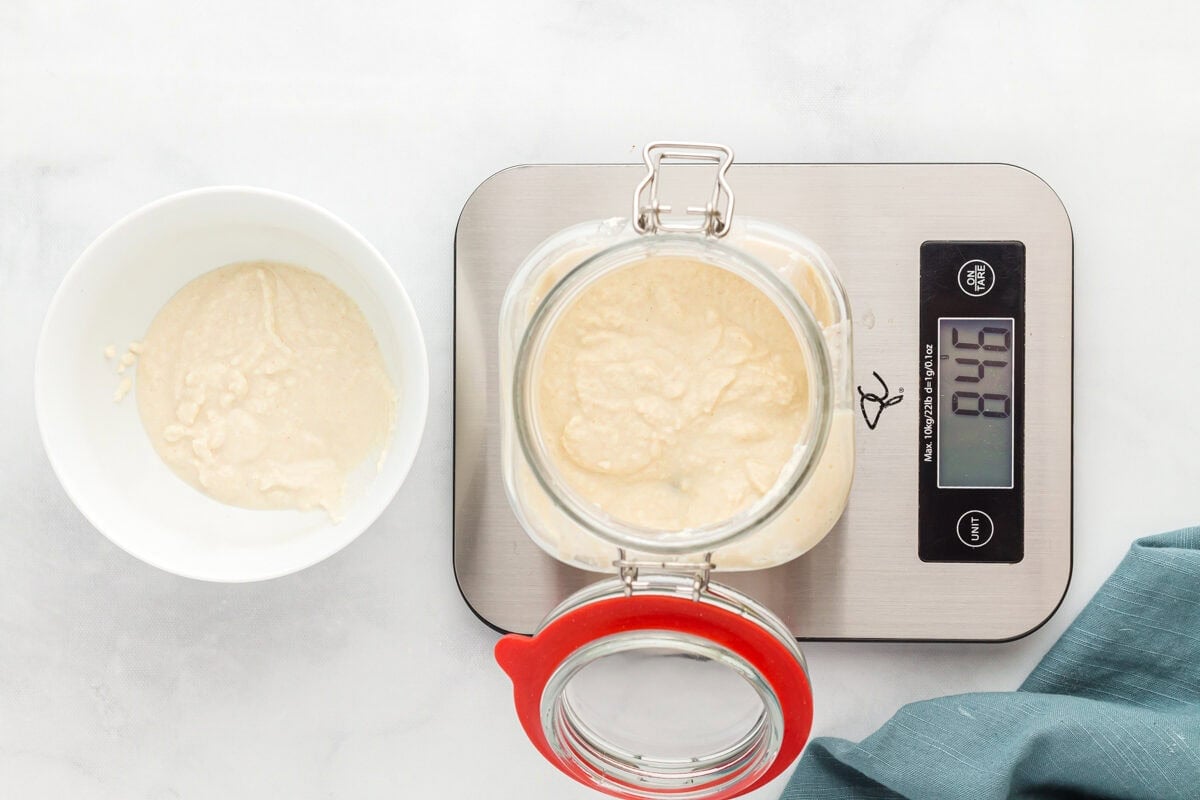
- Day 6 Feed (24 hours after Day 5 Second Feed): It’s now time to move to once a day feeds. Stir the starter with a wooden spoon. Discard all but 100 grams of the starter. Add an additional 100 grams of brown rice flour and 100 grams of room temperature filtered water. Using the math, the 730 gram jar plus the 100 grams of starter in it plus the 100 grams of additional brown rice flour plus the 100 grams of additional filtered water, the weight of all would now be around 1,030 grams. Stir well with a wooden spoon. Use the spatula to scrape down the inside of the jar. Move the colored tape or elastic band to the height of your starter. Cover the jar loosely with a clean towel or plastic wrap and set back in a warm location.
- Day 7 Feed (24 hours after Day 6 Feed): Repeat the steps of Day 6 Feed.
- Repeat the steps of Day 6 Feed every 24 hours until you’re seeing the starter double in size within 4 to 6 hours after feeding. It should also have a pleasant, yeasty bread smell. Now, it’s finally ready to use for baking a loaf of gluten-free sourdough! This could take another full 7 days of daily feeds so be patient.
- Once your starter is at the maintenance phase, it can be stored in the fridge and will need weekly feedings.
- For Weekly Maintenance Feeds: Stir the starter with a wooden spoon. Discard all but 100 grams of the starter. Add an additional 100 grams of brown rice flour and 100 grams of room temperature filtered water. Stir well with a wooden spoon. Use the spatula to scrape down the inside of the jar. Move the colored tape or elastic band to the height of your starter. Cover lightly and place back in the fridge.
- Before Baking: Remove the starter from the fridge, let sit at room temperature, feed as normal (100 grams each of starter, flour and filtered water) then let sit for 4 to 6 hours until you see peak rise. If the starter hasn’t peaked within 12 hours, do another feeding (100 grams each of starter, flour and filtered water).
Notes
- The amount of flour and filtered water needed for this recipe varies depending on how long it takes to build a strong active sourdough starter. Depending on the time of year, the temperature in your house, and other factors, it could take 2 full weeks to see a good rise. This recipe calls for 3 pounds of gluten-free brown rice flour to start, but you may not need all of it.
- Store the jar in a warm, draft-free area. Do not place this by a window, a door, a cold exterior wall, or in direct sunlight (too much heat will kill the yeast).
- For the first week, the sourdough starter is going to smell bad. This is normal! As long as there isn’t mold growing in it, it’s still good. It takes at least a week (usually two weeks) before it starts emitting a pleasant, yeasty bread scent.
- When you switch from twice-a-day feedings to once-a-day feedings, it’s normal for the activity level to decrease. You may see less rise and not as many bubbles. This is normal and usually lasts 2 to 3 days after switching to once-a-day feedings. Just keep going with the 24-hour feeds and your starter will start to become more active again.
- Keep the mouth of your jar, the lid area, and any ridges inside the jar clean. Use a slightly damp clean cloth to wipe the inside of the jar down after every couple of feeds. If you leave old starter to dry out and stick to the inside of the jar, it could be a breeding ground for mold.
- To store: Store gluten-free sourdough starter in a clean, covered jar on the countertop in a warm, draft-free spot indefinitely or in the refrigerator for fewer feeds. Do not place this by a window, a door, a cold exterior wall, or in direct sunlight (too much heat will kill the yeast).
- Mama says, “Make sure to always check your labels!”
How To Make Gluten-Free Sourdough Starter Step-by-Step
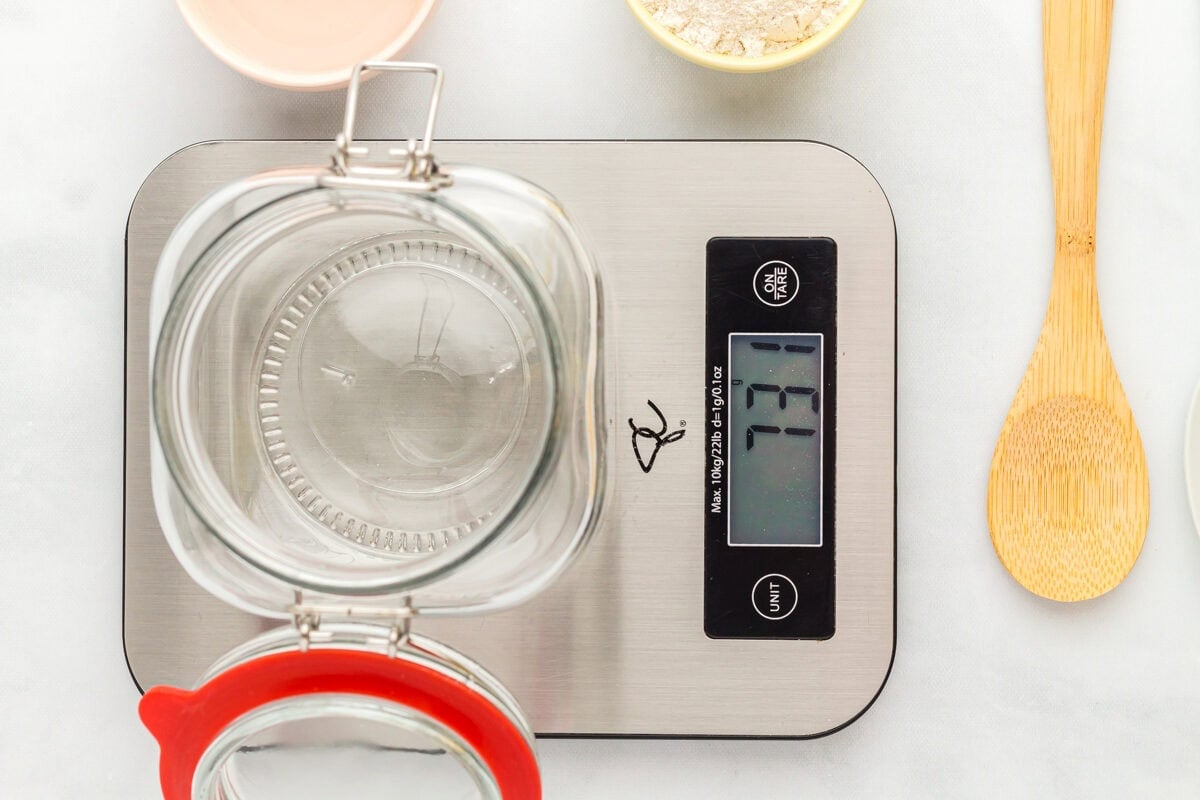
Weigh the empty glass jar. You’ll refer back to this weight daily so make sure you write the number down and have it near your prep area.
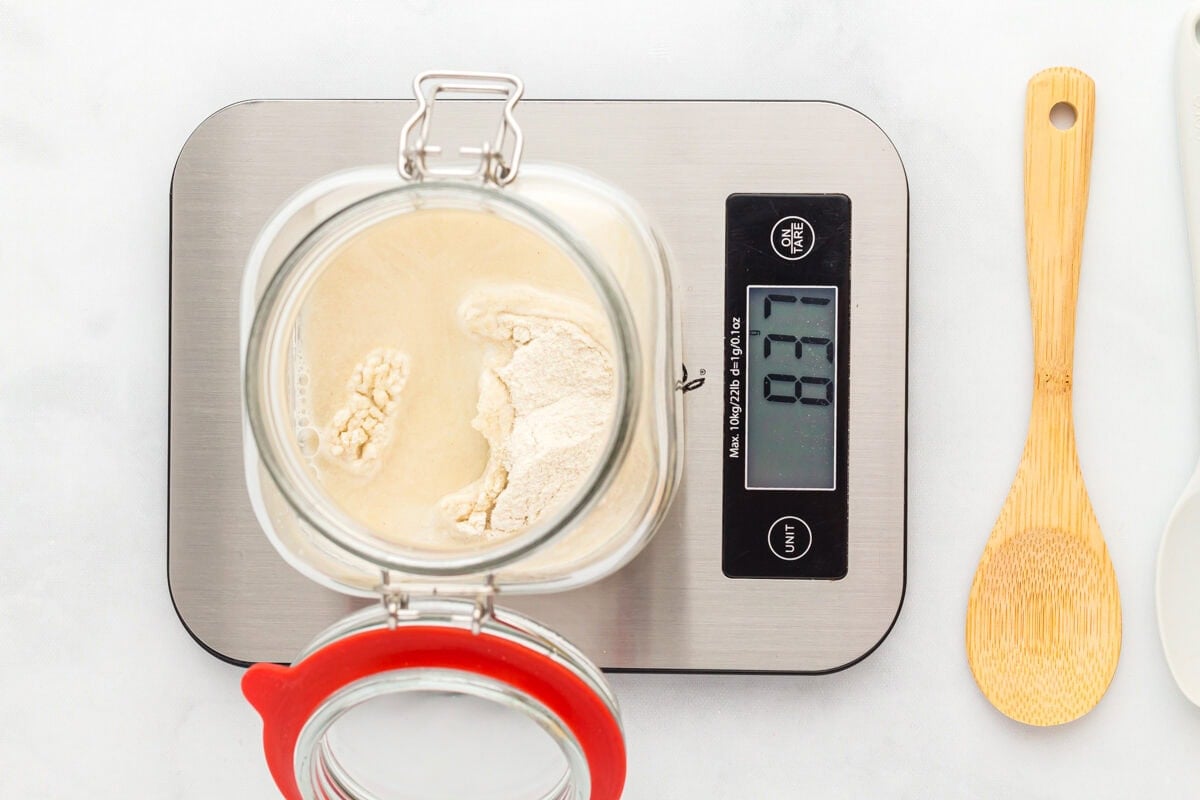
Day 1 First Feed: In the clean and dry glass jar, add 50 grams of brown rice flour and 50 grams of room temperature filtered water. It’s okay if you’re a few grams above or below 50 grams each when doing the daily feedings. The consistency should look like a thin paste that’s a bit thicker than pancake batter. Add a little extra water or flour if needed. Stir well with a wooden spoon, then use the spatula to scrape down the inside of the jar. Place the colored tape or elastic band at the height of the starter. Cover the jar loosely with a clean towel or plastic wrap and set it in a warm location in your home away from direct sunlight.

Day 1 Second Feed (12 hours after Day 1 First Feed): Stir the starter with a wooden spoon. Add an additional 50 grams of brown rice flour and 50 grams of room temperature filtered water. Stir well with a wooden spoon. Use the spatula to scrape down the inside of the jar. Move the colored tape or elastic band to the height of your starter. Cover the jar loosely with a clean towel or plastic wrap and set the jar back in a warm location.
Day 2 First Feed (12 hours after Day 1 Second Feed): Repeat steps of Day 1 Second Feed.
Day 2 Second Feed (12 hours after Day 2 First Feed): Repeat steps of Day 1 Second Feed.
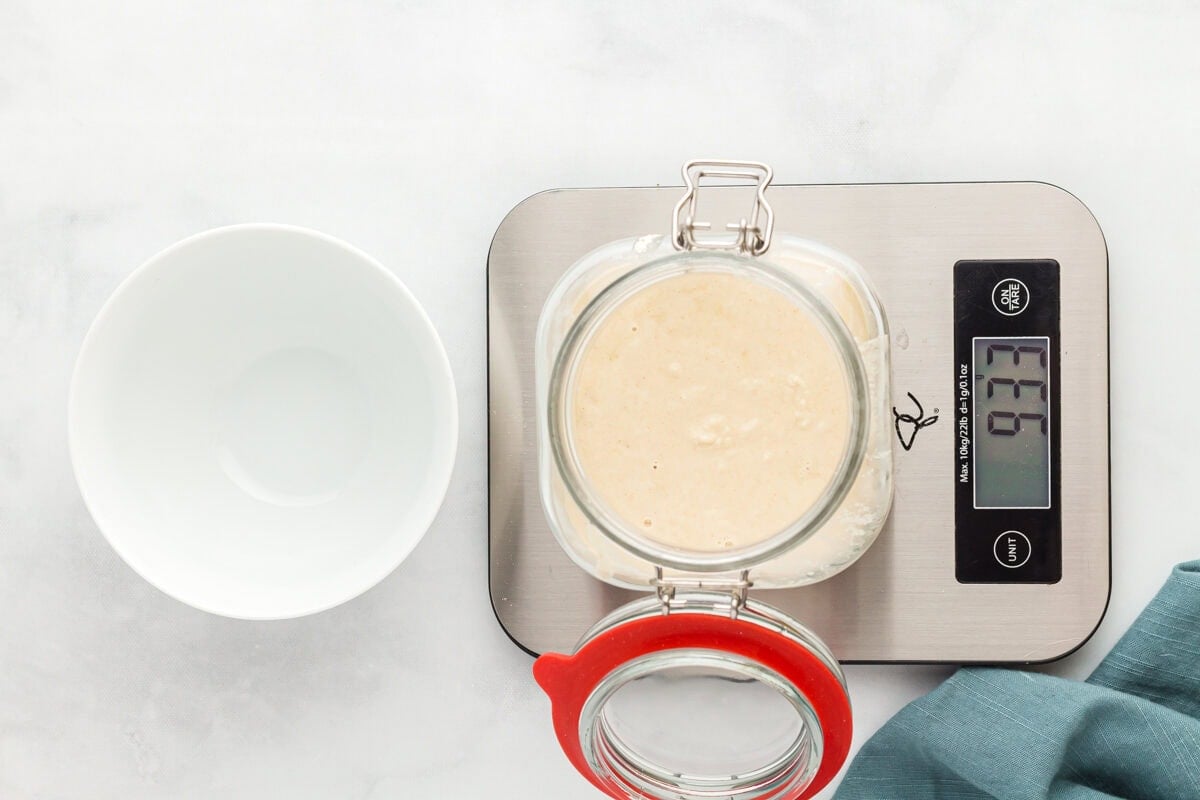
Day 3 First Feed (12 hours after Day 2 Second Feed): Stir with a wooden spoon. Discard all but 100 grams of the starter. This is where your math comes in handy. Let’s say your jar was 730 grams. When you stir and discard all but 100 grams, your food scale should now read approximately 830 grams (730 grams for the jar, plus 100 grams for the starter in it). Now add an additional 50 grams of brown rice flour and 50 grams of room-temperature filtered water. Using the math, the 730 jar plus the 100 grams of starter in it plus the 50 grams of additional brown rice flour plus the 50 grams of additional filtered water, the weight of all would now be around 930 grams. Stir well with a wooden spoon. Use the spatula to scrape down the inside of the jar. Move the colored tape or elastic band to the height of your starter. Cover the jar loosely with a clean towel or plastic wrap and set the jar in a warm location in your home.
Day 3 Second Feed (12 hours after Day 3 First Feed): Repeat the steps of Day 3 First Feed.

Day 4 First Feed (12 hours after Day 3 Second Feed): Repeat the steps of Day 3 First Feed.
Day 4 Second Feed (12 hours after Day 4 First Feed): Repeat the steps of Day 3 First Feed.
Day 5 First Feed (12 hours after Day 4 Second Feed): Repeat the steps of Day 3 First Feed.
Day 5 Second Feed (12 hours after Day 5 First Feed): Repeat the steps of Day 3 First Feed.
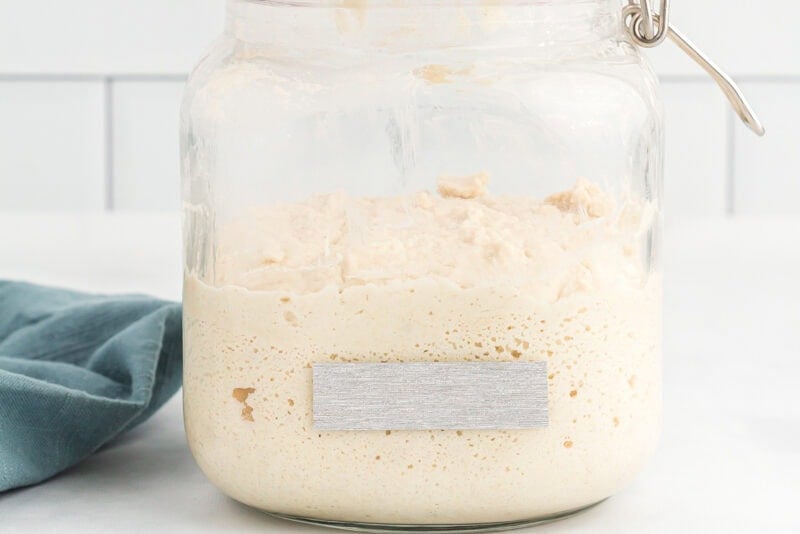
If you’re seeing good bubbles and a rise (almost doubling in height between feeds), then move on to Day 6 Feed instructions. If you aren’t seeing a good rise yet, don’t panic! Continue with Day 3 First Feed instructions until you see bubbling and height in your starter. The amount of time it can take to see a good rise is dependent on a lot of factors, including time of year, temperature inside the home, type of flour used, temperature of water used, etc. Be patient and keep going even if you aren’t seeing a lot of activity yet. If you’re seeing absolutely no activity (no bubbles, still a very loose consistency before feeds) after 5 days, it’s probably time to start over.
Day 6 Feed (24 hours after Day 5 Second Feed): It’s now time to move to once a day feeds. Stir the starter with a wooden spoon. Discard all but 100 grams. Add an additional 100 grams of brown rice flour and 100 grams of room-temperature filtered water. Using the math, the 730-gram jar plus the 100 grams of starter in it plus the 100 grams of additional brown rice flour plus the 100 grams of additional filtered water, the weight of all would now be around 1,030 grams. Stir well with a wooden spoon. Use the spatula to scrape down the inside of the jar. Move the colored tape or elastic band to the height of your starter. Cover the jar loosely with a clean towel or plastic wrap and set back in a warm location.
Day 7 Feed (24 hours after Day 6 Feed): Repeat the steps of Day 6 Feed.
Repeat the steps of Day 6 Feed every 24 hours until you see the starter double in size within 4 to 6 hours after feeding. It should also have a pleasant, yeasty bread smell. Now, it’s finally ready to use for baking a loaf of gluten-free sourdough! This could take another full 7 days of daily feeds so be patient. Once your starter is at the maintenance phase, it can be stored in the fridge and will need weekly feedings.
For Weekly Maintenance Feeds: Stir the starter with a wooden spoon. Discard all but 100 grams. Add an additional 100 grams of brown rice flour and 100 grams of room-temperature filtered water. Stir well with a wooden spoon. Use the spatula to scrape down the inside of the jar. Move the colored tape or elastic band to the height of your starter. Cover lightly and place back in the fridge.
Before Baking: Remove the starter from the fridge, let sit at room temperature, feed as normal (100 grams each of starter, flour, and filtered water) then let sit for 4 to 6 hours until you see peak rise. If it hasn’t peaked within 12 hours, do another feeding (100 grams each of starter, flour, and filtered water).


You are so wrong on so many levels here: “If the top develops a pink, white, green, brown, or black layer, it is a sign of mold or harmful bacterial contamination. The starter cannot be saved, and you must discard the entire jar and start over.”
Do your research!
Hi Sam, Thanks for pointing this out. You’re right that this wording was too broad, and I appreciate the correction. A dark liquid layer can often be hooch, and a white film may be kahm yeast rather than mold. The bigger red flags are fuzzy mold, pink/orange streaks, or a truly putrid smell. We’ll update this section to be clearer and more accurate.
I am worried I ruined my starter! I was getting good rise and then on day 6 when I switched to once a day feeds I accidentally added too much water so I added equal parts flour but not equal ratio starter. Since then I haven’t had any rise and I’ve started to have hooch form in between feeds. There are some bubbles but not as many as before. I don’t know if my starter is hungry or overfed!
Hi Sydney, Don’t worry, you did not ruin it—this is a really normal stage around day 6. When you added extra water and flour without keeping the ratio, you just diluted the yeast and made it a bit too thin to rise well, so it needs a few days to recover. The hooch means it’s hungry, not dead. Just go back to a simple 1:1:1 feed (equal parts starter, flour, and water), keep it a little thicker like pancake batter, and feed once a day. As long as you’re still seeing some bubbles, it’s alive and will bounce back.
My starter may be ready to make bread! This was so easy! Thanks for sharing this 😊 Do you have any discard recipes for using the gf sourdough starter?
Hi Jen, thank you! We don’t have any discard recipes yet!
Oh bummer! Do you think you will anytime soon? Or have suggestions on how to use it or to convert other discard recipes that aren’t gf? Thanks again! Jen
Hi Jen, there are lots of discard options if you Google it. We’ll keep it in mind for future posts as well!
I was just concerned about finding recipes that would work specifically with brown rice flour and how it absorbs water. I’m on the hunt tho! Thanks!
I’m just curious if you have a PDF or some easy way we can print these instructions? I’m much better with paper than digital 😁 I’m so looking forward to making this! I think Im starting it tonight and will feed it again tomorrow while making our breakfast!
Hi Jen, yes you can click the printer icon to print the recipe!
Why a wooden spoon?
Hi Jamie, Some experts say a wooden spoon is needed and others say stainless steel is fine. Some warn to stay away from metal or stainless steel utensils because sourdough is made with acid that will react to the metal. Experts are split on if this matter, but we recommend sticking to a wooden spoon to be safe.
Always my go to when I need something new, I love these recipes
my starter is already very bubbly and doubled in size before I hit day 3 feed. should I just skip to once a day feeds now or should I still do 3 more days of double feeding?
Hi Robbi, A super bubbly starter in the first few days is usually just the bad bacteria dying off to make room for the good bacteria. We recommend continuing as normal!
Do you have a GF sourdough recipe using this starter?
Yes we do: https://www.mamaknowsglutenfree.com/gluten-free-sourdough-bread/
can you change this out of grams into cups and tbs, i am confused i with the pounds and stuff…. thank you can you also try and respond as fast as you can!
Hi Brynlee, yes if you click on the “US” button it should convert it to cups and tbsp for you 🙂
um can it just be regular flour also can it be a little farther then 12 hours? i am new to this and could you tell me do i have to have a scale, can i just measure it? sorry i was just wanting some clarification!
Hi Brynlee, if you want to use regular flour, we recommend following a non gluten-free recipe.